
The fastest way to level in Banners of Ruin is to build a compact party, take battle nodes that you can win without heavy healing, and spend gold on permanent combat value instead of tempting one-run luxuries. Your best farming route is not the longest route: it is a repeatable chain of normal fights, one efficient shop visit, and enough Rest or event nodes to keep every character alive and earning experience.
This guide focuses on the campaign’s real economy: character experience, party survival, gold, food, cards, equipment, and the opportunity cost of every map choice. The same principles work whether you are learning the game through the official Steam release or already pushing deeper runs.
Build a small party before chasing more recruits
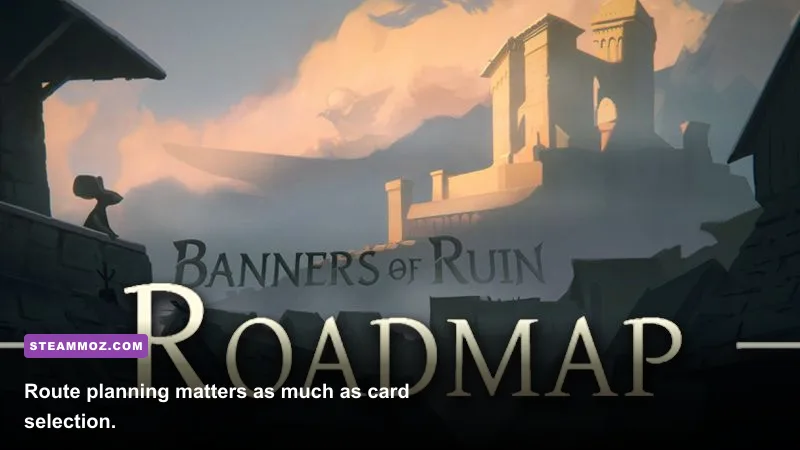
Early recruitment feels powerful, but adding bodies too quickly can make a run poorer rather than stronger. Every new character needs cards, equipment, healing, and a share of the experience coming from encounters. Until your first two or three fighters have a coherent plan, extra recruits often create a pile of mediocre hands instead of a reliable combat engine.
A practical opening target is a front-line defender, a damage dealer, and one flexible support or ranged character. The defender should absorb attacks with Block and protect the party’s health total. The damage dealer should specialize rather than carrying unrelated attack types. The third slot can provide additional damage, card draw, healing, or status application depending on what the map offers.
Experience is most valuable when it upgrades a character who is already seeing every fight. Keep your core party active instead of constantly rotating in under-equipped recruits. A character who participates consistently reaches useful upgrades sooner, while bench characters remain expensive liabilities. If a new recruit is clearly stronger than your weakest member, make the swap immediately; do not protect a failing build just because it has collected a few cards.
| Party Slot | Priority | What to Look For | Leveling Rule |
|---|---|---|---|
| Front line | Survival | Block, mitigation, protection, reliable low-cost cards | Upgrade defensive consistency before burst damage |
| Main damage | Tempo | High-value attacks, weapon synergy, repeatable damage | Remove weak cards so strong attacks appear more often |
| Support or ranged | Utility | Draw, healing, debuffs, safe damage | Choose one job and avoid splitting every upgrade |
Why fewer cards level you faster
Card quality affects leveling indirectly. A lean deck produces better turns, ends battles sooner, and reduces the health lost before the next map node. That means fewer emergency Rest stops and more gold left after each route. Do not blindly remove every basic card, though. A cheap defensive card can be better than a flashy attack if it prevents a character from needing a costly recovery stop.

🎮 Banners of Ruin
Looking to experience this game? Grab your digital key directly on our store for $3.99.
View on Steammoz Store →Choose map nodes for experience per risk

Normal battle nodes are the foundation of fast leveling because they provide experience and gold together. The trap is treating every visible battle as mandatory. A fight that costs half your party’s health may technically reward experience, but it can force a Rest node afterward and erase the value of the encounter.
Read the route as a sequence rather than a collection of isolated rewards. Favor a normal battle followed by a shop, event, or Rest node when your party is damaged. If two battles are stacked together, take them only when your defensive plan can survive the first without consuming your best recovery cards. Elite encounters are worth considering after your main damage dealer has a functional weapon and your defender can generate Block every round; before that point, they are usually poor farming targets.
Events are not automatically less profitable than fights. A safe event can provide a card, item, healing, or gold without spending combat resources. Conversely, an event with a punishment or uncertain combat outcome can destroy a run that was already profitable. The correct choice depends on your current health, food, gold reserve, and whether the next shop is reachable.
| Node Type | Experience Value | Gold Value | Best Use |
|---|---|---|---|
| Normal battle | Reliable | Reliable | Primary leveling and farming route |
| Elite battle | High | High | Take after the core build is online |
| Shop | None | Spending node | Convert saved gold into lasting combat power |
| Rest | None | None | Protect future experience when health is low |
| Event | Variable | Variable | Use when its risk matches your current resources |
For a useful rule of thumb, never take a fight solely because it is available. Take it when you expect to finish with enough health and cards to handle the next meaningful node. This is the same risk-versus-reward thinking that makes other roguelikes click; our Indoorlands farming guide applies a similar principle to route efficiency.
Turn every fight into a gold-positive encounter
Gold farming in Banners of Ruin is really about preventing waste. You earn currency from encounters, but you lose its value when you buy cards that do not fit the deck, replace equipment too early, or enter fights that require emergency healing. The strongest purchase is usually the one that improves several upcoming battles rather than the one with the highest number on its tooltip.
Visit shops with a purpose. Before spending, inspect each character’s deck and ask what currently causes failed turns. If the problem is an overloaded deck, prioritize removal or a card that improves draw quality. If damage is too slow, buy a weapon or attack that works with your existing damage plan. If your front line collapses, defensive equipment and Block generation are worth more than another conditional attack.
Keep a reserve instead of reaching zero gold every time. A reserve gives you flexibility after an event, lets you buy a key upgrade at the next shop, and prevents a poor random offering from forcing a bad choice. The exact amount depends on the map, but spending roughly two-thirds of your available gold while keeping the rest for the next branch is safer than emptying the purse for a marginal upgrade.
What not to buy
Skip expensive cards that require several other cards before they function. Skip equipment that only improves a character you may soon replace. Also be careful with effects that look powerful but trigger rarely; a modest weapon used every fight will outperform a spectacular conditional item that sits idle in half your encounters.
| Purchase | Priority | Why It Farms Better | When to Skip |
|---|---|---|---|
| Deck removal | S-tier | Improves draw quality in every future battle | Skip only if the deck is already extremely focused |
| Core weapon | S-tier | Raises consistent damage or defense immediately | Skip if it conflicts with the character’s role |
| Flexible utility card | A-tier | Helps solve several encounter types | Skip if it adds too much deck clutter |
| Highly conditional card | B-tier | Can be strong in a specialized build | Skip when the trigger is unreliable |
| Minor stat upgrade | B-tier | Useful when it fixes a clear weakness | Skip for a replaceable recruit |
Use combat rotations that preserve health

Fast leveling fails when every victory leaves your party battered. The goal is not merely to deal maximum damage on turn one; it is to finish fights while preserving the resources that keep the map route moving.
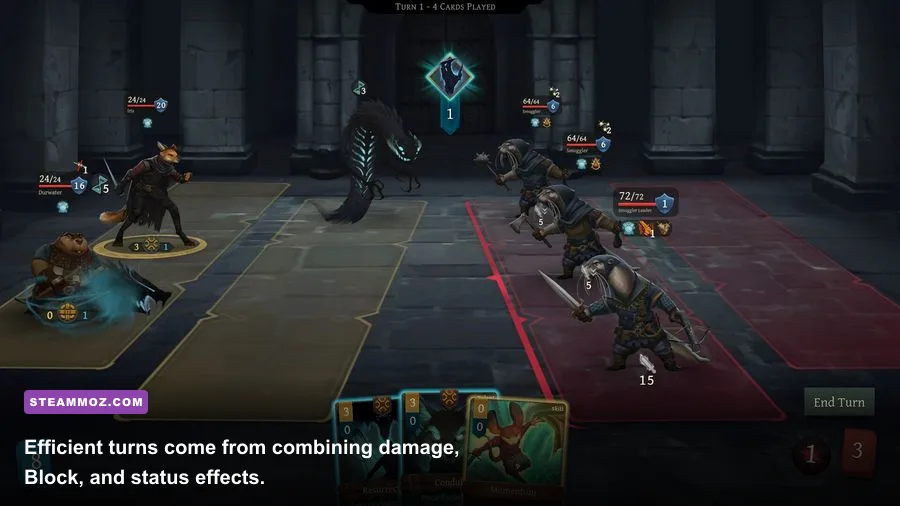
Open by identifying the enemy most likely to create unavoidable damage or a dangerous status effect. Focus that target unless a quick elimination is impossible. In that case, establish Block on the character being attacked and use debuffs or control effects to reduce incoming pressure. Do not spread damage across several enemies without a reason. A wounded enemy still attacks, while a defeated enemy stops costing health.
Use your best attack when it converts into a kill, not automatically whenever you can afford it. Likewise, do not spend every defensive card on a character who is not being targeted. Efficient turns match protection to the enemy telegraph and damage to the opponent closest to dying. This is where low-cost cards shine: they let you combine one defensive action with one meaningful attack instead of choosing between them.
Keep an eye on hand quality and deck cycling. If a character has a key defensive card available, do not dilute the turn with weak actions simply because action points remain. A clean turn that preserves the next draw is often better than squeezing out a few extra points of damage. When a fight is already won, stop gambling for bonus value; avoid unnecessary damage, especially before an elite or boss node.
| Combat Problem | Correct Response | Common Mistake | Result |
|---|---|---|---|
| One enemy threatens lethal damage | Focus it or stack Block on its target | Split damage across the whole enemy line | Less incoming damage next turn |
| Hand contains weak cards | Use removal and draw improvements between fights | Buy more cards without fixing consistency | More reliable future turns |
| Party is winning comfortably | Preserve health and save premium cards | Chase unnecessary damage or risky effects | Better condition for the next node |
Players coming from faster action games often overvalue speed and undervalue clean resource cycles. Compare that mindset with our Gods Trigger combat tips: the common thread is simple—every encounter should make the next one easier, not merely end the current one.
Spend Rest, food, and upgrades without killing momentum

Rest nodes are part of the farming route, not a sign that the run has gone wrong. Use one when a damaged core character would otherwise enter the next battle below a safe threshold. Losing a fight ends the experience and gold stream completely, so a recovery stop is profitable whenever it protects multiple future encounters.
Food deserves the same discipline. Do not treat it as free healing or burn it early just to make the current screen look comfortable. Maintain enough to survive the next map section, then compare the value of consuming it against taking a Rest node. If food lets you reach a shop or elite with a healthy party, it can be worth more than an immediate small recovery.
Upgrade the character who appears in every battle first. A marginal improvement on your permanent front-liner compounds across the run, while a large upgrade on a recruit used once does not. Keep equipment aligned with the role: defensive tools belong on the character attracting attacks, damage tools belong on the character with the most reliable offensive draw, and utility belongs on the member who can actually exploit it each turn.
For a first successful farming run, aim to reach the midgame with a focused core, a deliberately thinned deck, and enough gold for one meaningful shop purchase. Do not force elite fights before that checkpoint. After the run, note which node caused the most damage and which card stayed dead in hand. That information is more valuable than blindly copying a tier list, just as our beginner build guide for Heart of the Machine emphasizes learning from the first clean progression loop.
The repeatable farming loop
- Start with three complementary roles and keep them active for most battles.
- Take safe normal fights to build experience and gold, but skip routes that demand an immediate recovery.
- Use the first shop to solve deck consistency, core damage, or front-line survival.
- Remove weak cards and avoid recruits who need more investment than the route can repay.
- Take elites only after your party can win normal battles without spending every defensive resource.
- Use Rest and food proactively so your next fight remains profitable.
For official mechanics, check the MonteBearo developer site and the game’s Steam announcements and community resources. The winning mindset is consistent: experience comes from battles, gold comes from surviving them, and the best farming route is the one that lets your strongest characters keep fighting.