
The fastest way to level in Blackguards is not grinding random fights: clear every optional encounter that pays well, protect your damage dealers, sell surplus weapons after each hub visit, and funnel advancement points into a focused combat role. The biggest money mistake is buying every shiny weapon; the biggest leveling mistake is replaying low-value encounters instead of pushing the campaign and completing arena objectives.
Blackguards uses a deliberately stingy economy. Gold arrives in bursts from quests, enemy loot, and optional battles, while equipment prices can make a careless shopping trip feel like a tax audit. The answer is a disciplined route through the campaign. Treat each battle as an investment, keep your party alive without burning consumables, and only upgrade gear when the new item changes your damage, survivability, or action economy.
How Blackguards progression really works

Character progression is built around advancement points rather than a simple “kill enemies, gain XP” loop. After earning enough points, you spend them in the character-development screen on attributes, combat talents, spells, special abilities, and other improvements. That distinction matters because a battle that gives a modest amount of money can still be excellent if it advances a character toward a major skill breakpoint.
Your party develops around recurring roles. Naurim is naturally suited to heavy melee and can become a brutal front-line damage dealer. Takate works well as a mobile attacker who exploits positioning and ranged pressure. Zurbaran is the party's spell specialist, while Cassia can be shaped into a flexible weapon user or support character. Gladys and later recruits help cover gaps, but spreading every character across every weapon category is a reliable way to create an expensive, mediocre party.
The core attributes from The Dark Eye ruleset are important, but you should not raise them evenly. Strength supports physical melee performance, Agility helps characters avoid danger and improves the feel of mobile builds, Dexterity is valuable for ranged and finesse-oriented attacks, and Constitution gives a front-liner more room for error. Courage, Cleverness, Intuition, and Charisma have broader effects depending on the skill or character build. The practical rule is simple: raise the attribute that supports your next planned role, then buy the combat talent that lets you exploit it.
| Party role | Priority attributes | Useful investment | Why it levels efficiently |
|---|---|---|---|
| Heavy melee | Strength, Constitution | Two-handed weapon talent, defensive abilities | Turns one front-line character into a reliable finisher |
| Shield tank | Constitution, Agility | Shield talent, defensive skills | Reduces incoming damage and protects fragile allies |
| Ranged attacker | Dexterity, Agility | Bow or crossbow talent, mobility | Deals damage before enemies reach the formation |
| Spellcaster | Cleverness, Constitution | One offensive spell line plus support magic | Maintains useful range without becoming helpless when focused |
| Support hybrid | Charisma, Constitution | Healing or control abilities | Extends the party's endurance between expensive restocks |
For a closer look at how older RPG progression systems reward specialization, compare Steamoz's Dungeon Siege progression breakdown. Blackguards is more tactical, but the same lesson applies: a focused build reaches useful power sooner than a jack-of-all-trades.

🎮 Blackguards
Looking to experience this game? Grab your digital key directly on our store for $0.99.
View on Steammoz Store →The fastest leveling route from the opening chapters
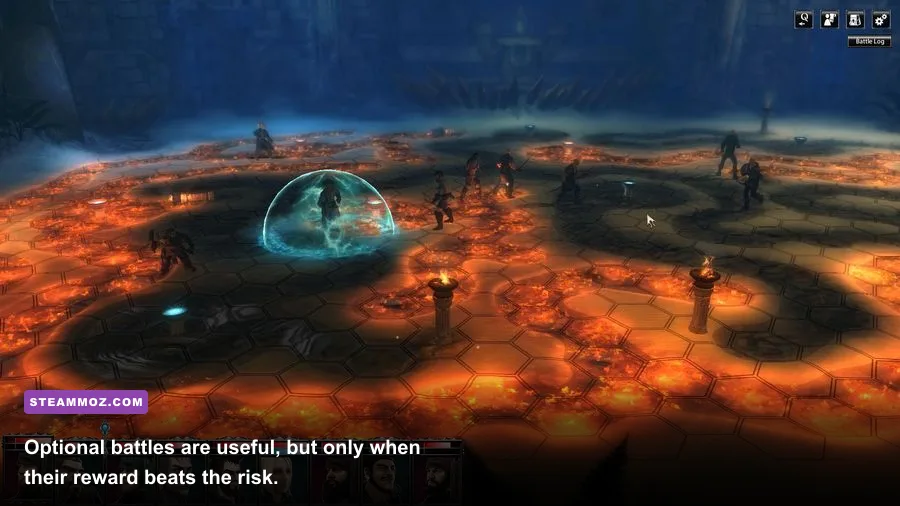
Start by clearing the tutorial and early campaign encounters without rushing past optional objectives. Blackguards often places bonus rewards behind battlefield tasks such as protecting a character, reaching a location, surviving a number of rounds, or interacting with an object. These objectives can produce more value than simply eliminating the last enemy, so read the battle text before committing to a kill-first strategy.
1. Complete battles once, then move forward
There is no universal repeatable grind that beats campaign progression. Replaying a low-level encounter costs time and may consume arrows, healing items, or spell resources without giving a worthwhile return. If an encounter can be won cleanly, take the reward and continue. The campaign's later fights provide better advancement opportunities and more valuable equipment drops.
2. Sweep each hub before leaving
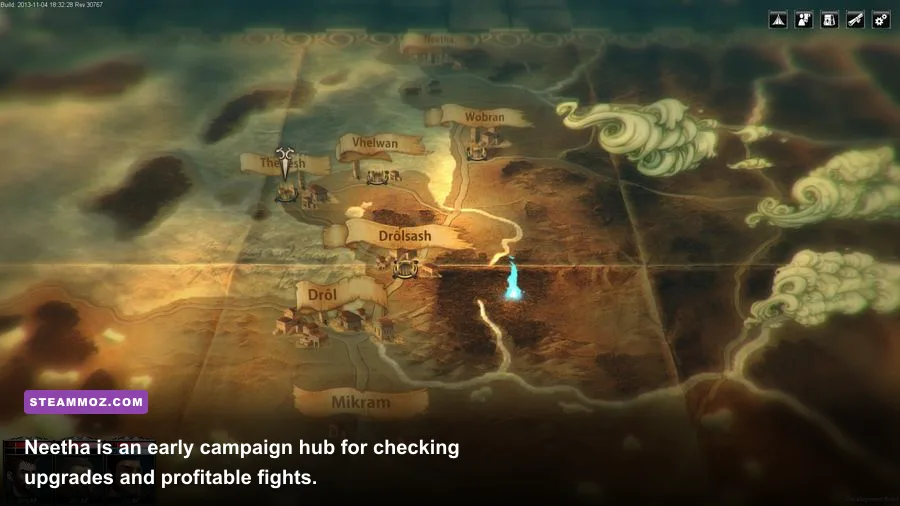
When you reach a major location such as Neetha, Hammerberg, or Tjolmar, speak to every available NPC and check the map for optional destinations. The best leveling route is a sweep: accept side objectives, finish nearby battles, return to sell loot, then push the main story. Leaving side content behind can force a weaker party to return later, when the rewards are less meaningful.
3. Prioritize objective-rich fights
Some battles are valuable because they contain several reward layers: advancement points for the fight, gold from the encounter, loot from enemies, and a bonus for completing the tactical objective. Protecting an NPC or holding a position may be more profitable than wiping the map quickly. Use a disposable front-liner to block routes while your ranged characters handle enemies that would otherwise disrupt the objective.
4. Use the arena as a test, not a lifestyle
Optional arena encounters can be worthwhile when your party has a clear advantage, especially after a new weapon or spell unlock. They are not automatically the best farm. Entering undergeared, losing a character, and replacing consumables can erase the reward. Save before committing to difficult arena fights, inspect the enemy composition, and retreat from the plan if the map hard-counters your formation.
| Encounter type | Leveling value | Gold value | Best approach |
|---|---|---|---|
| Main-story battle | High | Medium to high | Complete the objective and preserve consumables |
| Optional side battle | Medium to high | Medium | Clear it during the same hub sweep |
| Arena encounter | Variable | Variable | Attempt only with a favorable matchup |
| Low-level replay | Low | Low | Avoid unless testing a build or recovering from a mistake |
| Objective-focused fight | High | High | Finish bonus conditions before chasing kills |
Difficulty changes the economy indirectly. On higher settings, healing and defensive play become more important because a technically successful battle can still be a financial loss if you burn through supplies. On Normal, you can take more aggressive fights while learning enemy patterns. On Hard, prioritize clean victories and defensive positioning over speed. A three-turn win that costs half your inventory is not efficient farming.
Gold farming without wasting your best rewards
Gold farming in Blackguards is mostly about loot conversion and purchase discipline. Enemies drop weapons, armor, and other sellable items, but carrying every spare item into the next battle creates clutter and encourages bad buying decisions. Return to a merchant after a cluster of fights, sell duplicates, and compare the replacement's actual benefit before spending.
Use a strict upgrade rule: buy gear only when it improves a character's primary job. A stronger two-handed weapon for Naurim is a meaningful purchase if it lets him finish enemies before their next turn. A minor upgrade for a secondary weapon category is usually not. The same applies to armor. A defensive upgrade for the character absorbing several attacks per round has a much higher return than a small protection increase on a back-line caster who should not be targeted.
Sell duplicates immediately
Keep one sensible backup weapon for a character who may need to change range or damage type. Sell the rest. You do not need three versions of a sword because a future encounter might theoretically reward sword damage. Blackguards rewards planning, not hoarding. The exception is equipment with a clearly different tactical purpose, such as a ranged option for a melee character or a weapon needed to exploit an enemy weakness.
Don't buy consumables as a panic response
Healing items and combat supplies are valuable, but buying them after every rough battle can drain the purse faster than enemy loot replenishes it. First ask why the party took damage. Did a melee character charge too far? Did you ignore a ranged enemy? Did you spend turns attacking a heavily protected target instead of controlling the route? Fixing the tactical cause is a better farm than purchasing another pile of emergency healing.
Save before merchant decisions
Save before a major shopping trip, particularly when a new town unlocks expensive equipment. Buy the item, test it in a nearby encounter, and judge whether the improvement is real. If it only changes a damage number slightly while leaving your action economy unchanged, reload and preserve the gold for a character-defining purchase.
Players coming from games with automatic loot systems may find Blackguards' economy unusually manual. Steamoz's gold-saving progression tips for Decay: The Mare cover a similar principle: scarcity is solved through route planning, not by pretending every resource is unlimited.
Combat tactics that accelerate progression

The quickest battle is the one where your party controls the first two turns. Place durable characters on chokepoints, keep ranged attackers behind them, and make enemies spend movement before they can attack. Blackguards' maps are packed with obstacles, elevation changes, traps, barrels, and narrow routes. These are not decoration. They are free defensive tools, and using them correctly cuts the healing bill that slows down your farming route.
Focus fire instead of distributing damage across the whole enemy group. Removing one attacker reduces incoming damage immediately; leaving four wounded enemies alive does nothing for your survival. Use Naurim or another front-liner to pin the most dangerous melee threat, then concentrate Takate's ranged attacks and Zurbaran's spells on targets that are exposed or already injured.
Zurbaran should not spend every turn on flashy damage. A control or support spell that denies an enemy action can outperform a low-damage attack, especially when the spell prevents a character from being surrounded. Save high-cost magic for targets that threaten the objective or cannot be reached safely with weapons. Your spellcaster's long-term value comes from making difficult battles cheap, not from ending every fight with an impressive final hit.
Watch enemy telegraphs. Archers and spellcasters often become obvious priorities because they punish stationary formations. Melee enemies usually need to cross the map, giving you a full turn to establish a screen. Do not break that screen just to chase a wounded target. If an enemy is already trapped behind your front line, it is often better to wait, heal, reload a ranged attack, or reposition than to expose a vulnerable character.
| Problem | Likely mistake | Correction | Economic benefit |
|---|---|---|---|
| Too many healing purchases | Front line advances alone | Hold a chokepoint and focus one target | Preserves gold between hubs |
| Slow kills | Damage is split across enemies | Focus fire on the highest immediate threat | Shortens fights and reduces incoming damage |
| Caster runs out of resources | Every turn uses expensive magic | Use weapons on safe targets and reserve control spells | Reduces restocking pressure |
| Objective failure | Chasing kills before reading conditions | Secure the location, NPC, or interaction first | Protects bonus rewards and advancement |
Best early builds for faster returns
Build for consistency before peak damage. A party that wins every fight with minimal recovery will level and earn gold faster than a glass cannon group that occasionally collapses. Naurim is the easiest place to start: invest in a single heavy melee direction, improve Strength and Constitution, and give him enough durability to occupy enemies without needing constant support.
Takate benefits from a ranged or mobile setup. Keep him out of the first enemy wave, use terrain to create distance, and prioritize targets that threaten Zurbaran. His job is not to duel every enemy; it is to remove vulnerable targets while the front line prevents retaliation. If you instead build him as a second melee attacker, make sure the party has enough defensive control to support two characters in danger.
For Zurbaran, choose a clear spell identity. A caster who invests in several unrelated schools can become expensive and inconsistent. Pick offensive magic or a control-and-support route, then increase survivability enough to survive one mistake. The best spell is frequently the one that protects a stronger physical attacker from losing a turn.
Cassia is a useful flexible slot, but flexibility should come after the core team works. Give her a weapon style that fills a real gap rather than copying Naurim. A secondary ranged option, support ability, or defensive role can make her more valuable than another character competing for the same melee loot.
| Character | Recommended role | Early priorities | Gear rule |
|---|---|---|---|
| Naurim | Heavy front-line damage | Strength, Constitution, one melee talent | Buy meaningful two-handed or heavy upgrades first |
| Takate | Ranged damage and mobility | Dexterity, Agility, ranged talent | Keep distance; upgrade damage before defensive luxury |
| Zurbaran | Control or offensive magic | Cleverness, Constitution, focused spell line | Prioritize survivability and efficient spell use |
| Cassia | Flexible damage or support | Complement the party's missing role | Use spare loot instead of forcing duplicate upgrades |
| Gladys | Support or secondary combat role | Reliable utility over broad specialization | Equip her after the core party is covered |
Blackguards is available through the official Steam store page, and Daedalic's official website remains the best place to check publisher information. For players who enjoy deliberate positioning, Steamoz's Desperados III tactical review is a good companion read, even though its real-time stealth systems work very differently.
The clean farming loop to use every chapter
Use this loop whenever you reach a new settlement. First, save before accepting side content. Second, inspect the world map and collect nearby optional fights. Third, complete the encounter objective before cleaning up enemies. Fourth, return to town, sell duplicates, and spend advancement points on your primary roles. Fifth, buy only the upgrade that improves your next battle plan. Finally, push the main quest while your inventory and party are healthy.
That routine beats aimless grinding because it stacks rewards efficiently. You earn advancement points from meaningful fights, collect sellable equipment, preserve consumables through tactical play, and arrive at the next chapter with a party built around actual strengths. If a battle repeatedly empties your supplies, stop farming and diagnose the formation. Blackguards rarely asks for more levels; it usually asks for a better first turn.
The final rule is worth remembering: gold follows clean combat. Protect your front line, focus fire, exploit terrain, and stop buying gear that does not support a clear role. Complete optional objectives during your natural campaign route, use arena fights selectively, and keep every character specialized. Do that, and Blackguards' famously tight economy becomes manageable without exploits, tedious replays, or sacrificing the challenge that makes its tactical battles so satisfying.