
The best ASUS ROG Ally X starting build is a clean Windows setup using 25W Performance mode, 1080p or 900p game profiles, 60 FPS caps for demanding titles, and an early SSD upgrade only when the included 1TB drive becomes limiting. Start with Windows Update, ASUS Armoury Crate SE, AMD graphics updates, and MyASUS firmware before installing a large game library. The Ally X already has the right hardware for a strong handheld baseline: an AMD Ryzen Z1 Extreme with 8 cores and 16 threads, Radeon graphics with 12 RDNA 3 compute units, 24GB of LPDDR5X-7500 memory, a 1TB M.2 2280 PCIe 4.0 SSD, an 80Wh battery, and a 7-inch 1080p 120Hz VRR display.
This guide treats “starting build” as the complete first-day configuration: the Windows foundation, Armoury Crate control layout, power profile, screen settings, storage plan, and game-specific performance targets. It is designed for a new Ally X owner who wants stable performance instead of constantly changing wattage sliders and graphics options.
Build the Right First-Day Windows Setup
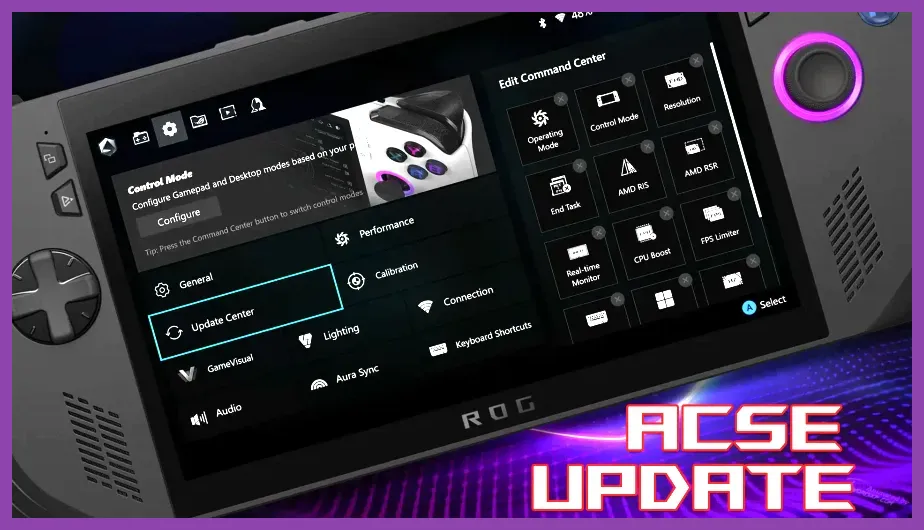
Before changing performance settings, let the Ally X finish its software setup. Connect the handheld to the 100W USB-C charger, join a reliable Wi-Fi network, and leave at least 20 percent free space on the internal SSD. Windows updates, ASUS firmware, and shader compilation can all produce misleading performance during the first launch, so do not judge the device from an unpatched game session.
Install updates in the correct order
- Open Settings > Windows Update and install every available cumulative, feature, and driver update. Restart until Windows reports that the device is current.
- Open MyASUS, run LiveUpdate, and install BIOS, chipset, firmware, and ASUS system-control updates. Keep the charger connected during any BIOS update.
- Open Armoury Crate SE and update the app, controller firmware, and ASUS components from its content or settings area.
- Install the latest AMD graphics package only through ASUS support or the official ROG Ally X support page unless you specifically need a newer AMD Adrenalin release.
- Sign in to Steam, Xbox, Epic Games, or other launchers after the system is stable. Keep game installations on the internal SSD while testing performance.
Do not immediately disable Windows services, uninstall Armoury Crate, or apply aggressive debloating scripts. The Ally X depends on ASUS control services for its Command Center, fan behavior, controller mapping, and power modes. Removing those services can create more troubleshooting than the small amount of background memory it saves.
Use a sensible Windows handheld layout
Set Windows display scaling to 100 percent or 125 percent depending on readability, then enlarge the on-screen keyboard if text entry feels cramped. Pin Steam, Armoury Crate SE, Settings, and your primary launcher to the taskbar. In Windows power settings, use the default balanced behavior and let Armoury Crate handle the actual gaming wattage. This prevents competing Windows and ASUS power policies.
Open Settings > System > Display > Advanced display and select 120Hz. The screen’s FreeSync Premium variable refresh rate is most useful when the frame rate moves between roughly 40 and 120 FPS. For demanding games, a locked 60 FPS or 40 FPS target is usually smoother than an unstable 80 FPS.
Choose the Best Ally X Power Profile
The Ally X has three useful starting modes in Armoury Crate SE: Silent at 10W, Performance at 15W, and Turbo at 25W on battery or up to 30W when connected to a sufficiently powerful charger. Your default build should be 25W Performance-style gaming when plugged in, 15W for lighter games away from an outlet, and 10W only for low-demand titles or emulation.
Recommended wattage profiles
| Use case | Mode | Target | Why it works |
|---|---|---|---|
| Indie games, visual novels, older RPGs | Silent, 10W | 40-60 FPS | Quiet fans and excellent battery efficiency |
| Hades II, Minecraft, Persona 5 Royal | Performance, 15W | 60 FPS | Good balance for lighter 3D workloads |
| Most modern games | Turbo, 25W | 40-60 FPS | Best unplugged performance without extreme power draw |
| Cyberpunk 2077, Starfield, demanding AAA games | Turbo plugged in, 30W | 30-60 FPS | Uses the Ally X’s full cooling and power headroom |
Do not assume 30W is always better. The 30W plugged-in setting increases heat, fan noise, and charger dependence, while gains over 25W can be modest if a game is limited by the Z1 Extreme’s shared memory bandwidth. Start at 25W, check the in-game frame rate, and move to 30W only when the extra performance clearly improves a difficult scene.
Set manual mode only after the baseline works
Manual mode is useful, but it should be a second step rather than the starting build. A good manual test profile uses a 25W CPU/GPU power target, a moderate fan curve that reaches high speed around 75-80°C, and no CPU boost experiment. The Z1 Extreme shares its 24GB memory between system RAM and integrated Radeon graphics, so over-allocating memory to the GPU can reduce Windows headroom without guaranteeing higher frame rates.
Use the Command Center button to show the real-time overlay, then watch FPS, temperature, wattage, and GPU utilization. If GPU utilization sits near 95-100 percent, lower resolution or graphics quality is the right fix. If GPU utilization is low while frame rate stutters, investigate shader compilation, CPU-heavy simulation, background apps, or a frame cap rather than blindly adding wattage.
Set Up the 1080p VRR Display Correctly

The Ally X’s 1920x1080 panel looks excellent, but native resolution is not automatically the best choice for every game. Your starting display build should keep 120Hz and VRR enabled, use 1080p for lighter games, and switch to 1600x900 or 1280x720 for demanding releases when maintaining a stable frame rate matters more than image sharpness.
Use these resolution and frame-rate rules
- 1080p at 60 FPS: Use this for Dead Cells, Hades II, Persona 5 Royal, Diablo IV, and many competitive or older games.
- 1080p at 40-60 FPS: Use medium settings and upscaling for games such as Baldur’s Gate 3, Forza Horizon 5, and Monster Hunter Rise.
- 900p at 40-60 FPS: This is the strongest general starting point for large open-world games when 1080p cannot hold a stable target.
- 720p at 30-45 FPS: Reserve this for especially demanding games such as Starfield or heavily modded titles.
Enable AMD Radeon Super Resolution when a game lacks its own upscaler. If the game supports FSR 2 or FSR 3, use the in-game option first because it usually provides better sharpening and motion handling. Begin with FSR Quality at 1080p or 900p; select Balanced only when the frame rate still misses your target.
Starter graphics profile for modern AAA games
Set textures to Medium or High, shadows to Low, ambient occlusion to Low or Medium, volumetric fog to Low, screen-space reflections to Low, and crowd density to Low or Medium. Keep anisotropic filtering at 8x or 16x because it improves ground texture clarity for a small performance cost. Disable ray tracing on battery; the Z1 Extreme’s integrated Radeon GPU is better spent on stable rasterized performance.
Use a 60 FPS cap for games that can hold it. For a 40 FPS target, keep the display at 120Hz because 120 divides evenly into 40 and creates consistent frame pacing. Avoid a 45 FPS cap on a 60Hz setting unless the game and display behavior are specifically tuned for it.
Choose Storage and MicroSD Safely

The included 1TB PCIe 4.0 SSD is enough for a starting build, but modern PC games can consume it quickly. Baldur’s Gate 3 is over 100GB, Forza Horizon 5 is well over 100GB with additional content, and Call of Duty installations can be dramatically larger. Keep at least 100-150GB free so Windows updates, shader caches, and game patches do not turn the system drive into a bottleneck.
When to upgrade the internal SSD
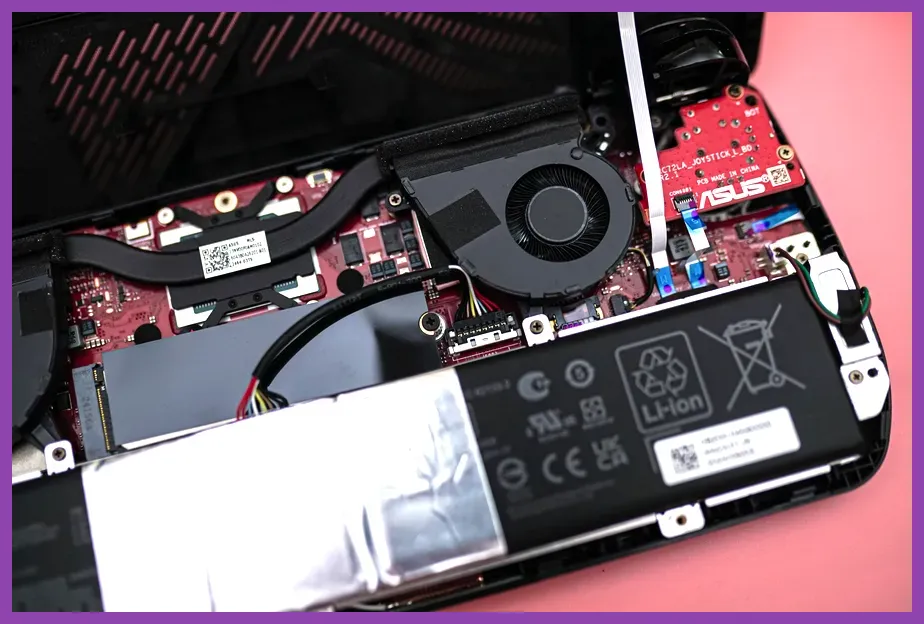
Upgrade to a quality M.2 2280 PCIe 4.0 NVMe SSD when your library regularly leaves less than 100GB free. A 2TB drive is the best value starting upgrade; a 4TB model is worthwhile only for a large Game Pass, Steam, and emulation library. Back up important saves before opening the chassis, shut down Windows completely, disconnect the charger, and follow the official ROG Ally X hardware information before removing the rear cover.
After installing the new SSD, use a Windows installation USB or a full drive clone. ASUS Cloud Recovery can restore the factory image, but it requires time, a stable internet connection, and access to the recovery process. Do not format the old drive until Windows boots correctly, Armoury Crate SE recognizes the controls, and the analog sticks, speakers, Wi-Fi, and USB-C ports have been tested.
Use microSD as secondary storage
A fast UHS-I microSD card is suitable for indie games, older PC titles, ROM backups, screenshots, and installers. It is less ideal for huge open-world games with constant asset streaming. Format it as NTFS when you need large files and Windows-only use, label it clearly, and avoid moving a card between devices while a launcher is writing data. For the most demanding games, the internal NVMe drive remains the safer performance choice.
Build Game Profiles That Actually Perform
Do not create one universal graphics preset and expect every game to behave the same. The Ally X’s shared-memory design makes texture quality, resolution, and frame pacing more important than chasing maximum presets. Make a profile in Armoury Crate SE for each demanding game, then assign the executable so the correct wattage and control layout load automatically.
Open-world and CPU-heavy games
For Starfield, start at 1280x720 or 1600x900, FSR 2 at 70-75 percent render scale, Low preset, motion blur off, and a 30 FPS cap. Dense cities and busy settlements can remain CPU-limited even at low resolution, so reducing crowd density and background applications matters more than lowering textures. For Cyberpunk 2077, use 900p, FSR 2 Quality, Medium textures, Low shadows, Low volumetric fog, crowd density Low, ray tracing Off, and a 30 or 40 FPS target.
For Baldur’s Gate 3, use 1080p or 900p with FSR 1.0 at Ultra Quality, Medium textures, Low shadows, and a 40 FPS cap. Act 3 can become CPU-limited, so do not expect the same frame rate in every district. The stable frame-time goal is more realistic than a flat 60 FPS promise.
Competitive and lighter games
For Counter-Strike 2, use 1080p, low or medium shadows, low effects, 4x or 8x MSAA depending on your target, and a 60 FPS cap for battery play. For Forza Horizon 5, choose 900p, Medium preset, dynamic optimization enabled, and a 45 or 60 FPS target. For Minecraft Java Edition, allocate 4-6GB of RAM rather than assigning nearly all 24GB, use Sodium if your mod list supports it, and lower simulation distance before render distance when CPU performance is the problem.
Install games from the official Steam store or another trusted launcher, and use each game’s built-in benchmark whenever available. Record average FPS and one-percent lows after a five-minute run. A profile that feels smooth at 40 FPS is a better build than one that briefly reaches 70 FPS and constantly stutters.
Finish the Ally X With Controls and Battery Tuning
The final part of the best ASUS ROG Ally X starting build is control mapping. Leave the built-in gamepad in XInput mode for modern PC games. Use Armoury Crate’s per-game profiles for mouse-heavy titles: map the rear M1 and M2 buttons to frequently used keyboard actions, assign one button to the on-screen keyboard, and reserve the other for sprint, crouch, or an ability wheel. Avoid mapping system shortcuts to buttons you may press accidentally during competitive play.
Battery rules that preserve the experience
Use 15W Performance mode for lighter games and 25W Turbo when a demanding game needs it. Lower screen brightness to around 60-70 percent indoors, disable unnecessary Bluetooth devices, and close launchers that are not downloading or syncing. The 80Wh battery is much larger than the original Ally’s 40Wh unit, but demanding 25-30W games still drain it quickly because the display, fans, CPU, and GPU all consume power.
When playing mostly at a desk, enable ASUS battery care charging if your firmware provides the option and set the charge limit to 80 percent. Use 100 percent charging before travel. Avoid covering the top exhaust or side vents, and do not play demanding games on soft bedding where heat can build around the intake.
Test the finished build
Run one light game at 15W, one modern game at 25W, and one demanding game while plugged in at 30W. Confirm that the analog sticks return to center, the triggers reach full range, Wi-Fi remains stable, sleep and wake work correctly, and the Command Center overlay reports the selected mode. If a title stutters, test the same scene after compiling shaders, then change one setting at a time.
For broader handheld maintenance, the battery-focused advice in Steamoz’s battery drain fixes guide is also useful, while the platform comparisons in our PC system requirements guide can help you judge whether a demanding game is a good fit. For official specifications and warranty information, check ASUS Support before replacing hardware.
The finished starting build is simple: keep Windows and ASUS firmware updated, use 120Hz with VRR, run 15W or 25W profiles according to the game, prefer stable 40 or 60 FPS targets, lower resolution before destroying texture quality, and upgrade the 1TB SSD only when real storage pressure appears. That setup lets the Ally X’s Ryzen Z1 Extreme, 24GB memory, 80Wh battery, and 1080p display work together instead of forcing one setting to solve every game.