
If you’re starting the Aliens: Colonial Marines Collection, the fastest way to stop dying is to treat every fight as a positioning problem, not an aim test. Keep the M41A Pulse Rifle ready, use the motion tracker before opening doors, burn runners only when they commit, and save heavy weapons for Crushers, Praetorians, and scripted swarm pushes. The campaign rewards calm target selection far more than frantic spraying.
The Collection bundles the base campaign with additional content such as Stasis Interrupted and Bug Hunt, so there’s a healthy amount of shooting to learn. The underlying game is old, occasionally rough, and much better with friends, but its best encounters still understand the Aliens formula: limited visibility, bad information, and a creature that wants you moving backward. These 10 tips will help you survive the opening missions and build habits that remain useful through Hadley’s Hope, the Sulaco, and the later combat arenas.
Before installing mods or changing files, check the official Steam listing for the current package and included content. If your priority is smooth performance rather than visual tweaking, Steamoz’s guide to graphics settings for maximum FPS covers the same practical principles that apply here.
1. Build Your Loadout Around the Pulse Rifle
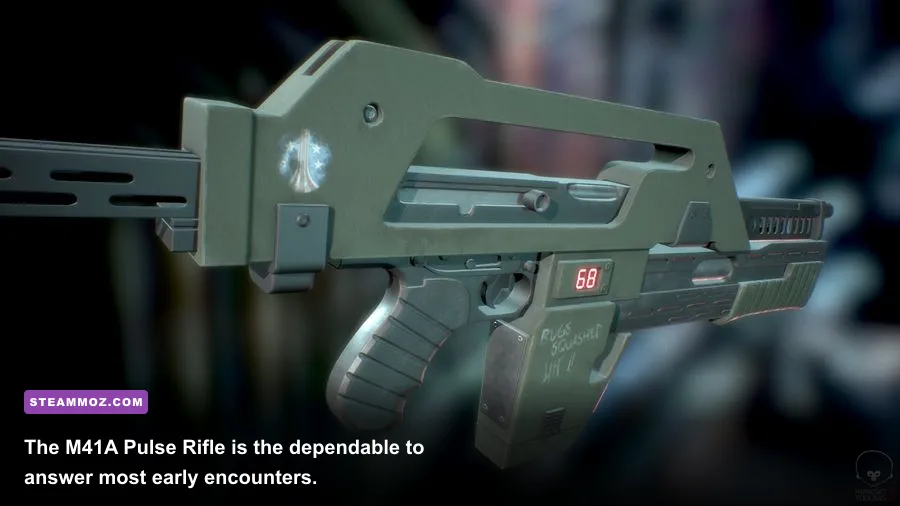
The M41A Pulse Rifle should be your default weapon for a reason: it handles the most common targets, carries a useful amount of ammunition, and stays controllable during close-range panic. Don’t immediately swap it for every weapon pickup. A weapon on the floor is only valuable if it solves a problem your current loadout can’t.
Use short bursts against distant Xenomorphs and aim for the head when a Warrior pauses before lunging. At point-blank range, controlled full-auto fire is acceptable, but keep the reticle around the upper chest rather than trying to track the head through a wall-climbing animation. The Pulse Rifle’s real strength is reliability, not spectacular damage.
The M37A2 Pump Shotgun is your emergency button. It is excellent against a runner that has already crossed your defensive line, but its slow follow-up shot makes misses expensive. Keep it equipped when the level funnels you through vents, maintenance rooms, or narrow cargo spaces. The VP78 Pistol is a sensible backup for conserving rifle ammunition, while the M240 Incinerator is best used to deny a doorway or punish a clustered swarm rather than chase a single target.
| Weapon | Best Use | Main Risk | New Player Advice |
|---|---|---|---|
| M41A Pulse Rifle | General combat and sustained fire | Wasting ammunition on distant targets | Use bursts and reload behind cover |
| M37A2 Pump Shotgun | Close corridors and emergency defense | Slow follow-up after a miss | Wait for a committed lunge |
| M240 Incinerator | Doorway denial and swarm control | Limited fuel and poor single-target value | Lay fire across a route, not at one drone |
| M56 Smart Gun | Holding lanes during heavy attacks | Wasting it during quiet exploration | Deploy it when multiple threats enter one sightline |
| SADAR | Crushers, bosses, and dense groups | Self-damage and scarce ammunition | Fire from cover with distance to the blast |
The M56 Smart Gun and SADAR are power tools, not regular firearms. The Smart Gun’s tracking lets you focus on movement and positioning, but it disappears quickly if you fire at every dot. The SADAR’s explosive damage is tremendous, yet the blast radius can punish you in a cramped room. If a heavy weapon pickup appears immediately before a major objective, assume the game is trying to tell you something.

🎮 Aliens: Colonial Marines Collection
Looking to experience this game? Grab your digital key directly on our store for $7.49.
View on Steammoz Store →2. Read the Motion Tracker Without Worshipping It

The motion tracker is one of your strongest tools, but it is not a wallhack. A contact tells you that something is moving nearby; it doesn’t reveal elevation, the exact side of a doorway, or whether a vent animation is about to trigger. Watch the screen, listen for hissing, and check the environment before committing.
When the tracker starts filling with contacts, stop advancing. Back into a room with a clear exit, turn your camera toward the most likely approach, and let the enemies come to you. This single habit prevents the classic beginner death: walking around a corner while three Xenomorphs attack from different elevations.
Use the tracker in rhythm rather than staring at it constantly. Check it before opening a door, after a scripted line, and whenever the ambient sound abruptly drops. In the Sulaco’s darker corridors, the pause between a tracker ping and an attack is often enough to switch from the Pulse Rifle to the shotgun.
Sound is a second tracker
Warriors make their presence obvious, but Spitters are more dangerous because they can punish you while you focus on melee targets. Their green acid projectiles create a clear threat zone, so move sideways instead of retreating in a straight line. Boilers demand even more patience: don’t shoot a swollen, stationary target from close range unless you have room to escape the blast.
In co-op, call direction and elevation instead of merely shouting “Xeno.” Say “tracker left,” “ceiling,” or “Spitter rear.” That information lets teammates cover separate lanes and avoids four players turning toward the same Warrior while a second one reaches the flank.
3. Fight From Chokepoints, Not the Middle of Rooms
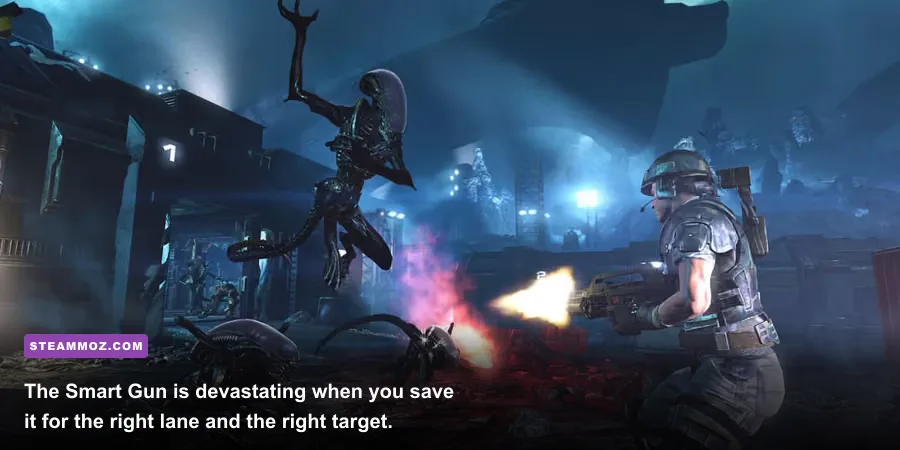
Aliens: Colonial Marines becomes much easier when you control where contact happens. Doorways, stairwells, cargo barriers, and narrow maintenance corridors reduce the number of angles the Xenomorphs can use. The middle of a room does the opposite: it exposes you to wall movement, ceiling attacks, and enemies slipping behind your camera.
During a swarm, identify one fallback position before you start shooting. A good fallback has a visible approach, enough room to reload, and a route that does not end in a locked objective door. Fire until the front target reaches the edge of your effective range, then retreat while reloading. Don’t wait until the magazine is empty and the entire group is in melee distance.
There’s a useful difference between a soft choke and a hard choke. A hard choke is a single doorway that forces enemies through one opening. A soft choke is a wide room entrance where enemies can spread. Use the M240 Incinerator across a hard choke, but don’t assume flame will protect a soft one. In open spaces, the Pulse Rifle and Smart Gun are safer because they let you track separate lanes.
| Enemy | Telegraph | Counter | Preferred Tool |
|---|---|---|---|
| Runner or Warrior | Hiss, crouch, then forward lunge | Backpedal through a doorway and shoot the head | Pulse Rifle or Shotgun |
| Spitter | Stops at range and launches green acid | Strafe from the projectile line and prioritize it | Pulse Rifle |
| Boiler | Swollen body and defensive posture | Keep distance and avoid the death burst | Rifle from cover |
| Crusher | Charges with armored front exposed | Break line of sight, then attack its vulnerable side or rear | SADAR or heavy fire |
| Praetorian | Large armored target leading an elite push | Use cover, focus fire, and preserve heavy ammunition | Smart Gun and SADAR |
Never reload in the open if you can avoid it. The reload animation is short enough to feel safe and long enough to get you killed. Step behind a crate, a bulkhead, or a teammate’s firing lane first. This is especially important on Hardened and Ultimate Badass, where a small positioning error snowballs immediately.
4. Learn the Xenomorph Attack Rhythm
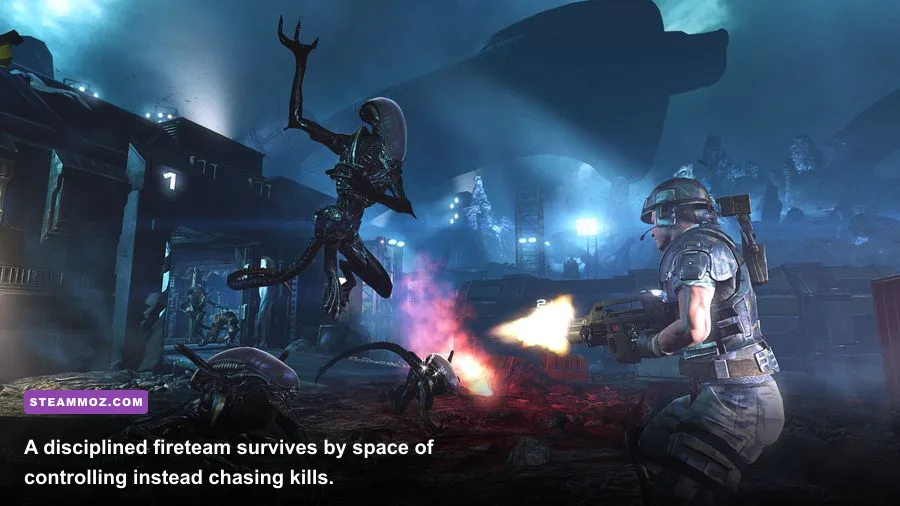
Most Xenomorphs are dangerous because of timing, not raw complexity. A common attack pattern is approach, pause, lunge, retreat. If you panic-fire during the approach, you may empty half a magazine before the creature actually commits. Hold your aim, wait for the lunge, and then deliver concentrated damage.
Runners are the test of your close-range discipline. Keep moving backward, but don’t sprint blindly into an unexplored corner. A shotgun blast after the lunge starts is more dependable than firing while the target is still weaving. Warriors can absorb more punishment and often arrive in groups, so shoot the lead attacker while maintaining enough awareness to avoid being surrounded.
Wall-crawling enemies are a camera problem. Keep your crosshair near the likely landing point rather than trying to follow every animation. If you lose sight of one, stop rotating wildly. Check the tracker, listen for claws, and reposition toward a doorway. The game frequently wants you to look at one threat while another approaches from above.
Crushers require a different mindset. Their armored frontal plate makes casual rifle fire inefficient, and standing directly ahead invites a charge. Break their line of sight with cover, create lateral space, and use the SADAR only when you can place the blast safely. In a team, one player should draw the charge while the others attack from the side; in solo play, patience matters more than damage-per-second.
Praetorians are ammunition checks. Don’t spend every grenade or explosive on regular Drones beforehand. If you know an arena is building toward an elite encounter, arrive with a full magazine, a usable secondary, and at least one escape route. Heavy targets become manageable when you turn the fight into repeated short exposures: peek, fire, retreat, reload, repeat.
5. Treat Campaign Progression and Objectives Carefully
The campaign’s objective markers can make you rush, especially when dialogue says a squadmate is pinned down. Resist that urge. Search side rooms before crossing an obvious trigger point, reload before entering a large arena, and collect armor or ammunition only after the area is secure. Some encounters begin when you pass a doorway or activate a console, and the game rarely gives you a generous warning.
Winter is built around surviving the campaign’s escalating situations, while O’Neal and the other marines often create the impression that you have more support than you really do. AI allies can distract enemies, but they are not a substitute for a defensive position. Let them draw attention, then use the opening to eliminate Spitters and flankers.
Check every accessible side room for audio logs, dog tags, and weapons. Collectibles are not just completionist decoration: exploring teaches you where the game hides ammunition and where its ambush logic likes to place threats. If you’re chasing every collectible, make a manual checkpoint habit before risky exploration, because backtracking through a live combat zone is rarely worth it.
Difficulty changes the correct habit
On Recruit and Soldier, you can learn weapon handling and enemy animations without obsessing over every round. Hardened exposes sloppy reloads and poor target priority. Ultimate Badass is less about showing off aim than refusing bad engagements. Don’t increase difficulty until you can consistently survive a swarm without sprinting into unknown space.
| Difficulty | What Changes for You | Best Training Goal | Common Mistake |
|---|---|---|---|
| Recruit | More forgiving damage and resources | Learn routes and enemy telegraphs | Building reckless habits |
| Soldier | Balanced campaign pressure | Practice burst fire and fallback positions | Ignoring Spitters |
| Hardened | Errors become costly during swarms | Reload only behind cover | Holding the trigger too long |
| Ultimate Badass | Minimal room for exposure or waste | Plan ammunition and arena positioning | Rushing objective triggers |
For technical issues, start with a stable baseline: disable unnecessary overlays, verify the game files through Steam, and cap the frame rate if uncapped rendering causes inconsistent frame pacing. The same troubleshooting mindset used in Steamoz’s PC fixes guide is useful here. You don’t need a beautiful 144-frame presentation to aim well, but you do need consistent input and a camera that isn’t stuttering during a swarm.
6. Use Fire and Explosives as Area Control
The M240 Incinerator’s best quality is psychological: flame changes where enemies can safely move. Place it across a doorway, around a corner, or along the edge of a defensive position. Don’t wave the stream at one target until the fuel is gone. A short burst that blocks a route can buy more time than sustained damage.
Grenades and the SADAR should follow the same logic. Explosives are strongest when enemies are committed to a narrow lane. They are weakest when thrown reactively at a single fast runner near your feet. Back up first, create distance, then throw. If a teammate is holding the choke, wait until the group is past the safe escape point before detonating.
7. Make Co-op Roles Deliberate
Four players firing together sounds powerful, but an uncoordinated squad can block sightlines, waste pickups, and leave the rear completely unguarded. Assign a front shooter, a rear watcher, and a player responsible for heavy weapons. The roles can change, but the coverage should not.
Stay close enough to revive, not so close that one Spitter or explosive attack hits everyone. The player carrying the Smart Gun should hold a lane while Pulse Rifle users focus on targets that slip through. Call out low ammunition before a major door opens, and don’t grab the only shotgun shells if another player is already defending the close route.
For more co-op-minded survival habits, Steamoz’s first-run survival tips offer a useful comparison: information sharing and retreat planning matter more than individual kill counts.
8. Save Heavy Weapons for Scripted Pressure
Weapon pickups often appear shortly before the game expects you to fight something unpleasant. The M56 Smart Gun is ideal for long defensive sequences, while the SADAR belongs in encounters featuring Crushers, Praetorians, vehicles, or tightly packed reinforcements. If the area is quiet and you’re tempted to fire because the weapon feels exciting, don’t. The next room may be the real test.
Heavy ammunition is also a reason to explore rather than sprint. Search nearby rooms before activating consoles or crossing arena thresholds. You’ll occasionally find extra rounds, armor, or a safer angle that turns an exhausting encounter into a controlled one.
9. Don’t Confuse Armor With Invulnerability
Armor can absorb punishment, but it doesn’t excuse standing in acid, allowing a Warrior to chain attacks, or letting a Crusher corner you. Think of armor as a buffer that gives you one extra decision. Use that decision to move behind cover, not to continue trading damage.
After a fight, pause before pushing forward. Check your health, reload every weapon you expect to use, and identify whether the next section is likely to be close quarters or open. A full magazine and a clear escape route are worth more than a few seconds saved on the march.
10. Play the Collection in the Right Order
Start with the main campaign on Soldier if you want the intended learning curve. It introduces the Sulaco, Hadley’s Hope, and the game’s basic Xenomorph behaviors before the additional scenarios ask for more aggressive resource management. Play Stasis Interrupted after gaining confidence with the core weapons, then use Bug Hunt to practice holding lanes and surviving repeated waves.
Stasis Interrupted is particularly useful for understanding how the Collection expands the story around the outbreak, while Bug Hunt is the better training ground for co-op communication. Don’t judge your campaign performance by multiplayer-style kill totals. The campaign is about reaching the next safe position with ammunition intact.
Finally, keep expectations realistic. Aliens: Colonial Marines has uneven AI, dated visuals, and occasional bugs that no tactical tip can erase. Yet the fundamentals still work: listen before you move, shoot the target that can damage you soonest, fight from a choke, and keep one resource in reserve. Follow those rules and the Collection’s most chaotic missions become tense rather than frustrating. For background on the game and its official support history, consult the official SEGA game page and the Gearbox game page. If you’re comparing this kind of campaign grind with another demanding action game, Steamoz’s Dragon’s Dogma: Dark Arisen tips are another good reminder that careful preparation beats frantic improvisation.