
There’s no character leveling, XP bar, or gold currency in Alien: Isolation—including the Last Survivor DLC. The fastest way to “level” is to progress through objectives while maximizing mission score, and the closest thing to gold farming is a disciplined loop for components, blueprints, collectibles, and challenge points. Stop searching for a hidden vendor or repeatable money exploit: the game is built around conserving tools, bypassing danger, and finishing encounters cleanly.
That distinction matters because many search results use RPG language that simply doesn’t fit Creative Assembly’s survival-horror design. Amanda Ripley never gains levels, buys stat upgrades, or banks credits. In Last Survivor, you play Ellen Ripley aboard the Nostromo, and your reward is a better score, faster completion, and access to leaderboard bragging rights—not a pile of gold. This guide turns that apparent “farming” problem into a practical route for the main campaign and DLC.
For the official PC version, check the Alien: Isolation Steam page for the base game and DLC details. The official Feral Interactive page is also useful for PC-specific support, while the official Alien: Isolation website covers the broader game package.
What “fast leveling and gold farming” actually means

Alien: Isolation has three progression tracks that players often confuse with leveling. First, the story unlocks tools and blueprints: the Motion Tracker, Flashlight, Revolver, Shotgun, Flamethrower, Bolt Gun, EMP Mine, Pipe Bomb, Molotov, Noisemaker, Smoke Bomb, Medikit, and Flashbang all shape your options. Second, the game tracks mission performance through score, time, deaths, alarms, and optional objectives. Third, collectibles—including Nostromo logs, ID tags, and archived terminals—reward exploration and completion.
None of these systems produces gold. Scrap, bonding agent, sensors, ethanol, SCJ injector, compounds, and blasting caps are crafting components, not currency. They occupy inventory space and feed specific recipes. Scrap is especially valuable because it appears in several recipes and supports healing, distraction, and defensive equipment. Hoarding every component can actually slow you down if your inventory is full and you leave useful items behind.
| System | What you earn | Best fast-progress approach | What it does not do |
|---|---|---|---|
| Story progression | Blueprints, weapons, new areas | Follow objectives and avoid unnecessary fights | Does not award XP |
| Mission score | Performance ranking and challenge progress | Finish quickly, stay hidden, complete optional tasks | Cannot be spent as money |
| Exploration | Logs, ID tags, terminals, components | Search rooms along the critical path | Does not unlock character levels |
| Crafting | Medkits, Noisemakers, EMP Mines, and more | Carry only tools that solve the next threat | Has no shop or gold economy |
If you’re coming from a game with actual gold loops, Steamoz’s Garage: Bad Trip farming guide covers that kind of progression. Alien: Isolation demands the opposite mindset: every resource is situational, and escaping with unused scrap is often better than burning it for a flashy distraction.
🎮 Alien: Isolation Last Survivor
Looking to experience this game? Grab your digital key directly on our store for $1.99.
View on Steammoz Store →The fastest campaign route is stealth plus selective scavenging
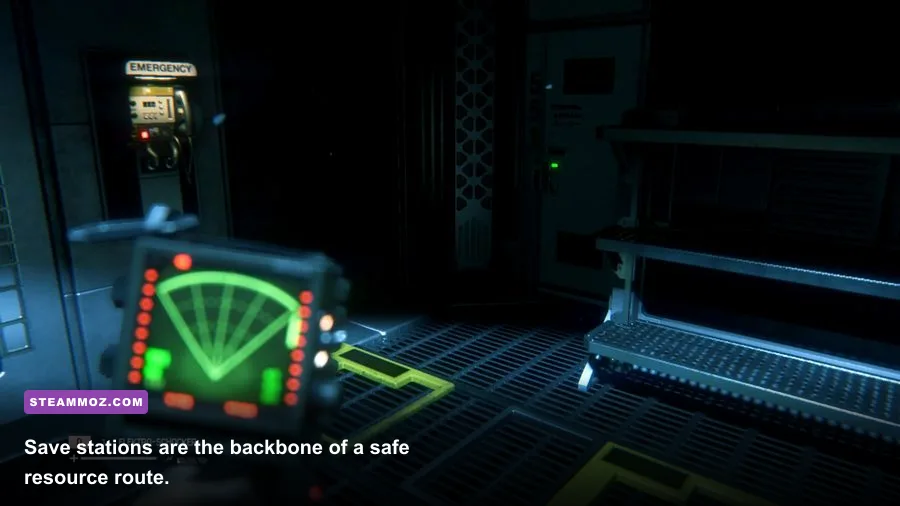
Your best “leveling build” is a stealth inventory. Move crouched when the Alien is nearby, walk rather than sprint through uncertain rooms, and use the Motion Tracker in short checks instead of staring at it continuously. The tracker’s beeps are information, not permission to panic. A nearby blip means you should identify cover, a locker, a desk, or a route around the room before the creature enters your space.
Prioritize blueprints and components in safe or semi-safe areas, then leave. The Medikit is your first major quality-of-life craft because fall damage, Working Joe attacks, and careless human encounters can drain health. After that, a Noisemaker is valuable for redirecting the Alien toward a known doorway. Don’t throw one randomly: you want the creature moving away from your objective, not arriving beside it.
The Revolver and Shotgun are emergency tools, not default weapons. Human enemies can be dispatched, but gunfire raises the noise profile and may attract the Alien. Against the Xenomorph, firearms are generally poor “damage” solutions. The Flamethrower is the important exception: a short burst can force it to retreat, but prolonged firing burns fuel rapidly and can leave you helpless later. Treat fuel as time purchased, not an ammunition pool for winning fights.
Use save stations whenever the route is safe enough. Saving before a risky door, generator, elevator, or scripted objective turns a death into a short correction rather than a full replay. However, save stations have a delay, and repeatedly attempting one while the Alien is actively hunting is a reliable way to get killed. Break line of sight first, listen for footsteps and ventilation movement, then save.
A practical inventory priority
| Priority | Item or component | Why it matters | Common mistake |
|---|---|---|---|
| S | Medikit materials | Restores survivability after unavoidable damage | Crafting before checking current health |
| S | Flamethrower fuel | Creates an escape window against the Alien | Holding the trigger too long |
| A | Noisemaker materials | Moves the creature away from doors and objectives | Throwing without an escape route |
| A | EMP Mine materials | Disables Working Joes and electronic hazards | Using it on the Alien |
| B | Revolver and shotgun ammunition | Useful against armed humans in forced combat | Assuming bullets are efficient against the Xenomorph |
| B | Scrap and sensors | Supports multiple recipes and upgrades | Searching dangerous rooms after inventory is full |
How to farm resources without creating extra danger

There is no infinite gold loop, but you can create a repeatable resource route around predictable safe rooms. On the Sevastopol sections, search desks, lockers, cabinets, open shelves, and corpses along the objective path. Terminal entries can reveal access codes and story information, while passcodes often open side rooms containing components or collectibles. The trick is to search during low-threat windows, not during an active Alien hunt.
When you reach a save station, make a mental checkpoint: record your current health, fuel, crafted tools, and the next objective. If the following section costs a Noisemaker or Medkit, craft it before leaving. If it contains Working Joes, keep an EMP Mine or Stun Baton plan ready. The EMP Mine is particularly efficient against synthetic enemies because it creates control without the noise and escalation of gunfire.
Don’t reload every empty drawer. Containers have fixed contents, and most areas aren’t designed to be stripped repeatedly. The closest thing to efficient farming is routing: collect high-value components while already moving toward a mission objective, then return only when a save station and a known reward justify the trip. Backtracking through Alien territory for one scrap pickup is usually a net loss.
For players struggling with stutter or poor visibility, performance matters to this route. A stable frame rate makes Motion Tracker checks, quick turns, and door interactions more reliable. Steamoz’s stutter-reduction settings guide and FPS optimization guide cover broader PC tuning principles. In Alien: Isolation, prioritize stable frame pacing over extravagant shadows or post-processing effects.
Last Survivor is a score challenge, not a farming map
Last Survivor is a short, focused scenario inspired by the original Alien film. You play Ellen Ripley, not Amanda, and the mission takes place aboard the Nostromo. The central task is to activate the emergency destruct sequence and escape before the ship is lost. There’s no shop, character sheet, XP reward, or gold chest waiting at the end.
For the fastest clear, learn the objective chain before chasing optional pickups. The Nostromo’s corridors are cramped, lighting is deliberately oppressive, and the Alien’s movement can turn a safe-looking shortcut into a dead end. Keep a mental map of intersections and doors. If the tracker shows the creature closing, stop moving and let the soundscape tell you whether it has entered your compartment.
Use the environment before crafting. Lockers, beds, tables, vents, and corners can break the Alien’s pathing long enough for you to reach the next interaction. Hiding is not automatically safe: staying inside a locker while the creature is suspicious can trigger a search, and breathing or movement cues can give you away. A clean route often involves waiting outside the obvious hiding spot, then moving after the Alien commits to another corridor.
For score-focused runs, avoid unnecessary reloads, alarms, and combat. Complete the required interactions in a single flow, use the Flamethrower only to create distance, and don’t burn a Noisemaker unless it saves a meaningful amount of time. If your first attempt is messy, replay the DLC as a route-learning run. The second attempt should be faster because you know which doors matter and which rooms are simply bait for nervous scavengers.
Last Survivor decision table
| Situation | Best response | Tool choice | Score-friendly result |
|---|---|---|---|
| Alien enters the corridor | Break sight and wait for it to pass | None | No noise and no wasted fuel |
| Alien blocks the objective door | Redirect it, then move immediately | Noisemaker or short Flamethrower burst | Fast progress with controlled risk |
| Forced close encounter | Retreat through a known escape route | Flamethrower | Survive without prolonged combat |
| Safe room reached | Check inventory and continue | Save station | Protects the run from a reset |
What not to do when chasing a faster run

Don’t shoot the Alien expecting a conventional boss fight. The creature’s behavior is built around intimidation, investigation, and retreat rather than a visible health bar. Gunfire may create a moment of space, but it also creates noise and can intensify the situation. Don’t sprint everywhere, either. Sprinting is useful for a committed escape after the Alien has moved away, but it’s a terrible scouting tool.
Don’t waste crafting materials on a full inventory. If your Medikit slots are full and your health is high, those components are temporarily dead weight. Likewise, don’t deploy an EMP Mine against a threat it doesn’t solve. The game rewards matching tools to problems: EMP for Working Joes and electronics, Flashbangs for human disruption, Noisemakers for redirection, and the Flamethrower for emergency Alien control.
Finally, don’t treat collectibles as mandatory during a speed attempt. Nostromo logs, ID tags, and terminal records are excellent for completionists, but detouring into an unvisited room while the Alien is active is not “free gold.” Finish the story or DLC first, then make a separate collectible sweep with a map and a lower difficulty if your goal is completion percentage.
The real reward is a cleaner, faster escape
The honest answer to the Alien: Isolation Last Survivor fast leveling and gold farming question is simple: those systems don’t exist. What you can optimize is far more interesting. Route through objectives, scavenge only when the threat level allows it, craft for the next obstacle, save intelligently, and use the Flamethrower as a panic button rather than a weapon you intend to master.
In the main campaign, that approach accelerates blueprint access and keeps your inventory healthy for the late-game Sevastopol sections. In Last Survivor, it produces the only rewards that matter: a faster clear, fewer deaths, better mission performance, and a route that feels deliberate instead of desperate. If you want a broader look at stealth-focused games, Steamoz’s hidden-rewards guide is a good next read. Just remember the core rule aboard the Nostromo: the best resource is the encounter you never start.