
Tom Clancy's Ghost Recon Breakpoint is finally worth playing because the post-launch updates fixed its biggest identity problem. With Immersive Mode enabled, gear score disabled, enemy-marking assists reduced, and the right class selected, Ubisoft's open-world shooter becomes a methodical stealth sandbox instead of a loot-driven checklist. It is still uneven, but the combination of tactical infiltration, detailed weapon customization, and Aurora's varied terrain now makes Breakpoint a compelling solo or co-op shooter.
The launch version pushed players toward constant gear upgrades and repetitive island activities. The current game gives you far more control over that experience. The crucial decision is to treat Breakpoint as a reconnaissance game first and an RPG second. That means scouting Wolves positions, using the Mk 2 drone intelligently, managing injuries, and choosing weapons for a mission rather than simply equipping the highest item level.
Ubisoft's official Ghost Recon Breakpoint page remains useful for checking editions and live features, while the Steam listing covers the current PC version. Here is why the game works better now, and exactly how to configure it.
Immersive Mode fixes Breakpoint's worst design decision

Breakpoint's original gear-score system made an elite soldier feel like an inventory manager. Every rifle had a number, every enemy dropped another replacement, and weapon progression often mattered more than positioning. Immersive Mode removes that pressure. Open the settings menu, switch Experience to Immersive, disable Gear Level, and choose the difficulty that fits your group. Your weapons become dependable tools rather than disposable loot.
For a first playthrough, Advanced difficulty is the best starting point. It keeps enemies dangerous without making every detection instantly fatal. Extreme difficulty is excellent once you understand patrol routes, but it can turn a single drone alert into a frustrating restart if you are still learning Aurora. Enemy difficulty and tactical difficulty can be adjusted separately, so do not hesitate to use Advanced enemies with a more punishing tactical preset.
Turn off enemy marking if you want the strongest version of the game. The drone can still scout bases, but you will need to physically identify threats instead of painting an entire compound through a wall. Disable automatic marking, keep enemy icons limited, and reduce HUD information where possible. These changes make the Mk 2 drone, binoculars, Sync Shot Drone, and actual line-of-sight judgment matter again.
The settings that create the best tactical loop
- Experience: Immersive.
- Gear Level: Off.
- Difficulty: Advanced for a first run, Extreme for experienced players.
- Injury Level: Often or Always, depending on how much survival friction you want.
- Stamina: Extreme makes long movement and steep climbs more deliberate.
- Bandage Limit: Reduced limits make mistakes carry into the next engagement.
These settings do not magically transform every mission. They do, however, make preparation meaningful. A suppressed TAC50 is valuable because it can remove a distant radio operator, while an M4A1 remains useful because its controllable recoil and versatile attachment options suit compound assaults. That is a much better progression system than replacing both weapons every few minutes.
Aurora is a better stealth playground than its story suggests

Aurora Island is frequently criticized for its narrative, but its geography supports excellent tactical encounters. The map includes snowy mountains around Mount Hodgson, jungle and wetlands in the New Argyll region, coastal settlements, restricted Skell Technology facilities, and the heavily fortified areas controlled by Sentinel and the Wolves. Each environment changes how you approach a base.
In the snowy north, visibility and elevation are your biggest advantages. A sniper can work from a ridgeline, but white camouflage is not a universal solution because movement across exposed slopes is easy to spot. In Cape North and the eastern industrial zones, roads and buildings create more predictable patrol patterns. The Sinking Country region gives stealth players dense vegetation and muddy approaches, while the Fen Bog area rewards patience around water, bridges, and isolated guard posts.
Before attacking, use binoculars to identify generators, alarms, medics, radio operators, turrets, and heavy gunners. The priority is usually the radio operator, followed by alarms and drones. A base with no reinforcement call is dramatically easier to clear, especially when playing solo. Sync Shot Drones can eliminate up to three marked targets, but save them for enemies you cannot safely reach rather than spending all three on ordinary riflemen.
How to clear a Sentinel base without triggering an alert
- Park outside the restricted zone and deploy the drone from concealment.
- Mark the radio operator, alarms, generators, and any Behemoth or turret covering the main approach.
- Use a suppressed DMR or sniper rifle to remove the radio operator only when the body can be hidden.
- Disable alarms before moving into the compound, or position yourself near the alarm panel for a quick interaction.
- Enter through the least defended side, then relocate after every two or three shots.
- Leave a spare Sync Shot Drone for a reinforcement soldier or a heavy gunner.
This rhythm is where Breakpoint feels closest to a modern tactical shooter. You are not simply clearing red icons; you are shaping the battlefield so that the next mistake is survivable. Players who enjoy deliberate solo progression can also compare the game with our solo-player class advice for Satisfactory, although Breakpoint's combat demands much faster decisions.
The best classes turn loadouts into real playstyles
Breakpoint's four original classes give each mission a clearer identity. Panther is the strongest general-purpose choice for stealth players. Its Cloak Spray reduces detection, and the class has bonuses that improve stealth movement and handling. Pair Panther with an MP5 or Honey Badger for close-range work and a TAC50 or Scorpio Scout for long sightlines. This setup is excellent for infiltrating camps, eliminating radio operators, and escaping before a full search begins.
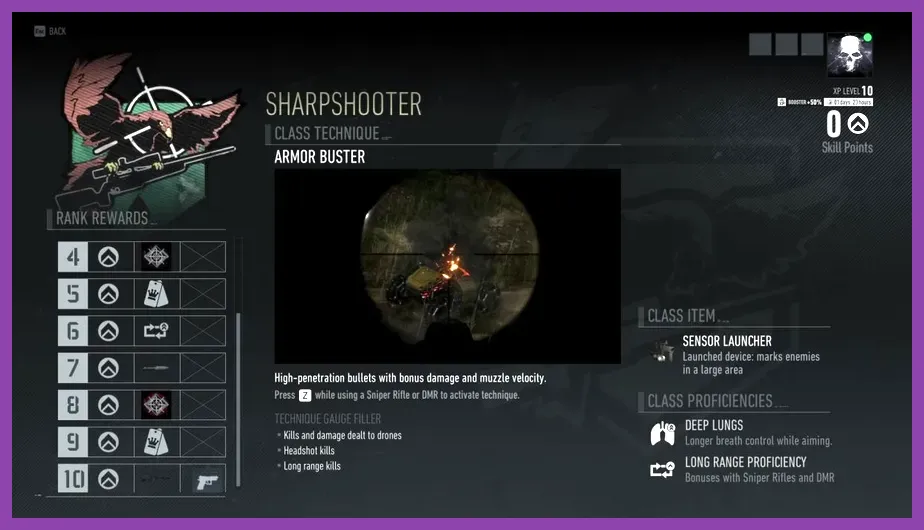
Sharpshooter is the most reliable class for players who prefer overwatch. Its Armor Buster technique fires a high-penetration round that is particularly useful against armored enemies and can damage vehicles. Use a TAC50, Scorpio Scout, or HTI, then carry an assault rifle such as the 416 for emergencies. The class skill accelerates preparation for difficult targets, but it is less forgiving if enemies collapse your distance.
Field Medic is the safest class for solo players who expect mistakes. Medkit deployment provides healing and can stabilize an injured operator, while the class is useful in missions with extended firefights. Run an assault rifle such as the M4A1 or 416 alongside a shotgun like the M590A1. This is not the fastest stealth build, but it gives you recovery options when a base-wide alert cannot be avoided.
Assault is the aggressive option. Its True Grit technique improves weapon handling and survivability during sustained combat, making it a good fit for the MK17, Stoner LMG, or a high-damage assault rifle. Choose Assault for Behemoth Defense Areas, convoy ambushes, and co-op groups that intentionally want loud engagements. It is powerful, but it offers less utility during a clean infiltration.
Weapons and attachments that remain useful
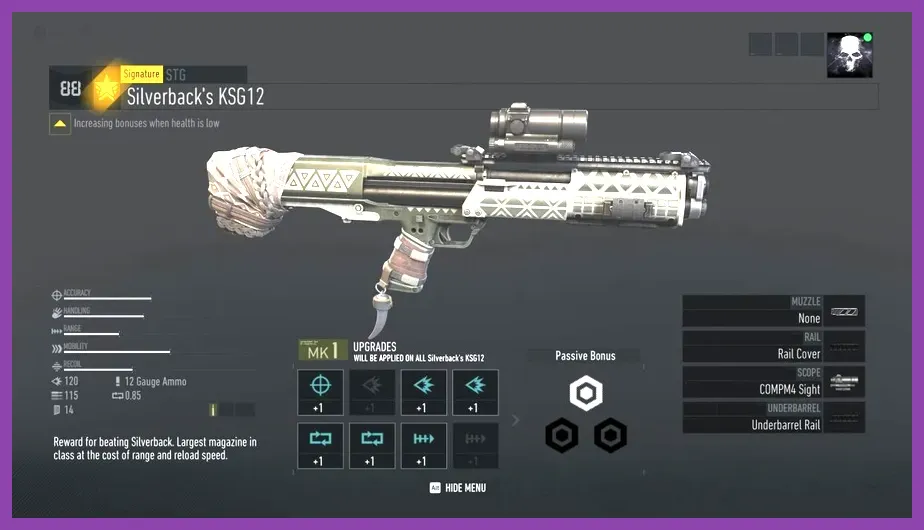
The M4A1 is the safest assault rifle recommendation because it combines manageable recoil, solid range, and broad attachment support. The 416 hits harder and suits players who can control its kick. The MP5 and Vector are effective inside buildings, while the Honey Badger is a strong suppressed option for Panther. For precision, the TAC50 offers dependable long-range damage, and the Scorpio Scout gives a lighter alternative for players who reposition often.
Prioritize a suppressor, a sight with a usable reticle, a foregrip that improves recoil control, and extended magazines where available. Do not automatically equip every damage-increasing attachment. A weapon that fires accurately from cover is more valuable than one with a slightly better stat bar that throws rounds wide. Breakpoint's official updates and news archive also explains major class and system changes that shaped the current balance.
Bivouacs make preparation faster and more rewarding
Bivouacs are not just fast-travel points. They let you change class, select a weapon loadout, craft items, apply temporary buffs, and prepare for the terrain ahead. Before a long mission, activate the preparation buff that improves a relevant attribute, then choose a class suited to the objective. Panther is ideal for a restricted facility; Sharpshooter is better for a mountain overwatch position; Assault makes sense when a convoy or armored site is the target.
Use bivouac preparation buffs deliberately rather than activating them automatically. The stamina buff is valuable before a long infiltration through cliffs or marshes. Injury resistance helps during enemy-heavy missions, while accuracy and handling improvements are worthwhile before a boss encounter. You can also use the bivouac to restock syringes, grenades, and class-specific items before committing to a difficult operation.
Drone resources deserve special attention. The Mk 2 drone is your most flexible scouting tool, but it is not invulnerable. Keep it low and behind cover when possible, and avoid flying directly over a jammer or dense enemy cluster. The Sync Shot Drone is best saved for targets that would otherwise force a risky approach. In co-op, coordinate drone marks rather than having every player reveal the same patrol.
How to build a dependable solo loadout
- Primary: M4A1 or 416 with suppressor, optic, and recoil-control grip.
- Secondary: TAC50, Scorpio Scout, or Honey Badger depending on terrain.
- Class: Panther for stealth, Field Medic for recovery-heavy missions.
- Items: Sync Shot Drones, EMP grenades, and medical supplies.
- Buff: Stamina for traversal, accuracy for overwatch, injury resistance for assault missions.
The goal is flexibility, not maximum damage. Breakpoint's best missions often force a transition from quiet entry to close-range escape. A balanced loadout gives you an answer for drones, armored soldiers, alarms, and vehicles without requiring a trip back to the menu.
Behemoths are preparation checks, not ordinary firefights

Behemoth Defense Areas contain autonomous armored drones that punish exposed movement. The Behemoth uses machine guns, rockets, a mortar barrage, and a rotating body-mounted weapon system. Its red weak points and exposed components are the key to shortening the fight, but the arena matters just as much as your ammunition. Never begin the encounter in open ground without identifying hard cover and an escape route.
A practical Behemoth strategy
- Scout the arena first and locate concrete barriers, buildings, and elevated positions.
- Use an EMP grenade or EMP launcher to interrupt the drone and create a damage window.
- Target the red components and exposed rear sections with an armor-piercing weapon or Sharpshooter's Armor Buster.
- Move whenever the mortar targeting indicator appears; staying behind the same cover invites a direct hit.
- Break line of sight when the Behemoth begins sustained rocket or machine-gun fire.
- Use explosives only after an EMP stagger or when the drone is trapped against terrain.
Armor-piercing rounds, EMP tools, and a high-damage sniper rifle make the encounter substantially easier. Assault's True Grit can help if you are forced into a close fight, while Sharpshooter offers the cleanest burst damage. Co-op teams should spread out so one missile or mortar strike cannot down everyone at once.
Breakpoint is not a flawless comeback story. Its dialogue can be stiff, some missions repeat familiar objectives, and the original campaign does not always match the quality of its combat sandbox. Yet Immersive Mode, the Ghost Experience settings, class variety, and Aurora's flexible bases give the game a strong second life. If you want a tactical open-world shooter where scouting and loadout choices matter more than grinding, this is the version to play.
For PC players, start with the performance principles in our Star Wars Outlaws graphics settings guide and remember that Breakpoint benefits from stable frame pacing during long-range engagements. For broader hardware context, our Sea of Thieves system requirements breakdown offers a useful comparison for open-world PC performance.
Final verdict: play Tom Clancy's Ghost Recon Breakpoint in Immersive Mode, disable excessive HUD assistance, choose Panther or Sharpshooter, and approach Aurora as a tactical sandbox. That configuration does not erase every weakness, but it reveals the focused stealth shooter hidden underneath the launch-era loot system.