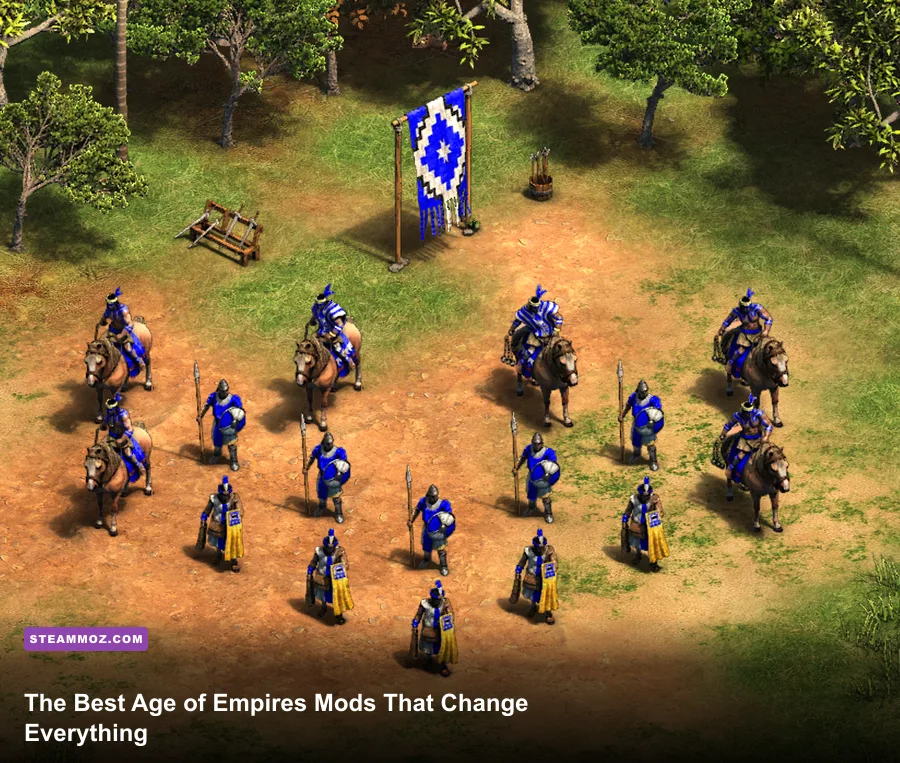
If you want the biggest upgrade to your Ages Of Empires experience without changing the game into something unrecognizable, start with Small Trees, Idle Villager Pointer, Grid Mod, Interactive Build Order Guide, and Improved Extended Tooltips for Age of Empires II: Definitive Edition. Together, they sharpen visibility, remove interface friction, teach practical openings, and reveal the combat math that the vanilla interface hides.
This list focuses on Steam Workshop mods that improve the way you play rather than handing you absurd resources or replacing the entire campaign. That distinction matters. A strong quality-of-life mod should help you execute a decision faster; it shouldn't make the decision for you. Most of these additions work beautifully in single-player, ranked preparation, and casual multiplayer, although you should always check the current ranked compatibility rules before launching a serious match.
For installation, open the official Age of Empires II: Definitive Edition Steam page, enter the game's Workshop, and subscribe to a mod from its listing. In-game, open Tools & Extras, choose Mods, then move your selected items into the active list. Restarting after a major UI or terrain mod is a good habit; it prevents old cached assets from producing strange icons or invisible textures.
The five essential mods to install first
These mods solve different problems, so they stack well. Small Trees clears sightlines. Idle Villager Pointer protects your economy. Grid Mod improves spatial planning. Interactive Build Order Guide gives you a training structure. Improved Extended Tooltips explains why your attack or defense is succeeding. You don't need all five on day one, but this is the cleanest all-round package for a returning player.
| Mod | Primary benefit | Best for | Gameplay impact |
|---|---|---|---|
| Small Trees | Clearer vision through forests | Ranked play and scouting | Low; visual readability only |
| Idle Villager Pointer | Highlights unused villagers | New and intermediate players | Low; prevents missed work time |
| Grid Mod | Shows construction tiles | Base layouts and walling | Low; placement assistance |
| Interactive Build Order Guide | Tracks opening milestones | Learning standard strategies | Medium; training support |
| Improved Extended Tooltips | Shows detailed unit and tech data | Counter-play and theorycrafting | Low; information only |
Why this combination works
Age of Empires II is often lost through tiny execution errors rather than one dramatic tactical blunder. A villager stands idle for 25 seconds, a house arrives late, a woodline blocks a farm transition, or you misread a unit's armor class. These mods attack those exact leaks. They don't increase the 25-population Dark Age cap, accelerate the 200-food Feudal Age requirement, or alter the 75-wood cost of a house. They simply make the existing rules more visible.
That makes the collection especially useful if you're returning after playing another real-time strategy game. The economy still revolves around food, wood, gold, and stone; the standard villager still costs 50 food; and the Town Center still produces villagers at roughly 20 seconds each before civilization or technology modifiers. The difference is that you'll see where your attention is being wasted.

🎮 Everything
Looking to experience this game? Grab your digital key directly on our store for $14.99.
View on Steammoz Store →Small Trees and Grid Mod make the map readable
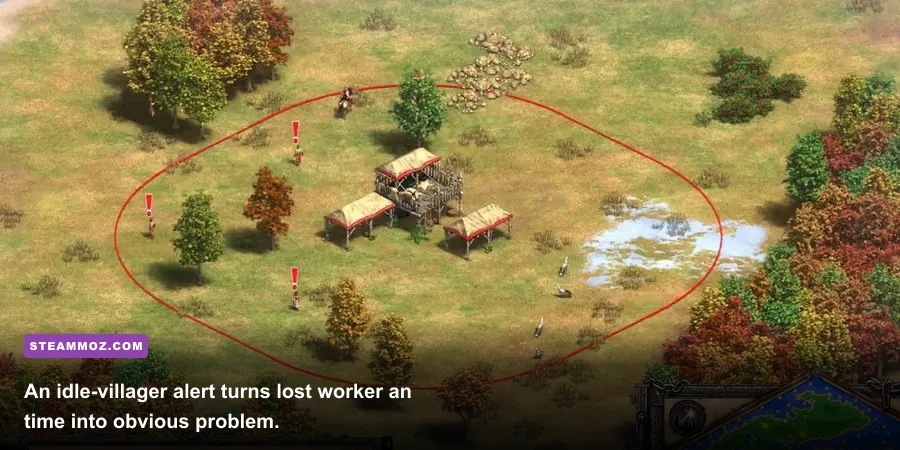
Small Trees is the most immediately transformative visual mod in the collection. Standard forests can swallow military groups, hide a monk conversion attempt, and make it difficult to judge whether a wall segment is actually connected. The reduced tree footprint keeps the forest's gameplay function intact while exposing more of the terrain around it.
This matters most on maps such as Arabia, where early scouting and wall placement happen under constant pressure. If your Scout Cavalry finds a forward gold pile or a narrow woodline, you can assess the approach more quickly. During a Feudal fight, you can also track whether a group of Archers is moving behind a forest or has simply stopped behind an obstacle. The mod doesn't reveal fog of war, so it isn't a cheat; it improves the information you already possess.
Pair it with Grid Mod when you're learning base geometry. The grid shows the tile footprint used by houses, farms, military buildings, walls, and defensive structures. That sounds cosmetic until you try to place a Palisade Wall around a resource under pressure. A one-tile gap can turn a supposedly closed entrance into a direct path for Scouts or Men-at-Arms.
How to use the grid without becoming dependent on it
Use the overlay during build-order practice, then occasionally disable it in unranked games. Your goal is to learn spacing, not stare at blue squares forever. A Mill occupies a relatively small footprint, while a Barracks, Archery Range, Stable, and Siege Workshop all need enough surrounding space for units to exit cleanly. Production buildings jammed against a forest or house cluster can create pathing problems that no hotkey fixes.
| Situation | What the visual mod reveals | Practical payoff | Common mistake avoided |
|---|---|---|---|
| Forward wall | Exact tile connection | Closes scoutable gaps | Leaving a one-tile opening |
| Woodline defense | Units and terrain edges | Cleaner archer positioning | Fighting blind around trees |
| Farm transition | Available placement tiles | Faster post-Feudal farming | Blocking villagers with buildings |
| Base expansion | Building footprints | Better production flow | Trapping units behind structures |
Keep in mind that the official Age of Empires II game page and current patch notes remain the authority on visual and gameplay updates. A terrain mod can look perfect after one patch and need an update after another, particularly when the developers adjust map rendering or add new DLC civilizations.
Idle Villager Pointer protects your entire economy
Idle Villager Pointer earns its place in every beginner and intermediate mod collection because idle time compounds brutally. If three villagers stand inactive for 30 seconds, that's 90 seconds of lost labor. On a standard opening, that can mean roughly one missing house cycle, delayed farms, or a late Barracks. The pointer turns that invisible economic loss into a bright, impossible-to-miss prompt.
The best way to use it is as a trigger, not a crutch. Every time the pointer appears, ask why the villager stopped. Did a boar die? Did a lumber camp run out of trees? Did a wall or building block the path? If the answer is a resource transition, retask the villager immediately instead of sending them back to the same depleted patch.
Where idle time hurts most
Early food workers are the priority because Town Center production depends on a steady food bank. A typical Dark Age opening needs enough food to sustain villagers while still banking 500 food for Feudal Age. If a boar hunt collapses and your villagers stand idle, the delay affects every later benchmark: the first military building, the first farm wave, and the timing of upgrades such as Double-Bit Axe.
Wood idle time becomes especially costly around 6:00 to 10:00, when you need farms, houses, military production, and possibly a Blacksmith. Gold idle time delays technologies and gold-heavy units such as Scouts upgraded into Light Cavalry, Knights, Crossbowmen, and Monks. Stone idle time matters when your plan includes a Castle or defensive towers, but mining stone too early can damage your food-and-wood engine.
| Resource | Early benchmark | Idle warning consequence | Fast correction |
|---|---|---|---|
| Food | Continuous Town Center production | Villager and age-up delays | Retask to boar, deer, berries, or farms |
| Wood | Camps, houses, farms, buildings | Production stalls | Add a lumber camp or shift one food worker |
| Gold | Techs and gold units | Late upgrades or army | Secure a second mining group before spending |
| Stone | Castle or tower timing | Defensive plan arrives late | Stop mining once the required amount is banked |
For an even stronger training loop, record one replay with the pointer enabled and one without it. Compare your villager count at 5:00, 8:00, and 12:00. If the mod is doing its job, the difference will show up in worker numbers and resource bank rather than in some magical bonus hidden in the rules.
Interactive Build Order Guide turns practice into a plan
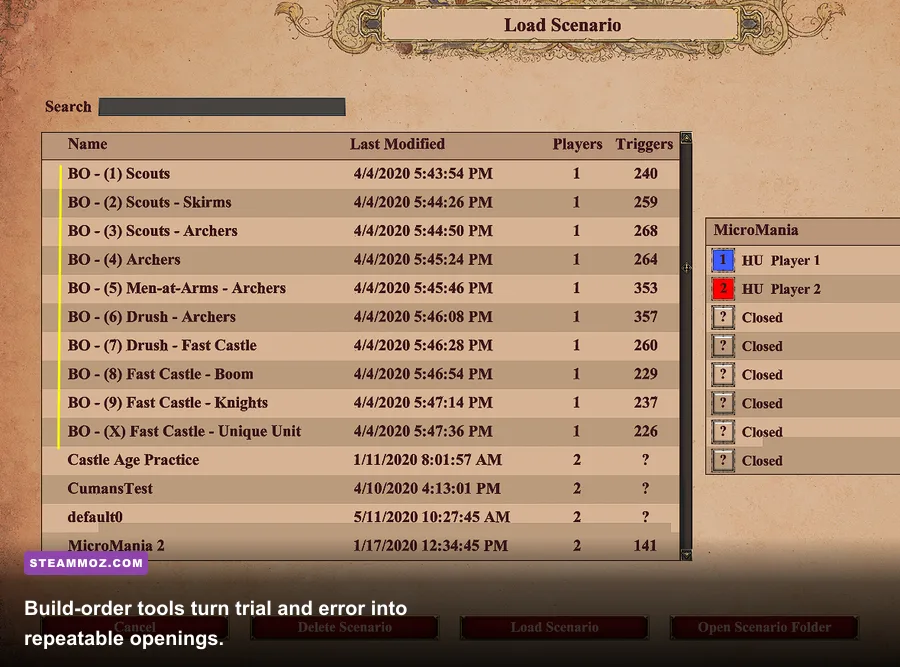
Interactive Build Order Guide is the best choice if your biggest problem is not knowing what to do next. It provides milestone-based instructions for openings such as Fast Castle, Scouts, Men-at-Arms into Archers, and two-range Crossbows. It won't play the game for you, and that's precisely why it's useful: you still have to respond when your opponent scouts the plan.
Use it in a controlled way. Pick one civilization and one opening for five games. For a Scouts opening with the Franks, your priorities are continuous Town Center production, early food income, a 150-wood Stable, and enough food and gold to sustain Scout Cavalry production. The exact timing changes with map generation, deer position, and idle seconds, so treat the guide's timestamps as targets rather than sacred commandments.
Three build-order drills worth learning
Scout opening: Aim to reach Feudal Age with enough food to produce several Scouts or upgrade existing ones. The goal isn't merely raiding villagers; it is forcing idle time, denying deer, finding exposed gold, and keeping the opponent's army at home. A failed Scout dive still has value if it reveals a defensive Spearman mass and buys you time to add Archery Ranges.
Men-at-Arms into Archers: Three Men-at-Arms can punish greedy openings, but they shouldn't wander into a Town Center. Use them to deny a forward resource or force walls while your Archers arrive. The critical resource tension is wood: Barracks, Archery Range, houses, farms, and Archer production all compete for it.
Fast Castle: This approach sacrifices early military pressure for a Castle Age timing, usually around 15:00 to 17:00 in a clean execution. The danger is obvious: Scouts, Men-at-Arms, or a tower rush can punish the open economy. Add a defensive Spearman or quick wall if scouting shows aggression. A Fast Castle is a calculated risk, not permission to ignore the map.
| Opening | Core buildings | Key transition | What to scout |
|---|---|---|---|
| Scouts | Mill, Lumber Camp, Stable | Archery Range or second Stable | Spearmen and exposed gold |
| Men-at-Arms into Archers | Barracks, Archery Range | Blacksmith and ranged mass | Walls, towers, and enemy gold |
| Fast Castle | Two Mills or market support, Barracks | Stable, Monastery, or Castle Age siege | Forward pressure and tower rushes |
| Two-range Archers | Two Archery Ranges, Blacksmith | Crossbowmen in Castle Age | Skirmishers and defensive towers |
Keep the official Age of Empires forum bookmarked for patch-specific build changes. Balance updates can change the value of a civilization bonus, a technology cost, or a unit's training time, so older guides may need adjustment rather than blind repetition.
Improved Extended Tooltips expose the real combat math
Improved Extended Tooltips is the mod for players who keep asking, “Why did that fight go so badly?” Standard tooltips often explain a unit's role but don't present every useful number in one place. Extended information helps you see attack, armor, bonus damage, attack speed, hit points, movement speed, upgrade effects, and technology costs without constantly opening external references.
That information changes decisions. Archers have low base damage against armored targets, while Crossbowmen gain stronger attack and bonus damage after the Castle Age upgrade. Skirmishers are designed to punish ranged units, but they need numbers and upgrades behind them to trade efficiently. Knights can overwhelm Archers in open ground, yet Monks, Pikemen, Spearmen, Camels, and concentrated Crossbowmen all change that equation.
Use tooltips to build counters, not memorize trivia
Start with armor classes. If the tooltip shows a unit receiving bonus damage from Spears, Archers, Camels, or a civilization-specific counter, that is more actionable than simply knowing its headline attack value. Then check technology interactions. Blacksmith upgrades such as Fletching, Bodkin Arrow, and Bracer improve ranged damage and range; Forging, Iron Casting, and Blast Furnace support melee attacks. Defensive upgrades alter whether a unit survives one extra hit, which can decide a fight under a Town Center.
Villagers also deserve attention. Loom raises villager armor and hit points, making early raids less punishing, but researching it too soon can delay an age-up or first military building. The tooltip lets you connect that cost to the actual threat instead of researching automatically every game.
| Enemy unit | First response | Upgrade to watch | Positioning rule |
|---|---|---|---|
| Mass Archers | Skirmishers or Scouts | Fletching and ranged armor | Don't fight in a narrow choke without numbers |
| Knights | Pikemen, Camels, Monks | Infantry armor or Sanctity | Protect gold and fight near support |
| Men-at-Arms | Archers or Knights | Crossbow upgrade | Kite; never surround them with villagers casually |
| Siege | Scouts, Knights, or Bombard Cannons | Ballistics and siege upgrades | Spread units before the shot lands |
For players chasing smoother performance while running large battles and overlays, Steamoz's PC crash and FPS troubleshooting guide has useful general steps for drivers, background applications, and config cleanup. The principles apply here even though the games are different: diagnose the system before blaming the mod.
Best mod combinations for different players
You don't need to install every popular Workshop item. The best setup depends on what you want from Age of Empires II. Competitive players should prioritize visual clarity and information. New players benefit from guidance. Campaign fans may prefer presentation upgrades, cinematic terrain, and interface changes that make long scenarios more comfortable.
| Player type | Recommended package | Why it works | Watch-out |
|---|---|---|---|
| Ranked beginner | Idle Villager Pointer, Grid Mod, Improved Extended Tooltips | Fixes execution and teaches counters | Check ranked compatibility after patches |
| Returning veteran | Small Trees, Improved Extended Tooltips | Restores map readability and current data | Old visual mods may conflict |
| Build-order learner | Interactive Build Order Guide, Idle Villager Pointer | Connects timings to actual economy | Don't follow timestamps over scouting |
| Campaign player | Small Trees plus approved UI or terrain mods | Improves long scenario readability | Some custom assets can affect immersion |
Installation and troubleshooting checklist
Subscribe to one mod at a time. Launch a skirmish on Arabia, create a small opponent, and inspect the Town Center, resource piles, forests, military icons, and minimap. If everything works, enable the next mod. This takes five minutes and saves you from trying to identify one broken asset in a 30-mod loadout.
When a mod causes crashes, missing textures, or invisible units, disable the newest subscription first. Then verify that the mod targets Age of Empires II: Definitive Edition, not the 2013 HD Edition or the original release. Check whether the Workshop page lists a current patch version, and test without texture packs or total conversions. If the game still misbehaves, unsubscribe, restart Steam, verify the game files, and resubscribe only after the clean launch succeeds.
Keep separate profiles for ranked practice, campaigns, and experimental scenarios. Total conversions and custom civilizations can be fantastic, but they belong in their own loadout. That separation also protects your replays: a replay recorded with altered units, terrain, or balance rules may not behave correctly when opened without the same active content.
Steamoz has also covered strategy-game progression and resource farming, plus PC settings for maximizing FPS. The same rule applies across both genres: remove friction, then spend your attention on decisions that actually win the match.
What to avoid when modding Age of Empires
Avoid stacking mods that solve the same visual problem. Two different tree replacements can conflict, while multiple UI packages may overwrite the same icons or tooltip files. Avoid “instant win” or resource mods if your goal is to improve at multiplayer; they teach habits that collapse the moment the standard 200-population rules and normal resource rates return.
Be cautious with balance mods in multiplayer. A custom civilization, altered unit cost, or faster research speed can make a scenario brilliant and a normal match invalid. Before joining a lobby, inspect the mod list and confirm whether the host expects standard data. In ranked play, follow the current rules published through the game client and official channels rather than assuming every Workshop subscription is allowed.
The strongest loadout is still the modest one. Install Small Trees for vision, Idle Villager Pointer for economic discipline, Grid Mod for cleaner construction, Interactive Build Order Guide for structured practice, and Improved Extended Tooltips for informed counters. Play ten games, review your replays, and remove anything that distracts more than it helps. That's how mods transform Ages Of Empires: not by turning every match into a different game, but by giving you a clearer view of the excellent one already underneath.
For official support and current compatibility information, consult the Age of Empires Support site before troubleshooting a Workshop issue. When the interface stops hiding mistakes, you'll find that better scouting, cleaner economies, and sharper counters follow surprisingly quickly.