The best secret locations and Easter eggs in Rainbow Six Siege PC are scattered across old maps, reworked layouts, and barely visible environmental props. Start with Yacht's underwater shark, Theme Park's dragon imagery, Outback's roadside details, Oregon's concealed tower routes, and Stadium's hidden references. Some are harmless visual jokes; others are genuinely useful angles, rotation routes, or rappel positions that can change a round.
Siege makes these discoveries unusually rewarding because maps are built as tactical machines. A tiny window, breakable panel, or overlooked ladder can be both a developer flourish and a serious piece of information. This guide separates real environmental Easter eggs from practical hidden locations, explains exactly where to look, and shows how to inspect them on PC without throwing away your match.
Yacht's Shark and the Secrets Beneath the Hull
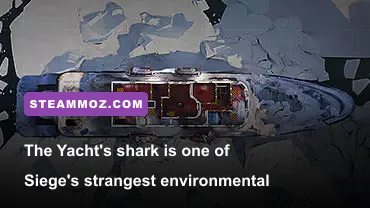
Yacht remains one of Siege's most memorable curiosity maps. Its biggest visual Easter egg is the shark moving through the dark water beneath the vessel. You can spot it from exterior viewpoints and selected windows when the camera angle is right, especially around the lower hull and exterior rappel areas. It isn't a killable creature, a hidden operator, or a trigger for bonus points. It's simply one of those wonderfully odd details that makes the map feel like a real ship trapped in dangerous waters.
To inspect it safely, load Yacht in a private Custom Game, choose an attacker with straightforward movement such as Sledge or Ash, and disable the round timer if you're taking screenshots. Move outside along the hull, then rotate your camera below the waterline rather than staring directly at the ship's windows. The shark can be easy to miss because the water is dark and exterior geometry limits your view. On PC, increasing brightness slightly helps, but avoid washing out the entire scene with extreme gamma.
Yacht has practical secrets too. The ship's exterior rappel points let attackers gather information before committing to a breach, while the long sightlines around the top deck punish anyone who assumes every approach is covered by a normal doorway. The lower levels contain multiple soft walls and hatches that make vertical play more valuable than the map's compact footprint suggests. Buck, Sledge, and Ram are particularly useful when the objective is below a floor with destructible material above it.
The key lesson is not to confuse the shark with a tactical signal. It does not reveal a defender, alter sound, or indicate a hidden room. Treat it as an environmental Easter egg, then spend your actual prep time checking camera lines, hatch positions, and exterior runout exposure. If you want a broader performance check before exploring older maps, Steamoz's PC crash and FPS fixes has useful troubleshooting habits that also apply to Siege.
What to check on Yacht
| Location | What you may find | Why it matters | Best approach |
|---|---|---|---|
| Exterior lower hull | Shark in the water | Visual Easter egg only | Use a Custom Game and look below the waterline |
| Top deck exterior | Long rappel and window angles | Early attacker information | Drone first, then rappel briefly |
| Lower ship levels | Soft walls and vertical routes | Creates unexpected pressure on objectives | Use Buck, Sledge, or Ram |
🎮 1bitHeart
Looking to experience this game? Grab your digital key directly on our store for $2.99.
View on Steammoz Store →Outback's Roadside Details and Hidden Angles
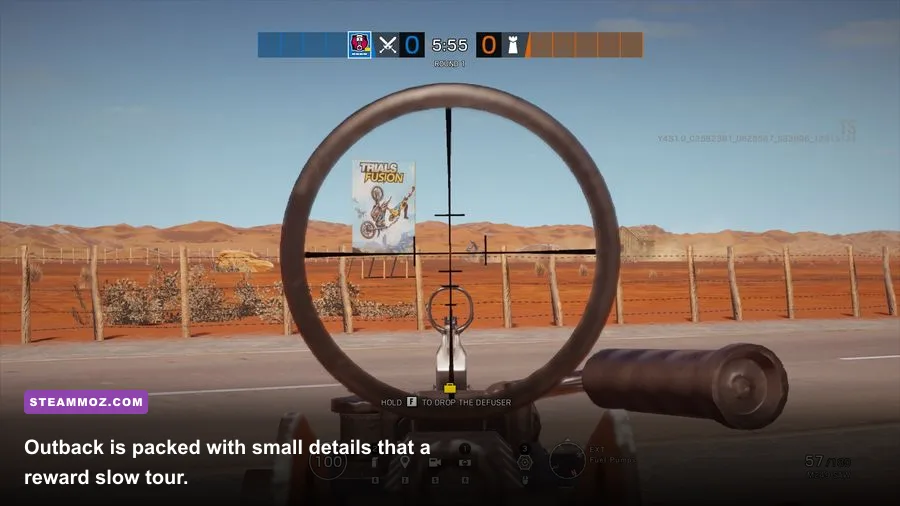
Outback is easy to read as a dusty motel map, but its props hide more personality than many players notice. The Australian roadside theme includes animals, weathered signage, faded advertisements, and small objects that reinforce the abandoned rest-stop setting. Some details have shifted with layout changes, so screenshots from launch-era Outback can be misleading. The reliable way to hunt them is to explore the current version in Custom Game after checking the map's present rotation and renovation state.
Begin outside the motel and circle the perimeter before entering. Look at the garage frontage, service-yard clutter, motel signage, and the areas around the highway-facing walls. The detail most players miss isn't always a single named Easter egg; it's the way the map tells its story through repeated Australian references. Road signs, animal imagery, old machinery, and tourist-style decoration make Outback feel like a location rather than a collection of bomb rooms.
That same perimeter is useful in live rounds. Attackers should drone the service yard and garage approach before rappelling because defenders frequently use shallow runouts or aggressive windows to punish predictable entries. IQ can identify electronics through clutter, while Zero's Argus cameras are excellent for checking the long exterior-to-interior transitions. On defense, don't assume decorative vehicles and motel furniture provide meaningful cover. Most props are visual noise, not ballistic protection.
Outback is also a good map for learning the difference between a hidden location and a hidden Easter egg. A tucked-away corner behind a vehicle may feel secret during a casual match, but it becomes a common prefire location once the community discovers it. Ubisoft's official Rainbow Six Siege site and its seasonal patch notes are worth checking when a familiar angle suddenly stops working after a rework.
Outback exploration checklist
- Walk the entire exterior perimeter and inspect signs, animal imagery, and roadside props.
- Drone garage and service-yard entrances before using a window or rappel.
- Test every suspected hiding place against a defender's line of sight, not just your own camera angle.
- Return after a map update; Outback's geometry and prop placement have changed over time.
Oregon's Attic, Tower, and Overlooked Vertical Routes
Oregon's most valuable “secret” isn't a cartoon reference. It's the network of spaces above and beside the main rooms that lets players appear from an unexpected direction. The attic and tower area are especially easy to overlook because new players focus on the meeting hall, dorms, kitchen, and basement objectives. Yet these upper routes explain why Oregon rewards vertical destruction and disciplined droning.
On the classic Oregon layout, the attic sits above the meeting-hall side of the building and connects to a narrow tower route. The current reworked map has different geometry and sightlines, so don't blindly apply an old YouTube callout. In a Custom Game, identify which stairs lead toward the tower, which floors are soft, and where a defender can hear a climb before seeing the attacker. The “secret” advantage is information: from above, you can pressure rotations without exposing yourself to the obvious hallway.
Sledge and Buck turn the upper floor into a threat because their soft destruction can open the ceiling over common defensive setups. Fuze can be dangerous when defenders stack utility below, but his cluster charges are loud and telegraphed. Zero is better for patient information gathering, while Dokkaebi can punish defenders who rotate through isolated upper rooms. On defense, Castle and Smoke can slow the attic route, but neither should rely on a single barricade to secure the entire vertical layer.
Watch the floor material carefully. Reinforced surfaces, soft surfaces, and indestructible structural sections don't always look dramatically different at a glance. A shotgun test during prep is safer than discovering mid-round that your planned drop is impossible. Also remember that sound travels through floors: a sprinting attacker in the tower can give away the “surprise” before the first bullet is fired.
| Route | Operator advantage | Main danger | Counter |
|---|---|---|---|
| Attic over meeting areas | Sledge or Buck opens vertical pressure | Roaming defender below | Drone the room before destruction |
| Tower stairs | Strong flank and late-round rotation | Predictable audio cue | Use a drone or move during gunfire |
| Upper-floor soft panels | Information and denial from above | Wamai, Jäger, or runout pressure | Clear utility before committing |
For PC players, stable frame pacing matters more than pretty shadows when checking these narrow routes. If Siege stutters as you turn through the tower, use Steamoz's FPS settings guide as a general starting point for lowering expensive effects without destroying visibility.
Theme Park's Dragon, Arcade Props, and Quiet Corners
Theme Park is one of Siege's richest maps for environmental storytelling. Its dragon-themed attraction, arcade equipment, colorful signage, and abandoned amusement-park decoration are easy to dismiss as background art, especially when you're sprinting toward a site. Slow down in Custom Game and inspect the attraction spaces, entrance areas, and rooms bordering the arcade. The dragon imagery is the standout visual reference, but the real fun comes from noticing how consistently the map mixes fantasy décor with tactical decay.
Check the dragon-themed exterior and interior zones from multiple heights. Siege's lighting can hide details when you view them from a doorway, while a rappel or stair landing may reveal a different prop arrangement. Look for posters, toy-like attractions, and arcade cabinets rather than expecting a glowing button or a secret cinematic. Most of these are set dressing, and that is precisely why they survive unnoticed: they don't interrupt a round.
Theme Park's practical hidden spots are more dangerous than its Easter eggs. The train-yard side, maintenance corridors, and rooms around the arcade create awkward approaches where a defender can hold a tight angle without being immediately visible to a drone entering from the main route. Attackers should use a vertical drone plan: first clear the entrance, then send a second drone through the nearest hallway so the first isn't doing all the work.
Operators with flexible utility shine here. Brava can turn defender gadgets against their owners if she has a safe line for Kludge drones. Ying can overwhelm a site once the approach is mapped, while Amaru can exploit an upper-window entry only when the team has already denied the obvious counters. Defenders should avoid hiding directly beside colorful props; players learn those camouflage tricks quickly, and thermal or outline contrast makes the position less clever than it feels.
How to hunt Theme Park references without wasting a round
Use a private lobby, select the current map version, and set the round timer high. Walk the perimeter first, then inspect one attraction at a time. Shoot only destructible props after photographing their original state; otherwise you'll erase the very detail you're trying to document. The Rainbow Six Siege Steam page is also the safest place to confirm the PC version and current platform information instead of relying on old map-tour videos.
Stadium Bravo and Siege's Lore Hidden in Plain Sight
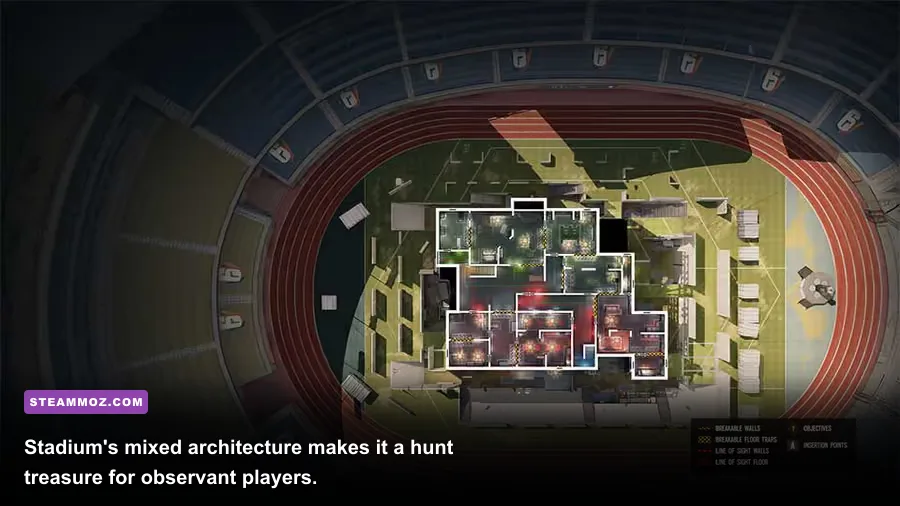
Stadium Bravo is a particularly good place to hunt lore because it combines familiar architecture from other Siege locations with its own competitive-spectacle identity. The map's glass, concrete, stadium infrastructure, and mixed-room layout can make environmental references feel like ordinary decoration. Look for signage, branded fixtures, architectural callbacks, and objects that suggest the wider Rainbow universe rather than a conventional residential or industrial building.
The best way to spot these references is to use the Observation Tools phase properly. Don't immediately launch every drone toward the objective. Park one drone in a quiet hallway, then take a few seconds to study the room around it. Attackers who rush the prep phase miss details because drone cameras flatten depth and color. Defenders can do the same with bulletproof cameras or Valkyrie's Black Eyes, although placing utility purely for sightseeing is obviously not a ranked strategy.
Stadium also rewards players who understand transparent and destructible surfaces. Glass may provide vision while offering little safety, and a soft wall that looks decorative can still be opened by Ash, Zofia, Hibana, or a breaching shotgun. Before treating a prop as cover, test it in a Custom Game. A hidden angle only matters if it survives the opponent's first drone, prefire, or grenade.
Performance settings can change what you notice. At 1440p, high texture quality makes signage and small props easier to read, but shadow quality and ambient occlusion can cost more frames during fast turns. A competitive PC profile should prioritize stable refresh-rate delivery, low input latency, and a clear image over cinematic lighting. Ubisoft's official Siege support hub is the right reference for current technical troubleshooting and known issues.
| PC setting | Recommended value | FPS impact | Visual trade-off |
|---|---|---|---|
| Texture Quality | High if VRAM allows | Low to medium | Small props and signage stay sharper |
| Shadow Quality | Medium | Medium to high | Less shadow detail, steadier combat frames |
| Ambient Occlusion | Off or low | Medium | Flatter corners, clearer competitive image |
| Lens Effects | Off | Low | Removes distracting glare and bloom |
| Render Scaling | 100% native | High when reduced | Lower values blur tiny environmental details |
| V-Sync | Off for competitive play | Variable | May introduce tearing but reduces latency |
If your GPU cannot hold a stable frame rate, lower shadows and ambient occlusion before dropping render scaling. You want the fine edges of a hatch, window frame, or camera to remain readable. For more general PC optimization habits, Steamoz's crashing and low-FPS fixes offers a useful checklist for drivers, overlays, and background processes.
How to Find Siege Secrets Without Getting Prefired
The safest hunting ground is a Custom Game with the map set to the exact playlist version you care about. Siege has changed major layouts, removed maps from standard rotations, and replaced props during reworks. A secret documented on old Hereford Base or pre-rework Oregon may no longer exist in the form you remember. Always date your notes, record the map version, and treat old clips as historical evidence rather than current strategy.
For practical spots, follow a repeatable four-step process. First, drone the route from the enemy's likely entry point. Second, inspect the same space from a defender's camera height. Third, test destruction, penetration, and sound with the operators you actually play. Finally, ask whether the location offers information, survival, or a useful line of fire. If it provides none of those, it's probably a fun Easter egg rather than a competitive position.
- Explore privately. Use a Custom Game so the timer, opponents, and teammate callouts don't rush you.
- Check every elevation. Rappel, crouch, prone, and use drones; many details only appear from one angle.
- Test the geometry. Confirm whether a wall is soft, reinforced, penetrable, or merely decorative.
- Learn the exit. A hidden angle is worthless if you can't retreat after firing.
- Update your notes. Reworks and balancing patches can remove a prop or turn a safe corner into a prefire magnet.
The best discoveries in Rainbow Six Siege PC aren't necessarily secret buttons or elaborate developer puzzles. They're the shark beneath Yacht, the dragon-themed clutter in Theme Park, a forgotten roadside prop on Outback, or a tower route on Oregon that turns a predictable push into a layered attack. Explore them for the laughs, then test the useful ones against real drones, real sound cues, and real opposition. That's where a missed Easter egg becomes a genuine Siege advantage.