
Goat Simulator 3 rewards curiosity more than skill, but new players will progress much faster by mastering ten basics: use the map aggressively, unlock the Goat Tower, treat Lick as a movement ability, save useful gear, chase events, and experiment with every suspicious object. San Angora is packed with quests, collectibles, launch pads, secret rooms, and physics puzzles, so the best approach is controlled chaos rather than wandering blindly.
This isn't a game with a traditional campaign build or a strict combat meta. Your goat's real progression comes from discovering gear, completing quests and events, opening map infrastructure, and learning which tools can manipulate the world. The tips below focus on the systems that save the most time while keeping the nonsense intact.

1. Open the map before you start collecting

Your first serious objective should be revealing San Angora instead of immediately chasing every shiny collectible. Climb to elevated landmarks, interact with discoverable points, and activate towers whenever the game presents one. A clearer map turns the island from a noisy playground into a route you can actually plan.
Look for question marks, event icons, collectible symbols, and large structures that stand out from the surrounding scenery. These markers often lead to several nearby activities, meaning one trip can produce multiple rewards. If you see a tower, tall crane, church, amusement ride, or unusually elaborate building, investigate it before driving across the island for a random object.
San Angora is designed around vertical discovery. The obvious road is rarely the shortest route to a destination. Use ramps, roofs, zip lines, launchers, and your ragdoll momentum to cross gaps. If a route looks impossible, it probably expects you to approach from above or bring a piece of gear that changes movement.
🎮 Goat Simulator 3
Looking to experience this game? Grab your digital key directly on our store for $11.99.
View on Steammoz Store →2. Unlock the Goat Tower early
The Goat Tower acts as your home base and fast-travel hub, so making progress toward it early pays off throughout the entire game. The tower also gives your exploration a satisfying sense of direction: instead of completing isolated jokes, you're gradually building a central place for your goats and gear.
Don't ignore tower-related objectives just because they look like another series of silly errands. They help introduce important systems and make returning to previously visited areas much less tedious. Once fast travel becomes available, use it between clusters of activities rather than constantly crossing the whole map on hoof.
A good opening loop is simple. Start at the tower, reveal nearby map points, complete the closest event chain, collect visible gear, then fast-travel to another district. This keeps your inventory growing while preventing the common beginner mistake of spending ten minutes driving in circles because the destination marker is on a different elevation.
| Early Objective | Why It Matters | Best Approach |
|---|---|---|
| Goat Tower progress | Improves your central hub and travel routine | Prioritize tower-related activities when nearby |
| Map landmarks | Reveals activities and useful navigation points | Climb tall structures and inspect unusual buildings |
| Nearby events | Provides rewards while teaching mechanics | Clear activities in geographical clusters |
| Visible gear pickups | Adds new abilities and customization options | Grab reachable items before leaving an area |
3. Master Lick, headbutt, and ragdoll together
Goat Simulator 3's basic abilities are more versatile than their slapstick presentation suggests. Lick lets you attach your tongue to people and objects, then drag them behind you. Headbutt launches targets and activates many environmental interactions. Ragdoll lets you absorb impacts, slide under obstacles, and turn a failed jump into a surprisingly useful landing.
The strongest beginner combo is lick first, then move. Attach yourself to a movable object, sprint or drive away, and use the tension to swing it into a target. A traffic cone, explosive prop, shopping cart, or human NPC can become a wrecking ball. When an item refuses to move, try headbutting it once before licking; some physics objects need to be knocked loose from their starting position.
Ragdoll isn't just a button for watching your goat flop. Use it after a jump to preserve momentum and reduce the chance of getting caught on a ledge. You can also ragdoll into groups of objects, recover quickly, and continue the chain. Practice this around ramps and staircases, because many collectibles are easier to reach by launching yourself than by following the intended path.
Remember that the environment has priority over combat. Most NPCs aren't meaningful enemies with health bars and attack patterns. They are movable puzzle pieces. If an objective asks you to cause destruction, don't waste time headbutting one person repeatedly. Link a larger object, create a chain reaction, and let the physics engine do the expensive work.
4. Test every gear item instead of judging its appearance

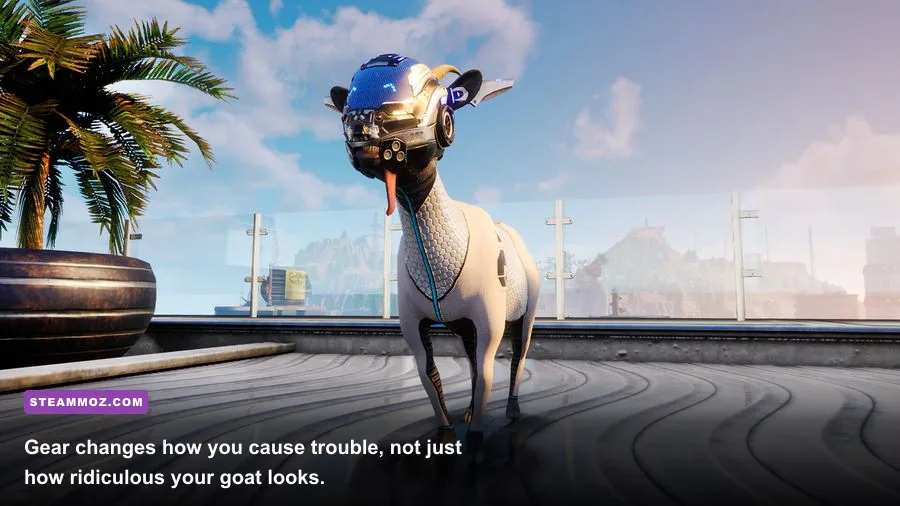
Gear in Goat Simulator 3 is functional customization. Items can change movement, attacks, traversal, or the way nearby objects react. A ridiculous hat might be cosmetic, while another piece can launch projectiles, alter your jump, produce fire, or create an entirely different way to approach an event.
Open the wardrobe whenever you find something new and test it in a safe area. Some gear is excellent for exploration but awkward around delicate objectives. Other pieces create spectacular destruction but make precise platforming harder. Don't assume that the newest pickup is automatically better; the right item depends on the activity and the terrain.
Keep at least one mobility-focused loadout and one chaos-focused loadout. Mobility gear is useful for reaching roofs, islands, towers, and collectibles. Destruction gear shines in event zones where you need to hit multiple targets or generate a specific kind of mayhem. Swap before starting an objective rather than after three failed attempts.
| Loadout Type | Useful For | Typical Advantage | Common Drawback |
|---|---|---|---|
| Mobility-focused | Collectibles, rooftops, towers | Better reach and safer traversal | Usually creates less area-wide chaos |
| Destruction-focused | Events and object-based quests | Fast chains and broad impact | Can make precision movement messy |
| Physics-focused | Dragging, swinging, launching props | Turns scenery into usable tools | Needs room and setup time |
| Cosmetic-focused | Roleplay and multiplayer comedy | Strong visual personality | May offer little practical utility |
5. Follow events before grinding random destruction

Random destruction is fun, but events are the most reliable way to learn what San Angora expects from you. They introduce set-piece mechanics, unlock rewards, and often place several useful objects in one compact area. If an event seems confusing, look for the environmental clue instead of repeatedly attacking the nearest NPC.
Read the objective text carefully. Some tasks require a particular interaction, not merely a high destruction score. A target may need to be attached, launched, dressed, ignited, or carried to a specific location. The game often gives you the correct tool within sight of the objective, so scan the surrounding streets, rooftops, and interiors before leaving.
When an event has several steps, don't rush to reset after a mistake. Goat Simulator 3's physics can produce accidental solutions. A prop that flies into the wrong building might trigger a hidden interaction, and an NPC thrown across the area may remain useful if you follow the trail. Treat failed attempts as scouting runs and note which objects moved, broke, or respawned.
6. Collectibles are easier with a route, not a sweep
Collectibles are scattered throughout the island, but trying to grab every visible item immediately is inefficient. First reveal the map, then complete nearby activities, then return with traversal gear. This reduces backtracking and prevents you from wasting time on collectibles that are clearly positioned for a later movement ability.
Use landmarks as route anchors. Group pickups around a tower, beach, industrial block, or high-rise district and clear that group in one visit. Mark awkward locations mentally: a rooftop item may be easier from a crane, while a fenced pickup may require a nearby launcher rather than a brute-force jump.
Look up only after you have searched at ground level. Goat Simulator 3 loves placing collectibles on signs, balconies, water towers, and suspended platforms. If the icon appears close but you can't see the item, check elevation before assuming it is hidden underground. Ragdoll launches and gear-assisted movement are often faster than hunting for a locked door.
7. Treat secret areas like puzzles
San Angora hides some of its best jokes and rewards behind spaces that don't look like conventional missions. Strange doors, ritual-looking props, isolated buttons, suspicious laboratories, and unusual groups of NPCs deserve attention. If an area feels deliberately staged, interact with more than the obvious object.
Try licking levers, headbutting panels, dragging objects onto pressure points, and bringing NPCs into the scene. Many secrets are built around the game's core verbs rather than a traditional key-and-lock system. If nothing happens, leave the area and return after unlocking more gear; some puzzles are effectively asking whether you have explored enough.
Keep screenshots or notes of locations you can't solve. The map doesn't always explain why an interaction failed, and revisiting a mystery hours later can be frustrating if you no longer remember where it was. This is a perfect place to use the same patient observation that helps in games covered by our first-playthrough survival guide.
8. Use vehicles as tools, not just transport
Cars, bikes, carts, and other vehicles can cross the map quickly, but their real value is kinetic. A vehicle gives you speed, weight, and a controllable impact angle. Use it to smash barriers, launch NPCs, carry an object into position, or create the momentum needed for a ramp jump.
For precise work, slow down before entering the objective area. High-speed collisions are funny, but they can scatter the exact objects you need. Park near the event, dismount, and use Lick for delicate positioning. For destruction objectives, approach from a straight line and use a ramp or downhill slope to increase impact without relying on random steering.
If a vehicle gets wedged, don't keep accelerating. Ragdolling out, headbutting a corner, or dragging the vehicle with Lick can free it faster. The same principle applies to boats and unusual props: the physics engine responds to angle and leverage more than raw button mashing.
9. Build a graphics setup that protects the physics
Goat Simulator 3 is a physics sandbox, so stable frame pacing matters more than chasing every visual option. A sudden performance dip can make jumps, vehicle launches, and object placement feel inconsistent. On PC, begin with the game's recommended preset, then lower shadows and effects before sacrificing resolution.
Use a stable 60 frames per second target if your system can maintain it. If it cannot, lock to a consistent lower target rather than allowing wide swings. Resolution scaling, shadows, post-processing, and effects are usually the first settings worth adjusting. Keep texture quality higher if video memory allows, because it tends to preserve surface detail with a smaller gameplay impact than dynamic effects.
| Setting | Recommended Starting Value | Performance Impact | Visual Trade-Off |
|---|---|---|---|
| Resolution | Native display resolution | High | Lowering it noticeably softens the image |
| Resolution scaling | 100%, reduce only when needed | High | Lower values improve FPS but blur motion |
| Shadows | Medium | Medium to high | Lower settings simplify contact shadows |
| Effects and post-processing | Medium | Medium | Reduces visual clutter during major chaos |
| Textures | High if VRAM permits | Low to medium | Lower values make surfaces look muddy |
| Frame-rate cap | Stable 60 FPS target | Improves consistency | May limit high-refresh displays |
For platform-specific requirements, check the official Steam listing rather than trusting an old benchmark. Our guides to PC performance tuning and checking minimum specifications also explain why stable frame pacing can matter more than a peak FPS number.
10. Make multiplayer organized chaos
Goat Simulator 3 supports up to four players, and multiplayer is at its best when each goat has a job. One player can handle navigation, another can move props, a third can search rooftops, and the fourth can test the most dangerous-looking button. Without a plan, four goats often scatter the objective before anyone understands it.
Use Lick to connect players or objects when the situation allows it. A linked group can become a swinging wrecking ball, a human conveyor belt, or a ridiculous transport system. Assign one player to stay near the event marker and call out what the objective actually requires while the others scout nearby tools.
Don't worry about sharing every collectible or gear discovery immediately. The best multiplayer sessions alternate between focused progress and deliberate nonsense. Complete an event, test the reward together, then move to the next landmark. If your group enjoys challenge, set rules such as no vehicles, no fast travel, or only one gear swap per district.
The best first-hour routine
Start by opening the map around your spawn area and heading toward the Goat Tower. Complete the nearest event chain, grab visible gear, and practice Lick, headbutt, and ragdoll on ordinary street objects. After that, fast-travel or drive to a new district, reveal another landmark, and clear activities in a tight route rather than bouncing randomly between map markers.
When an objective blocks you, change your tool before changing your strategy. Try a different gear item, approach from above, bring a vehicle, or search for an object that can be attached with Lick. Goat Simulator 3 rarely asks for twitch-perfect execution. It asks whether you've noticed the toy sitting beside the problem.
For more movement-focused experimentation, our beginner combat and movement tips are useful in a different way: they reinforce the habit of testing systems instead of forcing one solution. You can also follow Coffee Stain Studios' official game page for updates and platform information.
Most importantly, don't play Goat Simulator 3 like a checklist simulator. The ten tips above make progression smoother, but the game's greatest discoveries usually happen when a lick, a ramp, an explosive prop, and a badly parked car collide in a way nobody planned. Reveal the map, collect versatile gear, learn the physics, and then let San Angora fall apart on your terms.