Win more fights in Clone Drone in the Danger Zone by treating every encounter like a positioning puzzle: keep your feet moving, cut weapons before bodies, and spend upgrade points on one reliable plan instead of collecting random abilities. These 10 tips cover the combat habits, weapon choices, upgrades, and arena awareness that let new players survive Story Mode and start making real progress in Endless Mode.
1. Learn the one-hit kill zones first
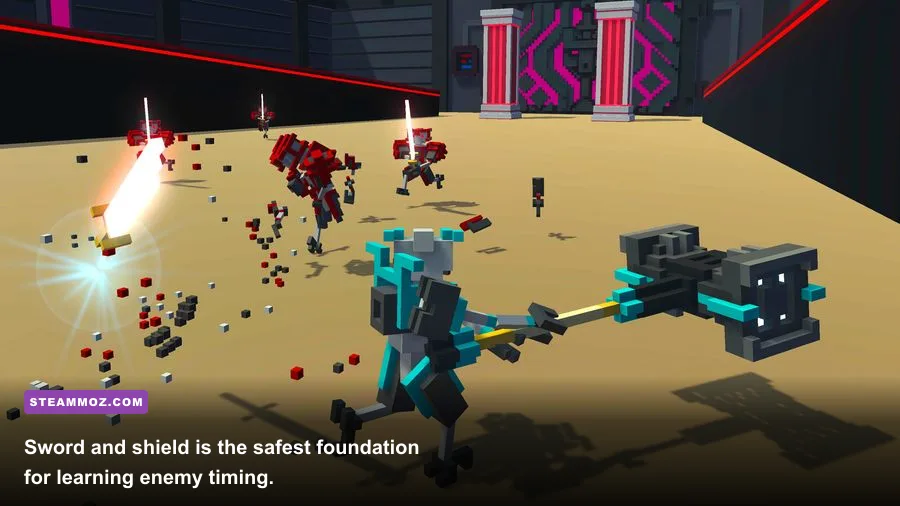
Clone Drone’s signature rule is brutally simple: exposed robot parts can be severed, and a clean cut can finish an enemy instantly. That makes the game less about draining a health bar and more about controlling the angle of your attack. The torso and head are the most valuable targets, but a protected head is often a trap. If a shield or weapon is between you and the target, attacking straight through it usually wastes your opening.
Start each fight by circling rather than rushing. Watch the opponent’s weapon hand, then step outside its swing and attack the arm or the weapon itself. Once the enemy loses its sword, spear, or hammer, its threat level collapses. You can then create distance and line up a horizontal cut through the torso. A low, frantic slash often hits the legs, which leaves the enemy alive and gives it another chance to punish you.
Use the training area and early Story Mode rooms to practice three attacks: a horizontal torso cut, a downward head cut, and a low weapon-arm cut. You don’t need fancy combos yet. A single deliberate strike is much safer than three uncontrolled swings.

🎮 Clone Drone in the Danger Zone
Looking to experience this game? Grab your digital key directly on our store for $6.99.
View on Steammoz Store →2. Keep your camera and feet working together
New players often stare at the enemy’s body and forget the arena around them. That’s how you get cornered by a shield carrier, walk into lava, or miss a second enemy approaching from behind. Keep the camera moving in short checks while you circle. Your movement should form a shallow arc around the opponent, not a straight retreat.
Distance matters because every weapon has a different danger zone. Swords threaten close and mid-range, hammers punish anyone standing near their broad swing, and spears control a long lane directly in front of the enemy. If you back away in a straight line, the opponent can chase you into the exact range where its weapon is strongest. Sidestepping forces it to turn before attacking, creating the delay you need.
Use arena walls as temporary tools, not permanent cover. A wall can stop a flanking route and make a dangerous enemy easier to isolate, but it also removes your escape options. Always leave yourself one clear direction to dodge. If two enemies are closing in, sprint past one rather than trying to fight between them.
3. Make sword and shield your first serious build
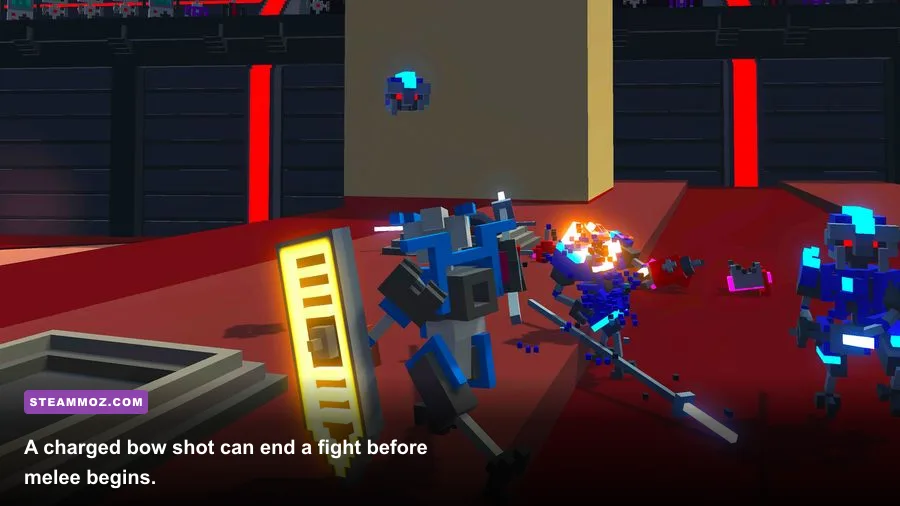
The sword-and-shield setup is the best learning platform because it forgives small mistakes without hiding the game’s fundamentals. The shield blocks incoming frontal attacks, while the sword gives you precise dismemberment. It won’t solve every encounter—flanking enemies and overhead attacks still matter—but it buys time to read telegraphs.
For early upgrades, prioritize sword reach and shield improvements before buying flashy mobility options. A longer sword gives you more space to work with, and a stronger shield lets you survive a poorly timed block or a projectile that you failed to see. When the upgrade tree offers a choice between raw damage and a tool that improves consistency, take consistency until your timing is reliable.
| Build option | Strength | Main weakness | Best use |
|---|---|---|---|
| Sword and shield | Safe defense and accurate cuts | Limited rear protection | Story Mode learning and mixed waves |
| Two-handed sword | Excellent reach and lethal cuts | No shield for projectiles | Confident players who control distance |
| Hammer | Large hitbox and heavy stagger | Slow recovery after swings | Groups and heavily armored targets |
| Bow | Can kill before melee range | Weak when surrounded | Open arenas and isolated targets |
| Spear | Strong lane control | Awkward in close quarters | Chokepoints and careful spacing |
Think of the shield as a timing instrument, not a button you hold forever. Block the incoming attack, immediately reposition, then punish the recovery. Staying stationary behind the shield lets other enemies surround you.
4. Don’t waste upgrade points on five different ideas
Upgrade points are limited during a run, so a scattered build is usually weaker than a focused one. Before selecting an upgrade, decide whether your run is built around melee control, ranged elimination, or mobility. A sword build that spends early points on bow skills and hammer upgrades has no clear answer when the arena gets crowded.
A strong beginner route is sword first, shield second, then one mobility option. Mobility helps you reset a fight, cross a gap, and escape a bad corner, but it should support your weapon rather than replace it. If you choose the bow, invest in the bow’s damage and ammunition economy before buying melee tools. Your goal is to kill priority targets at range, not become mediocre at everything.
Save a point when the next upgrade is merely convenient. Some rooms are easy enough that taking an upgrade immediately gives you no meaningful advantage. Holding the point until you see the next challenge lets you react to the threats actually present, especially in Endless Mode.
For more progression-minded habits, Steamoz’s Byte Driver run tips make a similar point: consistency beats gambling on a perfect run.
5. Use the bow to remove the biggest threat
The bow is powerful because it changes the opening seconds of a fight. Don’t fire at the nearest target just because it’s visible. Identify the enemy that can ruin your positioning—usually a hammer wielder, spear user, or shielded opponent—and shoot that one first. A charged arrow is far more valuable when it removes the most disruptive threat.
Line up shots while moving sideways. Standing still makes you an easy target for enemy archers, and turning your entire body to track one enemy can expose you to another. Fire, move, and fire again from a new angle. In open arenas, maintain enough distance that melee enemies need several seconds to reach you. In cramped arenas, use the bow for the first kill, then immediately switch to a melee plan.
Arrows can also solve problems that a sword cannot. Shoot an enemy’s weapon arm when the torso is covered, or target a leg to slow a dangerous pursuer. Don’t waste ammunition on a weak enemy if a stronger foe is about to enter striking range. The bow rewards target priority more than raw accuracy.
6. Read every enemy’s attack telegraph
Enemies in Clone Drone are dangerous because their attacks are readable, not random. The moment an opponent raises a weapon, stop thinking about your next attack and watch the swing. Swords commonly create a direct horizontal threat, hammers demand more space because of their broad arc, and spears punish players who retreat in a straight line.
Against sword robots, move toward the outside of the swing rather than backing away. Against hammer robots, step farther out than your instincts suggest, wait for the heavy attack to finish, and attack during recovery. Against spear users, sidestep the point and close the distance; staying directly in front of a spear is asking to be clipped.
Shield enemies require patience. Attack the exposed side or legs, then retreat before the shield bash or counterattack. If another enemy is nearby, don’t commit to a long exchange. Separate the shield carrier from the group by circling around an obstacle, then finish it when you have a clean angle.
| Enemy threat | Telegraph | Correct response | Common mistake |
|---|---|---|---|
| Sword robot | Weapon arm pulls back | Sidestep and cut the arm | Backing into another enemy |
| Hammer robot | Large wind-up and raised weapon | Create extra distance, then punish | Trying to block the entire swing |
| Spear robot | Point tracks your center line | Move laterally and close in | Retreating straight backward |
| Shield robot | Front stays covered | Flank, target legs, or use ranged fire | Repeatedly striking the shield |
| Archer | Draws and aims before release | Use cover or rush from an angle | Standing still to attack another target |
7. Separate waves instead of fighting the crowd
Most deaths happen because players treat a wave as one giant duel. Your real objective is to create one-on-one moments. Circle the outside edge, put a slow or shielded enemy between yourself and the others, and attack only when the nearest opponent is committed to a swing.
Explosive hazards and lava are useful for controlling space, but don’t chase a dramatic environmental kill if it drags you into danger. A safe dismemberment is worth more than a flashy knockback. If an enemy falls but remains alive, confirm the kill only when the surrounding space is clear.
Pause after every kill for half a second. Check your health, ammunition, remaining enemies, and available escape route. That tiny reset prevents tunnel vision and gives you time to notice an archer spawning at the far side of the arena.
8. Treat challenge rooms as practice, not chores
Story Mode’s challenge rooms are where you should test unusual weapons and movement options. They isolate specific problems: fighting ranged enemies, surviving multiple attackers, or making precise cuts under pressure. If you fail, identify the exact failure rather than restarting with the same plan.
For example, dying to a spear robot because you stayed at mid-range means your spacing was wrong, not that the spear is unfair. Losing to archers means you failed to use cover or target priority. Challenge rooms become dramatically easier once you turn each death into one adjustment.
Replay early levels with a different weapon after finishing them normally. The goal isn’t just a higher score. It’s learning how each tool changes your preferred distance, attack timing, and escape route. That knowledge transfers directly to Endless Mode.
9. Build for stable performance and clear visibility
Clone Drone is visually simple, but frame-time spikes still matter when a sword is crossing your screen. Keep the frame rate stable rather than chasing maximum visual quality. At 60 frames per second, enemy telegraphs and your own camera movement are easier to read than at a fluctuating 45 to 90 FPS.
| Setting | Recommended value | Performance impact | Visual priority |
|---|---|---|---|
| Resolution | Native display resolution | Medium | Keep text and silhouettes sharp |
| Shadows | Medium | Medium to high | Lower first on older PCs |
| Effects | Medium | Medium | Preserves readable impacts |
| Anti-aliasing | Medium | Low to medium | Reduce jagged weapon edges |
| V-sync | On if tearing bothers you | May add input latency | Use a stable frame cap |
Close overlays and cap the game at a frame rate your PC can hold consistently. If you’re troubleshooting stutter in other PC games, Steamoz’s locked-FPS settings guide covers the same practical approach. For official information, check the Clone Drone Steam page and the developer’s official site.
10. Use Endless Mode to refine one repeatable routine
Endless Mode is not just a test of reflexes; it’s a test of decision quality. Early waves are for building a foundation, not showing off. Take the safest kill, preserve health, and choose upgrades that remain useful when the arena fills with mixed weapon types.
Use this routine every wave: scan the arena, identify ranged threats, isolate the nearest melee enemy, remove its weapon if a torso cut is unsafe, then reposition before the next attack. When two enemies overlap, don’t swing blindly. Back away, wait for one attack animation to finish, and use that recovery window to cut.
Track what actually ends your runs. If you repeatedly die to projectiles, your next build needs better ranged counterplay. If you die while chasing wounded robots, stop pursuing kills across open ground. If hammer enemies break your defense, invest in mobility and learn their recovery timing. The best player improvement comes from fixing the repeated mistake, not from restarting faster.
For another survival-focused perspective, Steamoz’s Aliens vs. Predator survival tips and Alien: Isolation score guide both emphasize resource discipline and controlled encounters.
The beginner routine that actually works
Put the 10 tips together and your first reliable game plan looks like this: start with sword and shield, buy focused upgrades, circle instead of retreating, and target the most dangerous weapon before chasing a kill. Use the bow to delete priority enemies, read the wind-up of every attack, and keep one escape lane open. After each wave, reset your camera and reassess rather than sprinting into the next fight.
Most importantly, don’t measure progress only by how far you get. The moment you recognize why a hammer caught you, why a spear controlled your retreat, or why an archer forced you into a bad angle, you’re already playing Clone Drone in the Danger Zone differently. The robots are predictable. Make your decisions predictable too, and the arena starts working in your favor.
Keep the official Steam community discussions nearby for update-specific details, then return to the arenas and practice one adjustment at a time. That’s how new players stop surviving by luck and start cutting through waves on purpose.