
The best Gangs of Sherwood - Lionheart Edition equipment is not simply the item with the biggest damage number. Robin’s ranged weapons and Marian’s critical-focused blades sit in S-Tier for general play, while Friar Tuck’s flail and Little John’s gauntlets become top-tier when their stagger, survivability, and crowd-control bonuses match the party. Because loot rolls vary by character, rarity, and bonus package, this ranking focuses on weapon roles and the equipment effects that consistently improve a full run.
That distinction matters. Gangs of Sherwood is a four-player action game built around short missions, enemy waves, cooldowns, and elite encounters. A theoretically stronger weapon can still be worse if it slows your resource generation or breaks the timing of your best ability. The Lionheart Edition does not turn the game into a radically different loot system, so the fundamentals below apply whether you are starting fresh or returning with the bonus content.
For the official baseline, check the Gangs of Sherwood Steam page, the publisher’s game page, and the Appeal Studios website. Also, if you enjoy optimizing co-op runs, Steamoz’s Fast Break weapon ranking is a useful comparison point.
Gangs of Sherwood weapon tier list at a glance

This list ranks the four heroes’ core weapon styles rather than pretending every randomly generated drop has one permanent value. In practice, your first priority is a high-level weapon with a useful primary stat and a bonus that activates during the attacks you actually use. A lower-level item with reliable cooldown reduction can outperform a higher-level item that only boosts a rarely triggered effect.
| Tier | Weapon style | Best strength | Ideal use |
|---|---|---|---|
| S-Tier | Robin’s longbow | Safe sustained damage and target selection | Solo play, elites, mixed enemy groups |
| S-Tier | Marian’s twin blades | Critical burst and fast resource cycling | Boss openings and coordinated co-op |
| A-Tier | Little John’s gauntlets | Stagger, launch pressure, and frontline control | Protecting ranged allies and breaking crowds |
| A-Tier | Friar Tuck’s flail | Wide-area damage and defensive utility | Wave clears and messy four-player fights |
| B-Tier | Any low-level duplicate | Temporary stat bump only | Early chapters before a better roll drops |
Robin and Marian take the top spots because damage uptime is king in most missions. They can punish exposed officers, shield carriers, and bosses without standing in every melee telegraph. Little John and Tuck are not weaker characters; they simply need the party to understand spacing. Their value appears in stagger windows and enemy control rather than a scoreboard damage total.
Why item level is only half the ranking
Loot has a practical progression curve: replace under-levelled gear frequently during the early chapters, then become more selective once missions start dropping equipment close to your current power. Do not dismantle a useful effect just because the displayed damage is a little lower. Compare attack value, defensive value, effect quality, and whether the bonus works on normal attacks, skills, or ultimate attacks.

🎮 Gangs of Sherwood - Lionheart Edition
Looking to experience this game? Grab your digital key directly on our store for $4.99.
View on Steammoz Store →S-Tier equipment and the builds that make it work

Robin’s longbow
Robin is the safest S-Tier pick for a first playthrough. His bow lets you delete fragile targets before they reach the team, and charged shots are excellent against officers and exposed boss phases. Prioritize bonuses that improve ranged damage, critical chance, critical damage, or skill cooldown. A resource bonus is especially valuable because Robin’s strongest sequences depend on keeping his special attacks available rather than firing basic shots forever.
His ideal rhythm is simple: mark or focus the most dangerous target, use charged shots while it is exposed, then spend the generated resource on an area attack when soldiers collapse onto the group. Do not tunnel on a boss while an archer or shield unit is creating pressure behind you. Robin’s weapon ranks first largely because it gives you the freedom to solve that problem immediately.
Marian’s twin blades
Marian is the highest-ceiling damage option. Her dual blades reward aggressive movement, repeated light attacks, and attacks from the side or rear. Critical chance and critical damage are obvious priorities, but attack speed and cooldown reduction can be just as important: more hits mean faster resource generation, and faster skill access gives her more opportunities to escape after a burst string.
The trap is treating Marian like a stationary button-masher. Her short range puts her inside every shield bash, ground shockwave, and elite counter. Enter after an enemy commits, complete a short combo, spend the resource, and disengage before the recovery animation becomes punishable. With a Tuck or Little John controlling the group, Marian’s S-Tier damage becomes much easier to realize.
| Hero | Core priority | Strong secondary effect | Common mistake |
|---|---|---|---|
| Robin | Ranged damage | Cooldown reduction or critical damage | Ignoring dangerous backline units |
| Marian | Critical chance | Attack speed or resource generation | Staying in melee after the burst ends |
| Little John | Stagger and impact | Damage reduction or health | Chasing damage instead of peeling |
| Friar Tuck | Area damage and survivability | Cooldown reduction or healing utility | Spending defensive tools too early |
A-Tier weapons and the best frontline equipment
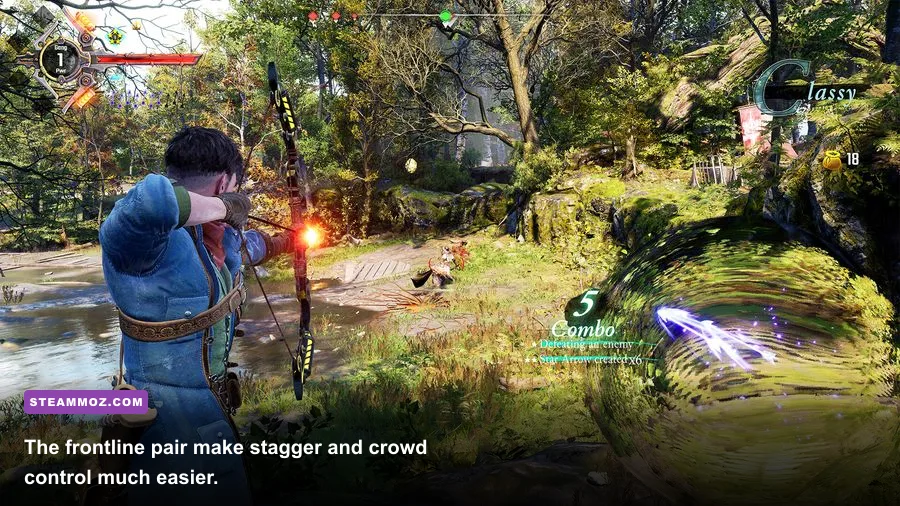
Little John’s gauntlets
Little John is the party’s best answer to enemies that refuse to leave your backline alone. His gauntlets excel at stagger, knockback, and creating room. Seek impact, defensive bonuses, maximum health, and effects that reward close-range hits. Damage is still welcome, but a gauntlet roll that reliably interrupts an elite is often more valuable than a slightly larger number on a normal punch.
Use Little John to start fights on your terms. Pull nearby enemies into a compact group, stagger the most threatening melee unit, and hold the center while Robin takes a firing lane. Against bosses, save the strongest control option for a clear telegraph rather than throwing it out on harmless trash. The best Little John player is not necessarily the one with the most knockouts; it is the one who prevents Marian from being interrupted during her burst.
Friar Tuck’s flail
Friar Tuck sits just below the S-Tier damage styles because his strength is distributed across damage, area denial, and support. The flail’s broad swings are superb in crowded rooms, especially when enemies funnel through a doorway or objective. Prioritize area damage, cooldown reduction, survivability, and any bonus that improves his defensive or healing-focused tools.
Tuck’s biggest timing lesson is patience. Keep a defensive skill available for the moment an elite wave arrives, not for the first two basic soldiers. His wide attacks can clear space, but his real contribution is making a dangerous room manageable. In a four-player group, that utility often beats a small personal damage increase.
For broader run-planning ideas, compare these roles with Steamoz’s co-op support and farming guide and survival tips that save runs. The games differ, but the lesson carries over: reliable team utility is worth more than flashy damage that only works in perfect conditions.
Best equipment effects by mission situation

There is no single best loadout for every Sherwood mission. Ranged damage shines in open spaces, while stagger and area effects gain value when the level forces the party through narrow routes. Read the mission before spending your best upgrade materials. If you are struggling with performance as well as combat, Steamoz’s frame-rate troubleshooting advice is also worth checking; consistent input matters when perfect dodges and interrupts decide a fight.
| Mission problem | Best effect | Best hero | Why it works |
|---|---|---|---|
| Armored elite pressure | Stagger, impact, or cooldown reduction | Little John | Interrupts attacks and opens a damage window |
| Large soldier waves | Area damage and resource generation | Friar Tuck | Controls clustered enemies efficiently |
| Backline archers and officers | Ranged damage and critical damage | Robin | Removes threats without crossing the arena |
| Boss punish windows | Critical chance, attack speed, and cooldown | Marian | Converts short openings into burst damage |
| Solo or under-levelled run | Health, damage reduction, and healing utility | Tuck or Little John | Provides more room for missed dodges |
The effects worth keeping
Keep equipment that improves a complete rotation. Cooldown reduction is broadly useful because every hero has a stronger answer when skills are available. Critical chance is excellent on Marian and useful on Robin, but less exciting on a control-focused Little John. Health and damage reduction rise sharply in value when you are learning a boss, playing alone, or entering a mission below its recommended gear level.
Be skeptical of conditional bonuses that require you to remain untouched, stand at a specific range, or hit a narrow status condition. Those can be powerful in a practiced group, but they are unreliable while learning. A modest always-on bonus usually wins more encounters than a spectacular effect that activates once per mission.
Upgrade order, boss damage, and final loadout advice
Upgrade the weapon that matches your actual hero first, then replace defensive gear when its level falls noticeably behind your current drops. Do not spread rare resources evenly across all four characters unless you regularly swap heroes. A focused Robin or Marian can carry early missions, while one properly equipped Tuck or Little John makes later co-op encounters dramatically safer.
During boss fights, watch for the telegraph rather than reacting to the damage. Heavy enemies typically commit to a visible swing, charge, leap, or area marker before the hit lands. Little John should interrupt when possible; Tuck should preserve defensive utility for unavoidable area attacks; Robin should stay on exposed targets; Marian should enter only after the attack finishes. That division of labor turns the tier list into a real combat plan.
| Upgrade stage | What to equip | What to avoid | Combat goal |
|---|---|---|---|
| Early chapters | Highest-level weapon with one reliable offensive bonus | Saving every upgrade for a perfect roll | Keep pace with enemy health |
| Mid-campaign | Two synergistic effects, such as crit plus cooldown | Bonuses that never activate in your rotation | Shorten elite encounters |
| Late missions | Role-focused equipment with defensive backup | Pure damage on a fragile frontline hero | Survive waves and boss mechanics |
| Replay or challenge runs | Specialized party loadouts | Four heroes competing for the same role | Build around stagger, burst, or sustain |
Final ranking: Robin’s longbow is the best all-round weapon style, Marian’s twin blades deliver the highest burst ceiling, Little John’s gauntlets are the strongest control choice, and Friar Tuck’s flail is the most dependable wave-clear and support option. Pick the weapon that matches your party’s missing role, keep effects that improve your entire rotation, and judge gear by completed missions rather than the largest number in the equipment menu.