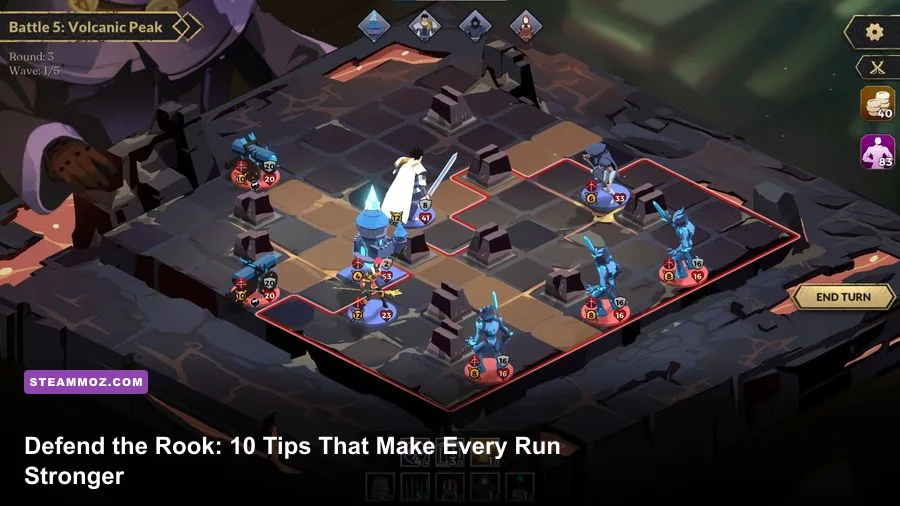
Defend the Rook becomes much easier once you stop treating it like a conventional tower-defense game. The winning habit is to build one coherent damage plan, place units where they can cover several lanes, and spend resources on the next dangerous wave rather than the current easy one. These 10 tips explain how to manage heroes, towers, cards, movement, upgrades, and boss pressure without wasting a promising run.
This advice applies to the PC version of the tactical roguelite from Klabater, available through the official Steam page. Balance can shift between patches, but the core principles remain reliable: action economy wins fights, focused upgrades beat scattered upgrades, and the Rook itself is your most important resource.
1. Learn the board before you spend anything
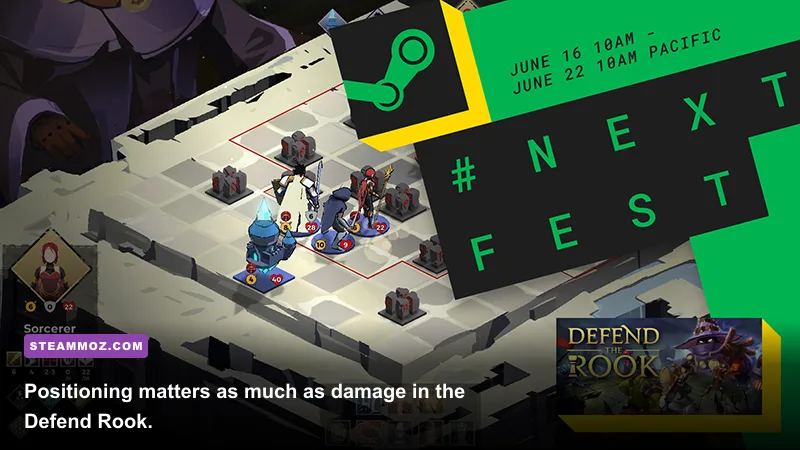
Every combat encounter asks you to solve two problems at once. Enemies are advancing toward the Rook, while your heroes and defensive structures need the right lanes, range, and timing to stop them. The first few seconds of a wave are therefore reconnaissance time, not an invitation to click the first available upgrade.
Look for three things immediately: the enemy entry points, the route enemies will take, and the tiles that allow a hero or tower to influence more than one route. A central tile with line-of-sight across two lanes is often worth more than a corner with perfect range over only one path. The best position is usually the one that creates overlap between your tower fire and a hero's active skill.
Do not move a hero simply because a different tile looks closer to an enemy. Movement costs an action, and an apparently aggressive relocation can leave the Rook exposed on the next turn. Before committing, ask whether the new tile gives you more targets, a safer retreat, or a better angle for the next wave. If the answer is no, keep the unit where it is and use its action for damage.

🎮 Defend the Rook
Looking to experience this game? Grab your digital key directly on our store for $3.59.
View on Steammoz Store →2. Build around one damage identity

The most common new-player mistake is collecting attractive upgrades that do not cooperate. A run with a little extra range, a little burn, a little melee damage, and several unrelated cards may look flexible, but it usually lacks the burst needed to remove a dangerous target before it reaches the Rook.
Choose a primary identity early. A direct-damage plan wants upgrades that increase reliable attacks and help a hero finish priority targets. A control plan values slowing, stunning, knockback, and area denial so enemies spend more turns exposed. A defensive plan uses durable structures and recovery effects to buy time while your heroes clean up. You can mix roles, but one of them should clearly be doing most of the work.
Think in terms of a simple combat loop: identify the enemy that reaches the Rook first, apply your strongest reliable effect, then use the remaining actions to damage the next threat. If an upgrade does not improve that loop, it is probably a luxury pick. This discipline matters because reward choices are limited and every mediocre upgrade makes it harder for later rewards to find the cards or bonuses your build actually needs.
| Build direction | Prioritize | Best use | Typical danger |
|---|---|---|---|
| Direct damage | Attack power, range, repeatable attacks | Deleting elite enemies before they advance | Weakness against large groups |
| Control | Slow, stun, knockback, area effects | Buying turns on narrow approaches | Low damage if control is resisted |
| Defense | Durability, healing, tower efficiency | Surviving long waves and mistakes | Eventually being overwhelmed |
3. Treat the Rook as a health budget

The Rook is not just an objective sitting at the edge of the screen. Its health is a limited budget that lets you make tactical trades. Taking one hit to finish an elite enemy can be correct; allowing several weak enemies through because you refused to spend a card or move a hero is not.
Set a personal threshold before each wave. If the Rook can absorb a single minor hit without ending the run, you have room to preserve a powerful cooldown or save a defensive card for the next encounter. If two enemies are already positioned to reach it, stop playing for perfect efficiency. Spend the resource now. A saved card has no value if the Rook falls before you can use it.
Also watch for situations where a hero is protecting the Rook by standing in the wrong place. Heroes are valuable, but their purpose is to convert actions into control and damage. A wounded unit that cannot meaningfully affect the next wave may be less useful than a temporary defensive structure or a retreat to a high-coverage tile.
4. Upgrade towers with a job in mind
Defensive towers are strongest when they solve a specific problem. Do not upgrade a tower just because the upgrade button is available. Ask whether the structure is your single-target finisher, your lane-control tool, or your emergency screen-clear option. If you cannot name its job, save the currency.
A tower covering a busy lane benefits enormously from range or attack-frequency improvements because it gets more opportunities to fire. A tower placed near a choke point gains more from area damage or effects that punish clustered enemies. A structure on a quiet side route may need only a modest upgrade; over-investing there starves the lane that actually decides the battle.
Build the first upgrade where it changes the next wave, not where it looks best on the board. If fast enemies are about to arrive, earlier damage and reliable coverage are usually better than a slow, expensive scaling project. If an armored target is approaching, save enough damage or hero actions to finish it rather than trusting a tower that chips away while the target keeps moving.
| Investment | When it is strong | What it solves | When to delay it |
|---|---|---|---|
| Range or coverage | Several lanes overlap nearby | More targets and fewer dead turns | The tower already covers every important tile |
| Attack frequency | Fast enemies arrive in groups | Consistent pressure and cleanup | A single high-health target is the real threat |
| Area damage | Enemies stack at a choke point | Wave control | Enemies are spread across multiple routes |
| Durability | A structure is repeatedly targeted | Prevents a defensive collapse | The structure can be safely replaced or ignored |
5. Use hero actions for priority targets
Heroes can feel powerful enough to attack whatever is closest, but that is rarely the best use of their turn. Your heroes should handle problems that towers cannot solve quickly: a fast enemy slipping through coverage, an elite with too much health for ordinary attacks, or a cluster that needs immediate control.
Start each turn by checking enemy order and distance. Kill the enemy that will reach the Rook first only when that enemy is genuinely dangerous. Sometimes the correct target is the second enemy because the first can be slowed, blocked, or finished by a tower. This is the small tactical calculation that separates a clean wave from a scramble.
Use active abilities when they produce more than one benefit. A control skill that hits three enemies is better than a damage skill that finishes one weak target, unless that target is the final threat. Likewise, an area attack is strongest when it hits a packed group before your towers fire, not after the group has already been thinned out.
6. Save cards for turning points
Cards are tempting because they offer immediate answers, but spending every card as soon as it appears leaves you helpless when the board changes. Hold at least one flexible answer whenever the current wave is under control. The ideal reserve is something that can either remove a priority target, reposition your defense, or buy one full turn.
Do not hoard cards blindly, either. A card that prevents a Rook hit or saves a damaged hero has already paid for itself. The right question is not “Can I save this?” but “Will this card be more valuable after the next reward?” If the next wave contains a threat your current board cannot handle, spend now and enter the reward screen from a winning position.
When choosing between cards, favor reliability over spectacular ceiling during your first runs. A repeatable attack or dependable control effect teaches you the game and stabilizes awkward boards. High-roll effects can be excellent once you understand enemy timing, but they should not be the foundation of a build that has no backup plan.
7. Protect your economy between waves
Resources in Defend the Rook are also tempo. Spending everything on one powerful upgrade can leave you unable to repair, reposition, or answer the next encounter. Keep a reserve large enough to respond to the map you have not seen yet, especially after a reward route offers multiple unexplored branches.
Look at the likely cost of your next meaningful purchase before selecting a cheaper upgrade. If a tower needs one more investment to cover a second lane, that breakpoint may be worth more than two minor bonuses elsewhere. The strongest economy decisions are usually about reaching a breakpoint: enough range to cover the approach, enough damage to kill an enemy in one fewer turn, or enough durability to survive a focused attack.
Do not confuse a full board with a strong board. Additional structures can create redundancy without improving the lane that matters. A compact defense with overlapping coverage is easier to upgrade and easier to protect than a scattered collection of underpowered towers.
8. Read enemy movement instead of chasing it
Enemy movement is information. Watch which route each group prefers, which enemies ignore your front line, and which targets accelerate the pressure on the Rook. Fast enemies demand early damage; durable enemies demand focused fire; ranged or disruptive enemies may need to be prioritized even when they are not closest.
Place control effects at the point where enemies will be forced to cluster. Using a slow too early can let the effect expire before your towers attack. Using it too late may leave no time for your heroes to capitalize. The sweet spot is generally one turn before the group enters overlapping tower coverage, giving you multiple chances to exploit the reduced movement.
Watch for telegraphed pressure before moving a hero into danger. If an enemy can punish a nearby tile, attacking from one tile farther away may produce slightly less immediate damage but preserve your action economy for the next turn. Surviving one extra round is often worth more than squeezing out a few points of damage now.
9. Plan routes for consistency, not greed
Map choices are strategic decisions, not merely rewards. A route offering a flashy upgrade is not automatically better than a safer encounter that strengthens your core plan. Early in a run, choose opportunities that establish your damage identity and stabilize your weakest lane. Later, prioritize the reward that fixes the specific problem the next dangerous wave will expose.
Healing and defensive options are especially valuable after a rough battle. A greedy route can work when your Rook is healthy and your board already has overlapping coverage, but it becomes dangerous when you are relying on one damaged hero or a single tower to hold an entire approach. Consistency wins more runs than chasing the largest possible reward every time.
Before committing to a route, inspect what your current build lacks. If enemies are surviving with a sliver of health, take damage or attack-speed help. If units are reaching the Rook despite dying quickly, take control, range, or better positioning tools. Rewards should answer a weakness, not simply improve the part of your defense that is already working.
10. Practice the boss wave as a resource test
Boss encounters expose every bad habit at once. A board that survives ordinary waves through scattered damage may collapse when a boss has enough health to ignore chip damage and enough pressure to force several threats through simultaneously. Enter the fight with your strongest hero actions available, a functional tower on the main approach, and at least one emergency card if possible.
Do not tunnel on the boss if smaller enemies can reach the Rook first. The boss often acts as a distraction while the real failure comes from ignored escorts. Use area damage and control to stabilize the supporting wave, then direct focused attacks into the boss during the turns when its movement or attack pattern leaves it exposed.
Boss preparation also means accepting imperfect outcomes. Losing some Rook health while preserving a key hero or card can be the correct line if the next turn gives you a clean finishing sequence. Conversely, sacrificing the Rook's health to protect an already obsolete tower is a poor trade. Every decision should be measured by whether it improves your chances of surviving the remaining waves.
A reliable first-run routine
For a new player, the safest routine is straightforward. In the opening wave, study the routes and identify a central coverage tile. Choose one primary damage direction rather than grabbing unrelated bonuses. Upgrade the tower or hero that already influences the most important lane, then keep enough resources for an emergency response.
During each turn, check the next enemy to reach the Rook, use control before enemies leave your overlapping coverage, and spend hero actions on targets towers cannot finish efficiently. Between waves, repair the weakest part of the defense rather than spreading currency across every structure. When a reward offers a powerful but narrow effect, take it only if the rest of your board can exploit it immediately.
After a failed run, review the first moment where the Rook became unsafe. Was your damage scattered? Did you spend a card on a harmless wave? Did a hero lose a turn walking between lanes? That answer is more useful than simply blaming the final boss. Defend the Rook rewards players who turn each failed defense into a cleaner plan for the next one.
For more strategy-game fundamentals, compare this resource-first approach with Steamoz's Bounty Train beginner build advice and the survival principles in Crawl's beginner guide. If performance gets in the way of reading a busy battlefield, the graphics-setting lessons in Baten Kaitos HD Remaster settings are useful general PC tuning reference points. For the latest patches and developer information, check Klabater's official website and the game's official Steam community hub.