
If you drop into Company of Heroes 3 expecting to click faster than your opponent and steamroll through massed unit production, your army will be wiped out before the ten-minute mark. Relic Entertainment’s Mediterranean theater redefines the franchise through brand-new directional side armor, true elevation mechanics, and a punishing Manpower bleed system where losing whole infantry squads permanently stalls your late-game tank tech. Conquering the dynamic Italian campaign or surviving cutthroat multiplayer skirmishes isn't about traditional base-building routines; it's about respecting ballistics, managing retreat thresholds, and understanding how cover geometry actually protects your troops.
Directional Armor and Why Side Hits Completely Change Tank Warfare
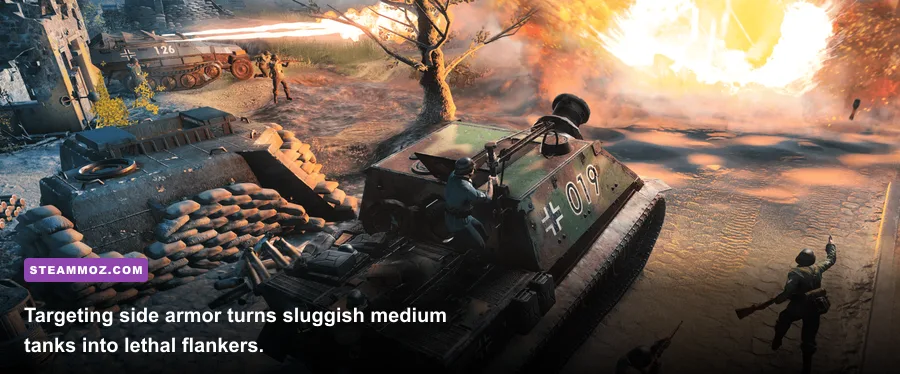
Veterans of Company of Heroes 2 remember the binary reality of vehicle combat: you hit the reinforced front plate, or you micro-managed a flank to hammer the paper-thin rear armor. Company of Heroes 3 breaks this dynamic entirely by introducing dedicated side armor calculations. Every medium and heavy tank now features three distinct armor profiles: Front, Side, and Rear. This mechanical overhaul makes vehicle positioning significantly more nuanced, giving agile light-to-medium platforms like the British Crusader or the American M4A1 Sherman immense utility against heavier Axis steel like the Panzer IV and the dreaded Tiger I.
The math behind penetration directly dictates how you angle your hulls. In earlier franchise entries, presenting your hull at a 45-degree angle often deflected incoming kinetic rounds. In CoH3, over-angling exposes your weaker side armor profile to incoming fire, drastically increasing the attacker's penetration probability. If a German StuG III G assault gun faces an incoming 57mm Anti-Tank gun head-on, its thick frontal casemate has roughly an 80% deflection rate at medium range. Rotate that StuG just twenty degrees too far to track an infantry squad, and that same 57mm round checks against the StuG's side armor rating—dropping deflection chance down to under 35% and risking an immediate engine-damaged critical effect.
Just as optimizing your PC setup requires precision adjustments like tweaking settings for max FPS to keep your inputs responsive during frantic battles, your vehicle micro requires zero wasted mouse clicks. You must bind and constantly use the Reverse Move command ('U' hotkey by default). Never order a tank to fall back by right-clicking behind it, or its pathfinding algorithm will turn the chassis around, immediately presenting its paper-thin rear plating to enemy anti-tank crews. Keep your thickest armor facing incoming fire while rolling backward into the safety of friendly smoke screens.
| Vehicle Platform | Front Armor Rating | Side Armor Rating | Rear Armor Rating | Tactical Engagement Profile |
|---|---|---|---|---|
| M4A1 Sherman (US Forces) | 180 | 110 | 75 | Workhorse brawler; devastating flanker against Axis armor weak spots. |
| Panzer IV Ausf. G (Wehrmacht) | 200 | 120 | 80 | Balanced frontline tank; punish bad enemy angles with heavy 7.5cm shells. |
| Crusader Mk III (British Forces) | 130 | 85 | 50 | Ultra-fast hit-and-run raider; always exploit side hit angles. |
| Tiger I (Wehrmacht Doctrine) | 320 | 210 | 140 | Fortress anchor; lethal frontally, but helpless if swarmed on flank angles. |
Elevation and Line of Sight: The High Ground Actually Decides Firefights
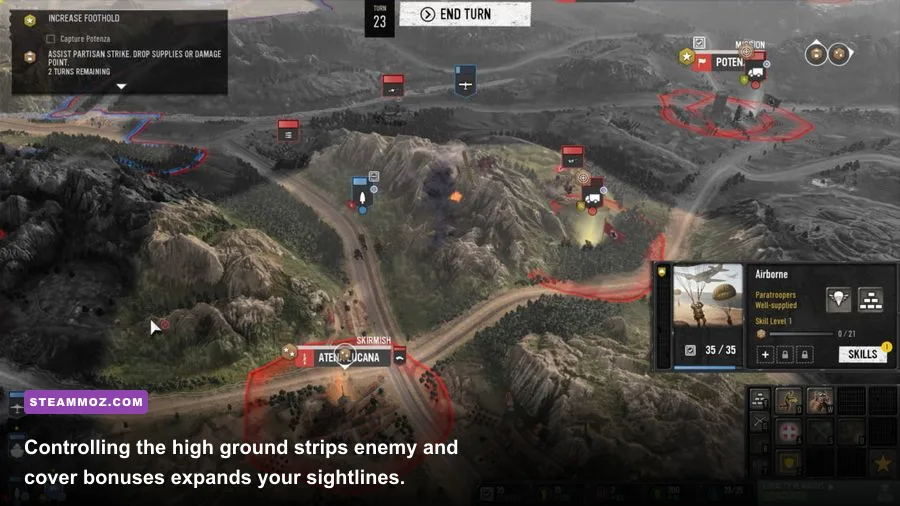
Previous entries simulated elevation primarily through visual flavor and modest line-of-sight benefits. In Company of Heroes 3, elevation is an active combat modifier that can single-handedly win or lose early-game infantry engagements. The rocky topography of North Africa and the terraced hillsides of Italy mean height differentials are everywhere, and understanding how they interact with the game's TrueSight ballistic engine is critical for field survival.
When an infantry squad holds the high ground on a hill, ridge, or stone terrace, they receive an inherent accuracy bonus against targets positioned below. More importantly, elevation fundamentally downgrades the defensive cover of your enemy. If hostile Riflemen dive into yellow light cover behind low sandbags at the base of a hill, your Grenadiers firing down from the crest treat that enemy squad as completely exposed in open terrain. This completely nullifies their damage reduction bonuses, turning what would normally be a protracted firefight into a devastating ambush.
Elevation also ties intimately into weapon weapon ranges and visibility arcs. Anti-tank guns like the British 6-Pounder or the German Pak 40 experience extended targeting sightlines when positioned atop bluffs, allowing them to fire at maximum ballistic range without requiring a forward spotter. Conversely, units at the bottom of steep cliffs suffer strict line-of-sight obstructions; they cannot fire mortar rounds or small arms over sheer vertical inclines unless an indirect trajectory weapon specifically clears the crest line. Always sweep high ground with reconnaissance abilities or mortar smoke before pushing your troops through Mediterranean valley chokepoints.
Tactical Pause vs. Hotkey Muscle Memory: Mastering the Real-Time Flow
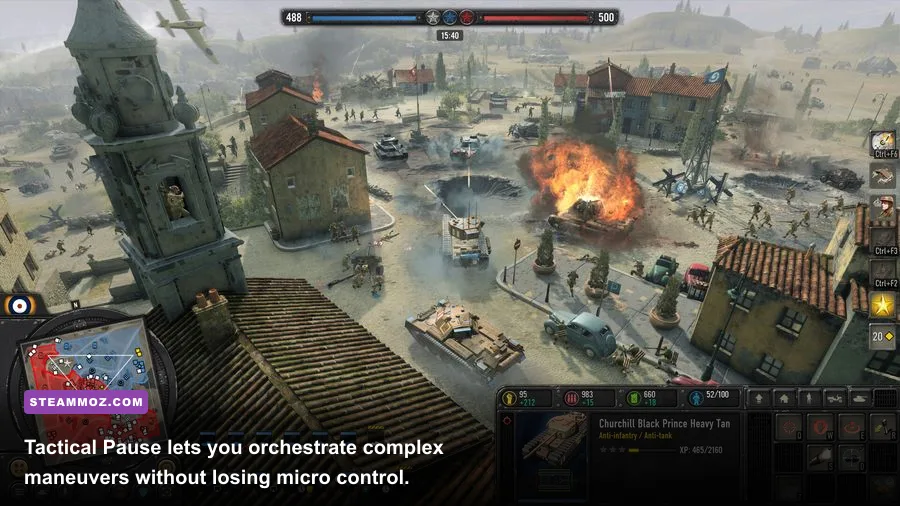
One of the biggest additions in Company of Heroes 3 is the Full Tactical Pause system, accessible in all single-player game modes by tapping the Spacebar. For newcomers stepping into the Italian Dynamic Campaign, this tool is transformative. Pressing pause stops the clock entirely while letting you pan the battlefield, inspect individual health bars, assess vehicle hull orientations, and stack long queues of contextual commands.
You can tell an Engineer squad to construct a sandbag wall, run to a munition depot, prime a wire-cutter, and lay an anti-tank minefield—all while the game remains frozen. When you tap Spacebar again, your units execute that precise choreography flawlessly. It removes the stress of micro-taxing situations and lets you study how unit abilities string together naturally. For players accustomed to slower management loops found in titles like Empires of the Undergrowth, this pause feature bridges the massive gap toward real-time tactical mastery.
However, you need to be careful: Tactical Pause does not exist in player-versus-player multiplayer or cooperative skirmishes. If you intend to take your skills online, leaning on Tactical Pause as a crutch will build disastrous habits. You must cultivate hotkey muscle memory early:
- 'T' (Retreat): Your panic button. Sends selected infantry sprinting directly back to base with major defensive bonuses against small arms fire.
- 'U' (Reverse Vehicle): Keeps frontal armor locked on the threat while moving backward.
- 'R' (Reinforce): Replenishes missing models while parked near base structures, medical trucks, or half-tracks.
- Tactical Map (Keypad 0 or 'M'): Zooms out instantly to a complete operational view of capture sectors, letting you issue macro orders across the entire front line.
Much like keeping your visual fidelity crisp and sharp in technical indie titles like Filament, stripping away UI clutter and memorizing your hotkeys ensures you spend your attention reading the battle instead of hunting for icons on the command card.
The Faction Meta: Pick Your Combat Doctrine Wisely
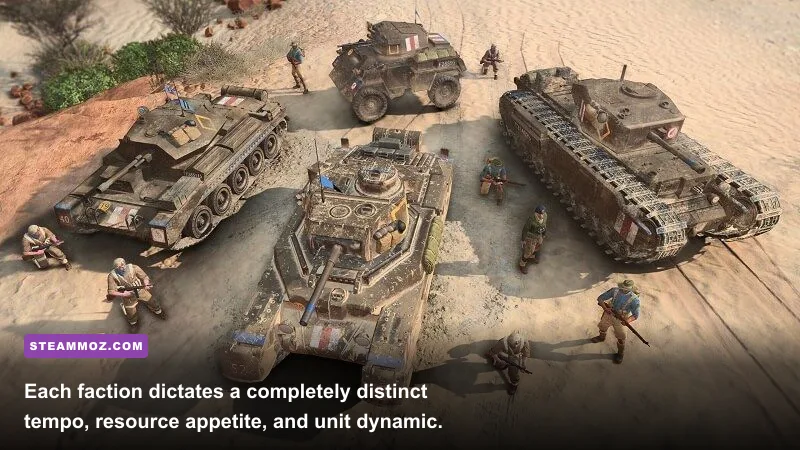
CoH3 launches with four distinct armies, representing the largest day-one faction roster in franchise history. Each military force features drastically different economic rhythms, timing pushes, and doctrinal playstyles. Choosing the wrong army for your personal playstyle will lead to immense frustration during your opening skirmishes.
The US Forces (USF) thrive on relentless early-game aggression, mobile infantry micro, and decentralized unit upgrades. Their primary line infantry, the Riflemen, outgun almost every other basic infantry squad at close-to-medium range. Supported by specialized weapon teams and fast-rolling M8 Greyhounds, USF players focus on suffocating the map before the enemy can establish solid defensive perimeters.
The British Forces (BRF) present a deliberate, defensive playstyle ideal for newer players. Their Infantry Sections are deadly at long range, especially when hunkered down in green cover. Backed by heavy artillery batteries, mobile training upgrades, and versatile Crusader and Matilda tanks, the British control the tempo of the engagement by locking down critical resource sectors behind sturdy Vickers heavy machine gun emplacements.
On the Axis side, the Wehrmacht represents traditional German military doctrine: structured tier progression, elite specialized weapon teams, and terrifying late-game armor. Their MG42 Heavy Machine Gun team has the widest suppression arc and fastest pin rate in the game, making it the supreme defensive tool against early-game infantry charges. Progressing through their building tiers unleashes lethal Panzergrenadiers, StuG assault guns, and eventually devastating Panther medium tanks.
Finally, the Deutsches Afrikakorps (DAK) is an aggressive, mechanized battle group built around fast vehicles, vehicle towing mechanics, and integrated combined-arms bonuses. DAK infantry fight significantly better when operating within close proximity to friendly half-tracks and light armored cars. However, DAK units carry exorbitant Manpower reinforcement costs, meaning careless casualties will bankrupt your economy rapidly.
| Faction Name | Primary Strength | Core Weakness | Ideal Starter Unit Synergy |
|---|---|---|---|
| US Forces | Dominant early infantry pressure; hyper-flexible side-tech trees. | Struggles against entrenched heavy armor without air or anti-tank doctrine. | Riflemen + M3 Halftrack (Quad .50 Cal conversion) + M1 57mm AT Gun. |
| British Forces | Long-range firepower; formidable static artillery and thick hull armor. | Slow tactical mobility; vulnerable to flanking attacks in open territory. | Infantry Section (Scoped Rifles) + Vickers HMG + 6-Pounder AT Gun. |
| Wehrmacht | Unrivaled defensive team weapons; devastating late-game armor tech. | High research costs; punishing early-game if machine gun teams get flanked. | MG42 HMG Team + Grenadiers (Jaeger conversion) + StuG III Ausf. G. |
| Deutsches Afrikakorps | Mechanized speed; light vehicle power spikes; combined arms auras. | Astronomical unit repair and reinforcement costs; fragile light hulls. | Panzergrenadiers + 250 Light Halftrack + Flakvierling 38. |
Breaching, Garrisoning, and Urban Warfare Traps
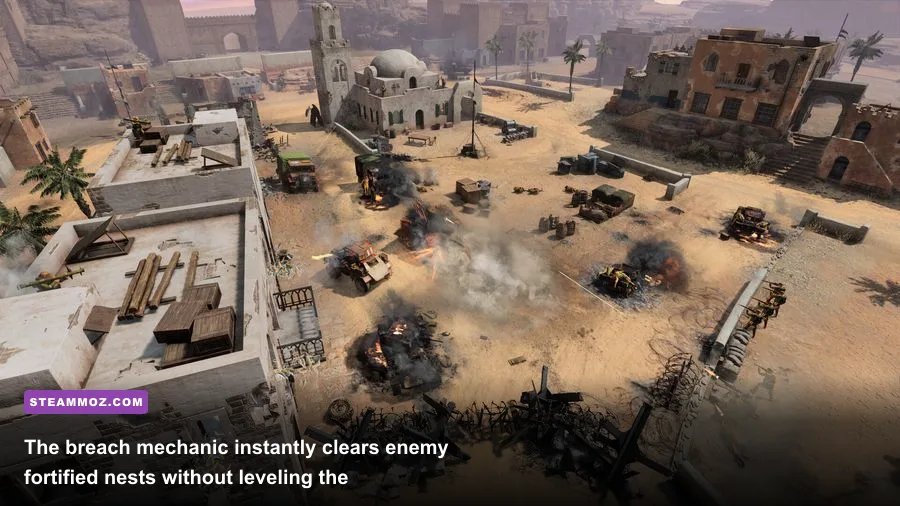
In earlier games, stuffing a machine gun squad or a sniper into a multi-story stone church effectively created an impenetrable fortress. Attackers had to spend several minutes lobbing mortar shells or suicide-charging with satchel charges just to dislodge a single squad. Company of Heroes 3 solves this classic balance bottleneck with the Breach mechanic.
Specific frontline units—such as US Assault Engineers, British Guastatori, or any squad equipped with flamethrowers or specialized breaching tools—can target an occupied structure directly. Rather than slowly whittling down the building's structural health bar, the squad rushes the entrances, throws flashbangs, smokes, or incendiaries inside, and completely clears the garrison. The defending unit is either instantly wiped out or forced out into the open in a panicked, disorganized state, ripe for target practice.
This changes how you approach urban warfare on Italian village maps. Garrisoning structures is still fantastic for buying time and shredding incoming pushes, but you can no longer leave a squad inside a building and look away. The moment you see an enemy squad sprinting toward your building with a breach icon flashing above their heads, you must manually order your squad to jump out of the rear windows. Staying inside is a guaranteed death sentence.
Always inspect building destruction states as well. Relic upgraded its physics engine, meaning collapsing masonry, crumbling roofs, and falling spires deal lethal crush damage to any unit caught beneath them. If your infantry squad is trading shots from behind a low stone wall and a tank shell slams into the balcony above them, falling debris can wipe out three models instantly. Treat urban geography as active, destructible hazard zones rather than permanent cover.
Economy Management: Munitions, Fuel, and Manpower Bleed
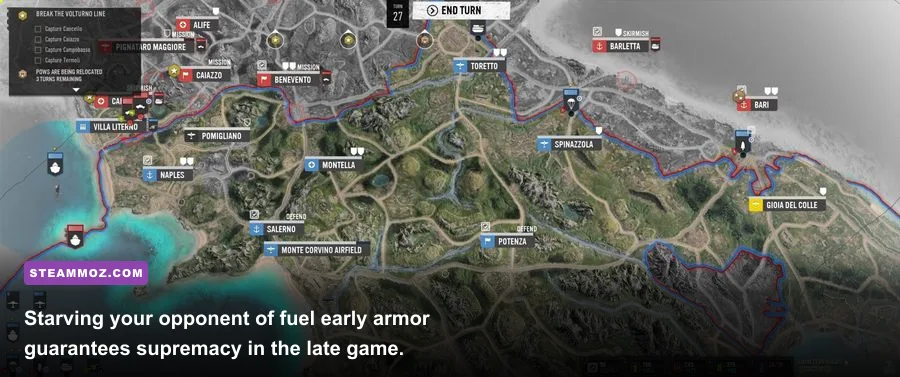
Every victory in Company of Heroes 3 is secretly decided by your balance sheet. The resource engine is divided into three primary currencies: Manpower, Munitions, and Fuel. Failing to manage the interplay between these three resources is the number one reason beginners hit an invisible wall twenty minutes into a match.
Manpower generates automatically based on the size of your standing army. The larger your field presence, the lower your Manpower income becomes due to unit upkeep costs. This mechanic is known as Manpower Bleed. If you carelessly feed three rifle squads into enemy heavy machine gun fire and continuously pay the price to reinforce them one model at a time, your Manpower income will crater. Reinforcing an individual infantry model costs roughly 25% to 35% of the squad’s initial purchase price. Losing entire six-man squads forces you to pay full sticker price to rebuild them from scratch, while wiping away any earned veterancy stars.
Fuel is the gatekeeper of tech progression. Every tier upgrade, light vehicle, and medium tank requires heavy Fuel deposits. If you ignore Fuel capture points on the map during the opening six minutes, your opponent will roll out an M8 Greyhound or an 8-Rad Armored Car while your forces are still running around with bolt-action rifles. Prioritizing fuel caches isn't optional; it's the primary objective of your early-game territorial expansion.
Munitions dictate your tactical lethality. You spend Munitions to activate smoke canisters, throw sticky anti-tank grenades, call down off-map artillery strikes, and equip permanent weapon upgrades like Browning Automatic Rifles (BARs) or Panzerschrecks. Just as calculating upgrade costs in titles like Everspace ensures you don't waste currency on secondary gear, every single Munition in CoH3 must serve an operational purpose.
Rather than burning 45 Munitions repeatedly on speculative hand grenades that decent players will easily dodge, save those resources for defensive Teller Mines and M21 Anti-Tank Mines. Placing a single 30-Munition mine on a road chokepoint will blow the treads off an advancing medium tank, locking it in place and gifting your anti-tank teams an effortless kill that can completely turn the tide of war.
To inspect faction balancing changes, patch updates, and mechanical weapon breakdowns, always consult the official resources provided by Relic Entertainment and verify technical build details via the official Steam Community Hub before jumping into ranked ladder matches.
Mastering these core systems transforms Company of Heroes 3 from a chaotic mess of explosions into an exhilarating game of tactical chess. Respect directional armor angles, always contest the high ground, preserve your infantry models to maintain a healthy economy, and watch your win rate climb across every battlefield from the deserts of Libya to the mountain towns of Italy.