The Winchester rifle, Colt revolver, and a properly upgraded train cannon form Bounty Train’s strongest all-purpose equipment core. The Winchester wins at medium range, the revolver is the best emergency sidearm, and mounted artillery supplies the burst damage needed to stop armored trains and large boarding parties. Shotguns and melee weapons remain useful, but only in specific crew positions and encounter types.
This ranking focuses on practical campaign value rather than the biggest damage number in the inventory. Bounty Train’s fights are won by range, reload downtime, accuracy, crew placement, and whether your equipment still works after the train starts taking damage. A weapon that looks impressive in a station shop can be a terrible purchase if its user spends half the battle reloading or cannot reach the enemy wagon.
The Bounty Train Weapon Tier List

The game’s weapon categories have clear jobs. Rifles control lanes and punish exposed attackers, revolvers keep crew members alive when enemies close in, shotguns erase clustered boarders, and melee weapons are insurance for the final few seconds of a fight. Train-mounted weapons are separate from personal firearms: they consume train resources and depend heavily on wagon placement, but they can decide encounters before an enemy crew gets close.
| Tier | Weapon or equipment | Why it ranks here | Best user or situation |
|---|---|---|---|
| S | Winchester rifle | Excellent range, reliable accuracy, and strong sustained damage | Experienced shooter on a forward or elevated wagon |
| S | Colt revolver | Fast response weapon with dependable close-to-medium range output | Engineer, guard, or any crew member covering boarding points |
| S | Upgraded train cannon | High burst damage against enemy engines and reinforced wagons | Dedicated gunner during train battles |
| A | Sharps rifle | Excellent precision and long-range pressure, but less forgiving during reloads | High-accuracy marksman |
| A | Shotgun | Devastating against grouped boarders at short range | Guard stationed near doors and ladders |
| A | Mounted machine gun | Strong sustained fire against exposed infantry | Defense-heavy train layout |
| B | Springfield rifle | Useful early ranged option, eventually outclassed by better rifles | Newly recruited shooter |
| B | Derringer | Quick emergency damage, but poor reach and limited stopping power | Backup weapon for a non-combat specialist |
| C | Basic melee weapons | No reload cost, but dangerous reach requirements and weak approach control | Last-resort defense after enemies board |
The important distinction is between damage per shot and damage during a real encounter. A slow rifle may have the superior tooltip, yet a revolver often produces more useful damage when a bandit crosses the gap in seconds. Likewise, a cannon is not automatically better than a machine gun: cannons are valuable when you can land decisive shots, while machine guns shine when several lightly protected targets remain exposed.

🎮 Bounty Train
Looking to experience this game? Grab your digital key directly on our store for $0.99.
View on Steammoz Store →S-Tier firearms and why they dominate

Winchester rifle
The Winchester is the safest high-value firearm in the campaign. Its combination of range, accuracy, and repeat-fire capability gives it an answer for almost every ordinary encounter. Put it in the hands of a crew member with strong shooting skill and keep that character away from the boarding line. The rifle should begin firing before the enemy reaches your train, not after the deck is already crowded.
Its biggest strength is tempo. A shooter can fire, reposition, and fire again without feeling as punished as a single-shot rifle user. That matters against raiders who move between cover and against enemy crews trying to repair their own locomotive. Aim at exposed attackers first, then switch to mechanical targets only when the infantry threat is under control.
Colt revolver
The Colt revolver is the game’s best general-purpose sidearm because it remains useful when a fight goes wrong. It reloads and responds faster than a long rifle, handles medium-range engagements, and does not cripple a crew member who has to move between wagons. Give it to the character responsible for protecting the boiler, cargo, or rear coupling.
Do not treat the revolver as a weaker Winchester. It fills a different role. A rifleman wants a clear firing lane; a revolver user wants mobility. Keep the revolver carrier close enough to respond to a ladder or doorway, but not so close that a single shotgun blast catches several crew members together. The weapon is also an excellent choice for newly recruited specialists whose combat stats have not caught up with your veteran marksman.
Sharps rifle
The Sharps rifle earns A-tier status because its precision can outperform a Winchester in the hands of a specialist. It is particularly good for opening an encounter with a high-value shot against a visible gunner or engineer. The catch is downtime. Missing or entering a reload cycle at the wrong moment leaves the shooter unable to protect the train.
Use the Sharps when the map gives you time and sight lines. Replace it with a revolver if the campaign is throwing repeated boarding actions at you. A weapon’s theoretical accuracy has no value when the shooter is being forced to retreat every few seconds.
Shotguns, melee gear, and mounted weapons
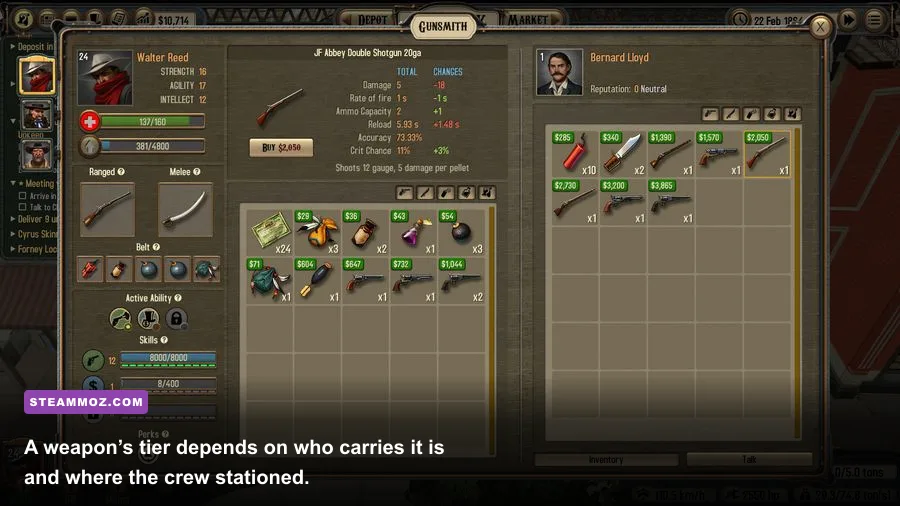
Shotgun
The shotgun is the best anti-boarding weapon, but it is not a universal primary. Its short effective range means the carrier must wait until attackers commit to a ladder, door, or narrow wagon entrance. That sounds risky, yet the same limitation creates its power: several enemies often stack in the exact space where a close-range blast is most valuable.
Station the shotgun carrier near a likely boarding point and give that character room to retreat. Never park the user beside the boiler or a valuable cargo object with no escape route. If the first blast fails to end the push, swap to a revolver or bring a second crew member forward. Shotguns are strongest as part of a layered defense, not as a lone answer.
Mounted cannon
A train cannon is the highest-impact piece of equipment against enemy locomotives. Its job is not to farm every infantry target; its job is to create a decisive mechanical advantage. Fire at the enemy engine, weapon wagon, or the section carrying the largest concentration of hostile crew. Destroying a key wagon can remove an entire threat rather than merely reducing one enemy’s health.
Cannons are expensive to maintain and depend on a clear firing position. They also become much less impressive when the enemy has already reached your deck. Protect the gunner, keep the cannon wagon repaired, and avoid spending every shot on low-value targets. If the enemy train is retreating or heavily armored, save ammunition for a clean shot that changes the encounter.
Mounted machine gun
The machine gun is the more forgiving mounted weapon. It delivers sustained pressure and is excellent against exposed raiders, especially when several targets move through the same approach lane. It is less spectacular than a cannon against an engine, but it helps prevent boarding in the first place.
Choose the machine gun for a defensive campaign route with frequent infantry attacks. Choose the cannon when train-versus-train battles are your main problem. That simple choice is more important than chasing the highest shop price.
Melee weapons
Melee gear belongs in the C or situational B tier, not because it is useless, but because reaching melee range is already a sign that your first defensive layer failed. A knife, club, or similar close weapon costs no ammunition and can finish a weakened boarder. It cannot control an open lane, stop a distant shooter, or protect a wagon during an approach.
Carry melee as a backup on workers and engineers, particularly when ammunition is scarce. Do not build an entire crew around it unless you deliberately want a high-risk boarding-defense run.
Best equipment by crew role
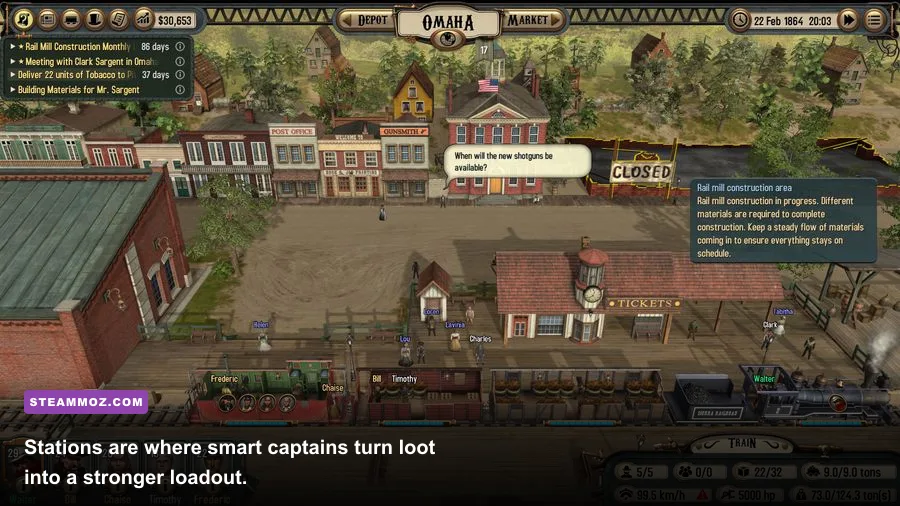
Bounty Train rewards role assignment more than simply giving every character the most expensive item. A strong shooter with a rifle should stay where the weapon’s range matters. A repair-focused crew member should carry a revolver or melee backup because that character will spend much of the fight moving between damaged systems. The best loadout is a chain of overlapping jobs.
| Crew role | Primary equipment | Secondary equipment | Positioning rule |
|---|---|---|---|
| Marksman | Winchester or Sharps rifle | Revolver | Elevated or forward position with a long firing lane |
| Guard | Shotgun | Colt revolver | One wagon behind the most likely boarding point |
| Engineer | Colt revolver | Melee weapon | Near engine systems, with a safe path to repairs |
| Gunner | Mounted cannon | Revolver or melee backup | Protected weapon wagon, never left isolated |
| Support specialist | Springfield rifle | Derringer | Flexible middle wagon covering either flank |
Stat priorities should follow the assignment. For a marksman, accuracy and weapon range matter before raw health. For a guard, survivability and close-range damage are more valuable because that character will absorb pressure. Reload speed is quietly one of the best practical stats in the game: a weapon that fires slightly weaker shots but returns to action quickly often beats a slow, high-damage option.
Keep at least one reserve firearm on the train. A weapon can become inaccessible when its carrier is injured, repositioning, or forced into a repair animation. That is why the Colt revolver remains an S-tier purchase even after your inventory contains premium rifles.
How to upgrade gear without wasting money
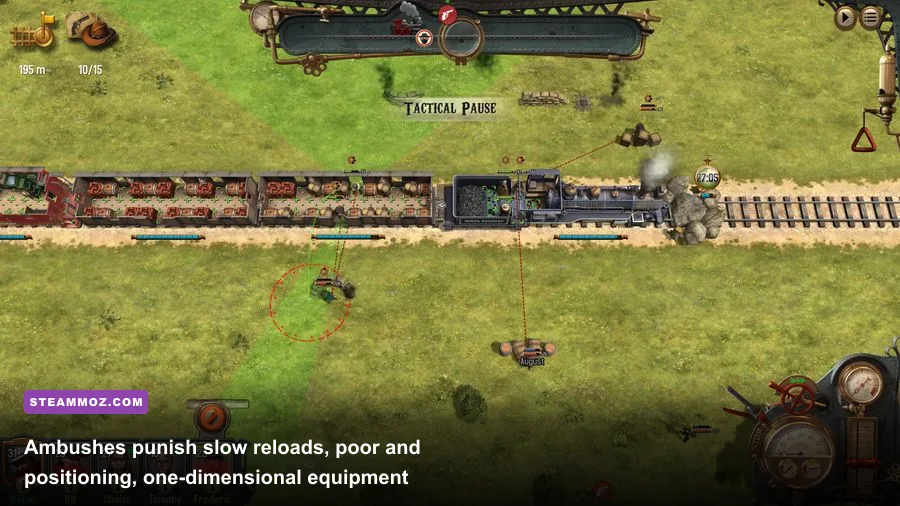
Buy equipment according to the next danger on your route, not according to the shop’s most expensive item. Early in a run, one reliable revolver and one serviceable rifle usually create more value than a single premium weapon. The rifle handles approach damage; the revolver protects the crew when the plan breaks. Only after those jobs are covered should you invest in a shotgun or mounted weapon.
Repair costs are part of the ranking. A weapon that sits damaged for several stations is not contributing to your campaign, and a train cannon that consumes resources faster than your route can replace them may slow your entire progression. Check the economic side of every purchase. Bounty Train’s wider route planning and supply decisions are worth comparing with Steamoz’s resource-focused survival guide, because the same rule applies: a powerful item is only useful if the campaign can sustain it.
Sell or replace low-tier weapons when their accuracy no longer keeps pace with enemy armor. Do not discard every basic item immediately, though. A spare Springfield rifle can keep a wounded veteran effective, and a Derringer is better than leaving a newly recruited specialist defenseless. Inventory depth matters during long routes between stations.
For players who like methodical build planning, the principles are similar to the loadout discipline discussed in Steamoz’s weapon-ranking breakdown: rank equipment by the situations it solves, not by the size of its tooltip.
Combat setups that make the tier list work
The strongest standard formation uses three layers. Put the Winchester or Sharps user where they can fire during the approach. Keep the cannon or machine gun protected behind the main structure. Place the shotgun guard one wagon away from the likely boarding point, with a revolver carrier close enough to cover a reload. This arrangement prevents one missed shot from collapsing the entire defense.
Against an enemy train, open with long-range rifle fire and mounted weapons. Prioritize enemy gunners and engineers before ordinary crew. A disabled weapon reduces incoming damage immediately, while an injured repair specialist prevents the opponent from recovering. Once the enemy loses momentum, shift fire toward the engine or the wagon that contains the largest remaining threat.
Against raiders, do the opposite: preserve your firing lanes and hold the shotgun until attackers commit. Firing too early wastes the weapon’s main advantage. Let the enemy enter the narrow approach, blast the lead target, then use the revolver to finish anyone who survives. If two crew members are forced into the same wagon, move one immediately; clustered characters invite devastating area pressure.
Before a major route, check ammunition, repair condition, and each character’s assigned weapon. Then make sure your best marksman is not carrying a short-range gun simply because it has a higher listed damage value. Steamoz’s run-preservation tips apply here too: consistency beats flashy damage when a campaign can unravel from one bad encounter.
Finally, use the game’s official Steam page for the current feature and patch context, and check the developer’s official site if you are comparing versions. Bounty Train rewards players who build for the next fight rather than the last one. Keep a Winchester for control, a Colt for emergencies, a shotgun for boarders, and a properly protected cannon for the battles that can end a run. That core stays effective long after the early-game equipment has stopped looking impressive.