
Jagged Alliance 3 does not pull its punches: you will miss point-blank shotgun blasts, watch your payroll run dry right as your contracts expire, and lose veteran mercenaries to preventable sepsis if you play it like a generic cover shooter. Developer Haemimont Games built a tactical RPG that intentionally hides explicit hit-chance percentages, demands real-time economic juggling, and punishes lazy positioning with ruthless enemy ambushes. Surviving the early hours in Grand Chien means shedding standard turn-based habits, mastering stance and aim mechanics, and treating your satellite map like a full-scale logistical command post.

Stop Guessing: How the Hidden Hit Chance System Actually Works

The first shock for most tactical RPG players jumping into Jagged Alliance 3 on Steam is the complete absence of a floating "85% to hit" indicator. That design decision is entirely intentional. Instead of crunching visible percentages, the game visualizes shot accuracy through your targeting reticle rings, audio cues, and contextual modifiers. If you fire from a standing position without investing extra Action Points (AP) into aiming, your bullet spread is massive, and you will routinely spray dirt around hostiles standing ten paces away.
To consistently land shots, you need to exploit stance modifiers and manual aiming pips. Going prone gives your merc an immediate +20% flat boost to accuracy while reducing your hit profile to enemy fire by half. Spending up to three additional AP to refine your shot contracts the crosshair reticle significantly, applying cumulative aim bonuses based on your merc's Dexterity and Marksmanship stats. Darkness, heavy weather like rain or dust storms, and defender cover status dramatically degrade your actual accuracy behind the scenes. Never take an un-aimed snap shot with a low-Dexterity merc unless you're desperate for suppression.
Body part targeting is where real tactical control happens. Torso shots provide the most reliable center-mass hit chances and strip body armor, but targeting specific limbs inflicts severe, fight-altering debuffs. Shooting an enemy's arms severely degrades their weapon handling and prevents throwing grenades, while a shot to the groin inflicts heavy stamina drain and immediate suppression. Knowing which body part to cripple transforms impossible firefights into controlled cleanups.
| Target Zone | Base Hit Penalty | Inflicted Status Effect | Best Tactical Usage |
|---|---|---|---|
| Head | High (-30% Base) | Blinded, High Critical Damage | Snipers in stealth targeting unarmored sentries |
| Torso | None (Standard Baseline) | Armor Degradation, Knockdown | Full-auto bursts and low-Marksmanship mercs |
| Arms | Moderate (-15% Base) | Crippled (Drops accuracy, ruins throwing) | Neutralizing heavily armed machine gunners |
| Legs | Moderate (-15% Base) | Hamstrung (Halves movement AP next turn) | Stopping melee-charging Legion Hyenas |
| Groin | Severe (-25% Base) | Suppressed, Extreme Moral Loss | Forcing dangerous elite targets out of cover |
🎮 Jagged Alliance 3
Looking to experience this game? Grab your digital key directly on our store for $44.99.
View on Steammoz Store →Build the Ultimate Budget Squad and Skip Overpriced Legends
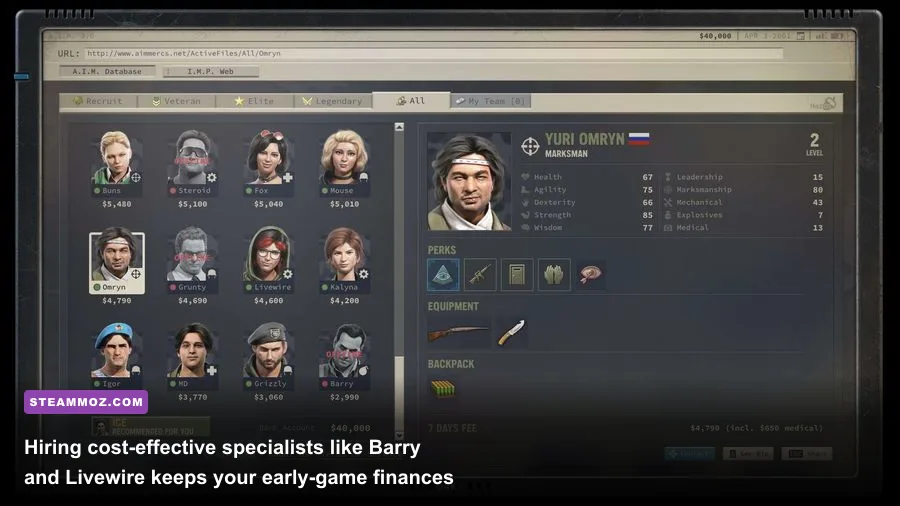
When you start your campaign, A.I.M. presents you with legendary names like Ivan Dolvich, Gus Tarballs, and Reaper. Hiring them on Day 1 is the fastest way to bankrupt your squad before you even cross Ernie Island. High-tier mercs demand massive upfront sign-on bonuses and exorbitant bi-weekly salaries. If a contract expires while you are stranded deep in enemy territory without cash, they will pack their bags and walk, taking their rare gear with them.
Instead, your Day 1 priority is assembling a lean, balanced crew of Recruit- and Veteran-tier workhorses with complementary specialties. Every functional early squad requires at least one dedicated Medic, one high-skill Mechanic (to pick locks and repair equipment), one Explosive Expert, and a Scout. Just as in crafting an optimized beginner combat loadout build, stacking raw firepower without supporting utility leads to quick failure.
Make sure to utilize the I.M.P. (Institute for Mercenary Profiling) web terminal on your in-game PDA. For a one-time fee of $6,999, you can design a fully customized mercenary who stays on your roster for the entire campaign with zero recurring salary. Maximize their Marksmanship (85+), Dexterity, and Leadership. High Leadership speeds up your world map travel times, slashes sector operation durations, and dramatically buffs team morale at the start of every combat encounter.
| Mercenary | Role / Key Stat | Unique Trait / Perk | Why They Dominate Early Game |
|---|---|---|---|
| Barry Unger | Explosives (92) | Crafts 2x Shaped Charges per rest | Dirt cheap; his directional shaped charges one-shot entire clusters of armored enemies. |
| Livewire | Mechanic (81) | PDA Intel Tracking | Reveals the location of all enemies on tactical maps if sector intel is gathered beforehand. |
| Fox | Medic (69) / Dex (100) | Striking Looks / Ambidextrous | Free opening stealth interrupts; dual-pistol mobile hit-and-run master with solid healing. |
| Igor Dolvich | Melee / Agility (90) | Grit on Close Range Kill | Cheap frontline brawler who gains temporary hit points and excels with machetes and shotguns. |
| I.M.P. Merc | Custom (Player Choice) | Perk Choice (Take Psycho or Sniper) | Completely free ongoing salary; provides an essential high-stat anchor for your roster. |
The Economic Loop: Diamond Mines and Militia Defense
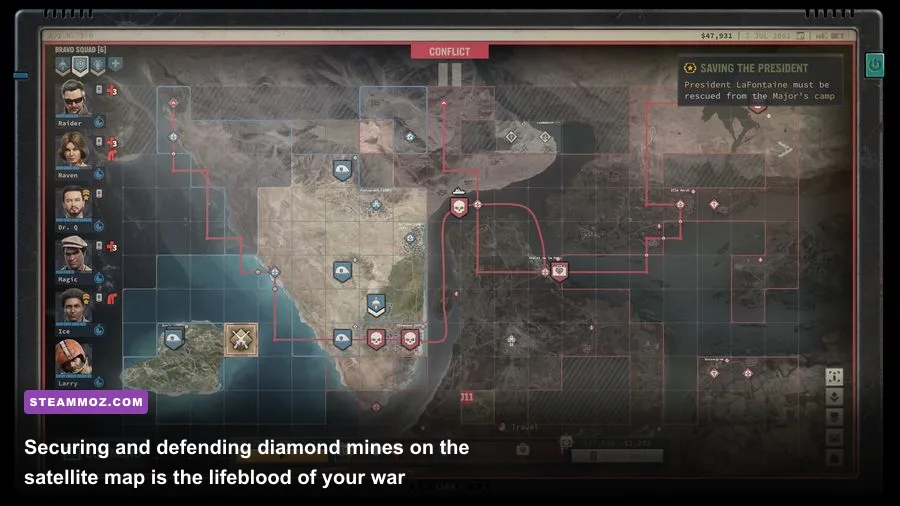
Money makes the world go round in Grand Chien. Your primary source of recurring income isn't looting dead mercenaries; it is conquering and holding Diamond Mines. Once you take the starter sector on Ernie Island, your immediate strategic objective on the mainland should be liberating Diamond Red (Sector A2) or the Msheshi Mine. Securing a single operational mine nets your squad between $3,000 and $8,000 per day, keeping your roster contracts comfortably funded.
Capturing a mine is only half the battle; defending it is where unprepared players hit a brick wall. The Legion faction routinely dispatches armed counter-attack squads from nearby outposts to retake your economic hubs. If an enemy patrol walks into an undefended mine sector, your daily revenue drops to zero instantly. Much like keeping an eye on your resource management when optimizing your resource flow, proactive defense saves you from sudden fiscal collapse.
Whenever you capture a mine, port, or town sector, you must immediately open the Sector Operations window and assign a merc with high Leadership to the Train Militia operation. Militia units act as automated garrisons. They start as basic Recruits, but a second training cycle elevates them to Veterans equipped with automatic rifles and body armor. A full garrison of eight Veteran militia can repel standard Legion strike squads without requiring you to scramble your main combat squad halfway across the country.
Master Sector Operations or Bleed Out on the SAT View
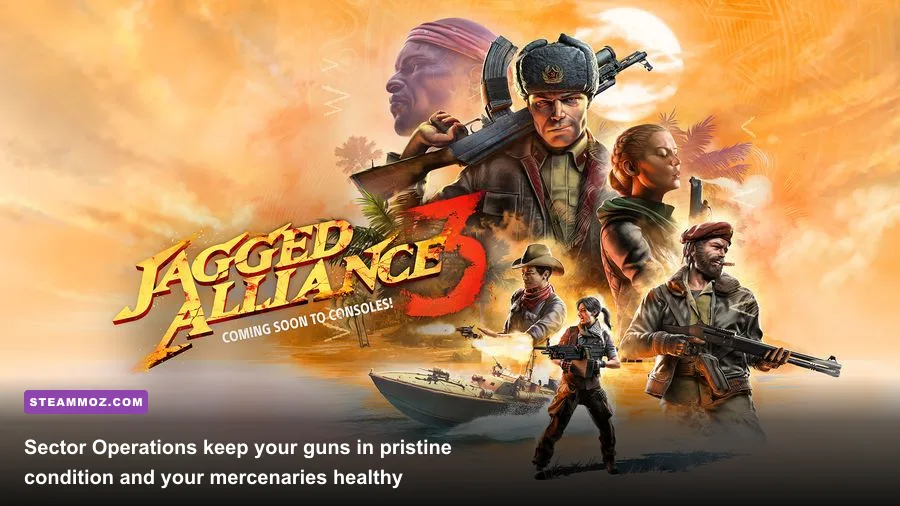
The Satellite (SAT) View is not just a fast-travel menu—it is where half of Jagged Alliance 3's mechanics take place. Time is an active resource. Whenever your mercenaries walk through jungle, swamp, or mountain terrain, they build up Fatigue, their firearms wear down, and unbandaged wounds begin festering. If you initiate combat while your squad is "Tired" or "Exhausted," their starting Action Points will be crippled, turning simple skirmishes into slaughterhouses.
You must actively halt your march and dedicate time to Sector Operations. The four operations you will lean on constantly are:
- Treat Wounds: Bandages applied during combat only halt active bleeding; they do not restore lost maximum health. A doctor must spend operational hours consuming medical supplies to return mercs to full strength.
- Repair Items: Firearms lose condition every time they fire. When weapon durability falls below 100%, the chance of catastrophic weapon jams skyrockets. Having an assault rifle jam mid-burst in front of a shotgunner is lethal. Assign your Mechanic to keep all field weapons and armor at 100% condition using weapon scrap.
- Scout Intel: Scouting an adjacent sector with a high-Wisdom scout reveals enemy patrol routes, defensive emplacements, hidden flanking paths, and structural weak points. Entering a battle with full intel fundamentally tilts the encounter in your favor.
- Train Mercenaries: Use downtime to have high-stat veterans tutor weaker recruits. Pairing Barry with a low-Explosives merc slowly raises their skill ceiling without wasting precious combat actions.
Weapon Modification and the Stealth Kill Alpha Strike
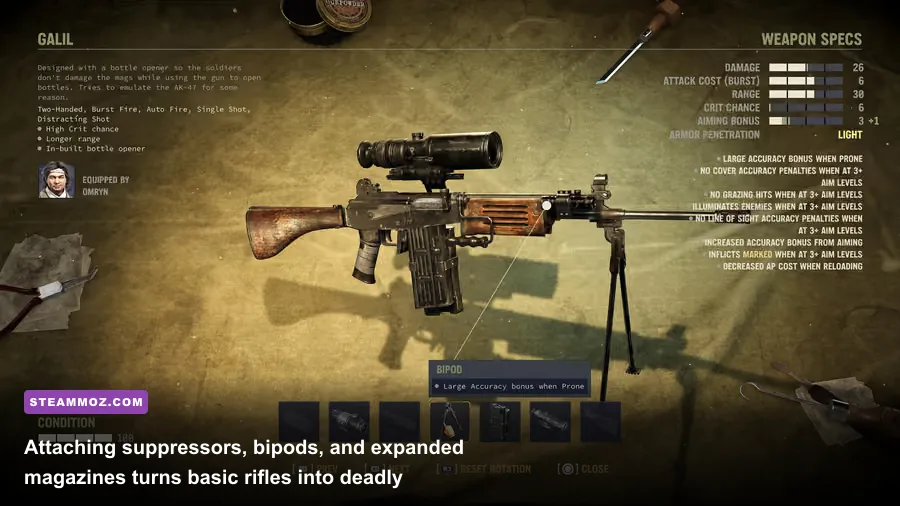
Standard weapons dropped by early Legion thugs are clunky, inaccurate, and loud. If you fire an unsuppressed weapon on your opening turn, every enemy within a massive sound radius immediately enters alert status, takes defensive cover, and calls for reinforcements. To dominate combat, you need to turn your squad into a silent assassination unit before open warfare begins, much like ranking your firearms effectively by their utility and silent lethality.
Every firearm in the game can be modified directly in the inventory screen using scrap steel, mechanical parts, and electrical chips. Modifying weapons does not require a workbench—just a mechanic with adequate skill and materials. Your first modification priority should always be fabricating Improvised Suppressors or Standard Silencers for your sniper rifles and sidearms. A suppressed Gewehr 98 or Winchester 1894 paired with a high-Marksmanship sniper allows you to score stealth headshot kills from maximum range without alerting the rest of the compound.
Keep a close eye on your ammunition calibers when managing your weapon arsenal and gear economy. Ammo is scarce in Grand Chien, and enemies drop calibers corresponding to their faction loadouts. The Legion predominantly uses 7.62x39mm (for AK-47s) and 9mm Parabellum. If you equip your entire squad with NATO-spec 7.62x51mm rifles or rare 5.56mm carbines early on, you will run completely out of ammunition within two major firefights. Diversify your squad's calibers, attach bipods to light machine guns for defensive overwatch setups, and always secure tactical high ground before breaking stealth.
By respecting the hidden accuracy mechanics, securing early diamond revenue, and running disciplined sector operations, you'll transform your ragtag band of cheap recruits into Grand Chien's most feared private military force. Check the official Jagged Alliance hub for recent patch notes and tactical balancing updates, and gear up for a long, brutal war of attrition.