
If you're building a backlog through PC Game Supply, start with these five games: Skyrim's Blackreach, Fallout 4's Covenant, The Witcher 3's hidden treasure trails, Portal 2's Rat Man dens, and GTA V's Mount Chiliad mystery. Each location rewards a different kind of curiosity, from following environmental clues to returning at a precise time, and several contain unique items, lore, or scenes that are easy to miss during a normal playthrough.
These aren't random collectibles buried in empty corners. They're the secrets that explain how developers guide attention, hide narrative context, and make familiar maps feel larger than they really are. Before you begin, turn on subtitles, carry a light source, keep a manual save, and resist fast travel when a quest sends you near one of these areas.
Skyrim's Blackreach Is More Than a Giant Cavern

Blackreach is the most rewarding secret location in The Elder Scrolls V: Skyrim, but many players only pass through it during “Discerning the Transmundane.” That is a mistake. The enormous underground Falmer city is packed with Dwemer ruins, hostile Chaurus, glowing mushrooms, and a hidden dragon encounter that feels like Bethesda daring you to experiment.
How to reach the hidden dragon
Once inside Blackreach, locate the huge artificial sun hanging above the central cavern. You can reach it from multiple structures, including Alftand, Mzinchaleft, and Raldbthar, depending on your route through the main quest. Stand beneath the glowing sphere and use the Unrelenting Force shout. The exact shout level doesn't matter; even a single-word Fus is enough. The blast triggers a hidden encounter with Vulthuryol, an ancient dragon that emerges from the cavern roof.
Vulthuryol is level-scaled, so don't expect a fixed damage number or a guaranteed legendary drop. The real prize is the encounter itself and the chance to fight a dragon in a space most players assume is just a transit area. Use pillars as cover against its breath, keep stamina available for repositioning, and avoid chasing it across the open floor while Falmer and Chaurus are still active.
The Crimson Nirnroot route
Blackreach also contains 44 Crimson Nirnroot plants for the “A Return to Your Roots” quest. The plants emit a distinctive red glow and make a sharp chime when you approach, but they can blend into the cavern's red lighting. Grab the quest from Avrusa Sarethi's journal in Sarethi Farm before collecting them. The quest reward is the Sinderion's Serendipity ability, which gives a 25 percent chance to create a duplicate potion when making one.
| Secret | Exact Trigger | Reward or Payoff | Best Preparation |
|---|---|---|---|
| Vulthuryol | Use Unrelenting Force beneath Blackreach's artificial sun | Hidden dragon fight and soul | Cover, healing potions, area control |
| Crimson Nirnroot | Collect 30 or more plants for Avrusa Sarethi | Sinderion's Serendipity | High Carry Weight and Candlelight |
| Alftand shortcut | Explore side platforms before the main elevator | Extra Dwemer loot and alchemy ingredients | Resist rushing the quest marker |
For a cleaner first run, use Candlelight or a torch rather than boosting brightness until the cavern loses its atmosphere. The official Skyrim page still captures the game's core appeal: exploration works best when the map doesn't tell you everything.
🎮 1bitHeart
Looking to experience this game? Grab your digital key directly on our store for $2.99.
View on Steammoz Store →Fallout 4 Turns Covenant Into a Moral Trap
Covenant looks like a cheerful pre-war suburb protected by a white picket fence, clean streets, and suspiciously friendly settlers. The town's hidden location is the Compound, a torture facility connected to the “Human Error” quest. You can discover it by investigating Covenant's residents, passing through the SAFE test, or following clues toward the abandoned shack outside town.
Finding the Compound without spoiling the choice
Speak with Honest Dan, who appears in Covenant after you begin “Human Error.” Ask about Amelia Stockton and the missing caravan. The investigation points toward the Compound, but the game doesn't force a single moral outcome. If you enter without permission, Covenant's residents can become hostile, so create a save before confronting the operators.
The most valuable detail is the SAFE test itself. It asks questions about threat recognition, and several answers are deliberately designed to expose prejudice rather than measure intelligence. Passing the test does not prove Covenant is safe; it simply grants access to the settlement. That contrast is the Easter egg: the town's polished presentation is part of the experiment.
Rewards, weapons, and the hard choice
Resolving the quest can award the unique ballistic weapon Justice, a combat shotgun with the Staggering legendary effect. Staggering gives a stagger chance on hit, which is especially useful against melee enemies and can interrupt charging super mutants. The weapon is not automatically the highest-DPS shotgun in every build, but it has excellent control value when paired with the Gun Nut and Skeet Shooter perks.
You can also acquire the Compound's password and explore rooms containing terminal entries that explain the SAFE project. Read those logs before making your decision. Killing everyone is fast, but it can permanently close off Covenant as a settlement. Letting the experiment continue preserves the town but leaves its victims in danger. Fallout 4 rarely gives this kind of uncomfortable consequence without a giant warning sign, which is why the location works so well.
| Approach | Immediate Result | Long-Term Cost | Best For |
|---|---|---|---|
| Side with Honest Dan | Rescue Amelia and finish the investigation | Covenant may become hostile | Role-playing a protective character |
| Protect the Compound | Keep the settlement intact | The experiment continues | Settlement access and pragmatic builds |
| Explore terminals first | Unlocks the full context | No immediate reward | Lore-focused playthroughs |
Bring a suppressed rifle or a strong VATS setup if you plan to enter the Compound aggressively. Its narrow corridors favor shotguns and automatic weapons, while the exterior's cover makes a scoped rifle safer. The official Fallout 4 site highlights player choice, and Covenant is one of the clearest places where that promise actually bites.
The Witcher 3 Hides Stories in Unmarked Places
The Witcher 3: Wild Hunt is full of marked quests, but its best secrets often sit just outside the interface. Skellige's sea caves, Velen's abandoned huts, and Novigrad's locked basements can contain diagrams, smuggler caches, and miniature stories told entirely through corpses and notes. One of the most memorable examples is the hidden treasure chain around Crookback Bog and the surrounding swamps.
Read the environment before opening chests
Geralt's Witcher Senses reveal more than red outlines. Listen for drowners underwater, inspect blood trails, and check nearby corpses for letters before looting a chest. Many treasure encounters deliberately place the reward after an ambush. If you dive toward a visible container without clearing the area, drowners can drain your health before the underwater crossbow becomes useful.
For underwater sections, use the crossbow rather than trying to swing a sword. The crossbow kills most standard drowners in a few hits and lets you maintain distance. Swallow provides regeneration, while Golden Oriole helps against poison-heavy enemies. If the encounter is on land, Northern Wind is excellent for freezing groups long enough to land a charged heavy attack.
Why the hidden gear matters
Witcher gear diagrams are not simply collectibles. The Griffin, Cat, Ursine, and Wolven schools support distinct combat rhythms. Griffin gear benefits sign-heavy characters; Cat gear amplifies fast attacks and critical pressure; Ursine favors heavy attacks, adrenaline, and survivability. A random hidden chest can therefore change your build path well before the main story expects you to commit.
| Exploration Tool | What It Reveals | Combat Pairing | Common Mistake |
|---|---|---|---|
| Witcher Senses | Blood trails, notes, hidden clues | Quen before investigating bodies | Looting before checking ambush points |
| Underwater crossbow | Smuggler caches and submerged routes | Swallow plus repeated ranged shots | Trying to sword-fight underwater |
| Explosives | Monster nests and blocked passages | Samum to interrupt groups | Ignoring nest destruction rewards |
Use the official Witcher 3 page as a reminder that this is an open-world RPG built around discovery, not checklist completion. You can also compare this style of exploration with Steamoz's Everspace 2 secret locations guide, where scanning and route planning replace Witcher Senses.
Portal 2's Rat Man Dens Explain Aperture's Collapse
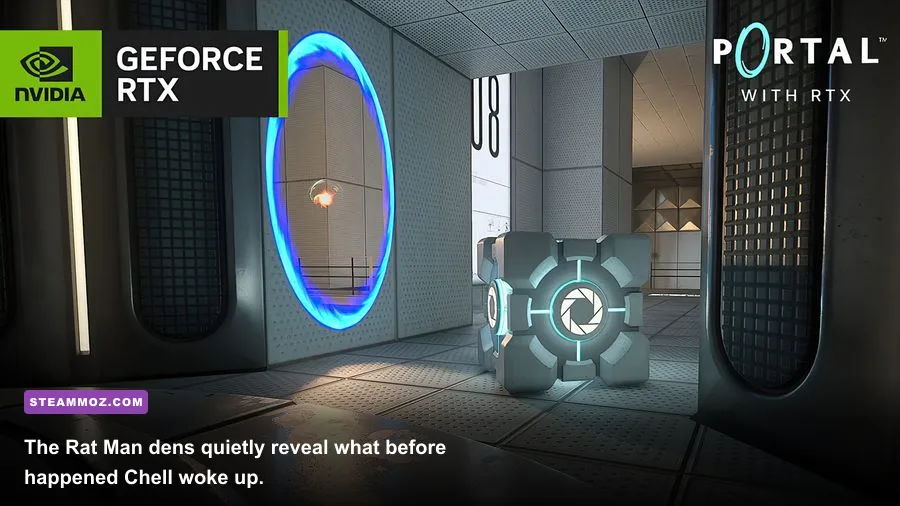
Portal 2's hidden Rat Man dens are easy to miss because they sit behind cracked walls and off-angle maintenance panels. The rooms belonged to Doug Rattmann, the paranoid Aperture scientist who helped Chell during the original Portal. Their scribbled warnings, diagrams, and observation points transform the campaign from a sequence of puzzles into a story about someone trying to manipulate events from the shadows.
How to spot the entrances
Look for damaged panels, exposed maintenance spaces, and surfaces that don't match the clean test-chamber geometry. In the early cooperative-looking chambers, pause after a puzzle rather than immediately entering the elevator. Portal 2 often places a hidden route behind a portalable wall or on a ledge that the intended solution never requires you to visit.
The dens contain no conventional weapon or stat upgrade, so their reward is context. Rattmann's drawings connect the testing chambers to Aperture's human experiments and suggest that Chell was selected for unusual resistance to neurotoxin. This also changes how you read GLaDOS: her comments aren't just jokes; they're fragments of a facility still shaped by old surveillance and failed control systems.
The speedrunner lesson
These rooms also teach a practical movement habit. Before solving a chamber, scan for every portalable surface and high ledge. Portal 2's physics reward momentum: a fling requires one portal on a low surface and another on a high surface, while a well-placed portal can preserve speed through a fall. Secret hunting makes you better at recognizing those relationships, especially in timed test chambers where the obvious route is intentionally slow.
Play with subtitles enabled because audio cues and off-screen lines can reveal machinery or character positioning. The official Portal website is archived, but the game itself remains one of the best examples of environmental storytelling hidden inside a puzzle framework.
GTA V's Mount Chiliad Mystery Still Rewards Patience

Mount Chiliad's summit contains a mural showing a mountain, an eye, a UFO, a cracked egg, and a stick figure. It is one of Grand Theft Auto V's most famous Easter eggs, but many players stop after seeing the painting. The actual secret requires three conditions: complete the main story, achieve 100 percent game completion, and return to the summit during a storm around 3:00 a.m.
What the mural points toward
The mural's symbols connect to three discoveries: a UFO above Mount Chiliad, another above Fort Zancudo, and a third over the Sandy Shores area. The Mount Chiliad UFO appears in bad weather after the 100 percent requirement is met. The Fort Zancudo craft can be seen from the military base area, while the Sandy Shores sighting requires careful timing and positioning.
Use a helicopter or the cable car to reach the summit, but land carefully because the mountain's uneven geometry can damage your aircraft. At 3:00 a.m., keep the camera facing the sky and avoid sleeping or switching characters. The storm's low visibility makes the craft easy to miss, so increase brightness slightly rather than cranking it high enough to flatten the scene.
Alien eggs and the deeper Easter eggs
The cracked egg appears to reference the alien egg found in a mission and the frozen alien beneath the opening sequence's ice. The game also hides a UFO-related hatch beneath the ocean, a ghost near Mount Gordo between 11:00 p.m. and midnight, and an alien appearance during the “Space Docker” hunt. Not every symbol has a confirmed single answer, and that's part of the design: Rockstar built a mystery that encourages players to compare evidence instead of handing them a final cutscene.
| Location | Requirement | Time or Trigger | What You See |
|---|---|---|---|
| Mount Chiliad summit | 100 percent completion | Storm, around 3:00 a.m. | UFO above the mural's mountain |
| Fort Zancudo | Reach the military base area | Usually after the story | UFO above the base |
| Mount Gordo | Visit the ghost's overlook | 11:00 p.m. to midnight | Jolene's ghost and a bloody message |
| Underwater hatch | Travel to the ocean location | Any time, with careful positioning | Strange light and unexplained sound |
If you want the full effect, don't use a guide video on your first attempt. Mark the locations, track the time, and let the game create the unease. Rockstar's official GTA V page barely hints at the rabbit hole, which is exactly why the community spent years mapping it.
How to Hunt Secrets Without Burning Out
The best approach is to treat secret hunting as a separate playstyle rather than another checklist. Complete the obvious objective, then inspect the route behind you. Developers frequently place Easter eggs where players feel safe: behind an elevator, above a quest entrance, inside an apparently decorative building, or at a time of day the main story never demands.
A practical exploration loadout
Carry a light source in dark RPG areas, keep at least one manual save before irreversible choices, and use subtitles when a secret depends on distant dialogue. In combat-heavy games, bring crowd control rather than only damage. Skyrim's Unrelenting Force, Fallout 4's VATS, Witcher 3's Quen, and Portal 2's momentum mechanics all solve different kinds of hidden-room problems.
| Game | Best Secret-Hunting Habit | Biggest Risk | Recommended Save Point |
|---|---|---|---|
| Skyrim | Search vertical spaces and unusual landmarks | Getting lost or overrun underground | Before entering Blackreach |
| Fallout 4 | Read terminals before choosing a faction | Locking out a settlement or reward | Before confronting Covenant |
| The Witcher 3 | Follow clues beyond the quest marker | Underwater ambushes | Before diving into a cache route |
| Portal 2 | Inspect every portalable surface | Missing a one-way hidden entrance | At the start of each chapter |
| GTA V | Track time, weather, and completion percentage | Arriving during the wrong condition | Before attempting the UFO sighting |
On the technical side, don't chase secrets at an unstable frame rate. A locked 60 FPS makes platforming, aiming, and timing-sensitive encounters more reliable than an inconsistent 100 FPS with stutter. If your PC struggles, Steamoz's ELEX crash and FPS fixes and Far Cry 6 performance settings offer useful optimization habits even for other open-world games.
Finally, save the strangest discovery for last. Whether it's Vulthuryol roaring through Blackreach, a ghost appearing on Mount Gordo, or a hand-drawn warning behind a Portal 2 wall, these moments work because you found them instead of being sent there. That is the real magic of the best PC Game Supply games: the map is only the beginning, and the most memorable rewards are often hiding just outside the route.