
The best missed secrets on PC and console include Skyrim's Notched Pickaxe, Fallout 4's alien crash site, Red Dead Redemption 2's vampire, GTA 5's Mount Chiliad mystery, Portal 2's Rat Man dens, and Cyberpunk 2077's hidden tributes. None requires a guide-breaking exploit: you need the right time, route, quest progress, or a willingness to climb somewhere the main story never sends you.
These discoveries are worth hunting because they do more than decorate a map. Some hand you unique weapons, some reveal environmental storytelling, and others completely change how you read a familiar location. The routes below work on PC, PlayStation, and Xbox unless a platform-specific difference is noted. If you enjoy this kind of treasure hunt, our guides to Eternal Destiny's hidden rewards and Everspace 2 secret locations are good follow-ups.
Skyrim's Notched Pickaxe Is Still One of Its Best Clues
At the summit of the Throat of the World, roughly 7,000 steps above Whiterun, a Notched Pickaxe is wedged into the rock. The item references Markus “Notch” Persson, Minecraft's creator, but it isn't just a joke weapon. The pickaxe grants five points of Smithing and deals 5 points of Shock damage on a successful hit. That makes it a useful early crafting tool if you reach the mountain before your Smithing skill is properly developed.
How to reach the summit
Follow the main quest through “The Horn of Jurgen Windcaller” and “The Way of the Voice” until the Greybeards open the path. You can then climb beyond High Hrothgar, using the stone steps and the Whirlwind Sprint shout where the route breaks. The item sits near the summit's exposed rock, above the word wall area. You don't need to finish “Alduin's Bane,” and fast travel to the mountain is available after discovering the location.
The real trick is temperature and stamina management. On Survival Mode, the climb can become dangerous because the summit's cold drains warmth and health. Carry hot food, use a torch, and avoid sprinting until a ledge is visible. The pickaxe respawns only under certain cell-reset conditions, so don't treat it like an unlimited Smithing shortcut.
| Secret | Reward | Requirement | Why It Matters |
|---|---|---|---|
| Notched Pickaxe | 5 Smithing, 5 Shock damage | Reach Throat of the World | Unique utility weapon and Minecraft reference |
| Paragon gems | Rare jewelry loot | Find Forgotten Vale portals | Unlocks hidden chests in the Inner Sanctum |
| Chillrend | Leveled glass sword | Explore Riftweald Manor | Strong frost and paralysis effects |
Don't confuse this with Skyrim's many unmarked weapon placements. The Notched Pickaxe is fixed, named, and deliberately positioned as a visual punchline. Bethesda's official Skyrim page remains useful for checking edition differences before modding or replaying.
🎮 1bitHeart
Looking to experience this game? Grab your digital key directly on our store for $2.99.
View on Steammoz Store →Fallout 4 Hides an Alien Blaster Behind a Blood Trail
Fallout 4's alien encounter is easy to miss because the crash event isn't tied to a quest marker. After reaching level 20, an unexplained flying object can streak across the sky and crash somewhere in the Commonwealth. The most reliable trigger is to travel near Oberland Station or the Mass Pike Interchange after that level threshold, then watch the sky for the bright green craft. If you miss the flight, the wreckage and smoke remain discoverable.
Follow the trail from the crash site
Start at the crashed UFO east of Oberland Station. Search around the wreck for green blood, then follow it through the trees and into a narrow cave. The wounded alien is inside. Killing it gives you the Alien Blaster Pistol and a small supply of Alien Blaster Rounds. The weapon has 50 base damage, a 100-round magazine with the appropriate upgrade path, and fast projectile behavior, but ammunition is extremely scarce outside the crash site.
That scarcity creates an important build decision. The Alien Blaster converts to Fusion Cell ammunition with the Fusion Mag modification, but its damage drops and the conversion requires Science! investment. Keep it on alien ammunition if you want maximum burst damage, or convert it for a pistol build that already carries Fusion Cells for laser weapons. VATS users benefit from the gun's low action-point cost, while stealth players should remember that the standard pistol isn't automatically silenced.
On survival difficulty, save before entering the cave. The alien can kill an underprepared character in a few shots, and the cave's cramped geometry makes retreat awkward. Bethesda's official Fallout 4 site confirms the game's major systems, but not every unmarked encounter, which is exactly why this one remains so satisfying.
Red Dead Redemption 2's Saint Denis Vampire Has a Strict Route
The Saint Denis vampire isn't a random spawn and won't appear just because you wander around at night. Arthur must inspect five pieces of graffiti around the city first. They are written in alleys, on walls, and near buildings around the central market and cathedral district. Each clue can be examined to add it to the journal. Once all five are logged, a final message points you to a narrow alley northwest of the cathedral.
Triggering the encounter correctly
Visit the marked alley between midnight and 1 a.m. The vampire is standing over a corpse and delivers a short speech before attacking. Disarm him with Dead Eye immediately if you want the safest outcome. Looting the body gives the Ornate Dagger, a unique melee weapon with decorative styling but no revolutionary damage advantage over standard knives.
The reward is less important than the scene's writing. The vampire uses religious language, calls Saint Denis “a city of sinners,” and leaves a corpse arranged like a ritual display. It is a compact example of how Red Dead Redemption 2 uses period detail and horror imagery without announcing a supernatural quest in the journal.
Do the graffiti in one session if possible. If a clue refuses to register, leave the district, sleep until daytime, and return on foot. Avoid starting a random encounter directly on top of a clue; Saint Denis can replace nearby ambient events and delay the final trigger. The game's official Rockstar page is worth checking for title updates, but the vampire sequence itself is unchanged across PC and console editions.
| Step | Time Window | What to Check | Common Mistake |
|---|---|---|---|
| Inspect five graffiti clues | Any time | Examine each writing prompt | Photographing it without inspecting |
| Read the final message | After clue five | Journal entry updates | Leaving before the final clue loads |
| Enter the alley | 12:00–1:00 a.m. | Vampire and corpse appear | Arriving during daylight |
| Loot the body | After the attack | Ornate Dagger | Walking away before searching |
GTA 5's Mount Chiliad Mystery Rewards Completionists

Inside the Mount Chiliad cable car station, a mural shows a mountain, an eye, a UFO, a cracked egg, and a jetpack-like figure. It is one of GTA 5's most famous Easter eggs, but the useful detail is the condition attached to the symbols: reach 100 percent game completion, then return to the summit during a storm between 3:00 and 4:00 a.m. A glowing UFO appears above the mountain.
What the mural actually confirms
The UFO is real and repeatable. The jetpack interpretation is not a confirmed reward in the original game. GTA Online later added alien and jetpack-related content, which caused years of confusion, but the single-player Mount Chiliad event doesn't hand Michael, Franklin, or Trevor a jetpack. The “egg” has been linked to other alien imagery, while the exact mural solution remains intentionally ambiguous.
For the cleanest attempt, complete the strangers-and-freaks missions, collectibles, property requirements, and miscellaneous objectives shown in the pause menu's 100 percent checklist. Save at the summit, set the clock to the target window through an in-game sleep cycle, and wait for storm weather. PC players can use a weather mod for testing, but mods can interfere with achievement tracking and should be disabled for a clean completion file.
Also check the underwater UFO near the north coast and the crashed UFO in the Grand Senora Desert. They are separate encounters, not steps in a single mandatory puzzle. Rockstar's official GTA V site makes no promise of a final conspiracy reward, so treat online theories as theories rather than undiscovered patch content.
Portal 2's Rat Man Dens Explain More Than the Dialogue
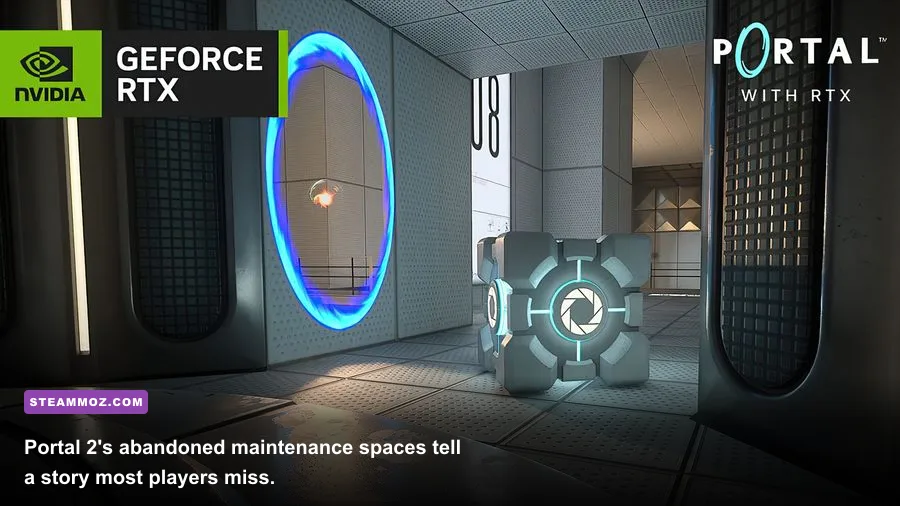
Portal 2 hides several Rat Man dens behind damaged panels and maintenance corridors. These spaces contain crude drawings, warning phrases, food scraps, and references to “the cake” and “the party escort submission position.” They belong to Doug Rattmann, the Aperture employee who predicted GLaDOS's betrayal and helped Chell before the events of the first Portal.
Where to look during the campaign
In the opening test chambers, listen for panels that sound hollow and watch for loose sections of wall. Portal 2's most memorable dens appear around early Test Chambers 6 and 16, plus later transitional areas where the facility's clean test surfaces give way to broken service spaces. Use portals to reach apparently decorative ledges; the game often places the accessible panel just outside the intended camera angle.
These rooms don't provide a weapon or achievement in every version, which is why many players rush past them. Their value is narrative. The wall art depicts GLaDOS's rise, Rattmann's isolation, and Chell as a potential savior. It also explains why the Companion Cube appears emotionally significant before the story ever says why.
On PC, ultrawide field-of-view settings can make hidden seams easier to spot, while console players should raise brightness slightly rather than turning on a guide video. Playing with headphones helps too: ventilation hum, panel movement, and distant machinery are deliberate navigation clues. Valve's official Portal site is still a charming archive of the series' design language.
Cyberpunk 2077 Turns Night City Into a Treasure Hunt

Cyberpunk 2077's best secrets are scattered across alleys, rooftops, and unmarked braindance-style set pieces. One of the most rewarding is the hidden room tied to the Edgerunners anime, found near the memorial area at the North Oak columbarium. Enter the columbarium and search the wall for David Martinez's niche. The inscription is a quiet tribute, not a combat encounter, but it adds context to Night City's cycle of disposable legends.
Hidden rewards worth prioritizing
For a physical reward, visit the abandoned hotel in the Badlands during the “Ghost Town” period or later free roam and explore its upper areas carefully. Cyberpunk's environmental loot often sits behind climbable debris, not obvious doors. Another excellent detour is the Arasaka waterfront and its locked industrial rooms, where access cards, shards, and iconic weapon clues reward double-jumping or Technical Ability investment.
The most useful secret-hunting setup is not a damage build. Equip a cyberdeck with Ping, use Recon Grenades to expose hostile silhouettes, and carry a weapon with a silencer for isolated guards. At 15 Technical Ability, multiple doors and loot routes open that a pure Reflexes build must bypass. A Phantom Liberty character can also use the Relic's Vulnerability Analytics to locate weak points, but don't assume every locked door needs a perk; many entrances are accessed from a roof, service ladder, or side alley.
| Secret Type | Best Tool | Recommended Stat | Payoff |
|---|---|---|---|
| Columbarium tributes | Map exploration | None | Character and anime references |
| Locked industrial rooms | Technical Ability or keycard | 12–15 Technical Ability | Components, shards, weapons |
| Roof access routes | Double Jump cyberware | Cyberware capacity | Alternate stealth paths |
| Hidden hostile caches | Ping and silenced weapon | Quickhack RAM | Safer loot collection |
If Cyberpunk crashes while you are loading dense districts, use the troubleshooting advice in our PC crash and FPS fixes guide as a starting point. Players on older hardware should also check our graphics settings guide for the same practical approach: reduce volumetric effects and crowd density before sacrificing texture quality.
How to Hunt Secrets Without Ruining the Discovery
Use a three-pass method. First, play naturally and mark anything visually strange: a dead end with fresh footprints, a light in an abandoned building, a wall panel that doesn't match, or an NPC repeating unusual dialogue. Second, check the game's own systems. Completion menus, journals, map filters, and time-of-day cycles often provide the intended key. Third, search for a precise route only after you've identified the clue yourself.
Save before entering unmarked caves, timed alleys, or one-time encounters. Some games reset NPC states when you fast travel, start a mission, or change the weather. Keep separate manual saves on console, and on PC don't combine achievement runs with console commands or major script mods. Secret hunting is at its best when the reward feels earned, not when a checklist turns the world into a scavenger hunt.
Most importantly, look up. Developers hide content above doorframes, on mountain ridges, behind waterfalls, and inside maintenance spaces because players instinctively follow the main route. The next great Easter egg probably isn't behind a giant glowing icon. It's the suspicious ledge you walked past three times.