
The fastest way to level and build cash in Call of the Wild: The Angler’s Spain Reserve is to stop chasing random trophy icons and run short, repeatable fishing loops. Start with missions and challenges near an outpost, target Iberian barbel and common carp with dependable bait or bottom rigs, then move into pike, zander, trout, and catfish once your tackle and line can handle them. The winning cycle is simple: complete objectives while fishing, sell or keep catches strategically, fast-travel back to the nearest outpost, and repeat instead of spending half the session driving between lakes.
The reserve is officially called the Iberian Peninsula Reserve, but plenty of players still call it the Spain Reserve. That distinction matters when searching for maps, species lists, and updates. This route also assumes the current open-world progression model: XP comes from catches, missions, challenges, exploration, and discovery, while the spendable currency is credits rather than a literal gold resource. If you mean “gold farming,” this is the practical cash route.
Build the right Spain Reserve farming loop

Your first goal is not a legendary fish. It is a loop with almost no dead time. Pick an outpost or fast-travel point beside several pieces of accessible water, accept every available mission and challenge, and fish toward the objective instead of treating missions as separate chores. A single barbel session can progress species catches, rod use, landing accuracy, hook-size challenges, and regional tasks at the same time.
Before leaving the lodge, check three things: the species objective, the tackle restriction, and the travel distance. If a challenge asks for a specific lure or fish, it should define the session. Otherwise, use the cheapest reliable rig you already own. Buying a new setup for every task destroys the credit advantage you are trying to create.
| Activity | XP Value | Credit Potential | Best Use |
|---|---|---|---|
| Mission objectives | High and consistent | Often includes direct rewards | Run these while fishing, never after |
| Regional challenges | Medium to high | Useful reward bursts | Stack several compatible objectives |
| Common barbel and carp | Reliable per catch | Steady and low-risk | Early progression and gear funding |
| Pike and zander | Good when located quickly | Better individual payouts | Mid-game targeted lure sessions |
| Rare or trophy fish | Potentially excellent | High variance | Late-session bonus attempts, not your base route |
There is no useful reason to inflate the route with fake “exact credits per minute” promises. Fish weight, rarity, mission state, skill bonuses, and your landing result change the payout. The stable metric is catches per travel minute. If a remote trophy spot gives one large fish every fifteen minutes but a nearby barbel bank gives five catches and two objectives in the same time, the nearby bank is the better farm.
🎮 Call of the Wild: The Angler - Spain Reserve
Looking to experience this game? Grab your digital key directly on our store for $4.99.
View on Steammoz Store →Fast leveling route for a fresh Spain Reserve character
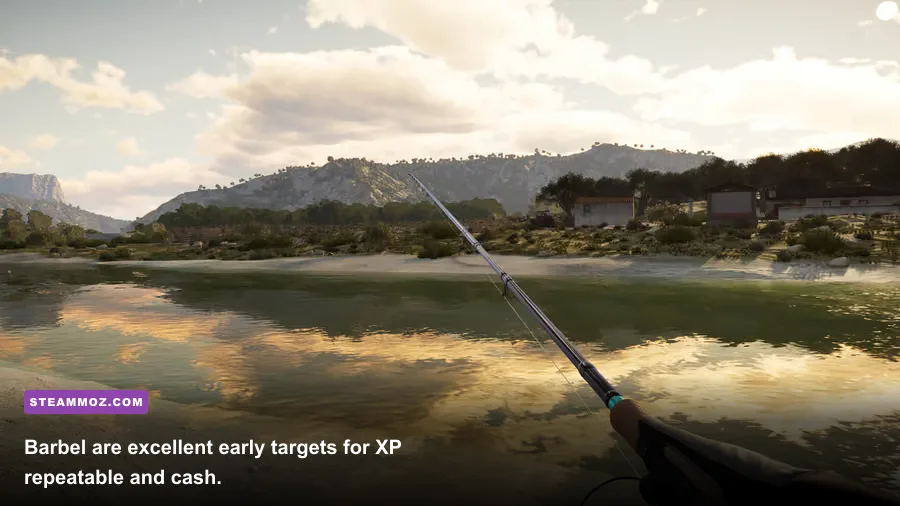
Begin by unlocking the reserve’s immediate viewpoints, cabins, outposts, and fast-travel nodes. Do not drive across the entire map just to reveal icons. Travel on foot or by vehicle only when a mission sends you in that direction, and activate every convenient travel point you pass. Exploration XP is useful, but the real payoff is removing future driving from your farming route.
Step 1: Clear the local missions first
At the first accessible outpost, speak with every available mission giver and inspect the challenge board. Prioritize tasks that overlap: catch a named species, use a particular fishing method, land fish in a weight range, or visit a nearby landmark. The order matters because mission rewards frequently unlock better equipment faster than unstructured fishing.
Step 2: Use barbel as your early consistency target
Iberian barbel are ideal for a new player because they let you learn bite timing, drag control, and line management without requiring the most expensive predator tackle. Fish likely holding water around current seams, rocky margins, bridge structure, and changes in depth. Cast beyond the visible target, retrieve through the feeding lane, and avoid yanking the rod the instant the float or indicator twitches. Let the bite develop before setting the hook.
For bait fishing, match hook size to the target shown in the tackle interface rather than blindly equipping the largest hook. A large hook can reduce bite frequency, while a tiny hook may make landing larger fish unnecessarily slow. The best early setup is the one that produces frequent, controllable fights and completes your active objectives.
Step 3: Convert every catch into multiple progression sources
After a catch, check the XP and challenge notifications before moving. If a species or technique objective is one catch away, stay put and finish it. Constantly relocating after every fish feels productive, but it usually sacrifices the bonus progression that makes missions powerful. Once nearby objectives are complete, fast-travel back to the outpost, restock only what you used, and take the next compatible assignment.
| Progression Stage | Primary Target | Recommended Method | Reason |
|---|---|---|---|
| Fresh character | Iberian barbel | Float or light bait setup | Frequent bites and low equipment pressure |
| Early upgrades | Common carp | Bottom fishing with patient drag control | Strong individual catches and repeatable water |
| Mid progression | Zander and northern pike | Soft-plastic or hard lure retrieval | Good XP when lure depth matches the lake |
| Higher tackle tier | Wels catfish and larger carp | Heavy bottom or robust bait setup | Better payouts, but longer fights and greater line risk |
| Completion phase | Trout, eel, and challenge species | Method-specific builds | Finish regional objectives efficiently |
For broader progression advice, compare this loop with Steamoz’s fast leveling and gold farming principles. The games are very different, but the useful idea is the same: remove downtime, stack objectives, and only chase high-variance rewards after the reliable income engine is working.
Best credit farming targets and when to switch
Barbel are your dependable starter income, but common carp become the better credit target when you can land them without exhausting line strength or spending too long on each fight. Carp reward patience. Keep the drag under control, steer the fish away from snags, and let stamina fall before trying to force it toward the net. A failed fight costs more than the bait: it also costs time and can interrupt a mission chain.
Bottom fishing works especially well for a farming session because you can monitor a stationary area and repeat casts with minimal movement. That makes it excellent for objectives involving a method, hook type, or number of catches. It is slower moment to moment than aggressive lure casting, but the consistency is valuable when you are building a bankroll.
Switch to predator fishing when you have a compatible rod, reel, line, and lure combination. Northern pike and zander are not simply “better fish”; they are better when you can find their depth quickly. Work a lure through drop-offs, weed edges, rocky transitions, and the mouths of inlets. Vary retrieve speed after several empty casts. If a lure produces no contact after multiple passes at the same depth, change the presentation rather than endlessly repeating it.
Wels catfish can produce memorable payouts, but they are a poor base farm for under-equipped characters. Heavy fish expose weak line, low reel capacity, poor drag technique, and insufficient rod control. Treat catfish attempts as a bonus after your mission route is complete, not as the first purchase target.
| Target | Gear Pressure | Income Profile | Farming Verdict |
|---|---|---|---|
| Iberian barbel | Low | Frequent, modest catches | Best starter XP and cash loop |
| Common carp | Medium | Slower bites, stronger payouts | Best dependable mid-game farm |
| Zander | Medium | Good lure-based progression | Excellent when depth is identified |
| Northern pike | Medium to high | Strong target value and challenge synergy | Worth switching to with suitable tackle |
| Wels catfish | High | High variance and long fights | Use for objectives or bonus attempts |
Gear, skills, and landing technique that save credits

Upgrade the weakest link, not the most exciting item. A stronger rod means little if your line snaps, and a large reel cannot rescue a poor hook choice. For a balanced route, prioritize line strength and reel capacity for the largest species in your mission list, then improve casting and lure control. If you are farming barbel, do not overbuild for catfish and reduce your bite frequency with oversized tackle.
Use the game’s skill and perk screens to reinforce the method you actually play. Fishing Accuracy and casting-related bonuses are valuable for lure users because landing a lure beside structure matters more than theoretical maximum distance. Reel and line-management bonuses help when targeting carp or catfish. Spotting Knowledge is useful for identifying fish activity and reducing wasted casts, while fish-finding assistance becomes more valuable when you are searching for a named or challenge-specific species.
Keep one flexible all-round setup and one specialist setup. The all-round rod handles barbel, smaller carp, and general mission work. The specialist setup should be built around either predator lures or heavy bottom fishing. Carrying a third niche setup early usually ties up credits that would be better spent on line, hooks, bait, and travel access.
The landing sequence
Hook cleanly, then keep the fish at a manageable angle instead of pulling directly against its strongest run. When the line indicator warns of excessive tension, release pressure briefly; a lost fish is never worth a reckless burst of reeling. Use drag adjustments before the fish reaches weeds, rocks, or other obstructions. The final approach is where inexperienced players throw away profitable catches: slow down, maintain control, and only net when the fish is genuinely in range.
For a useful mindset on performance-focused tuning, Steamoz’s settings guide for Dragonkin makes a similar point: stable input and clear visual information matter more than flashy maximum settings. In The Angler, readable water, a stable frame rate, and clear bite indicators directly improve your landing consistency.
Spain Reserve route optimization and common traps
Fast travel is not just convenience; it is part of the economy. Every unnecessary vehicle trip burns real minutes during which you could have completed another cast. Create a mental circuit linking an outpost, one high-confidence barbel or carp bank, a nearby challenge location, and a second waterway for the next species objective. Once the circuit stops producing, move to another circuit rather than wandering without a task.
Do not sell every fish immediately if a mission or challenge may need that species, method, or weight range. Check active objectives first. Conversely, do not hoard ordinary catches indefinitely. Storage clutter makes it harder to see genuinely useful specimens, and low-value fish are working capital when you need new line or bait.
- Bad habit: driving to every undiscovered icon before starting missions. Fix: reveal locations while following objectives.
- Bad habit: using trophy tackle for common fish. Fix: match hook, bait, and line to the target’s expected size.
- Bad habit: changing lakes after one empty cast. Fix: test depth, retrieve speed, and presentation first.
- Bad habit: forcing a powerful fish with maximum drag. Fix: manage tension and protect the line during runs.
- Bad habit: buying every new rod unlock. Fix: upgrade the setup that supports your current mission loop.
Community maps can help, but verify locations against the live game. Reserve updates, balancing changes, and multiplayer conditions can alter activity. The official Steam page is the safest place to check current DLC ownership and patch information, while the official news page is better for reserve and gameplay updates.
A practical 30-minute farming plan
Use this schedule whenever you want dependable levels and credits rather than a sightseeing session. First, spend two minutes at the outpost checking missions, challenges, inventory, and tackle restrictions. Next, fish the nearest barbel or carp water for ten minutes, staying until at least one objective is completed. Then spend ten minutes on the species or technique that overlaps with your next mission. Finish with five minutes of selling, restocking, and fast-travel preparation.
| Time | Action | Priority | Success Check |
|---|---|---|---|
| 0–2 minutes | Review missions and equip the correct rig | Remove future travel | At least two objectives overlap |
| 2–12 minutes | Farm nearby barbel or carp | Reliable catches | Complete a catch or method objective |
| 12–22 minutes | Target the next mission species | XP bursts and unlocks | Use the required lure, bait, or hook |
| 22–27 minutes | Attempt a predator or larger-fish bonus | Upside without risking the loop | Stop if tackle pressure becomes excessive |
| 27–30 minutes | Sell, restock, and fast-travel | Keep downtime low | Leave ready for the next circuit |
The biggest gains come from discipline, not a secret lake or a mythical gold exploit. Run missions alongside frequent species, protect your line, buy only targeted upgrades, and treat trophy fishing as a bonus after the reliable route is paid for. For more game-economy route planning, Steamoz’s winter leveling and gold route guide is a useful comparison, but in the Iberian Peninsula Reserve the winning currency is time: more casts, fewer detours, and smarter tackle choices.
Once your barbel-to-carp loop is funding upgrades, add pike and zander objectives to the circuit, then reserve catfish and trophy attempts for sessions where your equipment can survive the fight. That progression curve keeps XP moving, keeps credits flowing, and turns Spain’s huge map from a travel burden into a repeatable fishing operation.