For the best Resident Evil 4 Remake Steam PC performance, start with 1080p or 1440p, use DLSS 2 or FSR 2 on Quality, disable ray tracing, turn Hair Strands off, and lower Volumetric Lighting, Shadow Quality, and Screen Space Reflections before touching textures. That profile keeps the game sharp while targeting a stable 60 FPS on a modern mid-range PC; stronger GPUs can push 90, 120, or higher with the same priorities.
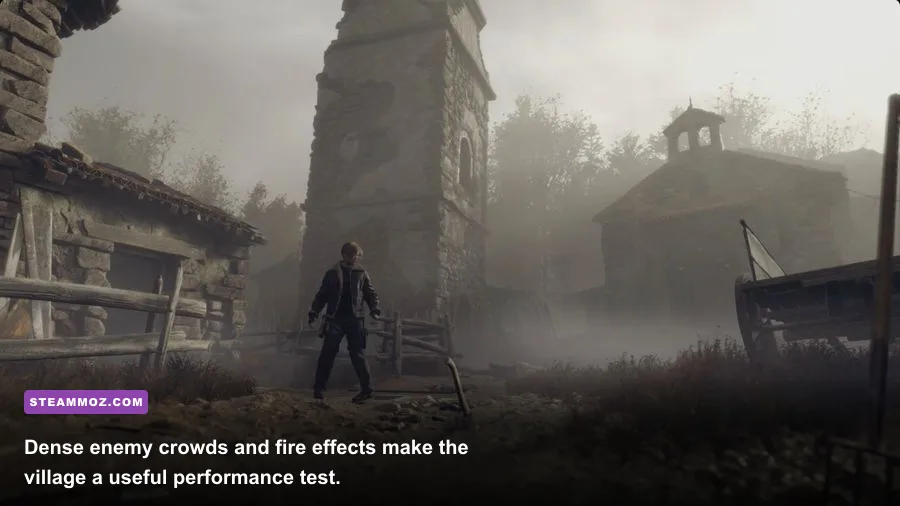
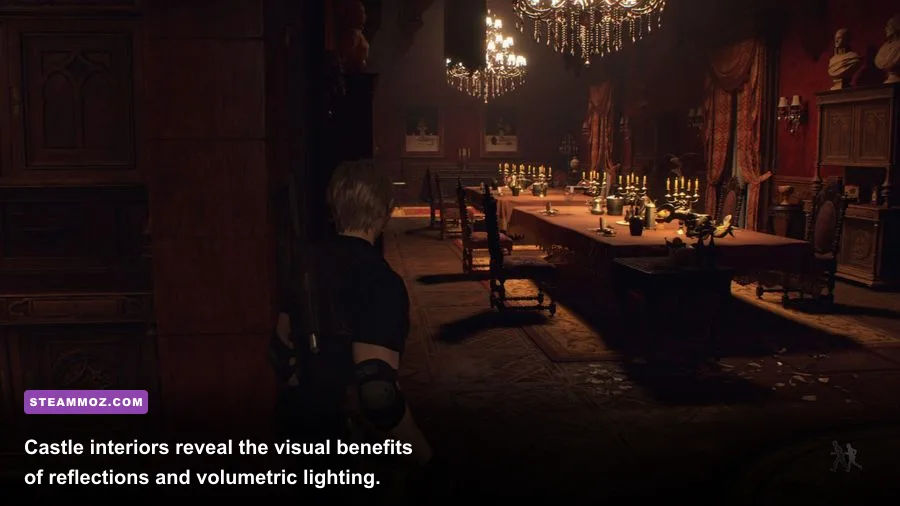
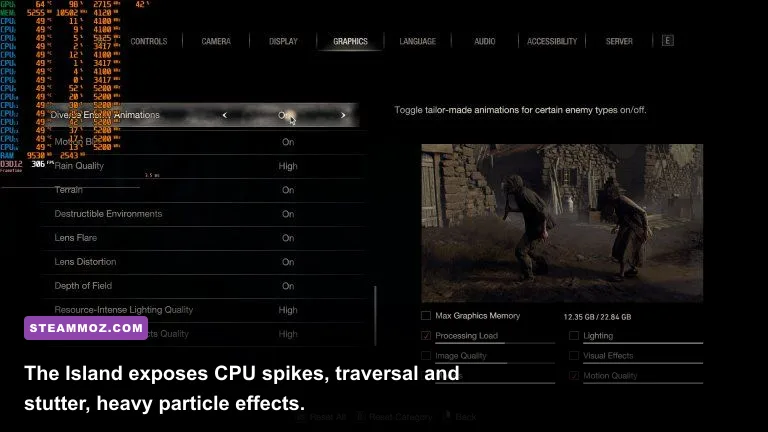
Capcom’s RE Engine makes the remake look extraordinary, but it also punishes careless settings choices. The village can throw dense foliage, fire, rain, Ganados, and volumetric fog at your GPU simultaneously. The Castle leans harder on reflections and interior lighting, while the Island adds particle-heavy combat and CPU-intensive enemy encounters. A setup that looks fine in the opening chapter can still collapse during the first village siege.
Before changing anything, check the official Resident Evil 4 Steam page for current requirements and patches. Then use the demanding locations below as your real benchmark instead of trusting the opening cutscenes.

The Best Baseline Settings for Smooth Performance
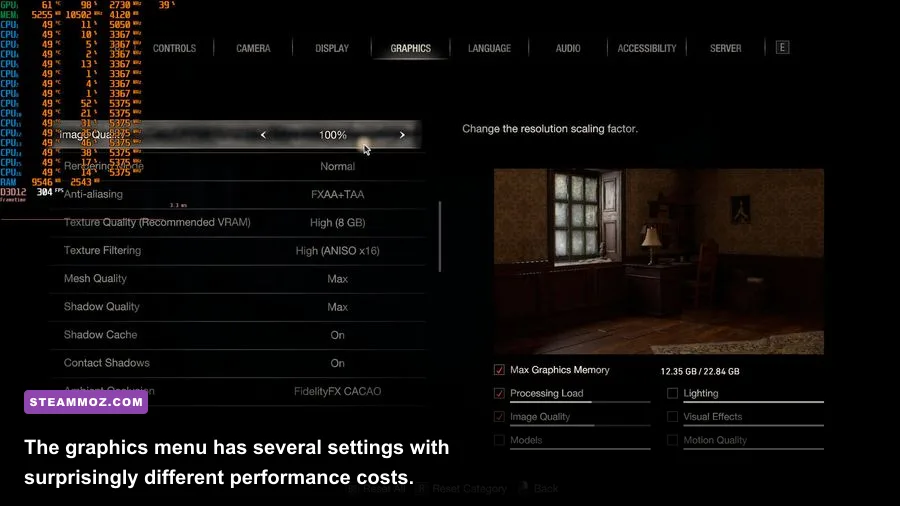
Use this as the default profile for a gaming PC with 16GB of RAM and a graphics card around the RTX 3060, RTX 4060, RX 6600 XT, or better. It deliberately protects frame-time consistency rather than chasing the highest possible screenshot quality. Resident Evil 4 feels best when aiming, parrying, and quick-turning stay responsive, so a locked 60 FPS is preferable to a wildly fluctuating 85 FPS.
| Setting | Recommended Value | FPS Impact | Visual Note |
|---|---|---|---|
| Display Mode | Fullscreen | Low | Usually gives the cleanest presentation and reliable frame pacing. |
| Resolution | 1920x1080 or 2560x1440 | Very High | Use your monitor’s native resolution if the GPU can sustain it. |
| Ray Tracing | Off | Very High | Reflections improve, but GPU load and frame-time spikes rise sharply. |
| Texture Quality | High, 2GB to 4GB | Low to Medium | Keep this high if the VRAM meter remains comfortably below the limit. |
| Texture Filtering | High / 16x | Low | Improves floor, wall, and weapon texture clarity at oblique angles. |
| Mesh Quality | High | Medium | Preserves geometry detail across village structures and foliage. |
| Shadow Quality | Medium | Medium to High | One of the safest settings to reduce when the village gets busy. |
| Contact Shadows | On | Low to Medium | Adds grounding beneath Leon, enemies, and nearby objects. |
| Volumetric Lighting | Medium | High | Lower it first if fog, smoke, and sunlight cause GPU drops. |
| Screen Space Reflections | On | Medium | Useful for wet floors and shiny surfaces; disable for extra headroom. |
| Subsurface Scattering | On | Low | Keeps skin and organic surfaces from looking unnaturally flat. |
| Hair Strands | Off | Medium to High | Leon’s hair looks nicer, but the feature is expensive in motion. |
| Particle Lighting | Medium | Medium | Controls the cost of fire, sparks, explosions, and muzzle flashes. |
| Ambient Occlusion | On | Low to Medium | Improves contact depth around corners and objects. |
| Anti-Aliasing | TAA or upscaler default | Low | Use the upscaler’s own reconstruction when DLSS, FSR 2, or XeSS is active. |
Leave Motion Blur, Depth of Field, Lens Distortion, and Lens Flare to personal taste. They generally matter far less to performance than volumetrics or ray tracing. I disable Motion Blur during combat because it makes rapid camera turns muddy, but keeping Depth of Field on preserves the game’s cinematic close-ups without a meaningful FPS penalty.

🎮 FORM
Looking to experience this game? Grab your digital key directly on our store for $14.99.
View on Steammoz Store →Upscaling, Resolution, and VRAM Explained
Upscaling is the biggest performance lever in the Resident Evil 4 Remake PC graphics menu. At 1440p, DLSS 2 or FSR 2 Quality renders internally below native resolution and reconstructs the final image. That gives your GPU fewer pixels to shade while preserving much more detail than simply dropping the monitor resolution to 1080p.
| Target | Upscaler Profile | Best Starting Point | Expected Trade-Off |
|---|---|---|---|
| 1080p / 60 FPS | Native or Quality | TAA or DLSS/FSR Quality | Native is sharpest; Quality helps weaker GPUs in heavy scenes. |
| 1440p / 60 FPS | DLSS Quality or FSR 2 Quality | Quality preset | Excellent balance between clarity and GPU load. |
| 1440p / 90-120 FPS | DLSS Balanced or FSR 2 Balanced | Balanced preset | More shimmer and fine-detail softness around foliage. |
| 4K / 60 FPS | DLSS Balanced or Performance | Balanced first | Performance mode can soften hair, wires, and distant vegetation. |
| Steam Deck | FSR 2 Balanced or Performance | 1280x800, 30 FPS cap | Stable pacing matters more than chasing an unstable 40 FPS. |
Choose DLSS if you have an RTX card and want the cleanest reconstruction. FSR 2 is the flexible alternative for Radeon, Arc, and GeForce hardware. At 1080p, Balanced and Performance modes can look noticeably soft, especially on Leon’s hair, weapon wires, and distant tree branches. Quality is the sensible floor unless you’re desperate for a locked frame rate.
Watch the VRAM estimate in the menu rather than blindly selecting the highest texture preset. The game’s texture options can show a memory requirement that exceeds your card’s available VRAM. That often leads to hitching, asset pop-in, or severe drops when turning quickly, even if the average FPS counter looks healthy. A card with 8GB should usually stick to High textures without maxing every texture-related option. On 4GB cards, Medium is safer.
Texture Quality mainly affects memory capacity, not raw FPS, until the VRAM budget is exceeded. That’s why it’s usually smarter to lower Hair Strands, shadows, or volumetric effects first. If you’re troubleshooting general PC instability, our ELEX crash and FPS fixes also cover useful basics such as driver cleanup, overlays, and power settings.
Which Settings Actually Cost the Most FPS?
Not every “High” setting deserves the same attention. Resident Evil 4 Remake’s performance profile is unusually lopsided: a few options consume huge chunks of GPU time, while others barely move the frame counter. Change them in the right order and you can recover smoothness without making the whole game look flat.
Ray Tracing
Ray tracing is the first switch to test, and usually the first one to turn off. It adds more convincing reflections in puddles, glossy floors, mirrors, and wet environments, but the cost is substantial. The setting can reduce performance in already difficult scenes and amplify stutter when multiple effects overlap. If you own an RTX 4070-class card or better and play at 1080p or 1440p with DLSS Quality, RT can be worthwhile. For a stable 60 FPS target, leave it disabled.
Hair Strands
Hair Strands makes Leon’s hair and some character hair react with more individual movement. It’s a lovely close-up feature and a questionable priority during a Ganado ambush. The effect is particularly expensive at higher resolutions, and the visual difference disappears while you’re sprinting through the village or aiming down a weapon sight. Turn it off on mid-range GPUs.
Volumetric Lighting and Fog
These settings control the thick shafts of light, mist, smoke, and atmospheric depth that give the remake its horror mood. High settings look superb in the Church, the Castle, and foggy outdoor paths, but they can hammer performance when the camera sees a large illuminated volume. Medium is the sweet spot. Low is a last resort because the world starts losing some of its deliberate cinematic depth.
Shadows and Reflections
Shadow Quality affects both the resolution and distance of cast shadows. Dropping from High to Medium often produces a worthwhile gain with only slightly softer edges. Screen Space Reflections are more scene-dependent: they shine in wet areas and polished interiors but contribute little in dry forest paths. Disable SSR after volumetrics if you still need extra GPU headroom.
Mesh Quality and Particle Lighting
Mesh Quality is more important than its FPS cost suggests. Lower values can simplify distant buildings, foliage, and environmental geometry, making the village feel visibly less rich. Keep it High unless you’re GPU-limited by a large margin. Particle Lighting is a better compromise when grenades, burning enemies, and muzzle flashes trigger dips. Medium keeps the combat spectacle intact while trimming the cost of overlapping effects.
| Setting to Lower | Use It When | Typical Benefit | What You Give Up |
|---|---|---|---|
| Ray Tracing | Any GPU below high-end RTX class | Large GPU headroom | More basic reflections and lighting. |
| Volumetric Lighting | FPS drops in fog, smoke, or sunlight | High | Less atmospheric light depth. |
| Hair Strands | GPU usage is high during normal combat | Medium to High | Less detailed hair simulation. |
| Shadow Quality | Frame rate dips around buildings and crowds | Medium | Softer, shorter-distance shadows. |
| Screen Space Reflections | Indoor or wet areas cause drops | Medium | Less convincing reflective surfaces. |
| Particle Lighting | Explosions and fire cause spikes | Medium | Less dramatic lighting on particles. |
| Texture Quality | VRAM warning or traversal hitching appears | Stability benefit | Lower surface detail, especially up close. |
Best Profiles for Low, Mid-Range, and High-End PCs
The official PC requirements list an Intel Core i5-7500 or AMD Ryzen 3 1200, 8GB of RAM, and a GTX 1050 Ti or Radeon RX 560 for the minimum 1080p/45 FPS target on Low. The recommended target calls for an Intel Core i7-8700 or Ryzen 5 3600, 16GB of RAM, and a GTX 1070 or RX 5700 for 1080p/60 FPS on High. Those targets are useful baselines, not guarantees for every chapter.
| PC Class | Resolution and Target | Core Settings | Upscaling and RT |
|---|---|---|---|
| Entry Level: GTX 1050 Ti / RX 560 | 1080p, 30-45 FPS | Low preset, Medium textures if VRAM allows, shadows Low, volumetrics Low | FSR 2 Performance or Balanced; RT Off |
| Mainstream: GTX 1660 Super / RX 6600 | 1080p, locked 60 FPS | High textures, mesh High, shadows Medium, volumetrics Medium, hair off | FSR 2 Quality; RT Off |
| Modern Mid-Range: RTX 3060 / RX 6700 XT | 1440p, 60 FPS | High textures, mesh High, shadows Medium-High, volumetrics Medium | DLSS or FSR 2 Quality; RT Off |
| Upper Mid-Range: RTX 4070 / RX 7800 XT | 1440p, 90-120 FPS | High textures, mesh High, shadows High, volumetrics Medium-High | DLSS Quality or FSR 2 Quality; RT optional |
| High-End: RTX 4080 / RX 7900 XTX | 4K, 60-100 FPS | High textures, mesh High, shadows High, volumetrics High | DLSS or FSR 2 Quality; RT optional, test carefully |
On an entry-level card, don’t chase the official 45 FPS number with an uncapped frame rate. A 30 FPS cap with consistent frame pacing can feel better than a range between 35 and 50, especially during parries and knife prompts. If your monitor supports variable refresh rate, enable FreeSync or G-SYNC and cap the game a few frames below the panel’s maximum refresh rate.
CPU performance matters more than many players expect. The game can become CPU-limited during the village siege, crowded Castle fights, and Island encounters with multiple enemies and effects. If lowering resolution does nothing, your processor is probably the bottleneck. Close browser tabs, disable unnecessary overlays, and use Windows Game Mode. Avoid aggressive background recording if you’re already seeing traversal hitching.
How to Test Your Settings Without Guessing
Resident Evil 4 Remake doesn’t offer a perfect built-in benchmark, so use repeatable gameplay routes. Load the Village square before the first major siege, walk through the Church area after acquiring the Insignia Key, and revisit the Castle’s reflective corridors. On the Island, test a large combat encounter rather than a quiet laboratory hallway.
Run each test for at least two minutes. Watch the 1% lows and frame-time graph, not just the average FPS. A 70 FPS average with repeated drops to 35 feels worse than a locked 60. Cap the game to your actual sustained result: 60 FPS for most systems, 90 FPS for a strong 1440p machine, or 30 FPS for hardware near the minimum specification.
A practical tuning order
First, select your resolution and an upscaler Quality mode. Second, disable ray tracing and Hair Strands. Third, set Volumetric Lighting to Medium. Fourth, lower shadows and Screen Space Reflections if heavy scenes still dip. Only after that should you reduce Mesh Quality or textures. This order protects the remake’s excellent character and environment detail while attacking the expensive effects that players notice least during combat.
Restart the game after major changes and allow shader compilation to finish if prompted. Updating your GPU driver can help, but don’t assume every new driver fixes traversal stutter. RE Engine games can still hitch when streaming new assets, particularly during fast movement between areas. Installing the game on an SSD is strongly recommended; it won’t magically raise average FPS, but it can reduce asset-loading delays.
If the game crashes after changing settings, delete or rename the configuration file only as a last resort, then rebuild your profile gradually. Also test with Steam Overlay, Discord Overlay, and third-party monitoring tools disabled. For broader troubleshooting habits, Steamoz’s guide to crashes and low FPS fixes is useful even though it covers a different title.
Finally, keep an eye on the official Resident Evil 4 website and Capcom’s game support channels for patches. Community fixes and driver updates can change the best choice for upscaling or ray tracing over time. For most Steam PC players, though, the winning formula remains consistent: Quality upscaling, ray tracing off, Hair Strands off, Medium volumetrics, High textures within your VRAM budget, and a firm frame-rate cap. That combination keeps Leon’s aim steady without stripping away the remake’s oppressive atmosphere.
Once you’ve found a stable profile, resist the temptation to keep tweaking after every chapter. The game’s worst moments are short but demanding, and a setting that survives the village siege will usually behave well everywhere else. Smooth frame pacing is the real upgrade here—not a benchmark number that disappears the moment a chainsaw Ganado charges through the fog.