
The best Lords of the Fallen armor sets are Pieta’s Set for Radiant builds, Tancred’s Set for heavy physical defense, Harrower Dervla’s Set for Umbral characters, and Lightreaper’s Set for Inferno users. Most boss sets are purchased from Molhu at Skyrest Bridge after exchanging the matching Remembrance, while Fitzroy’s Set and several early heavy sets come from chests or merchants during exploration.
Armor in Lords of the Fallen is not locked to a class. You can mix individual pieces, but matching a set is useful when you need a clear resistance profile, enough physical protection to survive late-game hits, or a look that fits a specific build. Check the weight total before equipping anything: crossing an encumbrance breakpoint can make dodging noticeably slower.
Best Armor Sets Ranked
S-Tier — Pieta’s Set: This is the best early-to-midgame Radiant armor target. It provides strong Holy resistance without the extreme weight of the largest plate sets, making it a natural match for Radiant spellcasting, the Pieta’s Sword, and the Radiant Purifier starting class. It also performs well against enemies using Wither and physical damage. Defeat Pieta, She of Blessed Renewal, at Skyrest Bridge, then take Pieta’s Remembrance to Molhu in the Umbral area of Skyrest Bridge. Buy the helm, armor, gauntlets, and leggings from Molhu with Umbral Scourings.
S-Tier — Tancred’s Set: Tancred’s set is the strongest all-purpose heavy option on this list. It has excellent physical defense and dependable resistance against the punishment dealt by late-game knights and bosses. Its weight is high, so pair it with Endurance investment and a heavy weapon rather than trying to stay lightly equipped. Defeat Tancred, Master of Castles, in the Tower of Penance, then use Tancred’s Remembrance at Molhu to unlock the four pieces.
S-Tier — Harrower Dervla’s Set: This is the most reliable choice for an Umbral or Wither-focused build. It offers a balanced mixture of physical, Wither, and elemental protection while remaining more practical than the heaviest plate armor. Defeat Harrower Dervla, the Pledged Knight, in Revelation Depths. The boss encounter continues into The Unbroken Promise, so finish the full fight before visiting Molhu. Exchange Remembrance of the Unbroken Promise for the set.
A-Tier — Lightreaper’s Set: Lightreaper’s armor suits Inferno builds that want strong fire protection and a threatening late-game appearance. It is especially appropriate for the Lightreaper’s Umbral Eye style of aggressive play, paired with Inferno spells or dual-wielded weapons. The Lightreaper can appear in several locations, but the definitive late-game encounter is in Bramis Castle. Defeat him, collect Remembrance of the Lightreaper, and trade it to Molhu for the complete set.
A-Tier — Judge Cleric’s Set: Judge Cleric’s armor is a strong Radiant alternative to Pieta’s set, with better late-game protection and a heavier profile. It is worth targeting if your character uses Radiant catalysts, holy weapons, and the Radiant spell school but has enough Endurance to carry plate. Defeat Judge Cleric, the Radiant Sentinel, in the Empyrean. Her Remembrance unlocks the set at Molhu.
A-Tier — Fitzroy’s Set: Fitzroy’s set is one of the best non-boss armor rewards available before the final areas. It provides solid physical defense and useful fire resistance for a moderate weight, which makes it a practical upgrade for melee characters exploring Lower Calrath. Search Fitzroy’s Gorge for the armor chest near the main route through the gorge and its elevated wooden platforms. Unlike remembrance equipment, this set does not require Umbral Scourings.
B-Tier — Hallowed Knight’s Set: This is the best simple starting option for a physical build. The Hallowed Knight class begins with it, and pieces can also be obtained through early equipment access rather than a boss remembrance. It has no single dominant elemental resistance, but its balanced physical protection and manageable weight keep it useful through the Forsaken Fen and lower Calrath.
Where to Get Pieta, Tancred, and Dervla’s Sets
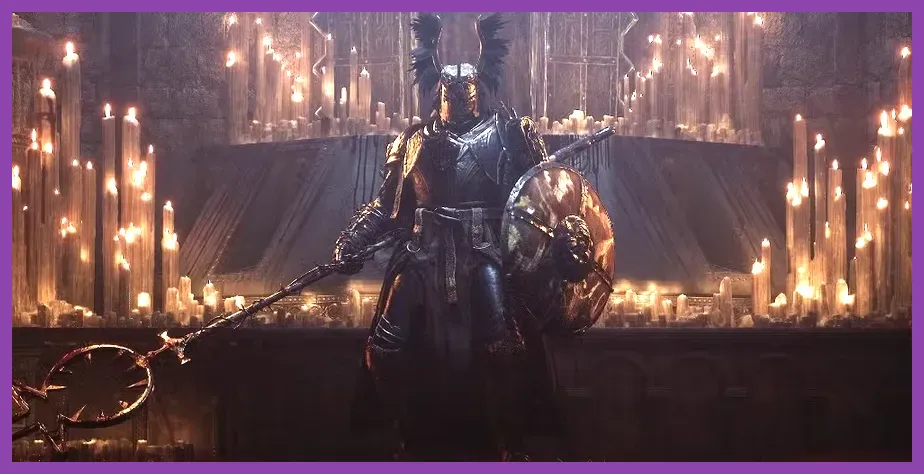
Pieta’s Set — Skyrest Bridge
Start at the Vestige of Ethryg in Skyrest and enter the boss arena at the end of the early Skyrest path. Pieta’s attacks deal Radiant damage and can create delayed holy explosions, so dodge through her sword swings rather than retreating in a straight line. After victory, travel to Molhu’s room, shift into Axiom if necessary to interact with the correct route, and spend the Remembrance of Pieta plus Umbral Scourings on each armor piece. You do not need to wear all four pieces to benefit from its resistance profile.
Tancred’s Set — Tower of Penance
Reach the Tower of Penance from the Leprosarium of the Hallowed Brothers and work upward through the prison-like tower. Tancred uses a large shield, a sweeping greatsword, and a second phase that adds faster ranged pressure. Break his rhythm by staying near his flank after the shield combo, then punish the recovery after his overhead strike. Once the Remembrance is available, Molhu sells Tancred’s Helm, Armor, Gauntlets, and Leggings. This is the clearest armor target for a high-Endurance greatsword or grand hammer character.
Harrower Dervla’s Set — Revelation Depths
Revelation Depths is accessed through the mines beneath Leprosarium routes. Dervla’s first phase uses a long sword, a shield, and delayed projectiles, while The Unbroken Promise adds large-area attacks and dangerous timing traps. Watch the floor and avoid attacking during the delayed eruption telegraph. Completing the entire encounter is mandatory because the second phase determines the Remembrance used by Molhu. The set is particularly valuable when your build suffers from Wither damage in Umbral-heavy areas.
Best Armor Locations Outside Boss Rewards

Fitzroy’s Set — Fitzroy’s Gorge: Explore both sides of the gorge rather than following the central road only. The relevant chest is placed along the raised platforms and side route overlooking the canyon. Use Umbral sight if a platform or ladder appears to be missing. Fitzroy’s equipment is a strong bridge between early Hallowed Knight gear and remembrance armor, especially for characters that need protection without becoming heavily encumbered.
Angel of the Void Set — Fief of the Chill Curse: This set is found while exploring the frozen Fief of the Chill Curse area. Search the optional side paths, wooden structures, and Umbral-accessible ledges instead of rushing directly toward the zone boss. Its cold-focused protection makes it useful while clearing the Fief and other areas with frostbite pressure. Because the pieces are scattered behind exploration routes, use the Umbral Lamp to reveal hidden bridges and soulflay targets.
Ruiner armor pieces — Fitzroy’s Gorge and Lower Calrath routes: Ruiner-themed equipment is tied to exploration around the lava-filled Calrath progression rather than a Molhu remembrance purchase. Revisit fire-heavy routes after acquiring the ability to enter Umbral paths safely. These pieces are a sensible choice for characters needing Inferno and burn resistance before Lightreaper’s Set becomes available.
Sovereign Protector Set — Upper Calrath: Search the fortified Upper Calrath streets and interior side rooms for the chest containing this heavy equipment. The area has multiple blocked routes and Umbral ladders, so leave no side courtyard unchecked. Sovereign Protector’s high physical protection favors shield users and strength builds, although the weight demands careful Endurance management.
How to Choose and Upgrade Each Set

Use the defense screen rather than the armor name alone. For a Radiant build, Pieta’s or Judge Cleric’s Set should be compared by Radiant resistance and weight. For Inferno, Lightreaper’s or Ruiner-related pieces are better starting points. For Umbral, Harrower Dervla’s Set gives the most dependable overall coverage. If a boss repeatedly kills you with a specific element, replace one or two pieces instead of forcing a full matching set.
Upgrade the armor pieces that stay equipped instead of spreading materials across every item you find. Blacksmith Gerlinde at Skyrest Bridge handles equipment improvements after you complete her early progression and provide the required materials. Armor does not need the same upgrade priority as your main weapon, but improving a favored chest piece and helm can make a measurable difference against physical boss combos.
Use a simple equipment plan: keep total weight below your preferred dodge breakpoint, equip the chest piece with the highest relevant resistance, then fill remaining slots with pieces that improve physical defense. A medium-weight mixed set is often better than a complete heavy set that prevents consistent rolls. Check your resistances before entering the Fief of the Chill Curse, Revelation Depths, Bramis Castle, or any area dominated by fire, frost, Radiant, or Wither damage.
Remember that armor is only one part of survival. Socket matching build-planning advice is not a substitute for choosing the correct Lords of the Fallen stats: Endurance controls equipment load, Vitality raises health, and your damage attribute determines whether the weapon and armor plan actually works together. For broader hardware advice, see Steamoz’s Steam Deck performance guide.
Fastest Armor Route for a New Character
- Begin with Hallowed Knight gear, or select a class whose starting armor matches your desired weight.
- Defeat Pieta at Skyrest Bridge and save Umbral Scourings for Pieta’s Set if you are using Radiant damage.
- Explore Fitzroy’s Gorge for Fitzroy’s Set before committing to the harder midgame areas.
- Reach the Tower of Penance for Tancred’s Set if you are building strength, Endurance, or a shield-focused character.
- Clear Revelation Depths for Harrower Dervla’s Set when Wither and Umbral resistance become more important.
- Finish the late-game path to Bramis Castle and defeat the Lightreaper for the premier Inferno-focused option.
For official system and ownership information, check the Lords of the Fallen Steam page, the official Lords of the Fallen website, and CI Games. The most efficient target depends on your build: Pieta for Radiant, Harrower Dervla for Umbral, Lightreaper for Inferno, and Tancred for maximum heavy physical protection.