The fastest way to become a Taker of Trophies in Hunt: Showdown 1896 is to stop treating every match like a deathmatch. Start with a forgiving rifle, make noise only when it buys information, rotate before enemies expect you, and extract the moment your bounty route becomes too dangerous. These 10 tips cover the habits that keep new hunters alive: economical loadouts, clue discipline, sound reading, compound fights, boss control, team communication, and the often-overlooked art of leaving with your prize.
Hunt is brutally specific about mistakes. A missed shot can be repaired; a careless sprint across open ground usually can't. The game rewards patience, map knowledge, and an ability to recognise when a fight is no longer worth taking. That makes the early hours feel harsh, but it also means every match teaches something useful.

1. Start with a loadout that forgives mistakes
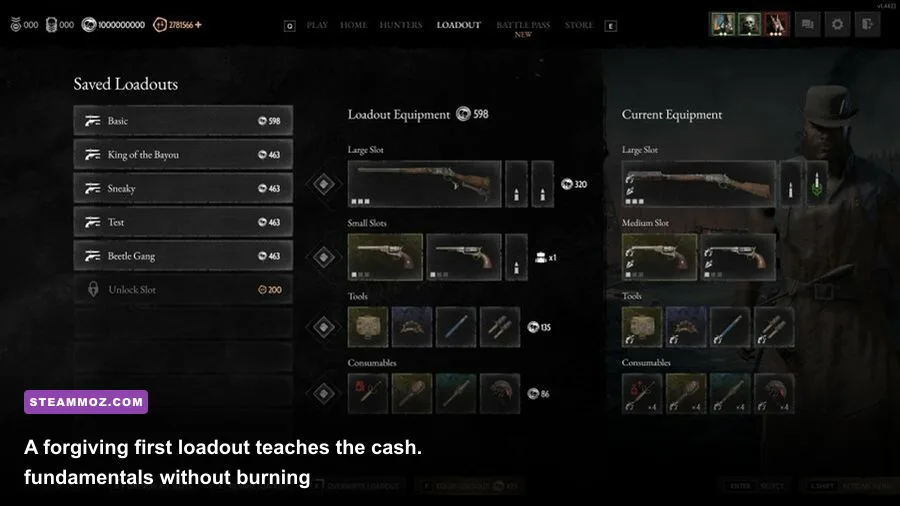
Your first objective isn't building the highest-damage kit. It's learning to land shots while keeping enough tools for PvE, healing, and close-range emergencies. The Winfield M1873C is an excellent starting rifle because its compact ammunition, fast follow-up shots, and generous magazine let you correct a miss without spending a fortune. Pair it with a Scottfield Model 3 or Conversion Pistol, a knife, a medkit, and two vitality shots.
Don't overlook the knife. A dedicated melee tool kills most basic AI quietly and efficiently, while a heavy knife gives you more forgiving stamina usage at the cost of a wider animation and different handling. Bring choke bombs in team play; they extinguish burning teammates, stop a downed hunter from being permanently burned, and can smother fire around a boss lair.
| Role | Recommended beginner pick | Why it works | Common mistake |
|---|---|---|---|
| Primary | Winfield M1873C | Fast follow-up shots and cheap compact ammo | Dumping the entire magazine without resetting aim |
| Sidearm | Scottfield Model 3 | Simple, dependable close-range backup | Reloading in the open instead of swapping weapons |
| Melee | Knife | Quiet PvE kills and low equipment cost | Using heavy attacks until stamina is empty |
| Healing | Medkit plus vitality shots | Lets you recover after chip damage | Waiting until the final health chunk to heal |
| Utility | Choke bombs | Protects bodies and counters fire | Saving them so long that a teammate burns out |
Once you understand recoil and sight alignment, move into the Sparks LRR, Vetterli 71 Karabiner, or Martini-Henry IC1. The Sparks hits extremely hard but gives you one round before a lengthy reload, so it teaches deliberate shooting. The Vetterli offers a friendlier middle ground. For a broader discussion of hardware tuning across PC games, Steamoz's guide to smoother FPS settings is also useful.
🎮 Hunt: Showdown 1896 - Taker of Trophies
Looking to experience this game? Grab your digital key directly on our store for $6.49.
View on Steammoz Store →2. Learn the sound map before chasing clues

Sound is Hunt's real minimap. Crows, ducks, horses, dogs, gunshots, glass, metal doors, broken branches, and sprinting all create information. A sound trap isn't just an obstacle; it's a broadcast telling every nearby team where you are. Crouch-walking is quiet, but it is slow and leaves you vulnerable if used constantly. The better habit is to cross danger quickly, then stop and listen.
AI telegraphs player movement too. Dogs barking, crows exploding upward, or an immolator screaming can mean another hunter passed through moments ago. You don't need to investigate every sound. Ask what it tells you: direction, distance, and whether the noise was deliberate. A single suppressed pistol shot might be a PvE kill. A chain of rifle cracks near a compound usually means a team fight worth avoiding until you have an angle.
Use headphones and lower unnecessary ambient volume if footsteps are getting buried. Never sprint through water unless you accept being announced. The Lightfoot trait later helps with vaults and ladders, while Greyhound improves long-distance sprinting and Determination accelerates stamina recovery. None of these replace awareness. A quiet hunter with poor positioning is still easy prey.
3. Treat clues as information, not errands
Clues are valuable because they shrink the boss search area and reveal the match's tempo. The blacked-out portion of a clue signals that an enemy hunter is close enough to contest it, so don't blindly interact just because you reached the compound first. Check windows, listen for movement, and be ready to cancel the interaction.
Move between clues with a route rather than a straight line. A direct sprint is predictable and often funnels you through the same road or bridge another team is using. Cut around compounds, use tree lines, and vary your approach. If your team has already found several clues while hearing distant gunfire, consider slowing down. The bounty team may be weakened, but the winning third party can be even more dangerous.
Dark Sight is a limited resource, not a permanent radar. After banishing, bounty carriers receive Dark Sight Boost, which spends a charge to reveal nearby hunters briefly. Use it in short checks while rotating or defending an extraction—not constantly inside a dark room. Burning every charge early leaves you blind when the final push arrives.
Traits can make clue routes safer. Vigilant helps identify traps, Conduit rewards clue and rift interactions with temporary health and stamina benefits, and Packmule improves your ability to resupply from toolboxes and saddle bags. Keep a mental note of compounds with tall towers, long sightlines, and multiple exits; those details matter more than the clue itself once the boss is located.
4. Win fights with angles, not bravado

Most new hunters lose because they repeat the same peek. They fire from a window, duck behind cover, then expose the same shoulder at the same height. Good opponents pre-aim that second peek. After every shot, change one variable: move to a new window, drop below the sill, rotate to another floor, or let your teammate create pressure from a different angle.
Compound fights are built around information. Before entering, identify the likely enemy position, your fallback route, and the nearest hard cover. Wooden walls can be penetrated by many weapons, but they are not equally reliable cover. Concrete, thick earth, and some heavy structures buy more confidence. Don't confuse concealment with protection; a bush may hide you from view while doing nothing against a wallbang.
Weapon choice changes the engagement distance. The Winfield thrives at short and medium range, while the Sparks and Martini reward patient long sightlines. Shotguns such as the Romero 77 can dominate a doorway but struggle when opponents refuse to enter. If your shotgun teammate is holding a building, don't abandon them by taking a 70-metre duel. Build the fight around what your team can actually win.
| Situation | Strong response | Why | Don't do this |
|---|---|---|---|
| Enemy holds a window | Suppress, rotate, and force a new angle | Breaks their pre-aim and creates uncertainty | Repeeking the same window |
| Team is crossing open ground | Wait for hard cover or use smoke thoughtfully | Reduces the chance of staggered downs | Sprinting one by one across the gap |
| Shotgun enemy inside | Hold distance and punish the exit | Removes their best damage range | Pushing through a doorway alone |
| Long-range rifle enemy | Break line of sight and rotate wide | Denies easy follow-up shots | Standing still to trade body shots |
For more examples of why weapon roles matter, Steamoz's weapon tier breakdown offers a useful comparison mindset, even though the games handle combat very differently.
5. Handle bosses as a timing problem
Bosses are not simply PvE targets. They are alarms, cover problems, and stamina checks. The Butcher swings aggressively and uses fire, the Assassin vanishes into a swarm and attacks from unpredictable angles, the Spider inflicts poison and darts around the lair, and the Scrapbeak punishes careless teams with concertina wire and limited resupply.
Before attacking, clear the lair's most dangerous AI and identify an exit. Use stamina shots or the Determination trait if you plan to melee, but don't spam heavy attacks until your stamina is empty. Hit the boss, back away, recover stamina, then repeat. A lantern, oil puddle, or fire source can be useful against some bosses, but fire also creates visibility problems and can trap your team.
The best boss strategy is often partial damage followed by a pause. If a team is approaching, you want the boss wounded and the room controlled, not an active enrage animation while everyone is trapped in a corner. Banishing reveals the compound and starts the most dangerous phase of the match, so reload, heal, place traps, and choose defensive positions before starting it.
Against Scrapbeak, remember that his lair can consume valuable equipment. Bring what you need before the encounter and don't assume the compound will refill you afterward. Against the Assassin, keep moving and avoid clustering. Against the Spider, poison resistance and antidote shots can save time, but positioning still matters more than brute force.
6. Make the banish work for your team
A banish is not a victory screen. It is a timer that tells every surviving hunter where to go. The moment it begins, your team should decide whether to defend, rotate, or leave. Defending is strongest when you have traps, usable sightlines, ammunition, and multiple exits. Rotating is better when the boss lair has poor windows or the incoming team has the numbers advantage.
Place concertina and alert traps where an enemy must commit, not randomly in the middle of your own movement routes. Poison traps work well in dark corners and stairwells, while alert trip mines can ignite oil or warn you of a flank. Don't stack every trap at the front door. A smart enemy will simply choose another entrance, leaving your preparation irrelevant.
When the bounty appears, don't instantly sprint to the nearest extraction. First check the map and identify whether the route crosses open fields, water, or likely enemy approaches. The best extraction is the one with cover and multiple escape paths, not automatically the closest icon. If the route is compromised, rotate early while you still have Dark Sight Boost and health bars intact.
New players often die because they defend a trophy they have already effectively won. If your team has a token, a clean route, and no reason to fight, leave. Hunt rewards survival with money, experience, and confidence. Pride doesn't buy back a high-level hunter.
7. Communicate in short, useful calls
Good voice comms are precise. Say “two hunters, red barn, upper window” rather than “they're over there.” Call weapon information when you know it: “shotgun inside,” “long ammo on the ridge,” or “one is burned.” Report your health state and ammunition before the fight begins, not after you miss a reload.
Agree on a focus target. A coordinated two-shot volley can end a fight before the opposing team understands the angle. If a teammate is down, don't automatically revive. First secure the area, extinguish fire with a choke bomb, and check whether the enemy can hear your interaction. Necromancer can revive a teammate from range in teams, but the revive still requires a safe window; it is not a license to throw your body into a compound.
Resilience can bring a downed hunter back with a full health bar after a self-revive, while Doctor and Physician make team healing much more efficient. These traits are powerful, but a calm revive decision is more valuable than any one perk.
8. Spend Hunt Dollars like a survivor
Don't buy a premium loadout every match while still learning. Hunters die often, and that is normal. Keep a budget kit ready: Winfield, inexpensive sidearm, knife, medkit, vitality shot, and a utility item suited to your team. Upgrade when you have a specific reason, such as needing a shotgun for a close-range compound or a long rifle to support a patient sniper.
Looting hunters and checking toolboxes can keep your economy healthy. Resupply before the final push, not while an enemy is already attacking. The Frontiersman trait expands certain tool capacity, while Packmule makes loot sources more rewarding. Don't waste expensive consumables on ordinary AI unless the time saved protects your position.
Hunter progression also teaches risk management. A high-level hunter with useful traits is an asset, but fear makes players passive. If you never take a fight, you'll never learn the timing required to win one. Run affordable equipment, take deliberate engagements, and accept that losses are part of the training curve.
9. Fix performance before blaming your aim
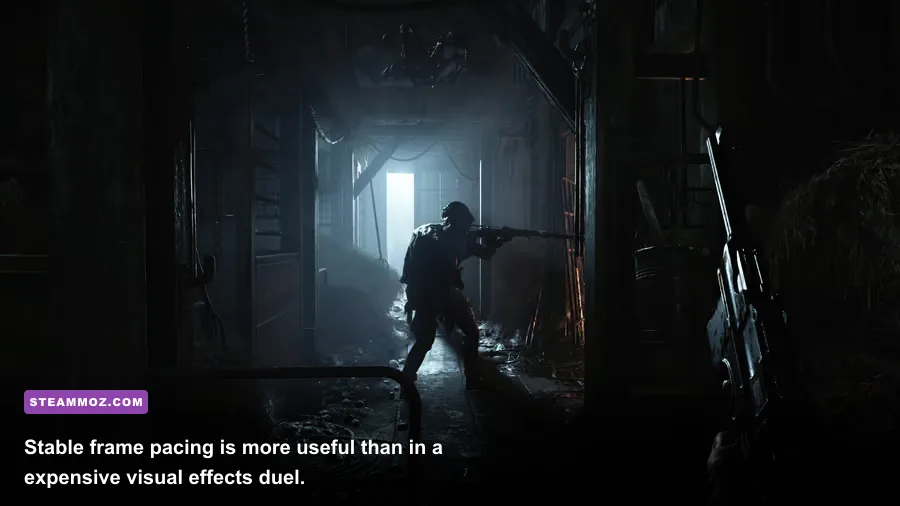
Hunt: Showdown 1896 is demanding, and unstable frame pacing can ruin close-range fights. Prioritise a consistent frame rate over cinematic settings. Lower shadows, fog, lighting quality, and volumetric effects first. Keep textures higher if your GPU has enough VRAM, because texture quality often costs less performance than shadows or global illumination.
| Setting | Recommended starting value | FPS impact | Visual trade-off |
|---|---|---|---|
| Resolution | Native, or 90% render scale | High | Lower scale softens distant targets |
| Texture quality | High if VRAM allows | Low to medium | Minimal clarity loss when reduced |
| Shadow quality | Low or medium | Medium to high | Less defined lighting and silhouettes |
| Lighting and global illumination | Low | Medium | Flatter interiors, clearer frame delivery |
| Volumetric effects and fog | Low | Medium | Less atmospheric haze |
| Anti-aliasing | Test SMAA 1X first | Low to medium | More jagged edges, sharper image |
Use the in-game performance display to watch frame time, not only average FPS. Cap frames slightly below your monitor's stable ceiling if that improves consistency. Disable overlays you don't need, update drivers, and make sure the game is installed on an SSD. Steamoz's PC crash and low-FPS troubleshooting guide covers several broadly useful fixes.
10. Build a review habit after every death
The most valuable Taker of Trophies habit is a 30-second post-match review. Ask three questions: what revealed my position, what angle did I fail to check, and what decision happened five seconds before the fatal mistake? “I got unlucky” is occasionally true, but it teaches nothing. “I sprinted across water after hearing a rifle on the far bank” gives you a fix.
Keep track of recurring errors. If you die while reloading, switch weapons earlier. If you lose every compound push, stop entering through the obvious door. If you win fights but never extract, plan the final rotation sooner. Hunt's maps—Stillwater Bayou, Lawson Delta, DeSalle, and Mammon's Gulch—reward different approaches, so learn landmarks rather than memorising only boss lairs.
Use the official Hunt: Showdown 1896 Steam page for current system requirements and patch information, and check Crytek's official Hunt website for event and update details. The official Steam news feed is especially useful when weapon balance, traits, or map mechanics change.
Finally, remember what the trophy actually represents. A bounty token is proof that you read the map, survived the boss, handled pressure, and made a clean extraction decision. You don't need to win every gunfight to become dangerous in Hunt: Showdown 1896. Make fewer noisy mistakes, take better angles, protect your teammate, and leave before greed turns a winning match into another loading screen.