
The Augur is the best Legends of the Bayou weapon for most hunters, because the Vetterli 71 Karabiner gives you a forgiving medium-ammo rifle with reliable damage, manageable recoil, and a practical rate of fire. The Benefactor is a good Caldwell Conversion Pistol skin, but neither legendary variant changes the underlying stats. For the strongest overall Hunt: Showdown 1896 loadouts, pair that rifle with a Medkit, Knife, Choke Bombs, and either a long-range sidearm or a close-quarters finisher.
That distinction matters. Legends of the Bayou is a DLC pack built around legendary hunters and weapon appearances, not a separate balance bracket. The Bone Doctor, The Researcher, and the other legendary hunters are cosmetic choices. Their hitboxes, health pools, stamina, and weapon handling are the same as every other hunter. The weapon skins are equally honest: The Augur is a Vetterli 71 Karabiner, while The Benefactor is a Caldwell Conversion Pistol.
This tier list ranks those weapons in the wider Hunt arsenal, using solo and team value as the main criteria. It also explains where the Bayou skins fit, which equipment is worth buying when cash is tight, and how to build around each range band. For patch-specific changes, keep an eye on the official Hunt: Showdown website and the game's Steam page.

Legends of the Bayou weapons ranked at a glance
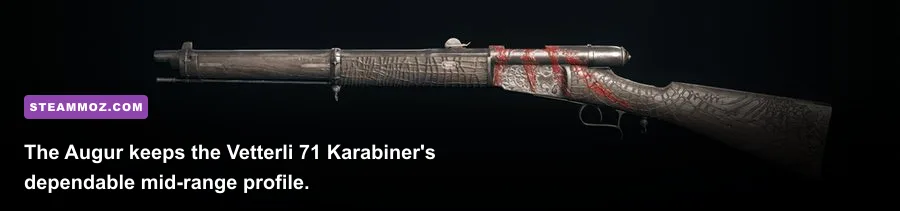
The Augur lands in the A-Tier because the Vetterli 71 Karabiner is one of the easiest rifles to use effectively. It fires medium ammunition, has a five-round internal magazine, and delivers a much friendlier follow-up shot than the Sparks LRR. You won't get the Mosin-Nagant 1891's top-end reload flexibility or the modern edge of a high-velocity build, but you get a rifle that performs from roughly 40 to 120 meters without demanding perfect aim every time.
The Benefactor is more situational. The Caldwell Conversion Pistol has a six-round cylinder, solid handling, and cheap ammunition, but its single-action firing cycle makes missed shots expensive. It belongs in B-Tier as a general sidearm and rises to A-Tier when paired with Fanning. With that trait, the pistol changes from a patient precision weapon into a close-range panic button. Without Fanning, it is best used to finish wounded hunters or cover a reload.
| Weapon or family | Tier | Why it ranks here | Best pairing |
|---|---|---|---|
| The Augur / Vetterli 71 Karabiner | S-Tier | Excellent medium-range balance, forgiving recoil, dependable follow-up shots | Uppercut Precision, Hand Crossbow, or melee sidearm |
| Mosin-Nagant 1891 | S-Tier | Fast cycling, strong long-range performance, excellent ammo economy for a bolt-action | Dolch 96, New Army, or LeMat Mark II |
| Berthier Mle 1892 | S-Tier | Fast reload and strong long-ammo pressure, limited by its three-round magazine | Officer, Scottfield Spitfire, or Terminus Handcannon |
| Romero 77 | S-Tier | One shell can decide a doorway fight; outstanding damage consistency within shotgun range | Caldwell Conversion or Pax Trueshot |
| Sparks LRR | A-Tier | Extremely high single-shot damage, but every follow-up requires a reload | Bornheim No. 3, Officer, or Spitfire |
| The Benefactor / Caldwell Conversion | B-Tier | Reliable sidearm with cheap ammo, but slow single-action follow-up shots | Fanning, Levering primary, or a long rifle |
| Winfield M1873C | A-Tier | High capacity and rapid fire dominate close and medium ranges | Full Metal Jacket or High Velocity ammunition |
For a second opinion on how weapon rankings should be structured, Steamoz's Ace Combat 7 weapon tier list uses the same useful principle: rank equipment by the situations it solves, not by raw damage alone.
🎮 Hunt: Showdown 1896 - Legends of the Bayou
Looking to experience this game? Grab your digital key directly on our store for $4.99.
View on Steammoz Store →S-Tier weapons that win more than highlight reels
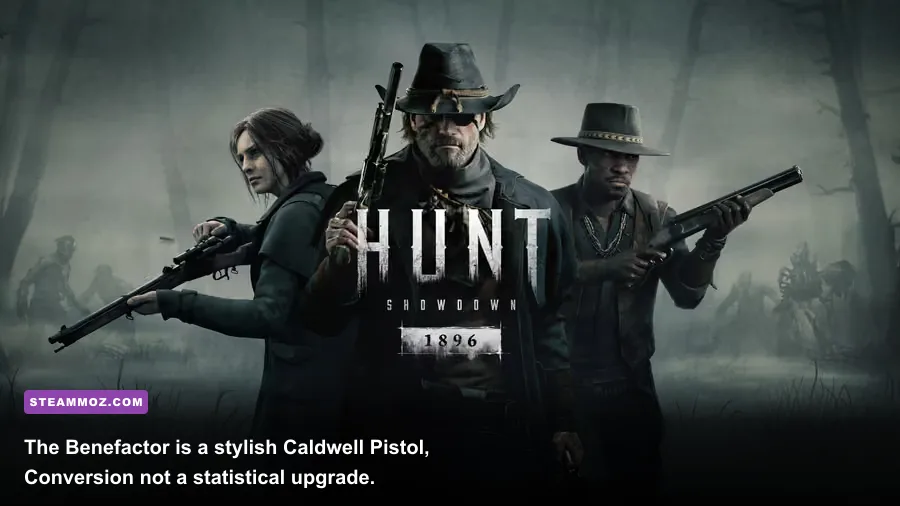
The Augur's real strength is tempo. The Vetterli 71 Karabiner lets you take a shot, adjust, and take another before many opponents can recover from their first miss. Medium ammo also gives it a healthy compromise between penetration, velocity, and carried ammunition. Aim for the upper chest at medium range, then shift to the head when the target is stationary or committed to a revive.
The Mosin-Nagant 1891 is the more complete long-ammo rifle. Its bolt cycle is quick, its stripper-clip reload is valuable under pressure, and its damage profile stays dangerous across long sightlines. The Berthier Mle 1892 has the faster reload animation, but its three-round magazine means you must respect every shot. Both rifles reward players who hold distance and punish hunters trying to cross open ground.
For compounds, the Romero 77 remains brutally efficient. It isn't versatile, and that is precisely the point. A well-placed buckshot blast at close range can end a fight immediately. The weapon's single shell forces discipline: fire only when your crosshair is on the torso, head, or a committed push. Pair it with a pistol that can continue the fight while the Romero reloads.
| Weapon | Primary range | Key strength | Main weakness | Recommended ammo |
|---|---|---|---|---|
| Vetterli 71 Karabiner | 30–120 m | Balanced damage and follow-up speed | Less penetration and reach than long ammo | High Velocity or standard medium ammo |
| Mosin-Nagant 1891 | 50–200 m | Fast bolt cycle and strong long-range pressure | High purchase cost and limited reserve economy | Spitzer for precision, standard for value |
| Berthier Mle 1892 | 50–180 m | Very quick reload with stripper clips | Only three rounds per magazine | Spitzer when budget allows |
| Romero 77 | 0–25 m | Outstanding one-shot potential | One shell and little flexibility outside shotgun range | Standard buckshot or Penny Shot for doors |
| Sparks LRR | 60–200 m | Massive damage in a single hit | Slow follow-up and reload vulnerability | Standard long ammo or Incendiary for pressure |
The Sparks deserves special mention because it creates a different kind of advantage. A body hit can leave an enemy one tap from almost anything, but the rifle does not reward frantic peeking. Fire, relocate, and let your partner exploit the wounded hunter. If you play solo, carry a fast sidearm; the Officer or Bornheim turns a Sparks hit into a realistic two-step kill instead of a hopeful follow-up.
A-Tier rifles and the best budget alternatives
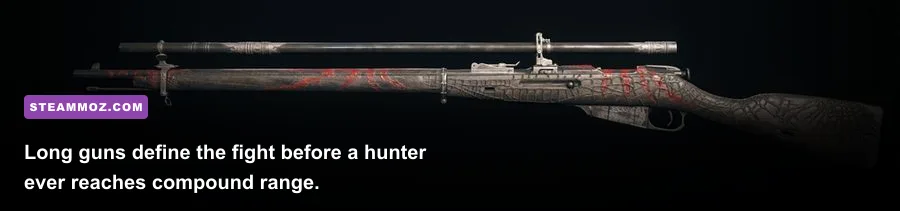
The Winfield M1873C is the best budget weapon for players who win through movement. Its compact ammunition is cheap, the magazine is generous, and rapid follow-up shots let you punish a hunter who misses with a slower rifle. The trade-off is range. Compact ammo loses effectiveness sooner, and wallbang attempts are much less reliable unless you bring Full Metal Jacket.
The Springfield 1892 Krag sits in an attractive middle ground. It offers long-ammo damage with a five-round magazine and smooth handling, but its reload behavior can punish poor timing. The Springfield 1866 is cheaper and hits hard, yet its single-shot action makes every engagement a test of positioning. These rifles are excellent for players who already understand cover and don't need a rapid-fire safety net.
For sidearms, the Caldwell Pax Trueshot is a strong all-rounder. It hits harder than the Conversion and handles medium-range finishing shots well, while the Scottfield Spitfire gives up some precision for a faster firing rhythm. The Caldwell Conversion remains the value pick, especially with Fanning, but don't mistake a large cylinder for sustained damage. Six misses are still six misses.
| Budget level | Primary | Sidearm | Why it works |
|---|---|---|---|
| Low cash | Winfield M1873C | Caldwell Conversion | Cheap ammunition, high capacity, and easy close-medium range pressure |
| Balanced | The Augur / Vetterli 71 | Caldwell Pax | Reliable rifle shots with a harder-hitting finisher |
| Close-range | Romero 77 | Conversion or Scottfield Spitfire | Shotgun controls compounds while the pistol covers reloads |
| Long-range | Mosin-Nagant 1891 | Officer or Dolch 96 | Fast follow-up pressure when a target closes distance |
| Solo pressure | Sparks LRR | Bornheim No. 3 | High damage on the first hit with a quick finishing sidearm |
Don't automatically buy expensive ammunition. High Velocity is excellent on the Vetterli and Winfield because it tightens the practical headshot window, but it also raises cost and can make a budget run unsustainable. Standard ammunition is usually the correct choice until your aim and extraction rate justify the upgrade.
Best equipment ranking for every Bayou loadout
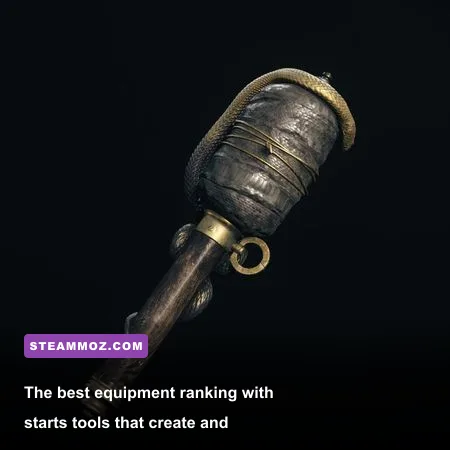
The Medkit is the only true non-negotiable tool. It restores a health chunk quickly, works behind cover, and keeps a team from burning through Vitality Shots after every exchange. The Knife or Heavy Knife comes next. The Knife is lighter and quieter for PvP-minded players; the Heavy Knife clears grunts efficiently but consumes more stamina.
Choke Bombs are S-Tier equipment in team matches. They extinguish burning teammates, deny fire-based area control, and can cloud a doorway or window during a revive. They also reveal useful information: a choke cloud can make an enemy hesitate, move, or expose a silhouette. Bring them even when you don't expect to fight a dedicated fire loadout.
Frag Bombs are the best general offensive consumable, but only if you understand their fuse and bounce. Cook too long and you kill yourself; throw too early and the enemy simply relocates. Concertina Bombs are less explosive but better for cutting off staircases, revive routes, and narrow exits. You can create a temporary bad decision for the other team without exposing your own body.
| Equipment | Tier | Best use | Important limitation |
|---|---|---|---|
| Medkit | S-Tier | Fast healing and recovery between exchanges | Does not replace a Vitality Shot in a crisis |
| Choke Bombs | S-Tier | Saving burning allies and denying fire control | Smoke can obscure your own push |
| Knife | S-Tier | Quiet PvE kills and reliable melee defense | Requires close contact and stamina management |
| Frag Bomb | A-Tier | Forcing enemies from cover or finishing a revive | Dangerous in tight spaces and easy to mis-time |
| Concertina Bomb | A-Tier | Blocking doors, stairs, bodies, and extraction routes | Slow to deploy and can trap your own team |
| Alert Trip Mines | B-Tier | Warning of flanks and controlling dark entrances | Strong players spot or disarm them carefully |
| Fire Bomb | B-Tier | Burning bodies and denying revive attempts | Chokes and water make it easy to counter |
For consumables, a Vitality Shot and Stamina Shot are the safest baseline. Add a Frag Bomb for direct pressure, then choose a flash bomb, choke beetle, fire bomb, or hive bomb based on your team plan. If you're carrying a Romero, a Stamina Shot is especially valuable because it lets you sprint, melee, and reposition without arriving at the compound exhausted.
Loadouts that make The Augur and Benefactor shine
The balanced Bayou loadout: The Augur, The Benefactor, Medkit, Knife, Choke Bombs, Frag Bomb, Vitality Shot, and Stamina Shot. This is the cleanest interpretation of the DLC's identity. Use the Vetterli to own the 40-to-100-meter band, then swap to the Conversion when an enemy enters a building. Fanning upgrades The Benefactor into a legitimate room-clearing tool, but don't buy the trait just to compensate for weak positioning.
The anti-push version: The Augur with High Velocity ammunition, a Caldwell Conversion Uppercut or Pax Trueshot, and a Hand Crossbow with choke bolts if your weapon slots allow it. The rifle handles exterior sightlines, while choke bolts give you a quiet answer to burning teammates and dangerous revives. This setup shines around compounds such as Lawson Delta, Stillwater Bend, and Alice Farm, where a team can rotate between open lanes and hard cover.
The close-range partner build: Give one hunter a Romero 77 or Caldwell Rival 78 and let the Augur player work just behind them. The shotgun enters first, checks corners, and punishes door swings. The Vetterli player holds the longer angle, tags enemies retreating from the building, and covers the reload. This role split is much stronger than giving everyone the same rifle and hoping aim solves every range problem.
| Build | Weapons | Traits to prioritize | Combat plan |
|---|---|---|---|
| Balanced Augur | The Augur + The Benefactor | Fanning, Doctor, Physician | Hold medium range, then use Fanning only when enemies breach cover |
| Precision Augur | The Augur + Uppercut Precision | Iron Eye, Steady Aim, Physician | Maintain sightline control and punish peeks with headshots |
| Bayou breacher | The Augur + Romero Handcannon | Quartermaster, Doctor, Frontiersman | Cover a shotgun teammate while keeping a rifle for exterior fights |
| Benefactor specialist | Long rifle + The Benefactor | Fanning, Quartermaster, Doctor | Use the Conversion as a close-range emergency weapon, not a primary dueling pistol |
Traits change the ranking more than most players admit. Iron Eye improves rifle control after the first shot, Doctor and Physician make healing safer, and Frontiersman increases tool charges. Quartermaster is the major breakpoint for the Augur because it allows a medium-slot secondary without abandoning the rifle's strengths. If you're still learning audio cues and rotations, buy utility traits before flashy weapon traits.
Ammo, traits, and performance choices that matter
Hunt's gunfights are decided by information as often as damage. Dark Sight Boost, sound traps, crows, ducks, doors, and broken glass all shape the engagement before either hunter fires. The Augur's medium range encourages disciplined peeking: take a shot from one window, rotate to another, and avoid repeating the same angle. The Benefactor rewards the same habit at a shorter distance because its cylinder gives you options, but its action still punishes panic.
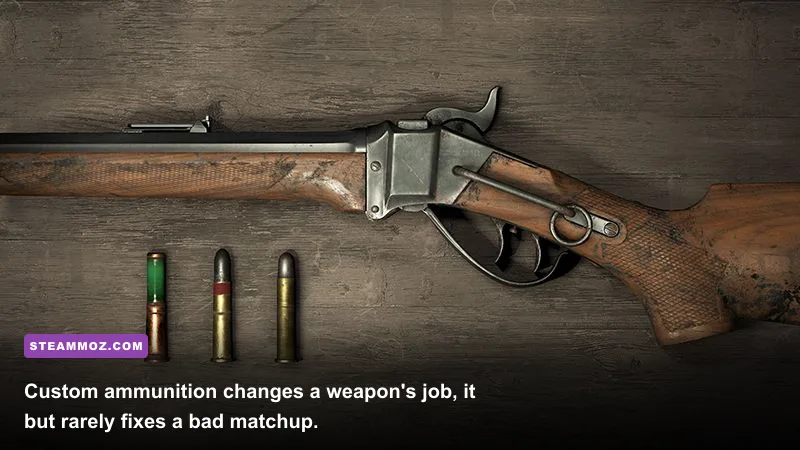
Custom ammo should support a plan. High Velocity helps rifles land headshots at distance. Full Metal Jacket improves penetration at the cost of higher recoil or reduced muzzle performance depending on the weapon. Dumdum creates bleed pressure but sacrifices penetration, making it dangerous to use against wooden cover. Incendiary ammunition can create chaos and ignite hunters, yet it isn't a replacement for accurate body shots.
Performance matters, too. Hunt: Showdown 1896 can become much harder to read when frame pacing is uneven. Use the game's 3D Resolution Scale carefully, keep Object Quality and Texture Quality high enough to preserve silhouettes, and lower effects that add clutter before sacrificing visibility. A stable 90 frames per second is generally more useful than a fluctuating 120, especially during compound fights with fire, smoke, and multiple players.
| Setting or choice | Recommended starting point | Competitive impact | Why it matters |
|---|---|---|---|
| 3D Resolution Scale | 100% | High | Lower values can blur distant hunter silhouettes and ironsights |
| Object Quality | High | High | Helps preserve geometry and readable cover edges |
| Effects Quality | Medium | Medium | Reduces fire and smoke cost without heavily damaging clarity |
| Texture Quality | High if VRAM allows | Low to medium | Improves surface detail but rarely fixes poor frame pacing |
| Motion Blur | Off | Medium | Keeps fast turns and close-range tracking clearer |
| V-Sync | Off with a suitable frame cap | Medium | Can reduce input delay, provided tearing is acceptable |
New players often chase the weapon with the highest theoretical kill potential. Veterans usually choose the gun that makes their next decision easier. That is why The Augur outranks The Benefactor, why the Medkit and Choke Bombs are near-universal picks, and why a cheap Winfield can outperform a premium rifle in the hands of someone who understands cover.
For more equipment-focused reading, check Steamoz's Cryptmaster weapon tier list and Captain Tsubasa equipment ranking. Hunt rewards the same habit in both cases: identify what the item actually changes, then build around that advantage.
Final verdict on the Legends of the Bayou tier list
The Augur is the clear winner from the Legends of the Bayou weapon lineup because the Vetterli 71 Karabiner solves more fights than it creates. It is accurate enough for open-ground duels, fast enough for repeated peeks, and forgiving enough to remain useful when the match collapses into a messy compound battle. The Benefactor is worth using for its look and for Fanning-based builds, but it shouldn't be mistaken for a top-tier pistol on raw performance.
Choose The Augur when you want a dependable rifle that can anchor a team. Choose The Benefactor when you already have your long-range problem solved and want a cheap, flexible sidearm. Whatever skin you equip, the winning foundation remains the same: Medkit, Knife, Choke Bombs, a deliberate range plan, and enough stamina to reposition after every shot.
That is the real Legends of the Bayou lesson. The best equipment isn't the loudest or most expensive. It's the gear that gives you one more safe angle, one more revive option, or one more way to force an enemy into the open.