
If you’re building an Arcane Archaeologist loadout in Hunt: Showdown 1896, start with the Mosin-Nagant M1891, pair it with a reliable close-range sidearm, and spend the remaining budget on information tools rather than flashy consumables. The Mosin is the best all-round S-tier primary, the Romero 77 is the strongest cheap alternative for compound fights, and the Vetterli 71 Karabiner gives newer hunters the cleanest path to consistent kills.
This ranking isn’t based on raw damage alone. Hunt is won by sound, sightlines, recovery time, ammo economy, and whether your secondary weapon covers the range your primary cannot. The Arcane Archaeologist fantasy fits that perfectly: scout first, identify the threat, then choose the tool that makes the next engagement unfair. Prices and balance values can shift between Crytek updates, so check the live arsenal before spending Hunt Dollars. The current Hunt: Showdown 1896 Steam page is the safest place to verify the active build.

Arcane Archaeologist weapon tier list
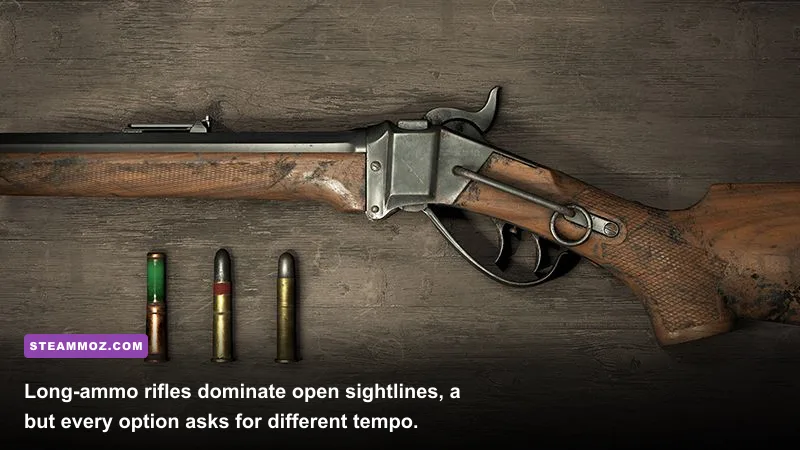
The table below ranks weapons by practical value in a typical bounty hunt: solo, duo, or trio play across Lawson Delta, Stillwater Bayou, and DeSalle. S-tier weapons are powerful without demanding a narrow gimmick. A-tier choices can absolutely carry a match, but they need stronger positioning or a more deliberate partner weapon. B-tier options remain lethal, especially in the hands of specialists, yet expose clearer weaknesses.
| Weapon | Tier | Core advantage | Best situation |
|---|---|---|---|
| Mosin-Nagant M1891 | S | High long-ammo damage, fast cycling, strong velocity | Medium and long sightlines |
| Sparks LRR | S | 149 damage and exceptional one-shot pressure | Disciplined single-shot players |
| Romero 77 | S | Reliable one-shell kill potential and low cost | Compound pushes and holds |
| Vetterli 71 Karabiner | A | 130 damage class, manageable recoil, strong value | General-purpose midrange fights |
| Centennial | A | Fast bullet velocity and useful lever-action follow-ups | Medium-range pressure |
| Lebel 1886 | A | Excellent velocity and long-ammo damage | Open fields and long lanes |
| Winfield M1873 | B | Rapid fire and large ammo pool | Short-to-midrange team fights |
| Caldwell Rival 78 | B | Two quick shells before a full reload | Aggressive entry play |
| Springfield 1892 Krag | B | Fast bolt cycling with long-ammo reach | Mobile rifle duels |
🎮 Hunt: Showdown 1896 - The Arcane Archaeologist
Looking to experience this game? Grab your digital key directly on our store for $2.44.
View on Steammoz Store →S-tier picks that earn their cost
Mosin-Nagant M1891
The Mosin remains the safest premium recommendation because it combines 136 listed damage, long ammo, a fast bolt cycle, and roughly 400 m/s muzzle velocity in its standard configuration. That profile matters more than the headline number. Long ammo penetrates many wooden surfaces, causes heavier damage retention, and creates better downed-hunter pressure when an enemy is trying to recover behind cover.
The main drawback is reserve ammunition. Five rounds in the magazine is generous compared with single-shot rifles, but a Mosin user can still burn through supply quickly during a siege. Bring two ammo boxes if your team expects a prolonged compound fight, or take the Obrez variant as a compact secondary when you need a second long-ammo source. The Obrez is less comfortable at distance, but it keeps your damage model consistent.
Sparks LRR
The Sparks LRR deals 149 damage with a single round and has some of the most punishing body-shot pressure in the game. A healthy hunter hit in the chest is left one tap from almost any follow-up, and a headshot is lethal at extreme range. The weapon’s slow reload is the balancing factor: miss, and the opponent gets a meaningful window to heal, reposition, or rush.
That makes the Sparks a better weapon for information-led play than panic dueling. Use Dark Sight, sound traps, and a choke or flash to force the enemy into a predictable angle. Fire, immediately move off the original line, and reload behind hard cover. Don’t stand still waiting for the perfect second shot. The Sparks rewards a hunter who treats every shot as a team event.
Romero 77
The Romero is the S-tier budget answer because its single shell is exceptionally consistent when the reticle is centered on the upper torso. Its effective one-shot range depends on ammunition and spread, but the standard buckshot load is brutally efficient inside compounds. The weapon also has an underrated psychological advantage: enemies hesitate at doors when they know one mistake ends the push.
Its weakness is obvious. If you miss, you have one shell and a lengthy reload. Carry a fast-firing pistol such as the Caldwell Conversion Pistol, or choose quartermaster later and add a compact rifle. Hand crossbows, throwing knives, and choke bombs also make the Romero safer by letting you control doors without wasting the primary shell.
A-tier rifles for flexible archaeologist builds

Vetterli 71 Karabiner
The Vetterli is the recommendation I’d give to most players learning the Arcane Archaeologist playstyle. Its 130 damage class, medium ammo, five-round internal magazine, and manageable recoil create a forgiving rhythm: fire, strafe, cycle, and keep pressure on the target. It costs dramatically less than premium long-ammo rifles while still handling the majority of fights between 30 and 100 meters.
Medium ammo has less penetration and damage retention than long ammo, so don’t challenge a Mosin user through thick wood and expect equal results. Instead, use the Vetterli’s economy to buy better utility. A hunter who brings a medkit, choke bombs, a stamina shot, and a frag bomb often has more win conditions than a fully loaded rifle user with empty pockets.
Centennial
The Centennial earns A-tier status through velocity and handling. Its standard ammunition travels around 600 m/s, making moving targets and distant peeks easier to lead than with many medium-ammo rifles. The lever action also gives it a satisfying follow-up cadence. It’s not a shotgun substitute, but it can punish an enemy who survives the first shot and tries to re-peek immediately.
Use the Centennial when your team likes to rotate around compounds rather than sit inside a boss lair. It shines on long fences, roads, and elevated approaches where a fast projectile turns narrow timing windows into real hits. Pair it with a Caldwell New Army, Scottfield Model 3, or another sidearm that can handle a sudden close-range collapse.
Lebel 1886
The Lebel is a superb long-range rifle with high velocity and a ten-round internal magazine, but its reload behavior keeps it below the Mosin. You reload individual rounds, so topping up during pressure is slower and more dangerous. The rifle becomes much better when you have cover and a teammate creating noise on another angle.
Choose the Lebel for wide maps and patient squads. On compact compounds, the Mosin’s faster handling and easier reload usually matter more. If you use the Lebel, resist the urge to empty the tube just because you have ammunition. Fire two or three controlled shots, rotate, then reload while the enemy is forced to respect your last position.
B-tier weapons that need a sharper game plan

Winfield M1873
The Winfield is not weak; it’s simply range-dependent. Its rapid fire and generous ammunition pool make it excellent inside roughly 40 meters, particularly against teams that overextend between cover. The rifle can overwhelm a wounded target before they finish healing, and its low recoil lets experienced players place multiple shots quickly.
That same speed encourages bad habits. Spamming at long range advertises your position while dealing modest damage. Use levering only when you’ve deliberately committed to close-range fighting, because the accuracy loss makes the trait a poor substitute for a shotgun. For an economical build, a Winfield with a high-damage pistol and choke bombs is still one of the strongest ways to enter a low-budget match.
Caldwell Rival 78
The Rival’s two barrels make it more forgiving than the Romero during an entry, but the spread and damage consistency can feel less dependable at the edge of shotgun range. Fire the first barrel, adjust, and use the second only when the target is still exposed. Blindly dumping both shots often leaves you helpless during the reload.
The Rival works best when a teammate carries a rifle. Your job is to clear stairs, doors, and boss-lair corners while the rifle player watches windows. It ranks below the Romero for solo consistency and below the Slate for sustained pressure, but its instant two-shot threat remains excellent for coordinated pushes.
Springfield 1892 Krag
The Krag’s fast cycling makes it comfortable in repeated rifle duels, and long ammo gives it strong penetration. Its limited magazine and single-round reload punish wasteful shooting, though. It’s a weapon for hunters who already understand when an angle is safe, not a rifle that fixes poor positioning.
Use the Krag from offset positions rather than the same window as your partner. After every shot, change elevation or move laterally. A hunter who remains predictable gives the enemy an easy pre-fire, regardless of weapon tier.
Best secondary weapons and ammo pairings
The best Arcane Archaeologist secondary depends on the primary’s failure state. A rifle needs a close-range answer; a shotgun needs reach; a single-shot weapon needs something that can finish a wounded hunter quickly. Don’t choose a pistol just because it looks thematically correct with the hunter skin.
| Primary | Recommended secondary | Why it works | Useful trait |
|---|---|---|---|
| Mosin or Lebel | Caldwell Conversion Uppercut | Extends threat range while handling close follow-ups | Quartermaster for a compact shotgun option |
| Sparks LRR | Bornheim No. 3 or Officer | Rapid finishing shots after a body hit | Doctor and Physician |
| Romero 77 | Caldwell Conversion Pistol | Reliable backup after a missed shell | Quartermaster or Fanning |
| Vetterli | Hand Crossbow or Scottfield | Covers silent utility or emergency close combat | Bolt Thrower or Fanning |
| Winfield | Hand Crossbow or high-damage pistol | Adds penetration, burst, or status pressure | Levering only for committed close fights |
The Uppercut is powerful, but don’t automatically buy it every round. Its cost, recoil, and limited ammunition can undermine an otherwise economical loadout. For the Sparks, a fast pistol is often more valuable than another high-damage hand cannon because the entire plan revolves around finishing a target after the 149-damage body hit.
For tools, the default package should be a medkit, choke bombs, and a melee option. The fourth slot can be a flare pistol, throwing knives, or decoy fuses depending on the map and team role. Chokes extinguish burning teammates, deny fire-based area control, and reveal movement when thrown through windows. That utility wins more matches than a second explosive.
Traits that turn the ranking into a real build
Weapon tiers only matter after your traits support the weapon’s rhythm. For rifle builds, Physician and Doctor are high-value sustain picks, while Bulletgrubber helps recover ammunition from certain expensive weapons that use stripper clips or similar reload systems. Iron Eye improves sustained rifle handling after aiming, and Quartermaster opens the strongest mixed-range pairings once you can afford the point investment.
For shotgun players, Frontiersman gives more tool charges, Resilience protects revival situations, and Packmule improves the value of every tool box and loot interaction. Fanning is tempting with the Caldwell Conversion Pistol, but it’s a close-range commitment rather than a universal upgrade. If you take Fanning, don’t pretend your pistol is now a rifle. Build around the distance where the trait is accurate enough to matter.
| Build role | Primary | Priority traits | Combat pattern |
|---|---|---|---|
| Long-range anchor | Mosin or Sparks | Steady Aim, Physician, Doctor, Resilience | Hold an angle, tag first, rotate after firing |
| Compound breacher | Romero or Rival | Frontiersman, Packmule, Quartermaster | Control doors, force panic, push on utility |
| Midrange scout | Vetterli or Centennial | Iron Eye, Physician, Beastface, Lightfoot | Rotate quietly and punish exposed crossings |
| Budget pressure | Winfield | Levering, Greyhound, Packmule | Close distance and sustain repeated volleys |
Beastface and Lightfoot deserve special mention for the archaeological theme. Beastface reduces the punishment for crossing sound traps, while Lightfoot helps you move over ladders, vaults, and similar surfaces with less noise. They don’t increase damage, but they improve the first-contact advantage that lets every weapon on this list perform above its paper statistics.
Best complete Arcane Archaeologist loadouts
Premium relic hunter
Take the Mosin-Nagant M1891, Caldwell Conversion Pistol, medkit, choke bombs, throwing knives, frag bomb, vitality shot, and stamina shot. This is the cleanest all-purpose setup. The Mosin handles the opening duel, the pistol protects you when a team collapses into the compound, and the knives quietly remove hives, armored targets, and lantern threats.
Budget excavation crew
Use the Vetterli 71 Karabiner with a Scottfield Model 3, then buy a medkit, choke bombs, dusters, a frag bomb, and one vitality shot. This leaves enough Hunt Dollars for repeated matches while maintaining answers at every practical distance. Don’t waste the economy advantage by taking unnecessary explosive spam. The point is to enter the next match fully equipped.
Boss-lair breaker
Choose the Romero 77, Caldwell Conversion Pistol, knuckle knife, medkit, choke bombs, flash bomb, vitality shot, and stamina shot. Let the rifle player hold the outside angle while you work the interior. Flash before pushing, listen for the enemy’s reposition, and reload behind a doorway rather than in the open center of the room.
How to play the tier list on each map
Stillwater Bayou rewards compound discipline and short rotations. Romero, Rival, and Winfield builds perform well around Lawson Station, Alice Farm, and Healing-Waters Church because sightlines repeatedly break into interiors. DeSalle offers more verticality and longer cross-compound lanes, making Mosin, Sparks, Lebel, and Centennial builds more attractive around Upper Desalle and First Testimonial Church.
On Lawson Delta, don’t assume long sightlines always mean you should take a long rifle. Concertina, barns, and dense compound geometry can turn a distant opening into a sudden close fight. The strongest Arcane Archaeologist player reads the next thirty seconds, not the entire match. If your team has already been tagged, rotate before the enemy establishes a crossfire. If you’ve landed a Sparks or Mosin hit, push the advantage while the target is healing instead of waiting for a perfect headshot.
Sound remains the universal multiplier. Avoid unnecessary crows, horses, and broken glass when carrying an expensive rifle. Conversely, a cheap Winfield can use noise aggressively because its value comes from sustained pressure rather than one irreplaceable shot. For more PC-focused performance advice, compare these principles with Steamoz’s FPS-locking settings guide and the PC troubleshooting checklist.
Final ranking and the smartest first purchase
For most players, the final order is Mosin-Nagant M1891, Sparks LRR, and Romero 77 in S-tier; Vetterli 71 Karabiner, Centennial, and Lebel 1886 in A-tier; then Winfield M1873, Caldwell Rival 78, and Springfield 1892 Krag in B-tier. That order changes with your role. A solo hunter may value the Romero’s immediate close-range kill more than the Sparks’ long-lane dominance, while a trio’s dedicated sniper can extract huge value from the Lebel.
The best first purchase is the Vetterli if you’re still learning spacing and sound. Move to the Mosin once you’re consistently landing opening shots and managing long-ammo supply. Pick the Romero when your team needs someone to take the doorway. The Arcane Archaeologist loadout is strongest when every item has a job: one tool gathers information, one creates an opening, one protects a teammate, and the weapon finishes the argument.
For official balance notes and event details, keep an eye on the official Hunt: Showdown website, the developer news feed, and Crytek’s Steam announcements. Hunt’s arsenal changes, but the core lesson doesn’t: information creates the fight, positioning decides it, and the right weapon makes the final shot much easier.