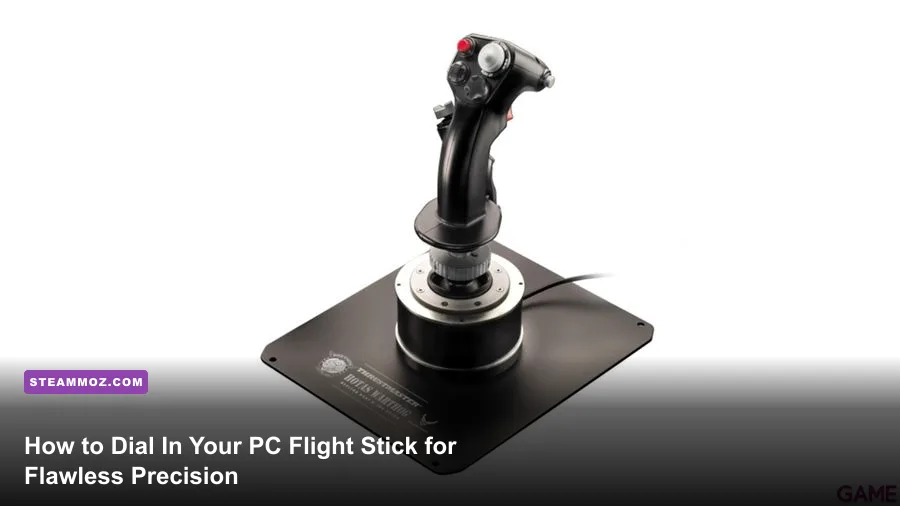
If your crosshair wobbles wildly whenever you line up a lead shot, or your flight sim craft slowly wanders off-heading the moment you let go of the grip, your joystick isn't broken—it’s running raw, uncalibrated, and improperly profiled. Dialing in a PC flight stick or Hands-On Throttle-and-Stick (HOTAS) rig requires three fundamental steps: calibrating raw sensor travel directly into firmware, carving out razor-thin inner deadzones to neutralize electrical noise, and sculpting custom exponential response curves so micro-adjustments don't throw your airframe into violent aerodynamic stalls. Skipping this process turns an expensive peripheral into an erratic, mushy chore, while calibrating it properly transforms your physical inputs into pinpoint accuracy across every dogfight, docking approach, and precision landing.
Hardware Diagnostics and Physical Mounting: The Foundation
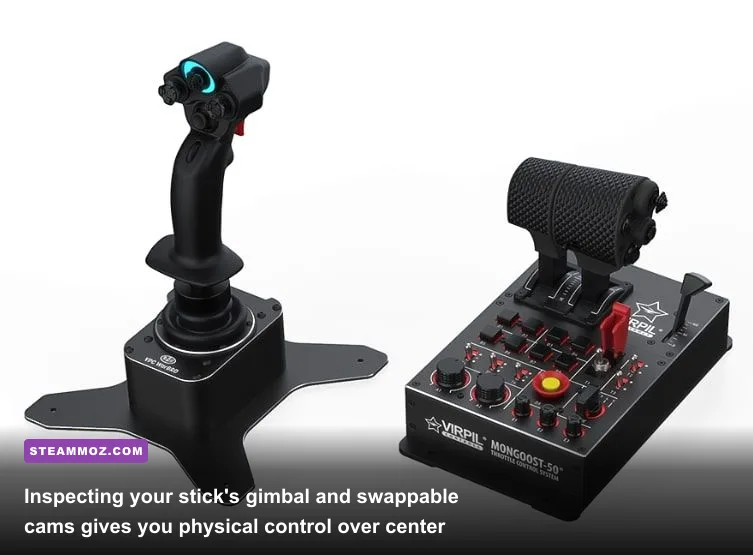
Before opening a single calibration suite, you need to understand the mechanical reality of what is sitting on your desk. Joysticks fundamentally split into two hardware camps: traditional potentiometers and contactless magnetic sensors (Hall-Effect or 3D magnetoresistive sensors). Budget sticks like the classic Logitech Extreme 3D Pro rely on potentiometers—wiper arms physically sliding across resistive tracks. Over hundreds of flight hours, microscopic plastic shavings and dust settle inside the pot housings, creating electrical resistance spikes that register on your PC as violent phantom twitches. Premium sticks like the VKB Gladiator NXT EVO, Virpil Constellation ALPHA Prime, and the Thrustmaster T.16000M employ magnetic sensors that read axis angle through contactless flux changes. These never degrade mechanically, but they still demand exact hardware zeroing.
Ergonomics and physical stability will ruin your calibration data if ignored. A flight stick that slides across a polished desk when you pull hard back on the stick prevents you from building reliable muscle memory. Heavy desk mounts from outfits like Monstertech or J-PEIN anchor your gimbal below desk height, aligning your forearm at a natural 90-degree angle to your elbow. This arm position reduces involuntary hand tremors that register as axis noise. If your joystick features a dual-cam metal gimbal, experiment with your cam profiles and springs before calibrating. Hard-center cams provide a distinct physical detent when passing through neutral, which suits atmospheric flight models in Microsoft Flight Simulator. Soft-center or no-center free-floating cams shine in space sims where you want seamless transitions across zero-G vectors.
Pay close attention to adjustable dry clutches if your base features them. Tightening the nylon clutch pads on a gimbal adds physical mechanical damping, eliminating that annoying "pogo-stick" oscillation where releasing the grip causes the stick to violently snap past center back and forth. Getting mechanical resistance right physically prevents you from over-correcting in flight before software compensation even gets involved.
Windows Calibration vs Dedicated Hardware Software
Here is a universal golden rule: never touch the native Windows Game Controller Calibration Wizard (accessed via joy.cpl) if your stick ships with proprietary firmware utilities. The built-in Windows tool creates software-layer registry offsets that sit awkwardly between your device driver and the DirectInput API. If your firmware ever updates or your USB port re-enumerates, those registry values apply incorrect math over your stick's raw zero-point, resulting in skewed axis ranges that no amount of in-game tweaking can resolve.
Instead, use dedicated OEM utilities or bare-metal DirectInput diagnostics. Tools like VKBDevCfg, VIRPIL VPC Software, and Thrustmaster T.A.R.G.E.T. write calibration limits directly onto the microcontroller EEPROM housed inside the base. When you calibrate a VKB or Virpil stick through their firmware suites, the physical microchip remembers exactly where mechanical zero sits and where the physical bump stops end. Windows only ever receives clean, processed DirectInput values ranging from 0 to 65,535.
| Software / Utility | Optimal Use Case | DirectInput Handling | Complexity Tier |
|---|---|---|---|
| VKBDevCfg | VKB sticks (Gladiator, Gunfighter) | Direct EEPROM Firmware Write | Advanced |
| VIRPIL VPC Software | Virpil bases, throttles, and panels | Direct Microcontroller Flashing | Enthusiast |
| Joystick Gremlin | Multi-device rigs, cross-brand setups | Virtual DirectInput (vJoy) Layer | Intermediate |
| DIView | Raw axis diagnostic and noise tracking | Passive DirectInput Monitoring | Beginner / Essential |
| Thrustmaster T.A.R.G.E.T. | Warthog, T.16000M script combos | Virtual Device Emulation Layer | Intermediate |
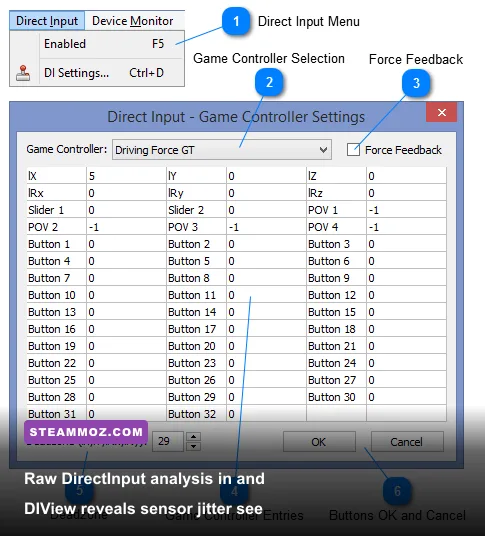
For independent diagnostic verification, download DIView (DirectInput Viewer). This lightweight utility gives you raw, unvarnished insight into what your computer sees. When you move an axis from end to end, DIView displays the exact numerical integer. If an axis resting untouched flickers rapidly between numbers like 32,710 and 32,850, you are looking at electrical noise or mechanical play that needs an inner deadzone. If an axis fails to hit 0 or 65,535 at physical lock-out, you need to expand your firmware calibration envelope.
If you fly with mismatched hardware—such as a VKB flight stick paired with a Thrustmaster TWCS throttle and cross-brand rudder pedals—rely on Joystick Gremlin paired with vJoy. This program grabs physical inputs from disparate USB devices and merges them into a single, unified virtual joystick device, preventing classic Windows controller assignment headaches where older flight engines scramble peripheral ID numbers upon reboot.
Tuning Deadzones: Finding the Sweet Spot Between Drift and Lag
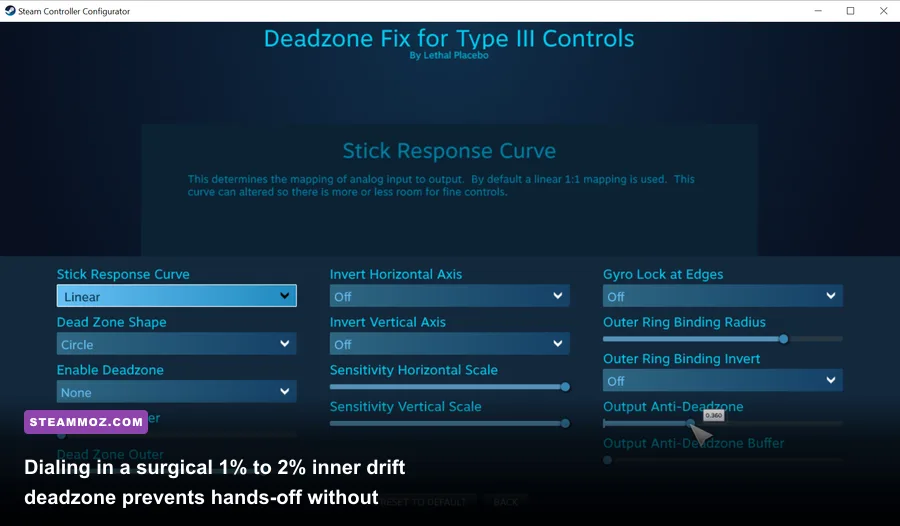
Deadzones exist to silence physical play, sensor noise, and hand weight. However, setting them blindly through massive generic in-game presets (like the default 10% deadzones found in many arcade ports) creates a massive responsiveness void. You pull the stick, nothing happens for several millimeters of travel, and then your elevators violently catch aerodynamic authority all at once. That lag breaks your target tracking instantly.
You need to tune two distinct deadzone thresholds: inner (center) deadzones and outer deadzones.
- Inner (Center) Deadzones: This ring ignores micro-movements right around the resting point. Even top-tier cam gimbals have roughly 0.5% mechanical play due to the tiny clearance required between ball bearings and cam pins. Open DIView, center your stick, let go, and note the numerical drift. Tap the grip from all four directions. If the resting integer shifts by 150 counts on a 16-bit axis, calculate that percentage: (150 / 65535) * 100 = 0.22%. In this case, setting an inner deadzone of 1% to 1.5% completely eliminates resting drift while keeping 98.5% of your physical travel responsive. Cheap potentiometer sticks worn down by friction may require 3% to 5% to stop ghost inputs.
- Outer Deadzones: Outer deadzones dictate how far you must push the stick to hit 100% deflection. Many square or circular gimbal housings prevent sensors from reaching absolute electronic maximums when pushed into the diagonal corners. Setting an outer deadzone of 2% to 4% (capping maximum input at 96-98% physical throw) guarantees that you achieve full rudder deflection or maximum pitch rate even if your physical stick bumps against the corner of its dust boot.
Never layer software deadzones on top of in-game deadzones. If you define a 2% deadzone inside Joystick Gremlin or your hardware firmware, ensure the in-game deadzone setting in DCS World or your space sim of choice sits flat at zero. Stacking deadzones creates a compounding "staircase" response that destroys low-speed flight maneuvers like carrier landings and air-to-air refueling.
Perfecting Response Curves: Linear vs S-Curves vs Exponentials
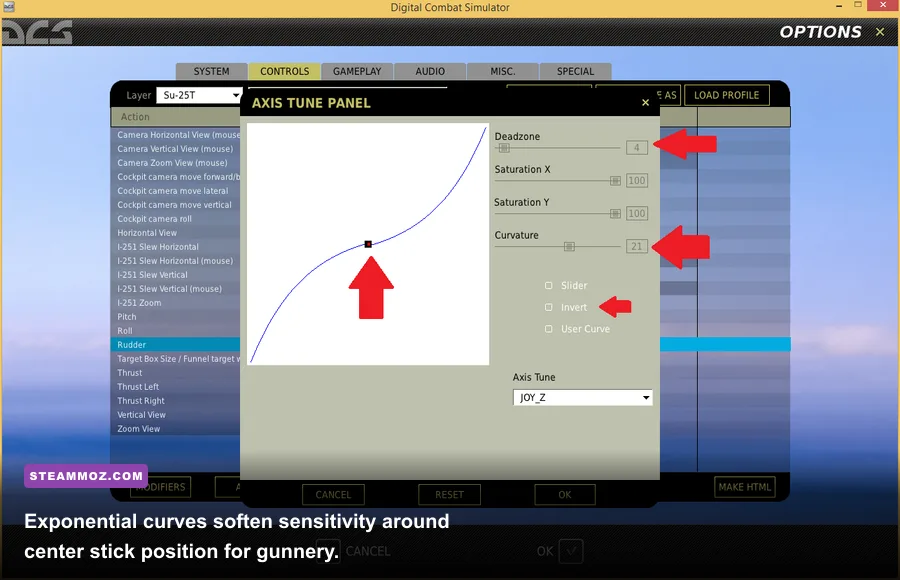
A purely linear response curve means a 10% physical stick movement yields 10% control surface deflection, and 50% yields 50%. While that sounds mathematically pure, human biomechanics and aircraft flight physics don't play well with raw linearity. Near the center position, human hands naturally twitch and struggle to make sub-millimeter corrections when tracking a bandit's tail three miles out.
This is where response curves (commonly labeled Curvature, Expo, or Non-Linearity) become your greatest gunnery tool. Adding an exponential S-curve flattens out the axis slope around the neutral center position, drastically lowering sensitivity where fine-aiming adjustments happen. As you push the stick past 60% deflection, the curve steepens sharply, delivering full aerodynamic deflection at the edges of physical travel so you don't lose emergency turn performance.
| Flight Sim Genre | Target Pitch/Roll Curve | Yaw (Rudder) Curve | Recommended Inner Deadzone | Primary Flight Rationale |
|---|---|---|---|---|
| Combat Jet Sim (DCS, BMS) | +18 to +24 (Expo) | +12 to +15 (Expo) | 1.0% – 2.0% | Fine-tuned gunnery tracking; preserves max turn-rate break turns. |
| Civilian Flight (MSFS 2024) | -10 to -20 (MSFS Scale) | -15 (MSFS Scale) | 0.5% – 1.0% | Simulates hydraulic aircraft inertia; prevents unrealistic airframe stress. |
| Space Combat (6-DOF) | Linear (0) to +8 (Expo) | Linear (0) | 0.0% – 1.0% | Newtonian thrusters require instant, uniform vector response. |
| Helicopter Flight Models | Linear (0) with low trim | Linear (Pedals) | 0.0% (Zero Deadzone) | Cyclic rotors demand immediate, continuous micro-corrections. |
Notice how helicopter flight dynamics flip the script entirely. If you apply heavy exponential curves to a helicopter's cyclic axis, you introduce control lag into your swashplate adjustments, resulting in catastrophic Pilot-Induced Oscillations (PIO) that will flip your bird onto the tarmac. Helicopters require zero deadzones and completely linear input. When you are jumping between combat flight sims and fast arcade-space hybrids, pair your fine-tuned flight stick with a rock-solid system; check out our guide on optimizing graphics settings for max FPS to keep system latency low enough that your input response curves feel snappy and instantaneous.
In-Game Axis Mapping and Eliminating Dual-Input Conflicts
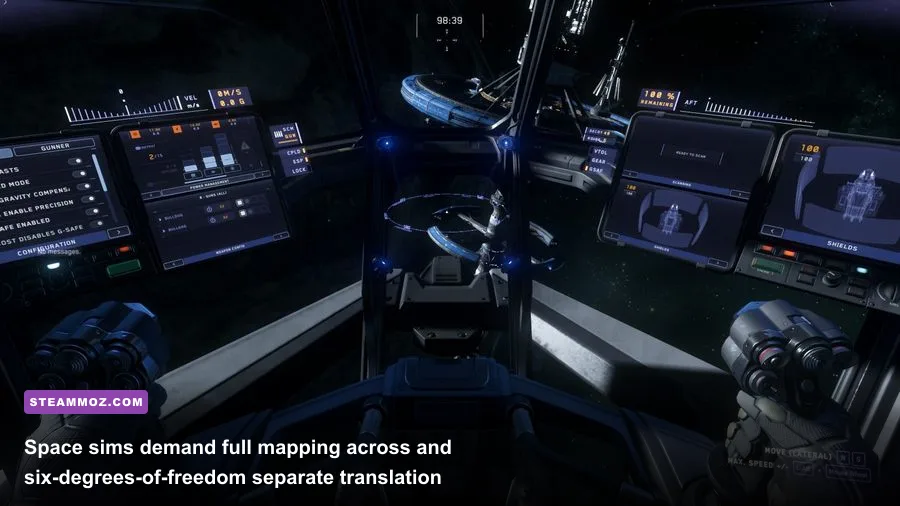
Once your hardware is cleanly calibrated, taking your stick into a modern game requires clearing out default mapping landmines. When you install modern flight engines, their autodetection routines routinely bind every newly plugged-in peripheral to every primary flight axis. It is shockingly common to discover that your throttle's thumb slider and your stick's X-axis are both mapped to Roll simultaneously, fighting each other for control authority.
Steam Input is another frequent culprit. Steam often attempts to wrap DirectInput flight hardware into emulated Xbox 360 controller profiles. This breaks multi-axis reporting, clamps throttle axes into 8-bit digital triggers, and injects severe input smoothing. Right-click your flight game in your Steam Library, head to Properties, navigate to Controller, and select "Disable Steam Input." Let the game engine interface with your joystick's native DirectInput driver directly.
If you run a twist-grip (Z-axis) for yaw/rudder instead of separate rudder pedals, you face an inherent mechanical challenge: when you pull high-G pitch maneuvers, your wrist naturally rotates slightly, bleeding unwanted rudder input into your flight path. Counteract this by giving your twist axis a wider deadzone (around 3% to 4%) and a steeper curve (+25 Expo). That way, inadvertent wrist rotation during an intense turn won't kick your aircraft out of coordinated flight.
For space sim pilots running twin sticks (HOSAS: Hands On Stick And Stick), map your left non-dominant stick to lateral strafe, vertical strafe, and forward/reverse throttle, while reserving your dominant right stick purely for pitch, yaw, and roll. In fast-paced dogfighters, keeping responsive input pipelines is critical; if you are hunting down gear and optimizing performance in open-world space action, our Everspace 2 secret locations and hidden rewards guide showcases how fluid control mechanics let you weave through dense asteroid belts and wreck sites with surgical control. To ensure your game engine runs without hitching while processing high polling rates, consult our rundown on Everspace 2 performance troubleshooting and general PC stability and crash fixes.
Pro-Level Tweaks: Anti-Deadzone, Damping, and Physical Maintenance
Sometimes you encounter games that enforce un-toggleable, hardcoded deadzones at an engine level. No matter what you set in your config menus, the developers baked a mandatory 10% deadzone into the binary to accommodate sloppy console gamepads. You can bypass this using Joystick Gremlin's "Anti-Deadzone" response curve modifier. The Anti-Deadzone filter works by instantly skipping the dead internal values: the moment your physical stick detects 0.1% movement outside its true center, the software immediately broadcasts a virtual output jump to 10.1%, completely skipping past the game's dead zone without sacrificing your fine range of motion thereafter.
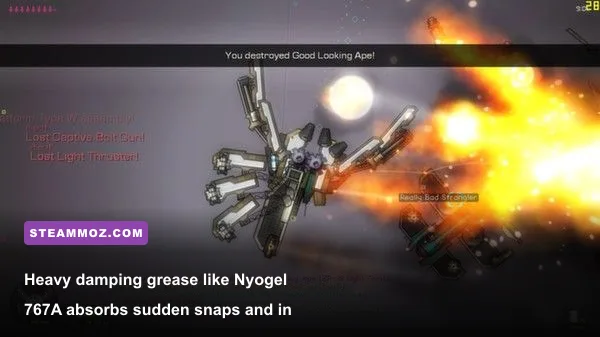
Hardware maintenance matters just as much as digital calibration. If your stick base feels scratchy, "notchy," or catches slightly when you cross the center point, your factory grease has dried out or migrated away from friction points. High-end flight sim enthusiasts swear by fluorosilicone damping grease—specifically Nyogel 767A. Disassembling your gimbal and applying a thin, deliberate coat of Nyogel 767A to sliding cam faces, centering pin rails, and dry clutch collars completely transforms cheap plastic setups into hydraulic-feeling, buttery-smooth flight hardware. It eliminates stick breakout force (stiction), allowing you to move your crosshair by fractions of a millimeter without the stick physically "jumping" into motion.
Finally, inspect your spring tensions every few months. Springs stretch over millions of extension cycles, subtly moving your physical zero position away from your software zero. Swapping worn springs or balancing symmetrical spring tension on dual-axis setups ensures that your calibration curves align perfectly with your stick's physical center for years of reliable, pinpoint flying.