
The fastest GENIE progression loop is simple: follow the highest-level quest you can clear without stopping, chain compact enemy groups with area damage, sell low-value loot after every two or three runs, and spend gold on weapon power before defensive upgrades. The best early route runs through the Verdant Outskirts, shifts into the Sunken Bazaar once enemies stop dying in one rotation, and eventually uses Ember Quarry as the main experience-and-gold circuit.
That sounds straightforward, but GENIE punishes inefficient downtime. Players lose more progress teleporting, sorting a full inventory, or fighting enemies far below their level than they gain from chasing a supposedly rare drop. This guide breaks down the leveling curve, the gold loop, combat priorities, equipment spending, and the settings that make repeated farming runs feel much faster.
Before you start, keep the official GENIE Steam listing bookmarked for patch notes and version changes. Gold values and enemy experience can shift between updates, so treat the route below as a priority system rather than a promise that every reward will remain identical forever.
The fastest GENIE leveling route
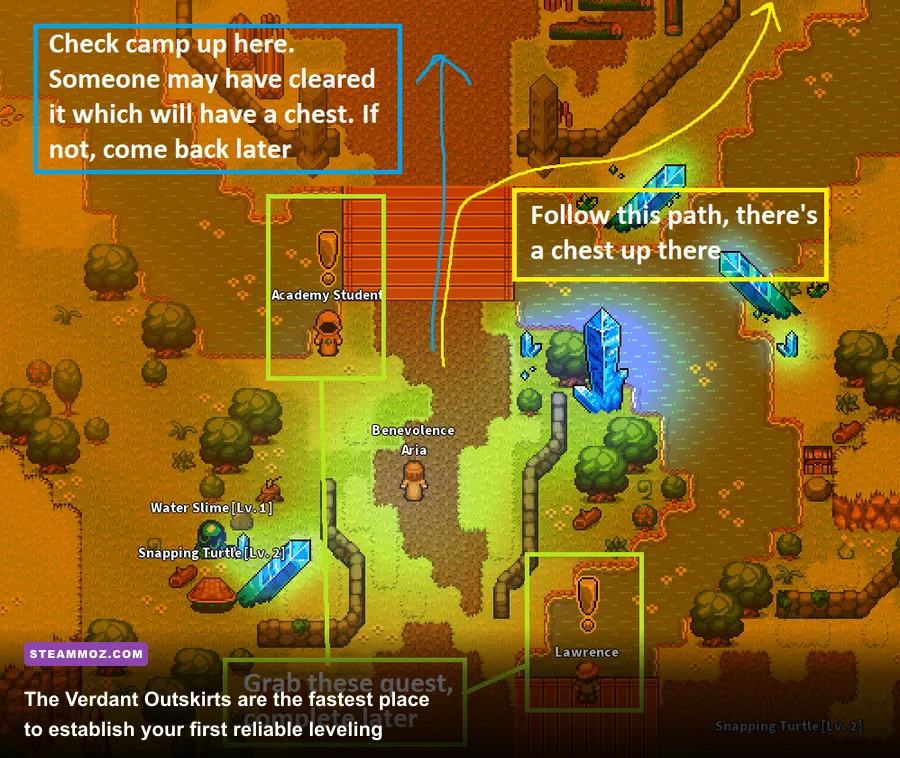
Your first target is not the highest-level area on the map. It is the highest area where normal enemies die in one full skill rotation. In practice, that means starting with the Verdant Outskirts, moving through the quest chain until the game opens the Sunken Bazaar, then using Ember Quarry when your damage is high enough to avoid repeated retreats.
GENIE's experience curve heavily favors completion speed. A weaker character clearing ten enemies in forty seconds usually gains more experience per minute than a stronger character spending three minutes on an elite. Ignore side paths unless they contain a quest objective, a chest directly on your route, or an elite that can be defeated without changing your rotation.
| Progression stage | Primary location | Target clear time | What to prioritize |
|---|---|---|---|
| Levels 1-8 | Verdant Outskirts | 2-4 minutes per quest loop | Main quests, grouped enemies, first weapon upgrade |
| Levels 8-14 | Sunken Bazaar | 4-6 minutes per circuit | Quest objectives, vendor drops, short elite detours |
| Levels 14-20 | Ember Quarry | 5-7 minutes per circuit | Dense packs, ore caches, blue-quality equipment |
| Level 20+ | Highest unlocked dungeon | 8-12 minutes per run | Experience-per-minute, sellable drops, repeatable rewards |
At each transition, test the route with one complete rotation. If your opening attack, area skill, and finisher leave more than two standard enemies alive, stay in the previous zone and upgrade first. That small delay is usually faster than forcing a higher zone with constant potion use.

🎮 GENIE
Looking to experience this game? Grab your digital key directly on our store for $2.49.
View on Steammoz Store →Build your character for clear speed

For leveling, GENIE rewards a practical damage profile: enough power to kill normal enemies immediately, enough resource regeneration to repeat your rotation, and only then survivability. A pure defensive setup may feel safe, but it turns every farming loop into a slow crawl. Likewise, stacking critical chance before your base damage is high enough creates inconsistent kills and wastes cooldowns.
Put your first weapon-related upgrades into the main damage stat shown on your character sheet. After that, favor cooldown reduction or resource recovery, depending on which one prevents your rotation from stalling. Health and armor become more valuable when you begin running Ember Quarry elites or unlocked dungeons, but they should not be your first gold sink.
| Priority | Stat or upgrade | Why it matters | When to stop investing |
|---|---|---|---|
| 1 | Main damage stat | Pushes normal enemies into one-rotation kills | When standard packs die before the finisher |
| 2 | Weapon power | Improves every damaging skill at once | When the next upgrade costs more than one full farming loop |
| 3 | Cooldown or resource recovery | Reduces dead time between groups | When the opening skill is ready for each new pack |
| 4 | Critical chance | Raises burst potential against elites | After base damage is already consistent |
| 5 | Health and armor | Prevents deaths during dungeon or elite pulls | When survivability is the reason runs fail |
Your rotation should start with the widest area attack, not the strongest single-target skill. Pull two or three nearby groups, place the area skill so it clips every target, then use your resource spender and save the finisher for the toughest survivor. This ordering matters because GENIE's cooldowns begin ticking immediately; opening with a single-target attack often leaves your area skill unavailable for the next pack.
A reliable early combat rotation
Use movement to group enemies, cast your area skill, trigger your resource spender, and finish with the highest-damage ability that does not interrupt your travel speed. Against elites, hold one defensive or escape tool rather than spending every cooldown at once. The goal is not a perfect damage parse; it is finishing the fight without stopping to recover.
If your class has a dash, blink, or short movement skill, use it between packs rather than through the middle of a fight. Lost positioning creates more downtime than the movement skill saves. This is also where GENIE feels noticeably better at a stable 60 frames per second: enemy telegraphs are easier to read, and your movement chain is less likely to catch on geometry.
How to farm gold without wasting runs
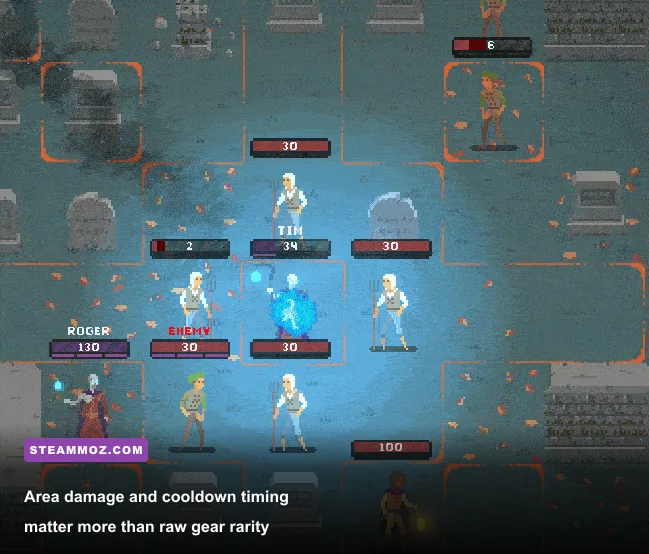
The best gold farm is the route that combines enemy density, vendor value, and repeatable objectives. The Sunken Bazaar is particularly efficient because its enemies are close together and its loot table produces a steady stream of equipment to sell. Ember Quarry becomes better once you can clear its packs quickly, thanks to its ore caches and higher-value drops.
Do not pick up every grey item during a timed circuit. Use a simple rule: collect equipment, currency, crafting materials, and any item with a clearly higher vendor value than the time it takes to reach it. If a low-value drop sits behind a long detour, leave it. Inventory space is part of your gold-per-minute calculation.
| Gold activity | Best use | Expected advantage | Main mistake |
|---|---|---|---|
| Sunken Bazaar circuit | Early and midgame farming | Dense enemies and quick vendor trips | Chasing side rooms for one chest |
| Ember Quarry circuit | Midgame gold and materials | Better drops plus ore caches | Fighting elites before damage is ready |
| Repeatable quests | Stable income while leveling | Gold, experience, and progress together | Abandoning objectives for random loot |
| Dungeon clears | Level 20 and beyond | Large reward bundle and equipment | Running a dungeon slower than an outdoor loop |
Sell after two or three circuits, not after every fight. A full inventory forces an unplanned return, while a quick batch sell keeps your rhythm intact. Before selling, lock anything with a higher item level, a useful stat combination, or a set bonus. GENIE's comparison display is helpful, but it does not understand your build priorities; a lower-level item with cooldown recovery can beat a slightly stronger item that only adds health.
Spend gold in this order: main weapon, damage-supporting accessory, resource or cooldown upgrade, then armor. Avoid buying a complete gear set every few levels. One strong weapon often carries several levels, while replacing every slot drains the money you need for later crafting or travel costs.
When to use quests, elites, and dungeons
Main quests are the backbone of fast leveling because they unlock zones, vendors, and repeatable activities. Side quests are worth taking when they overlap with your current route. If a quest sends you across the map to kill one isolated enemy, postpone it until you are already returning to that area for a main objective.
Elites are profitable only when their kill time stays under roughly ninety seconds and they do not consume a full stack of healing items. Their reward can look attractive, but a slow elite interrupts the pack-to-pack loop that generates most of your experience. Mark difficult elites and return after your next weapon upgrade instead of repeatedly throwing yourself at them.
| Activity | Run it when | Skip it when | Best reward type |
|---|---|---|---|
| Main quest | Always available and near your current route | Rarely skip unless the zone is far above your level | Experience and unlocks |
| Side quest | It overlaps with a main objective | It requires a long detour | Extra gold and equipment |
| Elite enemy | You can finish it in 90 seconds or less | It requires repeated healing | Higher-value loot |
| Dungeon | Clear time is close to an outdoor circuit | Mechanics cause repeated wipes | Reward bundles and upgrades |
For dungeon farming, learn the telegraphs before chasing speed. Red ground markers, delayed overhead attacks, and frontal cones are usually more dangerous than raw enemy damage. Stay behind bosses when possible, keep one movement skill available, and never enter the next room with your resource bar empty. A ten-second pause is cheaper than a failed run.
GENIE's official Steam support and news pages are worth checking after balance patches, especially if a dungeon reward or enemy experience value changes. Community reports can identify a faster route, but verify the location and reward in your own current build before reorganizing your entire farm.
Settings that make farming feel faster
Graphics settings do not directly increase gold, but stable performance absolutely improves your results. Farming depends on movement, pickup timing, and clean telegraph reads. A fluctuating frame rate makes every route feel slower and increases the chance of being hit while pulling groups.
| Setting | Recommended value | Performance impact | Visual trade-off |
|---|---|---|---|
| Frame-rate cap | 60 FPS, or your monitor refresh target | Reduces frame-time spikes | Less peak performance on high-end systems |
| Shadows | Medium | Medium to high FPS gain | Less definition around interiors |
| Effects quality | Medium | Medium FPS gain during large pulls | Less dramatic spell detail |
| View distance | High | Small FPS cost | Keeps distant objectives visible |
| Motion blur | Off | Small clarity improvement | Sharper camera movement |
| Upscaling | Quality mode if available | Useful on older GPUs | Slight softness at long range |
Keep view distance higher than effects quality. Seeing the next quest marker, enemy pack, or resource node helps your route more than elaborate spell particles do. If GENIE offers separate combat and exploration presets, use medium effects during dungeon pulls and restore higher quality for screenshots afterward.
The repeatable gold-and-level loop
Once you reach a zone where your rotation is reliable, repeat this five-step loop: accept every nearby repeatable objective, clear the closest dense pack, complete overlapping quest targets, collect high-value loot, then return to sell and upgrade only when the inventory is nearly full. This structure keeps experience, gold, and equipment moving together instead of forcing you to farm each resource separately.
- Start at the nearest vendor or hub. Repair, clear unnecessary inventory, and equip the best weapon before leaving.
- Run the shortest route first. Clear dense packs in a straight line and avoid backtracking for minor drops.
- Use cooldowns on groups. Save single-target burst for elites or the last enemy blocking a quest objective.
- Review loot quickly. Compare item level and your priority stats, then sell obvious replacements immediately.
- Upgrade before pushing zones. If clear times rise above seven minutes, improve the weapon or return to the previous circuit.
For broader route-planning ideas, Steamoz's Last Rites farming guide and Temple of Osiris loot guide make the same important point: efficient farming is built around repeatable loops, not flashy one-off rewards. GENIE follows that philosophy closely.
Use the official Steam Community hub to check current route discoveries, then measure your own results with a ten-minute test. Count experience gained, gold earned, and minutes spent returning to town. The best farm is the one that produces the strongest combined result, and with the Verdant Outskirts, Sunken Bazaar, and Ember Quarry rotation, GENIE gives you a dependable path from early leveling into serious endgame farming.