
The fastest way to find Force of Nature 2: Ghost Keeper’s hidden rewards is to stop treating the map like a straight quest route. Secret chests sit behind dead-end paths, ruined buildings, cave branches, cemetery corners, and blocked passages that only become useful after you return with the right tool. This guide covers the missable locations, what each detour usually pays out, how to reveal them without wasting durability, and when to revisit an area after unlocking new crafting technology.
Before hunting anything, make a manual save at your base, empty at least six inventory slots, and carry food, a light source, healing items, and the strongest pickaxe or axe you can currently craft. Ghost Keeper mixes survival pressure with action-RPG exploration, so a secret chest is rarely worth dying for. The game’s loot can vary by progression and difficulty, but the locations themselves are consistent enough to route efficiently.
How secret rewards actually work
Most secrets in Force of Nature 2 are not marked with a bright icon. Instead, the game hides them in spaces that look unimportant on the first visit. A path that ends at a rock wall may become a mining detour later; a broken house may contain a second room; and a suspicious gap between trees can lead to a chest just outside the camera’s comfortable viewing angle.
Use the minimap as a detection tool rather than relying only on the main screen. Walk the perimeter of every named location and watch for unexplored fog, a narrow strip of walkable ground, or an object that disappears behind scenery. Hold your interaction key around doors, containers, workstations, graves, and unusual wall sections. Some rewards are simple containers, while others come from interacting with an object or completing a short local task.
| Secret type | What reveals it | Typical reward | Best time to search |
|---|---|---|---|
| Buried or blocked route | Pickaxe, axe, or later tool tier | Ore, stone, crafting components | When the route first appears |
| Ruined structure | Interaction, door, or side entrance | Food, medicine, recipes, equipment | During the first story visit |
| Burial-site cache | Perimeter sweep and interaction | Coins, relic-style items, consumables | After clearing nearby enemies |
| Cave branch | Light source and full wall sweep | Rare ore and upgrade materials | Before major equipment upgrades |
Don’t confuse respawning resource nodes with one-time secrets. Ore and plants can return, but a chest, unique object, or scripted reward generally won’t. If you open a container, mark the spot mentally or with a screenshot so you don’t waste another trip expecting a second drop.

🎮 Force of Nature 2: Ghost Keeper
Looking to experience this game? Grab your digital key directly on our store for $3.99.
View on Steammoz Store →Old Cemetery and the ruined settlement
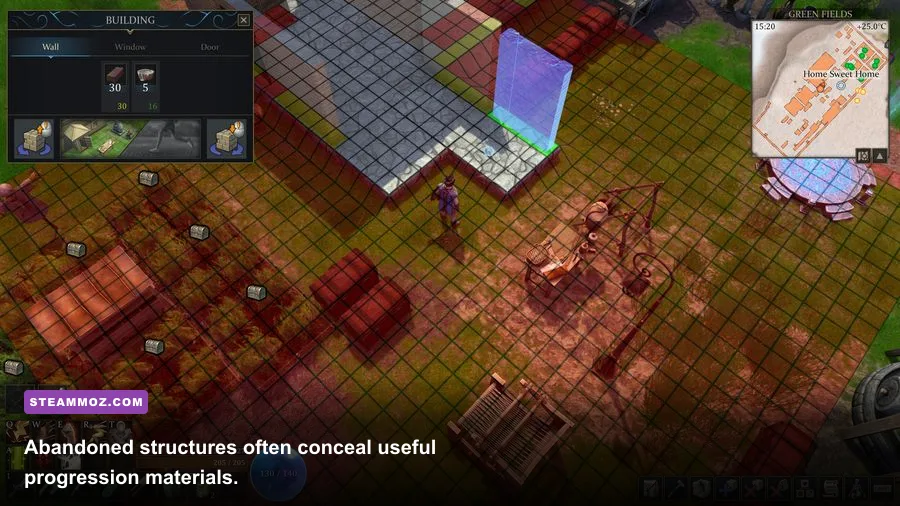
The Old Cemetery is one of the easiest secret areas to skim past because the main route pushes you toward the center. Enter slowly and clear hostile creatures first. Then trace the outer fence, especially the rear edge farthest from the entrance. The valuable detour is normally tucked beside the perimeter rather than placed in the middle of the graves.
Check every grave marker and stone structure with the interaction prompt active. Some are ordinary scenery, but the interactable pieces can provide a small cache of consumables or progression currency. If nothing triggers, leave the zone and return after advancing the relevant quest; scripted interaction points may remain inert until the story has introduced the area’s ghost-related objective.
The ruined settlement nearby deserves the same treatment. Search behind the largest damaged building, then enter each structure from both sides. The most common mistake is stopping after finding the obvious container inside the first room. Broken walls can hide a second chamber, and narrow passages along the back of buildings often contain a chest or loose pickup.
| Area | Search route | Likely hidden reward | Common mistake |
|---|---|---|---|
| Old Cemetery | Entrance, outer fence, rear graves, stone structures | Consumables and valuable quest-related loot | Leaving after clearing the center |
| Ruined settlement | Large house, rear wall, side rooms, dead-end paths | Food, medicine, currency, equipment pieces | Checking only the first visible container |
| Ghost objective area | Return after quest progression and sweep interactables | Scripted reward or story item | Assuming an inactive prompt is bugged |
These areas are also good places to test whether your combat setup is ready. If basic enemies are draining your healing stock, don’t force the next secret. Upgrade armor, improve your weapon, and return with enough carrying capacity to collect everything. Players coming from a loot-focused game may appreciate Steamoz’s weapon tier breakdown, although Ghost Keeper’s slower survival loop rewards preparation more than raw damage.
Abandoned houses, forest gaps, and the swamp camp
Abandoned houses hide rewards through layout tricks rather than elaborate puzzles. Walk around the outside first, then enter and hug every interior wall. Look for doors that blend into the timber, narrow spaces behind furniture, and back exits that appear to lead nowhere. If the camera blocks your view, rotate it before deciding that a room is empty.
Forest secrets are less obvious. When a trail forks, follow the branch that appears to terminate at a tree line or rock cluster. The game frequently places a small clearing just beyond the main camera angle. Sweep with your character moving diagonally, because straight-line movement can leave a one-tile-wide strip unexplored. These pockets commonly contain gathering nodes, loose materials, or a chest intended to reward curiosity rather than combat.
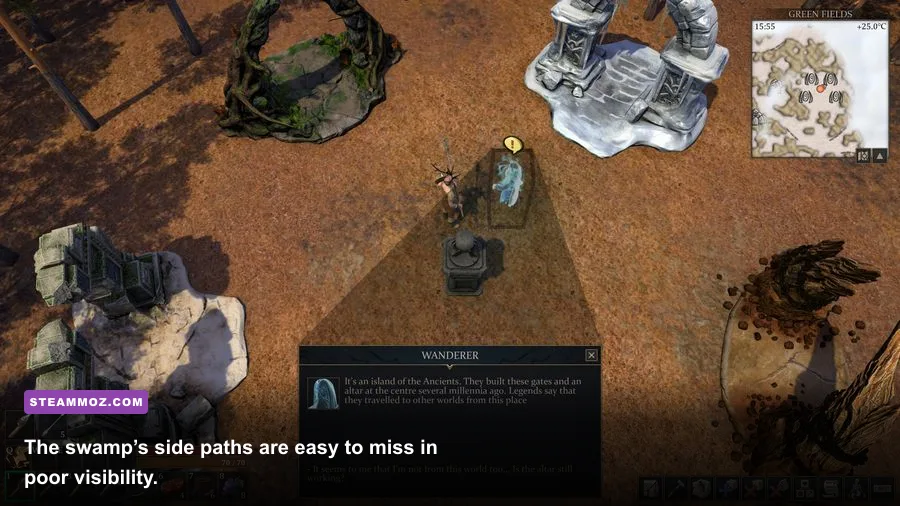
The swamp camp is a particularly useful revisit point. Search the outer boardwalk, the area behind the camp’s larger structures, and the muddy bank opposite the obvious entrance. Bring food and healing because movement and visibility are worse here, while enemies can pin you against terrain. If a route is blocked, mark it and return after upgrading your tool instead of burning durability against an object that cannot yet be opened.
Use the official Force of Nature 2 Steam page for the current build notes, screenshots, and player reports. Version changes can affect spawn behavior, quest triggers, and how quickly containers refill.
Mountain caves and blocked passages

Caves are where the best exploration rewards usually become attached to progression checks. Don’t rush to the visible ore vein and leave. First map the cave’s full outline, including narrow turns behind rocks and branches that appear to be dead ends. A hidden chest may sit beyond a short mining route, while a second ore pocket can be more valuable than the obvious entrance reward.
Bring the strongest available pickaxe and enough durability to finish the route. If your tool breaks halfway through, you may be forced to abandon materials or make a dangerous return trip. Keep your inventory organized before entering: reserve slots for ore, stone, monster drops, and equipment. The trick is not merely finding a secret; it’s being able to carry its reward home.
Enemies in enclosed spaces are more dangerous than their health bars suggest. Back away through cleared ground, avoid fighting beside resource nodes, and use healing before you reach critical health rather than after. A narrow cave entrance can also become an escape route, so clear the first chamber before mining deeper.
| Cave obstacle | Danger | Counter strategy | Reward value |
|---|---|---|---|
| Visible ore chamber | Overcommitting tool durability | Mine only after mapping exits | Reliable upgrade materials |
| Side tunnel | Missing a narrow branch | Walk every wall and rotate the camera | Rare ore or a one-time container |
| Enemy pocket | Being trapped beside rocks | Pull enemies into the entrance chamber | Monster drops and safe access |
| Blocked passage | Wasting tools before progression | Record the location and revisit later | Potentially high-tier materials |
For PC players, stable performance matters during cave fights because the camera and terrain already limit your reaction time. Steamoz’s smoother-FPS settings guide offers useful general tuning ideas, while the official Steam Community hub is the best place to compare current performance reports.
Best route for collecting every hidden reward

The efficient route is a loop, not a one-time sweep. On your first visit to a region, grab obvious resources and identify blocked paths. On the second pass, return with better tools, extra inventory space, and enough healing to handle enemies without retreating. This prevents the classic survival-game mistake of carrying half a chest’s reward while your inventory is packed with low-value wood and stone.
- Prepare at base. Repair equipment, cook food, create healing items, and leave common materials in storage. Carry one weapon, one tool set, light, food, and a few empty slots.
- Clear the main route first. Opening the area and removing nearby enemies makes the perimeter sweep safer and gives you a reliable retreat path.
- Trace the map boundary. Check cemetery fences, settlement backs, swamp banks, and forest corners before mining anything.
- Mark progression gates. A blocked rock, locked interaction, or unreachable branch is a revisit note, not a failed secret.
- Return after upgrades. Recheck caves and structures whenever you craft a stronger axe, pickaxe, armor set, or weapon.
- Finish with a storage run. Deposit rare materials immediately, then save before opening any unusually important chest or triggering a ghost objective.
Prioritize secrets by reward impact. A medicine cache before a major fight is worth more than another stack of common stone; rare ore is worth the detour if it unlocks the next equipment tier; and a story-linked object should be collected as soon as its interaction becomes available. Don’t measure a secret only by how flashy the chest looks—some of the most useful rewards are quiet progression materials.
| Priority | Secret to collect | Why it matters | Recommended action |
|---|---|---|---|
| S | Ghost-objective interaction | Can advance story progression | Revisit when the prompt activates |
| S | Mountain cave side branch | Supports equipment upgrades | Bring a durable pickaxe and empty slots |
| A | Old Cemetery perimeter | Safe consumables and valuable pickups | Sweep after clearing enemies |
| A | Swamp camp rear route | Easy-to-miss supplies and side loot | Search with healing and light |
| B | Forest dead-end clearings | Extra materials and occasional containers | Collect during normal travel |
Keep your own checklist because the game doesn’t provide a perfect secret tracker. Record the region, landmark, whether the container was opened, and whether a blocked path needs a better tool. If you want more practical progression reading, Steamoz’s farming-route guide and starter-build breakdown cover the same valuable habit: spend preparation time where it directly accelerates the next power spike.
Finally, don’t reload just because a chest gives ordinary materials. Rewards can be progression-dependent, and a modest-looking cache may be exactly what your next recipe requires. The reliable strategy is to explore methodically, revisit every marked obstruction, and treat every named location as a complete loop rather than a waypoint. That approach catches the Old Cemetery cache, the settlement side rooms, swamp detours, cave branches, and the ghost-linked rewards without turning Force of Nature 2 into a frustrating pixel hunt.