The best beginner build in Firefighting Simulator: Ignite - 1 Year Edition is a simple interior-attack setup: breathing apparatus, hose line, Halligan tool, thermal imaging camera, and a partner assigned to water supply or search support. Start with the hose, keep the extinguisher for small isolated fires, and treat every call as a three-part problem—access, rescue, then fire control. That approach is safer, faster, and far more reliable than carrying every tool and improvising inside a smoke-filled room.
One important clarification: Ignite is not an RPG with strength, agility, or weapon-damage statistics. Your “build” is a practical loadout and role plan built around the equipment available on the apparatus, the job objectives, and the way you divide work between your firefighter and AI or human crew. The 1 Year Edition does not turn the game into a loot-driven progression system. It gives you the full package of content and updates, but your real progression comes from learning fire behavior, vehicle positioning, hose management, and search discipline.
This guide focuses on the first several career calls and normal solo play. The same setup works in co-op, although a human teammate can take over ventilation, rescue, or the backup line. If you want a broader look at how we approach demanding simulations, our Dragonkin performance settings guide has a similar focus on practical decisions rather than flashy presets.
The Best Beginner Build for Ignite
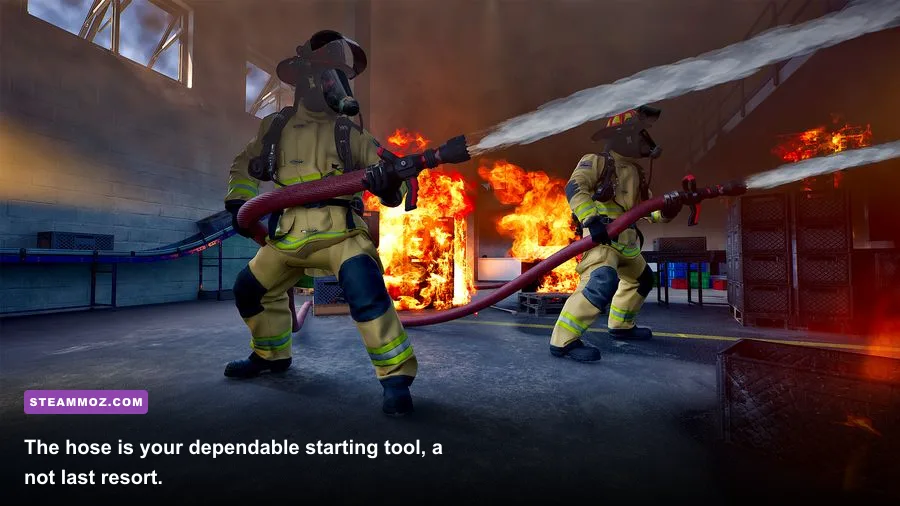
Your first build should be a balanced interior attack kit. It gives you a way to enter, find the seat of the fire, open blocked access points, protect yourself, and deal with the most common early objectives without constantly running back to the truck.
| Build Slot | Recommended Choice | Why It Matters | Beginner Rule |
|---|---|---|---|
| Protection | Breathing apparatus | Lets you operate in smoke-filled interiors for longer | Put it on before crossing the threshold |
| Primary attack | Charged hose line | Controls room fires and protects the advance | Open doors carefully and pulse the stream |
| Access | Halligan tool | Handles forced entry and stubborn doors | Do not waste time striking a door that is already open |
| Information | Thermal imaging camera | Finds heat through smoke and highlights dangerous areas | Scan ceilings, corners, and closed rooms |
| Utility | Portable extinguisher | Excellent against a small isolated fire | Use it for bins, appliances, and spot fires—not a whole room |
The order matters. The breathing apparatus is not a cosmetic safety choice; smoke rapidly turns an easy search into a retreat. The hose is your main tool because it can both suppress flames and create a safer route forward. The Halligan is the access tool, while the thermal camera answers the question that ordinary vision cannot: where is the heat actually hiding?
Leave the axe and additional specialist equipment on the truck until the call specifically demands them. Carrying extra tools sounds prepared, but it creates a common beginner failure: you arrive at a room, realize you brought the wrong item, and lose valuable time walking back through a changing fire. A focused loadout keeps your decisions quick.
Why this build beats an extinguisher-first setup
The extinguisher feels comfortable because it is easy to aim and does not require hose deployment. It is also easy to overuse. An extinguisher has a limited agent supply and a short practical reach, so it shines against a small flame isolated from nearby fuel. It struggles against a room that is already fully involved. The hose gives you sustained output, better reach, and the ability to keep working while the environment changes.
Use the extinguisher when the fire is genuinely small: a single appliance, a wastebasket, or a compact patch that has not spread to furniture. If flames are rolling across the ceiling or multiple objects are burning, connect a hose instead. That one judgment call prevents a huge amount of wasted time.

🎮 Firefighting Simulator: Ignite - 1 Year Edition
Looking to experience this game? Grab your digital key directly on our store for $32.99.
View on Steammoz Store →Build Your First Response Around Roles
A strong starting build is not just what you carry. It is what you do during the first sixty seconds. On arrival, choose one of three jobs: attack, search, or support. Beginners should normally take attack because it keeps the main fire in view and teaches you how smoke, heat, doors, and water interact.
| Role | Core Equipment | First Objective | Biggest Beginner Mistake |
|---|---|---|---|
| Interior attack | Breathing apparatus, hose, Halligan | Establish a safe route and cool the fire room | Charging in before the line is ready |
| Search and rescue | Breathing apparatus, thermal camera | Clear bedrooms, bathrooms, and side rooms | Searching without marking or communicating progress |
| Exterior support | Hose, extinguisher, ladder access | Protect exits and limit exterior spread | Parking where ladders or hose lines cannot work |
| Ventilation support | Halligan or ventilation equipment | Improve visibility only when the attack team is ready | Opening an exit and feeding the fire too early |
For solo players, assign the AI crew the task that removes the most repetitive work. If your crew can establish water supply or handle an external line, let them do it while you take the interior hose. If the mission emphasizes missing civilians, keep the AI on suppression and use your thermal camera for search. The correct assignment changes with the objective; there is no universal “best” order.
In co-op, say the role out loud before anyone moves. “I’m attack, you search, meet at the stairwell” is enough. The worst co-op habit is having two firefighters enter with separate goals and no one maintaining a backup route. A second hose line is usually more valuable than a second person carrying a Halligan.
The first-minute checklist
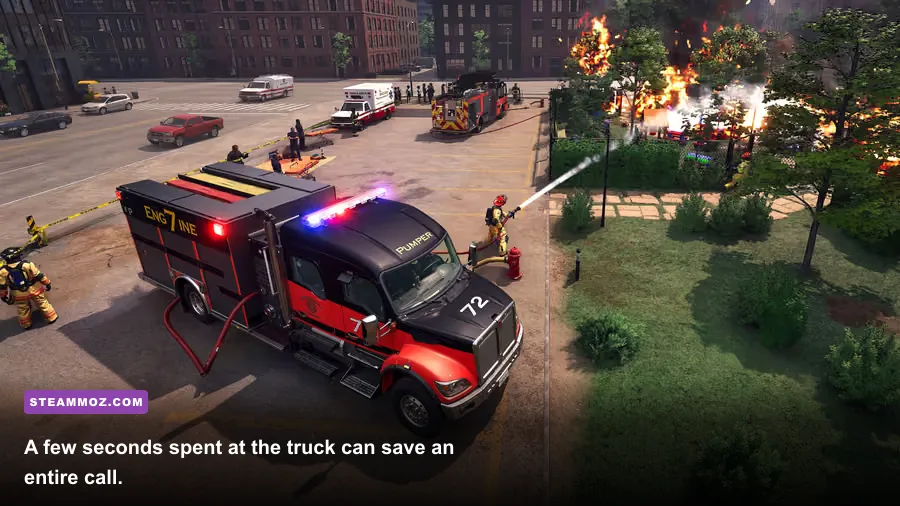
Park the apparatus close enough for hose access but not directly in front of the building entrance. Check whether the mission requires a rescue, suppression, or both. Put on the breathing apparatus before entering smoke. Connect the hose and confirm water is available. Then approach the building from the side that leaves you a clear retreat path.
At the doorway, pause. Listen for the objective prompt, look for visible flame, and scan above your eye line. Fire can be concentrated in the ceiling or an adjoining room even when the entrance looks manageable. Open the door with the hose ready, use a short burst to cool the immediate area, and move only when the heat and visibility make that movement sensible.
Skill Priorities and Progression That Actually Matter

Because Ignite does not use a conventional character-stat build, your progression priority is operational knowledge. Unlocks, missions, equipment access, and scenario familiarity matter more than trying to create a damage-focused firefighter. Think in this order: survivability, water control, access, information, then speed.
| Priority | Practice Target | What You Gain | When to Focus On It |
|---|---|---|---|
| S-Tier | Breathing apparatus and hose discipline | Longer, safer interior operations | Every early mission |
| S-Tier | Thermal-camera scanning | Faster searches and fewer missed hotspots | Any smoky structure |
| A-Tier | Forced-entry timing | Quicker access without unnecessary tool swaps | Locked commercial and residential calls |
| A-Tier | Vehicle and hose placement | Less downtime and better retreat routes | Large structures and multi-room fires |
| B-Tier | Ventilation sequencing | Better visibility and reduced smoke buildup | After attack is established |
Do not chase speed before you can read a room. Fast entry is not fast firefighting if you have to retreat, refill, or restart a search. The most valuable “skill” is recognizing when a room is not ready for entry. If the hose stream is not cooling the space, visibility collapses instantly, or your escape route is blocked, back out and reset.
Your progression curve should look like this: first learn to deploy a hose without tangling yourself around furniture; then learn to identify the hottest area with the thermal camera; then practice opening doors and controlling the stream; finally, add ventilation and ladder work. This order mirrors how real calls become manageable. Information and survivability come before optimization.
Hose technique: short bursts beat panic spraying
Hold the stream on the upper hot layer and the seat of the fire rather than sweeping wildly across every visible flame. Short controlled bursts preserve water and keep your aim deliberate. When the room cools, advance a few steps, reassess, and repeat. If the fire is spreading along a ceiling or through an adjacent opening, direct the stream toward that path instead of standing in the doorway and spraying the nearest object.
Never let the hose become an anchor that traps you. Keep the line behind you in a route that leads back to the entrance. In cramped rooms, work in small movements and avoid wrapping the hose around tables, stair rails, or door frames. The game rewards preparation here more than raw reaction speed.
Step-by-Step Opening for Early Career Calls
Use this sequence on the first residential and small commercial missions. It is deliberately conservative, but it teaches habits that remain useful when the game starts throwing larger structures and multiple objectives at you.
1. Read the scene before touching equipment
Look for visible fire, smoke from windows, open doors, trapped civilians, and the nearest hydrant or connection point. Check the apparatus position. If the vehicle blocks the only access lane, reposition immediately rather than discovering the problem after the interior attack has begun.
2. Establish water and a retreat lane
Connect the hose before entering. Make sure the line reaches the target room without pulling you sideways into obstacles. Your retreat lane should remain recognizable even after smoke thickens. If you cannot see the doorway from the attack position, use the thermal camera and memorize the turns you made.
3. Search the likely civilian rooms first
Bedrooms, bathrooms, offices, and rooms away from the obvious fire deserve deliberate checks. A fast sweep of the main room is not a complete rescue operation. Use the thermal camera at corners and closed doors, and avoid assuming that an empty doorway means the room is safe.
4. Attack the seat, not the symptom
Put out the object or area generating the spread. If you only knock down flames at the doorway, the fire can continue behind furniture, above the ceiling, or in an adjoining room. Once the main flame front drops, scan again for residual heat and hidden pockets.
5. Ventilate after suppression is ready
Ventilation can improve visibility, but opening windows or doors changes airflow. Do it when the attack line is in position and the crew can capitalize on the improved conditions. Early ventilation without suppression can intensify the fire and turn a controlled entry into a retreat.
6. Finish the call methodically
Do not leave when the largest flames disappear. Check adjoining rooms, high corners, furniture edges, and the route between the fire and the exit. Missions often grade completion through objectives beyond simple flame reduction, so confirm rescue, search, and suppression tasks before returning to the apparatus.
This structure is especially useful for players coming from other tactical games. Our Dins Curse beginner tips make a similar point: early survival comes from protecting your options, not gambling on a quick clear.
Vehicle Setup, Ladders, and the Tools to Add Later
The balanced hose build is the right starting point, but it is not the only setup you will use. Large incidents reward a support configuration built around access, height, and exterior containment. The mistake is bringing that setup to a small interior fire where it only slows you down.
| Situation | Best Added Tool | Why It Helps | What to Avoid |
|---|---|---|---|
| Small appliance or bin fire | Portable extinguisher | Quick response with minimal setup | Emptying it on a spreading room fire |
| Locked entry or blocked route | Halligan tool | Creates access without searching for another path | Carrying it after the entry problem is solved |
| Heavy smoke and missing civilian | Thermal imaging camera | Reveals heat and improves search decisions | Trusting the camera as a substitute for hose protection |
| Upper-floor rescue | Ladder apparatus | Creates an alternate access and escape route | Deploying where power lines, trees, or vehicles interfere |
| Exterior spread | Second hose line | Protects exposures while the interior team attacks | Leaving the interior line unsupported |
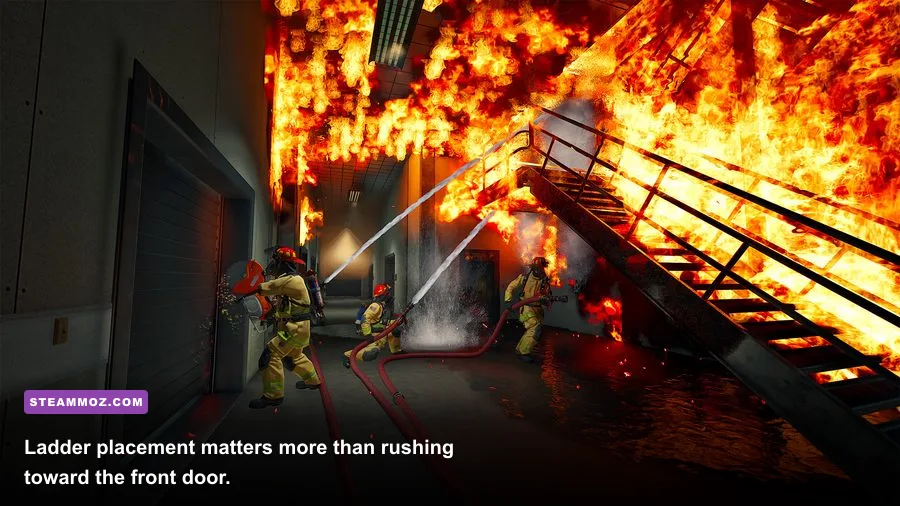
Ladder placement deserves special attention. Approach the building with enough room to deploy, then align the ladder with the actual rescue window rather than the center of the façade. A ladder that looks close can still be useless if it lands below the sill, points at the wrong floor, or is blocked by street furniture. Set it before the emergency becomes a frantic rescue timer.
Use the Halligan with purpose. If the door is open, move on. If it is locked and the mission gives you no obvious alternate entry, force it, then immediately switch back to the hose or camera. Tool swapping is a hidden time sink. The best firefighters in Ignite are not carrying more equipment; they are spending fewer seconds holding the wrong equipment.
Performance Settings for a Smoother First-Person View
A stable frame rate matters in a smoke-heavy simulator because aiming a hose, reading a thermal image, and navigating a tight hallway all become harder when frame pacing stutters. Start with the game's recommended preset, then prioritize consistent performance over maximum reflections or volumetric effects. Exact frame rates depend on your CPU, GPU, resolution, and mission complexity, so treat the table below as a tuning order rather than a promise.
| Setting | Recommended Beginner Value | Performance Impact | Visual Trade-Off |
|---|---|---|---|
| Resolution | Native monitor resolution | High if reduced or increased | Native is clearest for smoke and tool prompts |
| Upscaling | Quality mode, if available | Medium positive impact | May soften distant detail slightly |
| Volumetric smoke or fog | Medium | High in burning interiors | Lower values reduce smoke density and lighting quality |
| Shadows | Medium | Medium to high | Lower settings make exterior scenes flatter |
| Reflections | Medium or low | Medium | Wet surfaces and glass lose subtle detail |
| Textures | High if VRAM allows | Low to medium | Keep high before lowering texture quality |
| Motion blur | Off | Small positive impact | Sharper turns and cleaner tool aiming |
| Field of view | Default, then modest increase | Small GPU impact | Wider view can make close objects look distorted |
If smoke-heavy missions dip while outdoor scenes run smoothly, lower volumetric smoke or fog first, followed by shadows. Do not immediately drop textures; texture quality usually affects memory more than raw rendering time. Cap the frame rate at a number your system can hold consistently instead of allowing dramatic swings between a high outdoor reading and a choppy interior firefight.
For PC troubleshooting, our ELEX crash and FPS fixes cover the same sensible order: update drivers, verify files, disable unnecessary overlays, and test one graphics change at a time. You can also compare your hardware with the real-world PC settings approach we use for lighter games.
Five Mistakes That Ruin a Beginner Call
Entering without a charged hose: You may reach the fire faster, but you have sacrificed your safest way back. Connect first unless the mission clearly demands a fast exterior rescue.
Using the extinguisher on a full room: It feels productive because flames disappear briefly. If several fuel sources are involved, switch to the hose before the fire spreads beyond your control.
Ignoring the ceiling: Smoke and heat are not limited to the object directly in front of you. Scan overhead and check adjoining rooms after the main flame front is down.
Opening everything immediately: Doors and windows change airflow. Ventilate with a reason, preferably after suppression is established and the team is ready to exploit the improved visibility.
Parking for convenience: The shortest walk from the truck is not always the best apparatus position. Leave room for ladders, hose deployment, and a clear route for other vehicles or crew.
Final Recommendation for the 1 Year Edition
Start every unfamiliar call with the balanced interior-attack build: breathing apparatus, hose, Halligan, thermal imaging camera, and extinguisher as a lightweight utility option. Take the attack role, let the crew handle water supply or exterior support, and change your kit only when the mission objective proves that you need to. That discipline gives you the cleanest introduction to Firefighting Simulator: Ignite and scales naturally into harder scenarios.
For official information, check the Firefighting Simulator Steam listing, the astragon developer and publisher site, and the game's official community announcements before assuming a patch has changed equipment behavior. For another example of how a focused first build can outperform an overloaded one, see our Dungeons 2 beginner build guide.
The winning mindset is straightforward: protect the route, read the heat, control the fire, and search after the danger is manageable. Once those four habits become automatic, the equipment stops feeling like a cluttered inventory and starts working like a real response system.