DRAGON BALL Z: KAKAROT has no conventional weapons, so the real tier list ranks Super Attacks, Soul Emblems, Community Boards, training upgrades, and meal bonuses. S-Tier choices are Ultimate Kamehameha, Super Saiyan Blue transformations, maxed Training Room upgrades, high-bond Soul Emblems, and full-course meals that raise attack or Ki. Accessories and ordinary inventory items matter far less. If you are searching for a weapon tier list, this is the important correction: Kakarot’s best “equipment” is the system that multiplies your damage, not a sword, rifle, or armor set.
That distinction saves a lot of wasted time. The game borrows the structure of an action RPG, but Goku, Vegeta, Gohan, Piccolo, Trunks, and the rest of the cast do not equip weapon classes with attack values. Their combat performance comes from character level, transformation, passive skills, Super Attack development, Community Board bonuses, meals, and the temporary effects of items. This ranking focuses on what actually changes a fight, including the difference between a flashy move and a genuinely efficient one.
For a broader look at how RPG progression systems work, Steamoz’s Dungeon Siege retrospective is a useful comparison. Kakarot is far more cinematic, but its best builds still reward understanding the numbers behind the spectacle.
The Kakarot Weapon Tier List, Corrected
Think of each Super Attack palette as a weapon loadout. You can carry several techniques, but only a few deserve priority because they combine high damage, reliable hit confirmation, useful stun pressure, and manageable Ki cost. The best setup is not always the attack with the largest single number. A move that misses mobile bosses or leaves you locked in a long animation can lose more damage than it gains.
| Tier | Equipment or ability | Why it ranks here | Best users |
|---|---|---|---|
| S-Tier | Ultimate Kamehameha | Huge beam damage, excellent reach, strong boss punish after a stun | Goku, Gohan |
| S-Tier | Super Saiyan Blue | Major offensive boost with enough Ki generation to sustain burst rotations | Goku, Vegeta |
| S-Tier | Training Room upgrades | Raises the ceiling of selected Super Attacks and provides permanent progression | Every playable fighter |
| A-Tier | Super Spirit Bomb | Excellent story and boss burst, but setup time makes it situational | Goku |
| A-Tier | Big Bang Attack | Fast, dependable ranged pressure with strong Vegeta synergy | Vegeta |
| A-Tier | Masenko variants | Reliable beam damage and useful access during Gohan’s progression | Gohan |
| B-Tier | Solar Flare | Great control and opening creation, but limited direct damage | Krillin, Tien |
| B-Tier | Burning Attack | Useful burst and easy targeting, though later techniques outscale it | Trunks |
| C-Tier | Low-level early-game techniques | Fine before the skill tree develops, but poor long-term resource targets | Any early character |
The S-Tier label does not mean every move should be spammed. Ultimate Kamehameha is at its best when the enemy is stunned, recovering from a failed super attack, or trapped in a long animation. Firing it into a boss that is teleporting or armored wastes both Ki and your damage window. The same rule applies to Super Spirit Bomb: it can deliver spectacular burst, but its charge and execution time make it less practical during chaotic exchanges.
For everyday combat, pair one heavy finisher with one quick projectile and one control option. Goku can use a fast Kamehameha variant to maintain pressure, then reserve Ultimate Kamehameha for a break state. Vegeta’s Big Bang Attack is particularly comfortable because it delivers ranged damage without demanding the same commitment as a large ultimate. Piccolo’s ranged tools and support-oriented techniques also become more valuable when you are controlling a party rather than chasing a solo damage record.

🎮 DRAGON BALL Z: KAKAROT
Looking to experience this game? Grab your digital key directly on our store for $14.99.
View on Steammoz Store →S-Tier Super Attacks and How to Use Them
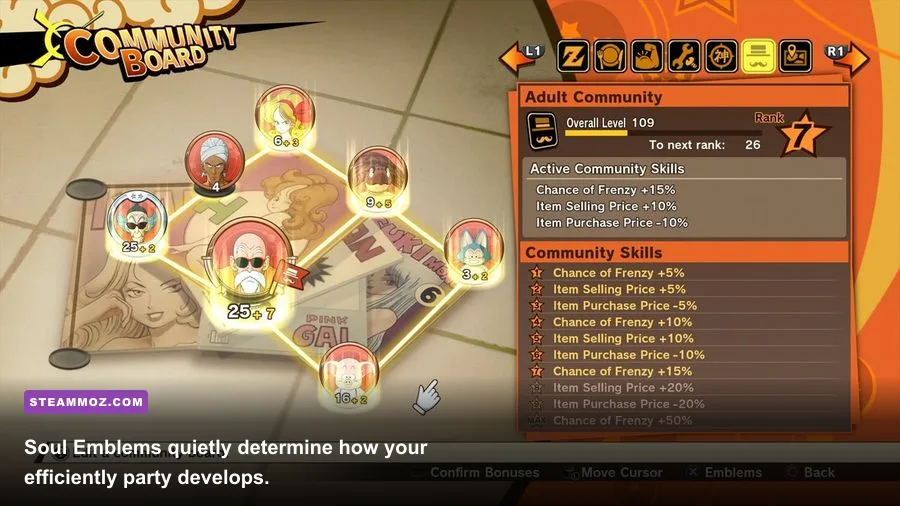
Super Attacks are the closest equivalent to weapons in Kakarot, and their ranking changes with the fight. Standard enemies often die before a full combo matters, while major opponents such as Raditz, Nappa, Frieza, Cell, and Mira punish careless charging. Your goal is to create a repeatable rotation around stun and guard break rather than simply filling the palette with expensive attacks.
Ultimate Kamehameha
Ultimate Kamehameha is the safest top-tier recommendation for Goku and Gohan because it combines a clear visual hit with long-range coverage. Use normal melee strings or a quick Ki blast to force the enemy into recovery, then fire the ultimate when the target’s movement is predictable. The beam is especially effective after a successful Surge or when an enemy has just finished a charged super attack.
Its weakness is commitment. If the opponent has a red aura, is teleporting, or has entered a scripted invulnerability sequence, cancel the plan and reposition. Kakarot’s bosses often telegraph their most dangerous attacks with a colored warning field. Boosting directly through that warning to launch a beam is how a promising fight turns into a healing-item tax.
Super Spirit Bomb
Super Spirit Bomb belongs in A-Tier rather than S-Tier for one reason: it asks for time. Against a stunned boss or a target pinned by an assist, it is devastating. Against a fast enemy in open space, the charging window can be more valuable than the final hit. Treat it as a planned finisher, not a default button.
Big Bang Attack and Masenko
Big Bang Attack is Vegeta’s practical workhorse. It is quick enough for neutral pressure and powerful enough to remain relevant after the Saiyan Saga. Vegeta’s transformation options make Ki management important, so avoid building a palette where every button drains a large chunk of your resource. One efficient ranged attack, one close-range punish, and one ultimate is usually stronger than four expensive moves.
Masenko earns its A-Tier placement because Gohan receives strong value from a beam that is easy to aim and useful throughout the story. It will not always produce the biggest screenshot number, but consistency matters more when you are clearing random encounters, side quests, and villainous parties. For animation-heavy techniques and the full roster of moves, check the official Steam listing alongside the Bandai Namco game page.
| Combat role | Recommended choice | Rotation use | Common mistake |
|---|---|---|---|
| Fast neutral damage | Big Bang Attack or standard Kamehameha | Use after a short melee string or vanish | Spending all Ki before the boss enters break state |
| Boss punish | Ultimate Kamehameha | Fire during stun, recovery, or guard break | Launching into teleport or red-aura armor |
| Planned finisher | Super Spirit Bomb | Charge while the enemy is controlled or staggered | Charging in neutral with no protection |
| Control | Solar Flare | Create breathing room and reset positioning | Judging it only by raw damage |
Best Equipment Means Soul Emblems and Community Boards
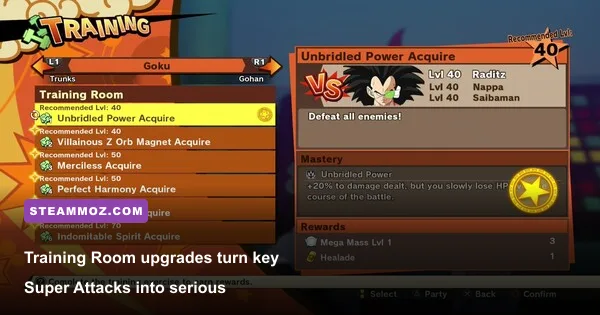
Soul Emblems are Kakarot’s most misunderstood equipment system. They do not add attack damage like a weapon, but they improve the Community Boards that govern key bonuses. The best emblem is not automatically the one with the highest individual level. A high Community Board rank, strong link bonuses, and good gift investment can outperform a famous character placed randomly.
Goku, Chi-Chi, King Kai, Master Roshi, Bulma, and other characters belong to different board categories. The Training Community Board is built around combat development, while the Cooking board improves meal-related returns and the Development board helps with crafting and vehicle-focused progression. You can move emblems freely, so experiment rather than treating the first arrangement as permanent.
For a combat-first setup, prioritize the Training board and look for links that raise its rank. Goku, Vegeta, Gohan, Piccolo, and other martial artists are natural anchors. Keep high friendship values in mind because gifts improve emblem proficiency and can increase the value of their board placement. Chi-Chi is more important on the Cooking board than on a combat board, where her role helps maximize meal output instead of direct battle performance.
| Priority | System | Best investment | Practical result |
|---|---|---|---|
| 1 | Training Community Board | Place martial artists together and use matching links | Better combat-oriented passive bonuses |
| 2 | Cooking Community Board | Build Chi-Chi’s proficiency and improve linked emblems | Stronger full-course meal effects |
| 3 | Development Community Board | Use Bulma and development-focused characters | Better crafting and support progression |
| 4 | Adventure Community Board | Invest when exploration and resource gathering are your bottlenecks | More comfortable open-world cleanup |
Do not hoard every gift forever. Gifts exist to raise Soul Emblem proficiency, and that progression compounds over a long campaign. If you are about to begin a difficult story stretch, spend a portion of your stored gifts on the characters supporting your main board. The return is usually better than leaving every present untouched while hoping for a theoretically perfect arrangement.
The same principle applies to community leaders. A board with excellent links but no upgraded proficiency is often weaker than a slightly less glamorous board that you have actively developed. Kakarot rewards steady optimization: place emblems, improve bonds, check links, and revisit the board after recruiting a new character.
Steamoz’s Dungeons 3 progression tips cover a very different game, but the lesson carries over: systems that look optional often become the backbone of a strong late-game setup.
Training Room, Transformations, and Stat Priorities
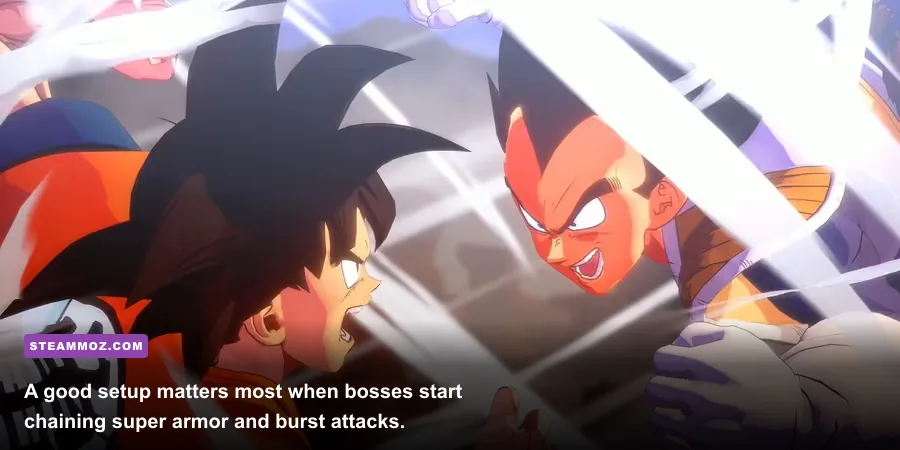
The Training Room at Capsule Corporation is the most direct permanent upgrade system, especially once you unlock tougher challenges and invest materials into its development. It should be a priority whenever the story makes new upgrades available. The room can improve Super Attacks and unlock progression opportunities that ordinary random battles cannot match.
Transformation management comes next. Super Saiyan, Super Saiyan 2, Super Saiyan 3, and Super Saiyan Blue are not cosmetic toggles; they change the damage and Ki economy of Goku and Vegeta. The strongest transformation is only useful if your Ki recovery, meal preparation, and encounter length can support it. For a long sequence of fights, a slightly weaker form that stays active is often more efficient than repeatedly draining yourself for a burst window.
Your stat priority should be simple. First, raise character and Super Attack progression through story rewards, training, and relevant upgrades. Second, improve Ki sustainability if your rotation depends on beams or ultimates. Third, use meal bonuses before difficult story battles rather than consuming them randomly during low-level open-world encounters.
| Progression target | Priority | Why it matters | When to spend resources |
|---|---|---|---|
| New Super Attack levels | Very high | Directly improves your damage options and break-state punishment | Whenever the skill tree or Training Room unlocks it |
| Transformation upgrades | Very high | Raises burst potential and changes Ki management | Before major saga finales and DLC challenges |
| Training Room development | High | Permanent account-wide combat value for available fighters | When materials are not needed for an immediate story upgrade |
| Meal bonuses | High for bosses | Temporary offensive and defensive boosts can smooth difficult fights | Before bosses, not routine dinosaur hunts |
| Minor consumable items | Medium | Excellent emergency healing, limited long-term progression value | Use when a fight goes wrong instead of restarting blindly |
On PC, performance can affect this ranking in a practical way. Kakarot is an action game built around reaction windows, so a stable frame rate is more useful than a handful of extra visual effects. At 60 frames per second, enemy aura warnings, vanish timing, and beam release cues are easier to read than during uneven performance. That does not make a higher refresh rate a damage stat, but it can make your defensive timing feel far more consistent.
For troubleshooting, pair the game’s official PC requirements with Steamoz’s PC crash and FPS fixes. Keep resolution scaling sensible, disable expensive effects first if frame pacing is poor, and avoid blaming your build for missed inputs caused by stutter.
Best Builds for Goku, Vegeta, Gohan, and Piccolo
Goku’s best general build is a balanced burst setup: one fast Kamehameha, one control or gap-closing option, and Ultimate Kamehameha as the finisher. Use a transformation when you have enough Ki to complete the rotation, then preserve a small reserve for emergency movement and defensive recovery. Goku is the easiest character to build around because his kit covers nearly every combat situation.
Vegeta is strongest when you play aggressively but refuse to waste Ki. Big Bang Attack handles neutral exchanges, while a close-range strike or combo route punishes a stunned target. Vegeta’s transformation damage is excellent, but the resource cost can tempt players into a bad loop: transform, fire two expensive techniques, run dry, and lose the ability to answer a boss super attack. Keep one lower-cost move equipped.
Gohan benefits from a beam-centered setup built around Masenko variants and a high-damage finisher. His combat role changes across the story, so do not overinvest in an early technique just because it carried the Saiyan Saga. Revisit his skill tree after major story transitions and replace outdated moves when the stronger version becomes available.
Piccolo is the reliable control specialist. His ranged attacks give you room to study enemy telegraphs, and his support presence makes him valuable even when he is not the active fighter. Use Piccolo when you want a safer battle rhythm: create distance, punish a whiffed super attack, and call assists during a break window rather than burning every resource at once.
| Character | Recommended build | Core techniques | Best battle plan |
|---|---|---|---|
| Goku | Balanced beam burst | Kamehameha, Ultimate Kamehameha, control option | Build stun, then commit to the ultimate |
| Vegeta | Efficient ranged pressure | Big Bang Attack, close-range punish, transformation | Maintain Ki reserve while forcing recovery |
| Gohan | Beam-focused finisher | Masenko variants and a high-tier ultimate | Stay at mid-range and punish predictable movement |
| Piccolo | Control and safety | Long-range attacks, Solar Flare-style control, assist support | Reset spacing and attack during enemy recovery |
| Trunks | Direct burst damage | Burning Attack and sword-combo pressure | Use fast burst before the enemy can armor through it |
Against story bosses, watch for three telegraphs. A red aura usually means you should stop trying to trade and prepare to evade. A large colored targeting field signals an incoming super attack, so move laterally or vanish rather than retreating in a straight line. A stagger or break animation is your premium damage window. That is when assists, transformations, ultimate beams, and full Ki expenditures belong.
Do not spend healing items as a substitute for learning those signals. Sensu Beans and other recovery items are valuable when a long fight goes sideways, but they cannot fix a rotation that constantly empties your Ki or ignores boss armor. Adjust the palette first, then use items to stabilize the attempt.
Meals and the Final Equipment Ranking
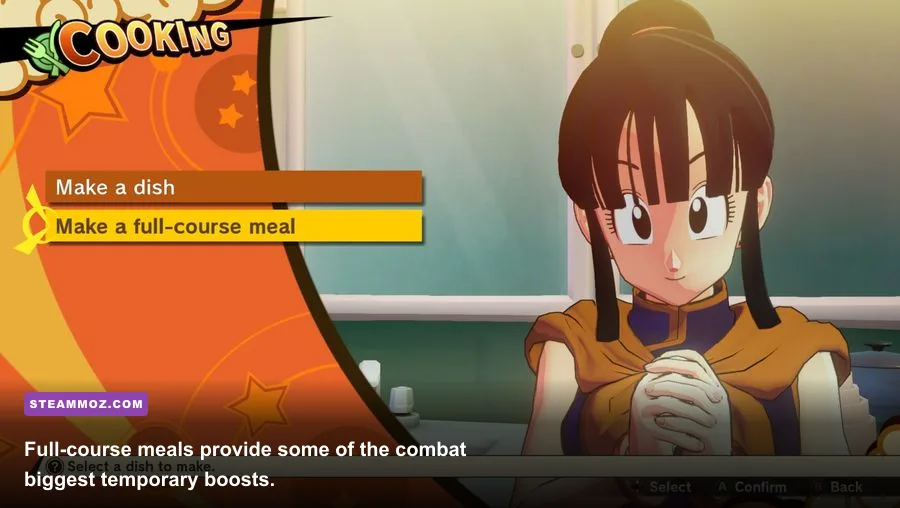
Full-course meals are the best temporary “equipment” in Kakarot because their bonuses apply before combat begins and can cover weaknesses in a developing character. Chi-Chi’s cooking menu can provide meaningful boosts to offensive stats, defensive stats, HP, Ki, and other attributes depending on the recipe and ingredients. Save premium ingredients for saga bosses, major villainous enemies, and DLC encounters rather than spending every dish on routine patrols.
The ideal preparation loop is straightforward. Finish side activities that provide ingredients, return to a cooking location, select a full-course meal suited to your character, check the duration and bonuses, then enter the difficult encounter with a Super Attack palette that matches the buff. An attack-focused meal pairs naturally with Goku or Vegeta’s burst rotation. A defensive or HP-focused meal is more valuable when you are learning a boss and still taking avoidable damage.
| Final rank | Equipment category | Value | Who should prioritize it |
|---|---|---|---|
| 1 | Training Room and Super Attack upgrades | Permanent damage and progression improvement | Everyone |
| 2 | Transformation upgrades | Massive burst potential with Ki-management demands | Goku and Vegeta |
| 3 | Training Community Board | Long-term combat bonuses and efficient character development | Players pushing late game |
| 4 | Full-course meals | Powerful temporary boosts before difficult battles | Boss-focused players |
| 5 | High-level Super Attack palette | Flexible damage, control, and punish options | Every active fighter |
| 6 | Healing and support items | Excellent safety net, weak as a permanent build strategy | New players and long encounters |
The short version of this DRAGON BALL Z: KAKAROT weapon tier list is that the game’s “best equipment” is layered. Upgrade the Training Room, develop the Training Community Board, keep your strongest Super Attacks leveled, manage transformations around Ki, and use full-course meals before serious fights. Ultimate Kamehameha and Big Bang Attack deserve top billing, but they only become elite when the systems around them are developed.
There is no hidden sword, armor set, or legendary weapon waiting to transform your damage numbers. Kakarot’s real loot chase is knowledge: knowing which techniques fit each character, when a boss can be punished, where your Ki should go, and which Soul Emblems deserve your gifts. Build around those decisions and even the toughest late-game encounters become dramatically more manageable.
For more RPG optimization and progression advice, browse Steamoz’s weapon tier list coverage and equipment-ranking guide. Those games have literal weapons; Kakarot’s best gear is more subtle, but mastering it is every bit as rewarding.