Code of Princess does not have a traditional collectible map with numbered, permanently fixed secrets. Its hidden rewards come from off-route treasure containers, breakable scenery, optional quests, alternate lane paths, and character unlock conditions. The safest full-clear method is to sweep all three lanes after every encounter, destroy every suspicious object before the exit appears, and replay completed quests on higher difficulties when a reward does not drop.
That distinction matters because many old posts call every rare drop a “secret chest location.” In practice, Code of Princess and Code of Princess EX mix fixed stage objectives with randomized equipment rewards. A chest or breakable object can be easy to miss, but the weapon inside is not always identical. This guide separates the reliable locations from the random loot, then gives you a route for unlocking the game's less obvious rewards without wasting hours farming the wrong mission.
How Code of Princess Hides Its Rewards
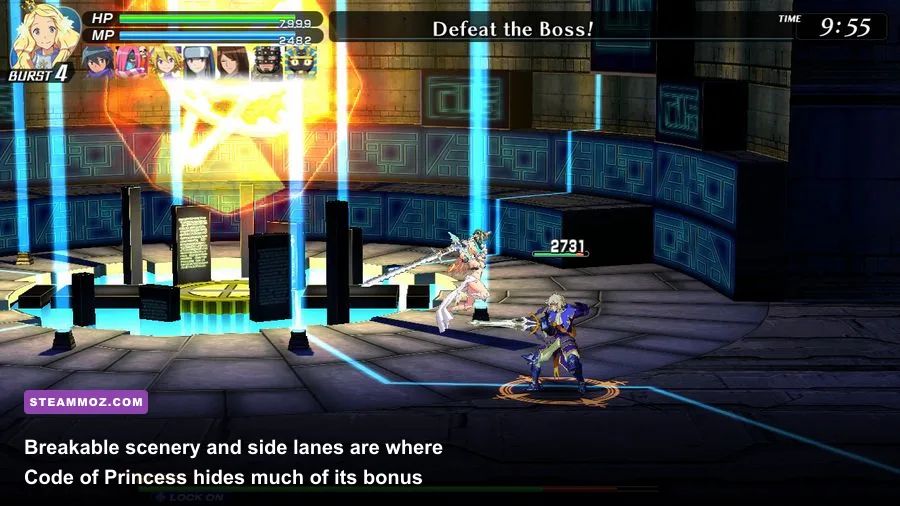
Every combat stage is built around a horizontal arena with three movement planes: the foreground, the central lane, and the background. The camera naturally favors the middle, so enemies and treasure tucked into the other two planes are the first things players miss. A reward may also sit behind a wave trigger, meaning it doesn't become interactable until the current group is defeated.
There are four important rules to remember:
- Clear the whole arena before advancing. Some exits activate as soon as the objective is met, but the previous section can still contain a breakable object or side pickup.
- Check both outer lanes. Move up and down through the lane-change points even when the screen looks empty. A chest can be visually masked by foreground decoration.
- Break scenery before collecting drops. Barrels, crates, urns, signposts, wooden barricades, and decorative containers are more than visual clutter in treasure-heavy quests.
- Expect randomized equipment. The location of a bonus reward is often repeatable, while its weapon, armor, stat roll, or rarity can change between runs.
Use Solange for a first sweep if you are still learning the layouts. Her sword has forgiving reach and her straightforward ground strings let you destroy objects without constantly losing control of the character. Ali is faster and excellent for crossing a cleared arena, while Zozo is the safer pick when enemies respawn around a suspected reward. Allegro's ranged pressure is useful, but his attacks can push enemies and objects away from where you want them.
The official Steam listing for Code of Princess EX is worth checking before following an old 3DS guide. Quest names, menu layouts, and unlock information can differ between versions, while community maps often combine the original release with EX content.

🎮 Code of Princess
Looking to experience this game? Grab your digital key directly on our store for $2.99.
View on Steammoz Store →All Reliable Secret-Reward Locations
Rather than inventing fixed coordinates for a game that uses several repeatable quest layouts, use these landmark checks. They cover the places where secret rewards consistently appear or where players most often trigger an optional reward condition.
| Location type | What to inspect | Likely reward | Best search timing |
|---|---|---|---|
| Starting arena | Outer foreground and background edges | Coins, healing items, low-level equipment | Before the first wave trigger |
| Enemy spawn corner | Barrels, crates, urns, and wall props | Consumables or equipment drop | Immediately after the wave dies |
| Mid-stage fork | Unoccupied lane opposite the objective marker | Bonus chest or optional pickup | Before crossing the screen boundary |
| Boss approach | Last side pocket before the boss gate | Higher-level gear and recovery items | After all regular enemies are cleared |
| Post-boss arena | Breakables near the exit or reward prompt | Extra currency and quest completion loot | Before leaving the stage |
The starting arena
Don't rush into the first enemy group. Walk to the far left and far right edges, change lanes, and attack every breakable prop. This is the lowest-risk place to learn whether a quest contains destructible scenery. Early rewards are rarely spectacular, but the coins and starter equipment help new characters survive the first difficulty jump.
The spawn corners
After a wave appears, enemies can cover a container that was visible a moment earlier. Finish the group, then return to the exact spawn point. This is especially important in cramped castle and village-style stages, where a barrel blends into the architecture. If a heavy enemy knocked you across the screen, retrace your path before triggering the next section.
The mid-stage fork
The most commonly missed reward sits on the lane that does not contain the obvious objective. If the game points you toward a gate, bridge, or enemy cluster in the middle lane, sweep the upper and lower lanes first. The reward may be a chest, a breakable prop, or simply a dead-end pocket containing several objects. Never assume a dead end is empty until you've attacked the walls and floor props.
The boss approach and exit
Boss gates are a psychological trap: players see the warning and stop exploring. Before entering, clear the final side pocket and grab every visible pickup. After the boss, don't immediately accept the stage completion prompt. Check both lanes around the arena and the route back toward the entrance. The post-boss reward is usually tied to the quest result rather than a single chest, but missed breakables can still cost you currency and equipment.
This same method works well in other loot-focused games. Steamoz's Bug Fables weapon breakdown makes a similar point about separating guaranteed gear from random rewards, while the Blood Rush secret-location guide is useful if you enjoy methodical map sweeps.
Hidden Character and Quest Rewards
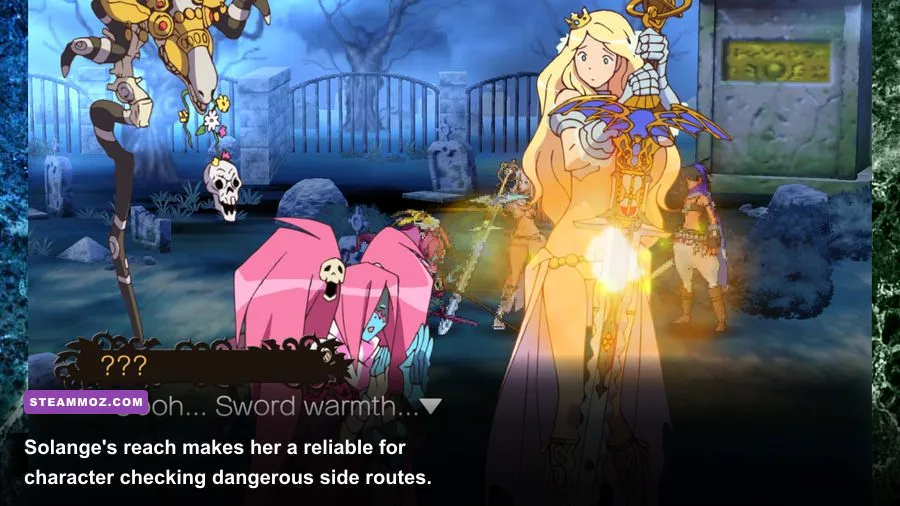
The biggest rewards in Code of Princess are not always sitting in a box. Completing story chapters, optional quests, and challenge content expands the roster and gives you access to characters with completely different combat rhythms. Solange, Ali, Zozo, and Allegro form the central party, but the broader cast is where the game's replay value really opens up.
Start by finishing the main story instead of abandoning it to farm early equipment. Story progress unlocks additional quests and exposes more of the game's character content. Once a new quest category appears, read its objective carefully: some missions reward completion, while others expect a specific performance condition such as protecting an NPC, defeating a target, or surviving a timed encounter.
For unlock hunting, use this order:
- Clear the next available story mission with your main character.
- Return to the quest menu and check every newly opened optional mission.
- Complete missions with named objectives before grinding random free-play stages.
- Replay difficult quests after your roster and equipment improve.
- Check the character-selection screen after returning to the main menu; some unlocks are not loudly announced during the mission result screen.
| Reward category | How to pursue it | What changes the result | Efficient approach |
|---|---|---|---|
| Story characters | Advance the campaign | Story progression | Prioritize main quests first |
| Optional characters | Clear relevant bonus or challenge quests | Quest availability and completion | Read objective text before starting |
| Equipment | Open containers and finish quests | Difficulty, drop tables, random rolls | Farm the fastest reliable mission |
| Currency | Destroy scenery and finish stages | Breakable count and result grade | Sweep side lanes before exits |
| Skills and upgrades | Level characters and manage equipment | Character level and loadout | Test new skills in Training |
Don't treat every locked portrait as proof that a hidden chest exists. Some characters are gated by progression, some by optional content, and some are associated with the expanded EX roster. If a guide promises a character from one exact barrel but your version doesn't produce it, the guide is probably mixing releases or confusing a random equipment drop with a roster unlock.
Best Characters for Secret Hunting
Searching is still combat, and your character choice determines how safely you can inspect a stage. The ideal secret-hunting build is not necessarily the highest-damage setup. You want reach, crowd control, and enough mobility to move between lanes without being clipped by an off-screen attack.
| Character | Secret-hunting strength | Weakness | Recommended use |
|---|---|---|---|
| Solange | Long sword reach and stable ground attacks | Slower repositioning | First clears and breakable-object sweeps |
| Ali | Fast movement and agile attack strings | Less forgiving when surrounded | Speedy repeat farming |
| Zozo | Area control and ranged magic pressure | Needs space to cast safely | Searching after enemy waves respawn |
| Allegro | Ranged damage and safe harassment | Can scatter targets and drops | Open arenas and boss approaches |
Solange's safest routine is simple: approach a container, use a short attack string, pause, then change lanes before the next enemy wave. Avoid holding a long combo while exploring; knockback can send a breakable prop or dropped item toward the screen edge. With Ali, dash through the upper and lower lanes first, then return to the middle for the fight. Zozo should place herself where a spell can cover the enemy spawn while leaving one lane open for inspection.
For bosses, search before the gate and save your strongest meter-based attacks for the actual fight. A secret reward is worthless if you enter the boss arena with no recovery item and half a health bar. If your character keeps getting interrupted, switch to a sturdier loadout rather than chasing a slightly better weapon. The best equipment is the item that lets you finish the quest consistently.
Difficulty, Farming, and Drop-Reroll Strategy
Code of Princess rewards repetition, but not every replay is equally productive. Early missions are useful for learning routes and testing a character. They are poor long-term farms once your equipment has outgrown their enemies. Move to the fastest optional quest that still drops gear near your current level, then repeat it with a complete lane sweep.
Difficulty affects the quality and usefulness of drops, but a higher setting is not automatically better if it doubles your clear time. A clean five-minute run with every container destroyed can beat a chaotic fifteen-minute run on a tougher setting. Track the number of useful items per minute, not just the headline rarity of one lucky drop.
| Farm profile | Priority | Route | When to use it |
|---|---|---|---|
| First clear | Survival and unlock progress | Middle lane, then both side lanes | New story or optional quest |
| Equipment farm | Useful drops per minute | Destroy known props, skip empty detours | Current gear feels underpowered |
| Completion sweep | Every chest and breakable | Left edge to right edge on all three lanes | Before marking a quest complete |
| Challenge replay | Quest objective and survival | Ignore low-value props until waves are safe | Hunting character or special rewards |
If the reward is random, don't restart after every ordinary item. Finish the quest, note the time, and compare the result against another mission. Restarting only makes sense when the secret is a guaranteed chest and you can reach it quickly. For equipment, repeated clears are usually more efficient than trying to force a particular weapon from a single container.
Keep a small inventory buffer, too. A full equipment screen can turn a good run into a wasted one if you overlook the pickup prompt. Sell or discard obsolete gear between runs, then test any new item before committing to another farm. Weapon numbers matter, but a familiar moveset and a useful bonus often outperform a slightly stronger item that ruins your combo timing.
What Counts as 100 Percent Completion
Code of Princess doesn't present secret hunting like a modern checklist-driven open-world game. A complete run means different things depending on your goal: clearing the story, unlocking the available roster, finishing optional quests, collecting strong equipment, or simply finding every breakable object in a stage. Treat those as separate completion targets.
For a practical full-clear checklist, complete every visible story mission, revisit the quest menu after each major chapter, clear optional missions with named objectives, and replay stages where you previously left a side lane unexplored. Check the character screen after major unlock milestones. Finally, test the Training Room with each newly acquired character so you can tell whether the reward is genuinely useful or merely novel.
One final warning: walkthroughs claiming a single universal list of chest coordinates are often unreliable. The original Nintendo 3DS release and Code of Princess EX do not always present content identically, and random equipment tables make screenshots look more definitive than they are. Use landmarks, quest objectives, and repeatable sweep patterns instead of trusting an unexplained “secret chest” label.
That approach also keeps the grind sensible. Steamoz's BloodRayne farming guide covers the same principle: farm only when the activity improves your power efficiently. If your PC version is stuttering or loading oddly, compare the official Nicalis Code of Princess EX page with the game's Steam community hub before assuming a missing reward is a secret.
The short version is this: sweep all three lanes, break every suspicious prop, revisit spawn points after each wave, and treat character unlocks as quest rewards rather than chest loot. Once you stop hunting for fictional fixed coordinates and start reading Code of Princess's arena logic, the hidden rewards become far easier to find—and the farming becomes much less tedious.