
The fastest way to level Bayek and build a healthy drachma reserve in Assassin’s Creed Origins is to follow the main quest only until you unlock Alexandria, then clear side quests, viewpoints, enemy camps, papyri, and wildlife routes inside your recommended level range. Sell every duplicate weapon at blacksmiths, dismantle low-value gear when you need crafting materials, and spend ability points on Warrior and Seer skills that increase kill speed and loot efficiency. This approach keeps you ahead of the story without resorting to mindless grinding.
Origins uses a level-gated RPG structure, so wandering into a level 35 fort at level 12 is a spectacularly bad investment. Enemies hit harder, assassinations lose their instant-kill potential, and even basic guards can burn through your healing supply. The trick is not finding one magical XP exploit; it’s stacking several rewarding activities along the same route so every trip produces experience, gear, materials, and money.
Start in Siwa, Then Move East With the Story
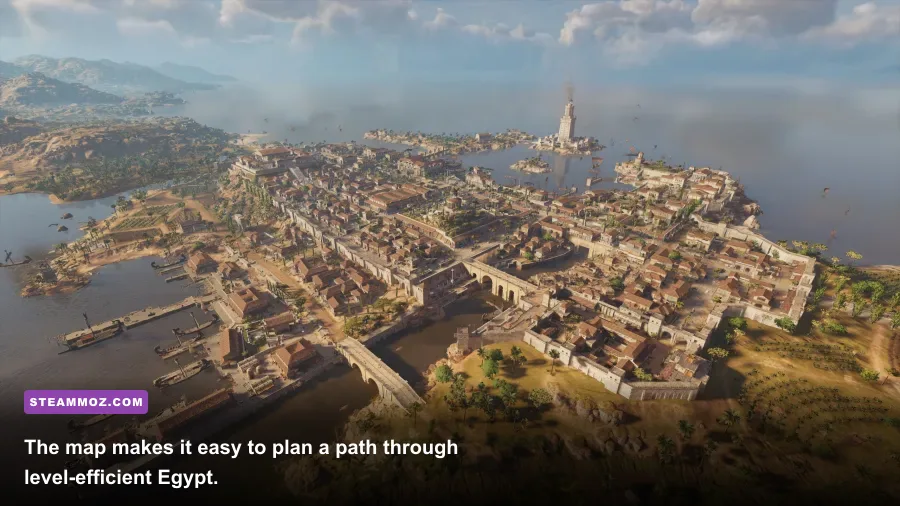
Begin by completing the opening sequence in Siwa and prioritizing the early objectives that teach you combat, Senu scouting, and investigation. The most useful early skills are Regeneration, Parry, and Assassination. Regeneration lets Bayek recover from ordinary mistakes between encounters, while Parry turns shield-bearing guards into easy counterattack targets. Assassination remains valuable even when it no longer kills an enemy outright because the opening damage gives you a huge advantage.
Don’t rush directly from one golden main-quest marker to the next. Siwa and the surrounding Iment Nome contain low-level camps, animal dens, treasure locations, and side quests that can push Bayek several levels ahead before you leave. Synchronize viewpoints whenever they appear. Viewpoints don’t produce a huge XP payout by themselves, but they reveal roads, activities, and fast-travel points, saving considerable time later.
Once the story sends Bayek toward Alexandria, make the city your first major hub. Alexandria’s quests are densely packed, and the surrounding Lake Mareotis, Sap-Meh Nome, and Kanopos Nome regions offer a smooth progression curve. Accept every available side quest, but avoid accepting quests marked several levels above Bayek. A quest two levels above you can be manageable; one five or more levels above you usually turns into a slow, frustrating slog.
| Activity | Typical Reward | Best Use | Risk |
|---|---|---|---|
| Side quests | Large XP payout, gear, drachmas | Primary leveling route | Low when within level range |
| Enemy camps | XP for objectives, loot, materials | Stack stealth kills with treasure hunting | Medium if alarm spreads |
| Viewpoints | Exploration XP and fast travel | Unlocking efficient travel routes | Very low |
| Papyri puzzles | XP and rare gear location | Breaking up combat-heavy sessions | Low |
| Animal dens | Leather, soft and hard hide, XP | Crafting and quick repeatable income | Varies by animal |
After Alexandria, the best general rule is simple: finish activities in the current region before pushing into the next story zone. You’ll gain levels naturally, and the gear you collect will usually be strong enough to avoid wasting drachmas on constant blacksmith purchases. For broader efficiency advice, the same route-planning mindset applies to our fast leveling and gold farming guide for Empires of the Undergrowth.

🎮 Assassin's Creed Origins
Looking to experience this game? Grab your digital key directly on our store for $8.99.
View on Steammoz Store →Stack XP From Camps, Quests, and Exploration
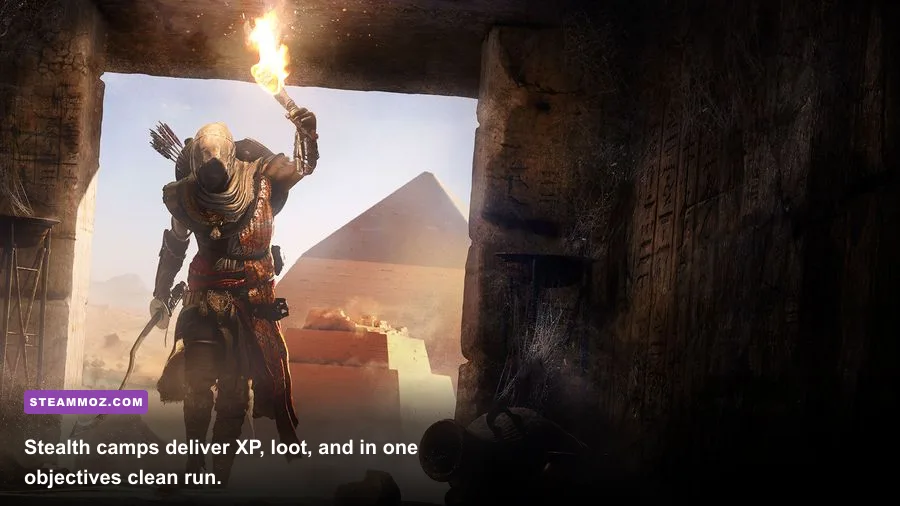
The best XP loop in Origins combines one story or side quest with every nearby activity. Send Senu overhead before entering a location and mark the captain, commander, treasure chests, scrolls, and alarm fires. A military camp is worth far more when you complete its objectives, loot its treasure, free prisoners, and kill its named officers instead of simply eliminating a few guards and leaving.
Night infiltration is usually the fastest approach. Guards sleep or stand in predictable patrol patterns, and many camps can be cleared without triggering an alarm. Start by sabotaging the alarm fire if you can reach it safely. Then assassinate isolated guards, use a silent bow shot on lookouts, and save the captain for last. If the captain survives the opening strike, switch to a heavy weapon or shield-and-sword combination rather than trying to force another assassination through a level disadvantage.
Quest XP is generally the most valuable because objectives often overlap with exploration. If a quest sends you to a fort, complete the fort’s location objectives before leaving. If it takes you through a town, loot chests and synchronize nearby viewpoints while you’re there. Papyri are especially efficient when you’re already near their clue location. They provide a change of pace and can lead to rare weapons without requiring a full combat encounter.
Use Senu aggressively. The eagle can identify elite enemies, quest targets, chests, entrances, and valuable animals before Bayek commits to a route. This reduces failed approaches, and failed approaches are expensive: you lose time, burn healing opportunities, and often end up fighting reinforcements that provide no special reward. Senu’s tagging is also useful for spotting red chests, which frequently contain better equipment than ordinary containers.
Choose activities by XP per minute
Don’t clear every red icon just because it exists. A nearby level-appropriate camp with three objectives is usually better than crossing half the map for a single treasure chest. The same principle applies to side quests. Prioritize missions that remain close together, especially in Alexandria and the Nile Delta, where roads and settlements create compact activity clusters.
| Priority | Activity Pattern | Why It Works | Recommended Method |
|---|---|---|---|
| S-Tier | Side quest plus nearby camp | Combines major XP with location rewards | Scout with Senu, clear objectives, loot everything |
| A-Tier | Dense region circuit | Minimal travel between several activities | Use viewpoints and complete icons in clusters |
| A-Tier | Story quest with exploration | Progresses the narrative while revealing new areas | Stop for viewpoints and chests on the route |
| B-Tier | Standalone animal den | Excellent crafting value but modest XP | Farm during travel, not as your only activity |
| C-Tier | Random low-level guard patrols | Weak XP and unreliable loot | Ignore unless you need a quick weapon drop |
Daily quests from the Nomad’s Bazaar can also add variety and rewards, but they aren’t a substitute for regional questing. Their availability and objectives can vary, so treat them as bonus income rather than the backbone of your leveling plan.
Spend Ability Points on a Fast-Kill Build

For fast leveling, build around reliable kills rather than flashy abilities. In the Warrior tree, take Parry, Regeneration, and Overpower. Overpower charges through combat and gives Bayek a powerful burst attack, while Parry lets you punish shield users instead of circling them for several seconds. Later, Adrenaline 2 and Overpower Combo make elite encounters much shorter.
The Hunter tree should supply Bow Bearer, Elite Ranger, and Enhanced Predator Bow when available. Bow Bearer lets you carry two bows, which is ideal for combining a Hunter Bow for precision damage with a Predator Bow for silent headshots. Enhanced Predator Bow greatly improves the damage and utility of guided arrows, though it demands more careful aiming and a steady supply of arrows.
In the Seer tree, Animal Taming is fun but not essential for speed. Prioritize Sleep Darts, Smoke Screen, and Buy Materials. Sleep Darts can remove a dangerous guard from the encounter, Smoke Screen creates an escape window after a failed assassination, and Buy Materials lets you convert spare drachmas into crafting progress. Chariot Owner is a quality-of-life choice for players who spend a lot of time moving between objectives.
Use a Hunter Bow to open on an exposed head, switch to a Warrior Bow for close-range follow-up, then activate Overpower against captains or heavy soldiers. Against shielded enemies, Parry the attack rather than rolling repeatedly. Against brutes, stay just outside their wide swings and punish the recovery animation. Bayek’s hitbox is generous, but his recovery after a missed heavy attack is not; reckless swings are one of the quickest ways to waste time and healing.
| Skill | Tree | Priority | Reason |
|---|---|---|---|
| Assassination | Seer | Early | Lets stealth openings remove or heavily weaken guards |
| Parry | Warrior | Early | Hard-counters shield attacks and accelerates duels |
| Regeneration | Warrior | Early | Reduces downtime between encounters |
| Bow Bearer | Hunter | Early | Supports both precision and rapid-fire bow setups |
| Sleep Darts | Seer | Mid | Removes a high-threat target from a camp temporarily |
| Overpower Combo | Warrior | Mid | Turns a charged ability into a fast elite kill |
Gear level matters more than rarity early on. A level 18 blue sword will normally outperform a level 10 legendary sword simply because enemy scaling is severe. Keep one strong weapon of each useful class, upgrade favorite legendary items only when you’re attached to their perks, and don’t pour money into replacing every weapon after a single level-up.
Farm Drachmas by Selling Gear and Hunting Wildlife
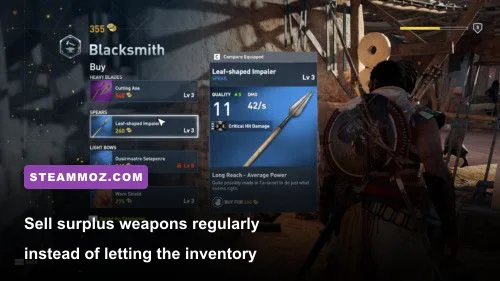
The most dependable gold farming method is not a secret chest route. It’s disciplined inventory management. Every camp, fort, and quest produces weapons and shields, and most of those items are safe to sell once you’ve compared their damage, quality, and perks. Visit a blacksmith, use the sell screen, and clear out duplicate low-level equipment before your inventory becomes cluttered.
Keep legendary weapons, unique quest rewards, and items with perks that match your build. Sell ordinary gear that is several levels below your current equipment. If you’re short on crafting materials, dismantle instead of selling: dismantling produces components such as bronze, iron, cedarwood, and various hides, while selling produces drachmas. The right choice depends on your current bottleneck.
Wildlife is the other half of the economy. Hunt hippopotamuses and crocodiles for hard hide, gazelles and hyenas for soft hide, and vultures for animal goods. Crocodiles are dangerous but predictable: keep distance with a bow, aim for the head, and avoid fighting in shallow water where their lunges are harder to read. Hippos have a brutal charge, so attack from the side and roll through the follow-up bite rather than backing straight away.
Use the Buy Materials skill when a crafting upgrade is close but a particular material is missing. Don’t buy everything blindly. Drachmas are better spent on scarce materials, weapon upgrades that preserve a favorite perk, and ammunition. Buying basic supplies in bulk can quietly drain your wallet, especially before you’ve built a strong selling routine.
Enemies also drop drachmas, and treasure chests frequently contain cash alongside gear. This is why complete camp looting is more efficient than rushing objective kills. After the captain falls, use Senu’s earlier markings to sweep the barracks, armory, rooftops, and storage areas. It takes seconds with a clear route and turns every XP run into a gold run.
Use Phylakes and the Arena at the Right Time

Phylakes are elite bounty hunters who begin pursuing Bayek after the relevant story progression. They carry powerful weapons and can destroy an underleveled player, so they are not an early-game farming target. Once Bayek is within their level range and has a dependable weapon, Phylakes become excellent high-value fights. Their questline rewards legendary gear, and killing all ten eventually unlocks the Phylakes’ Prey conclusion with additional rewards.
Study their weapon types before engaging. A Phylakes with a heavy blade has slower but punishing swings; one with dual blades attacks quickly and can shred Bayek during a bad dodge; spear users control space with long thrusts. Lock on, watch the shoulder and weapon movement, and avoid panic-rolling. A perfect dodge creates a short punish window, while Parry is safest against readable shield or sword strikes.
The Arena of Krokodilopolis becomes useful after the story opens it. Arena fights provide combat practice and rewards, but they aren’t always the fastest raw XP-per-minute option compared with side quests and camps. Use the Arena when you want to sharpen timing, test a new weapon class, or earn rewards without traveling. Don’t repeatedly fight above your comfortable level just because the next opponent is available.
| Target | When to Farm | Main Reward | Combat Advice |
|---|---|---|---|
| Low-level camps | Immediately after reaching a region | XP, weapons, drachmas, materials | Disable alarms and clear objectives |
| Animal dens | Whenever crafting is behind | Soft hide and hard hide | Use bows and attack from safe angles |
| Phylakes | When within one or two levels | Legendary weapons and quest progress | Read weapon telegraphs and avoid greedy combos |
| Arena bouts | After the Arena unlocks | Combat rewards and practice | Parry shield users and save Overpower for elites |
For performance-minded players, keep the game responsive during these fights. On PC, prioritize a stable frame rate over maximum foliage or volumetric effects. Origins can become CPU-heavy in Alexandria and crowded settlements, and inconsistent frame pacing makes parries feel late even when your timing is correct. Our PC crash and FPS troubleshooting guide covers the same practical approach to reducing stutter in demanding open-world games.
Follow a Repeatable Leveling and Gold Loop
Here’s the route I recommend whenever Bayek feels underleveled or short on cash. First, return to the nearest settlement and sell duplicate weapons. Second, check crafting requirements and dismantle only the gear that supplies a material you actually need. Third, open the map and choose a side quest in your level range. On the way there, synchronize any nearby viewpoint and clear one camp, animal den, or treasure location.
At the quest site, scout with Senu, mark the objective, remove alarm threats, and complete every location challenge. Loot the camp before leaving. After the quest turns in, repeat the same process in the neighboring region rather than fast-traveling across Egypt for a single isolated icon. This loop steadily raises Bayek’s level while keeping his weapons current and his crafting upgrades moving.
Keep three rules in mind. Never ignore a nearby viewpoint. Never carry a full inventory into a major fort. And never spend ability points randomly just because a new icon looks interesting. A focused Warrior-Hunter setup kills faster, takes less damage, and therefore earns more XP and drachmas per minute than a scattered build.
For a clean story playthrough, aim to remain one or two levels above the current main quest without obsessively clearing the entire map. That balance preserves challenge while preventing level-gated missions from interrupting the narrative. If you’re playing The Hidden Ones or The Curse of the Pharaohs, finish the base-game regions first and bring upgraded gear; the expansions expect a much stronger Bayek.
You can verify current PC versions, controller support, and installation details through the official Steam page for Assassin’s Creed Origins. Ubisoft’s official Assassin’s Creed Origins page also lists the game’s setting and major features, while Ubisoft Support is the place to check account, save, and technical information.
That’s the entire economic engine in practice: quest through level-appropriate regions, turn every camp into a full objective clear, hunt animals while traveling, and sell surplus gear every time you return to town. Origins rewards momentum. Keep moving through Egypt with a plan, and Bayek will stay overpowered enough to enjoy the story without ever needing a tedious gold exploit.
If you enjoy optimizing older PC RPGs, Steamoz also has practical guides for beginner build planning in Far Cry 6 and choosing weapons worth your credits in Everspace.