
The fastest way to level in Architect Life: A House Design Simulator - Supporter Edition is to chain short, requirement-heavy career contracts, complete every scored objective before adding decoration, and reinvest gold into tools that remove repeated work. Don't treat each property like a free-build art project. Read the brief, build a compact shell, satisfy the checklist, use a memorized interior template, and leave optional landscaping until the contract score is secure. The Supporter Edition doesn't turn inefficient builds into profitable ones; your real advantage comes from route planning and avoiding expensive rework.
This guide focuses on legitimate progression rather than save manipulation or idle exploits. Architect Life rewards completion, not merely placing the most expensive furniture. A beautiful house can still be a poor farming run if you spend too long on rooms the client never requested. For the latest feature notes and edition details, check the official Steam listing and the developer's SimFabric website before applying older advice to a patched build.
Start with the right contract, not the biggest payout

Career progression is fastest when you compare the whole contract, not the headline gold number. A large commission may demand a broad floor plan, multiple utility connections, a full furniture package, and several trips between construction stages. A smaller contract with a tight brief can produce more gold per minute and more reliable level progress because you finish it cleanly on the first attempt.
How to calculate a profitable job
Before accepting a contract, check four things: the cash reward, the number of required rooms, the construction complexity, and the amount of optional work. The best early jobs usually involve a compact house with a clear bedroom, bathroom, kitchen, and living-area requirement. These properties let you reuse the same layout and furnishing rhythm. Avoid jobs that combine a large footprint with vague design demands until your building workflow is quicker.
Use the contract screen as a filter. If the brief requires an item you have not unlocked, factor in the purchase cost and the time needed to travel, shop, or return to the site. Gold earned is not the same as gold kept. A contract paying 12,000 gold can be worse than one paying 7,500 if the first job forces 6,000 gold of avoidable purchases and an hour of extra construction.
| Contract profile | Leveling value | Gold efficiency | Best approach |
|---|---|---|---|
| Compact starter home | High early | High | Repeat a four-room template and finish all mandatory objectives |
| Large family property | High later | Medium | Accept after unlocking faster construction and more furnishing options |
| Decoration-heavy brief | Medium | Low to medium | Use only when the reward justifies extra placement time |
| Large custom build | Variable | Low early | Save for sandbox enjoyment or a well-upgraded career profile |
Keep a simple mental rule: take the shortest job that advances a new unlock or pays enough to cover one planned upgrade. If every available contract is expensive, complete the least wasteful brief rather than repeatedly abandoning jobs. Progress is usually lost through indecision and unfinished sites, not through choosing a slightly imperfect contract.
Why optional work should wait
Optional work is where gold farming runs go bad. Landscaping, extra wall segments, premium flooring, and decorative clutter can make a property look dramatically better, but they also consume placement time and budget. Build the required shell first, install the required rooms, and check the objective panel. Only then spend on appearance. If the contract already qualifies for its reward, extra decoration is a luxury, not an investment.
That principle also applies to the Supporter Edition. Treat its bonus content as a design choice, not as a mandatory farming route. If a supporter item costs more or takes longer to place than a basic equivalent, use it after the contract's required standards are secured. The edition is best enjoyed as a cosmetic expansion of your toolkit; it shouldn't dictate your early economy.

🎮 Architect Life: A House Design Simulator - Supporter Edition
Looking to experience this game? Grab your digital key directly on our store for $11.99.
View on Steammoz Store →Use a repeatable build order to level faster
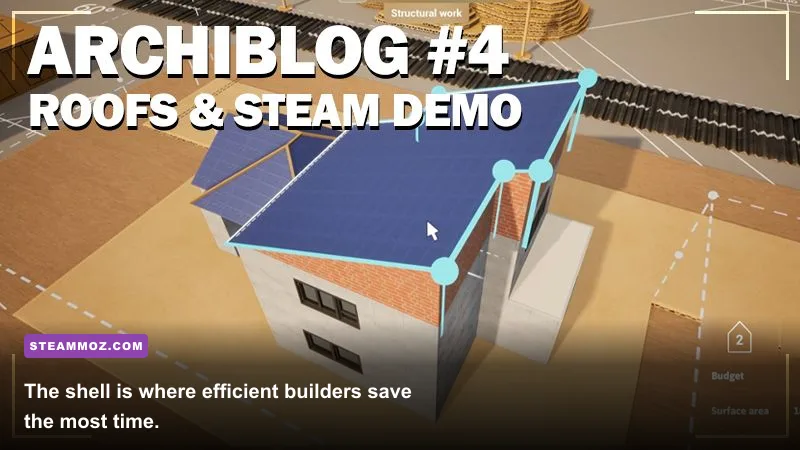
Every profitable career run should follow the same sequence: inspect the lot, place the footprint, finish the structural shell, install utilities and openings, create only the required rooms, furnish by priority, then submit the evaluation. This order prevents the most costly mistake in Architect Life: decorating a house that still needs a structural change.
Phase one: lock the footprint
Start with the smallest footprint that can hold the requested rooms comfortably. A compact rectangle is usually more efficient than a complex L-shaped plan because it reduces wall length, roof complications, walking distance, and camera adjustments. Leave enough circulation space for doors and furniture, but don't create oversized hallways that generate no reward.
Place doors and windows while the shell is still simple. Repositioning openings after furnishing can force you to move nearby objects, and that ripple effect is pure lost time. If the brief specifies natural light or an exterior entrance, satisfy that requirement before you begin interior decoration. Read the objective wording literally; “place a window” and “provide windows in the living room” are not the same task.
Phase two: build in requirement order
Finish the roof, walls, floors, and major connections before spending on visual polish. Then create the room types named in the brief. A functional kitchen is more valuable than a beautiful dining corner if the contract explicitly evaluates kitchen equipment. Likewise, a bathroom with the required fixtures should come before a second decorative bathroom.
Use a fixed furnishing sweep. Move clockwise through the property, completing one room before touching the next. In the kitchen, place the required cooking and storage pieces first. In the bathroom, place the toilet, sink, and bathing fixture before accessories. In bedrooms, place the bed and required storage before lights or artwork. This keeps your objective checks readable and makes failed requirements easy to identify.
Phase three: test before you decorate
Walk through every room after the mandatory furniture is installed. Look for blocked doors, objects intersecting walls, missing room labels, and requirements that did not register. Fixing a problem before adding rugs, plants, and wall art saves both gold and patience. Take a screenshot or quick note of layouts that pass cleanly; your second and third contracts should feel like a practiced route, not a fresh puzzle.
Players coming from other progression-heavy games often overcomplicate the first loop. The same discipline used in our Deponia progression guide applies here: identify what the game actually checks, then stop investing in systems that don't improve the next reward.
| Build stage | Do first | Common gold leak | Fastest correction |
|---|---|---|---|
| Planning | Read every objective and mark required rooms | Starting a layout before checking the brief | Spend one minute planning the footprint |
| Shell | Place walls, floors, roof, doors, and windows | Oversized rooms and decorative exterior shapes | Use a compact rectangle until upgrades arrive |
| Function | Install required fixtures and room furniture | Buying premium objects before essentials | Use the cheapest valid item first |
| Polish | Add lighting, art, landscaping, and supporter items | Decorating before checking requirements | Delay optional purchases until the reward is safe |
Spend gold on time-saving upgrades first

Gold farming only matters if your spending improves the next run. Early purchases should reduce repeated actions, unlock more affordable valid furniture, or make larger contracts manageable. Cosmetic upgrades are tempting, but they don't increase your income when a basic object satisfies the same objective.
The correct upgrade priority
Prioritize construction and placement tools that shorten the shell phase. Anything that helps you place walls, floors, roofs, doors, windows, or repeated furnishings with fewer actions has a direct return. Next, expand your practical furniture selection so you can satisfy different briefs without buying an expensive showcase item every time. Only after that should you invest heavily in decorative variety.
Don't empty your wallet after every contract. Keep a reserve large enough to cover the required materials for the next two jobs. A surprisingly common trap is buying a premium kitchen or supporter decoration immediately after a payout, then discovering that the next contract requires several structural pieces. Being cash-poor slows leveling because you either abandon the contract or spend time on a low-value recovery job.
Think in terms of payback. If an upgrade costs 10,000 gold and saves roughly five minutes on every contract, it becomes valuable after several runs. If a decorative pack costs the same amount and only changes the appearance of one room, it has no farming value. You can still buy it—Architect Life is a design game, after all—but buy it after your income loop is stable.
Budgeting a reliable farming loop
Use three money buckets: operating cash, upgrade cash, and design cash. Operating cash pays for the next contract's essentials. Upgrade cash is reserved for tools that reduce future build time. Design cash covers optional furniture and supporter content. When a contract pays out, refill operating cash first, then fund one practical upgrade, and only then spend the remainder on style.
For a deeper look at making early resources work harder, compare this approach with Steamoz's gold progression breakdown for Decay: The Mare. The games are very different, but the principle is identical: protect the resource that keeps your next run alive.
Turn each completed house into a faster next run
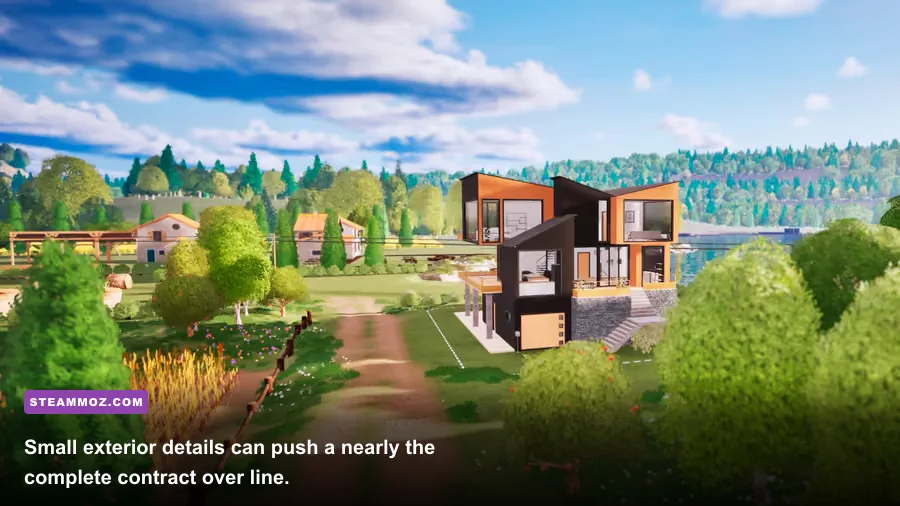
The strongest Architect Life farmers build a personal catalog of layouts. After a successful contract, remember the room dimensions, doorway positions, and furniture clusters that worked. Reusing a proven plan cuts decision time and reduces failed evaluations. You don't need to recreate the same visual style; keep the efficient skeleton and change the surface details.
Build templates worth keeping
Save one compact starter layout with a combined living and dining zone, a small kitchen, one bathroom, and the required bedroom count. Keep a second plan for a wider family property with separated common areas. Your templates should prioritize direct movement between rooms, easy camera angles, and clear wall space for windows and doors.
Make a shopping list before placing furniture. Required objects should be bought in batches rather than through repeated browsing. If the game lets you duplicate, copy, or reuse placed items, use that function aggressively for chairs, lights, cabinets, and decorative sets. Repetition isn't laziness here; it's how you convert design knowledge into gold per minute.
When to choose sandbox over career
Sandbox is excellent for testing layouts and learning the construction tools, but it should not replace career contracts when your goal is leveling and gold. Use sandbox to practice a roof style, experiment with supporter content, or work out a room template without risking a contract budget. Return to career once you know the sequence. Practice reduces failed jobs, and fewer failures are effectively a gold multiplier.
Likewise, don't chase perfection on a contract that has already met its requirements. If the evaluation is complete and the payout is secure, finish the job. A flawless garden may look good in screenshots, but starting the next profitable contract is usually worth more than another twenty minutes of decorative tweaking. Players who enjoy stealthy efficiency can borrow the same mindset from our Desperados III review: control the sequence, remove unnecessary actions, and don't improvise when the plan is working.
Common farming mistakes that quietly kill your profit
The most expensive mistake is rebuilding. Before you confirm a wall, roof, or room division, check whether it supports the brief. Structural changes made after furniture placement often create a chain of replacements. That cost is easy to miss because the individual purchases look small, but several failed adjustments can erase an entire contract's profit.
Don't confuse expensive with better
Premium furniture is not automatically the fastest route to a higher reward. If the objective asks for a bed, a basic bed may be enough. If it asks for a furnished kitchen, satisfy the functional requirement before styling it. Use expensive objects when the brief, budget, or personal design goal calls for them—not because their price tag feels like progression.
Another trap is overbuilding empty space. Extra bedrooms, oversized garages, and elaborate gardens can consume materials without improving the contract score. They also make the final inspection slower. Build what the client requests, then add only the optional details that are cheap, quick, and visually meaningful.
A clean repeatable route
For most early and mid-career sessions, the best loop is simple: accept the shortest suitable contract, plan a compact footprint, complete the structural shell, install mandatory fixtures, verify objectives, add inexpensive polish, collect the reward, and reserve enough gold for the next job. After every few contracts, use sandbox or an unpressured build to test one new tool or layout. That keeps your skills improving without turning your income runs into experiments.
If your progression feels slow, compare your completion time rather than staring only at the payout. A contract that pays less but takes half as long can be the better farm. If you repeatedly miss objectives, stop buying decoration and focus on reading the brief. And if every run feels cramped financially, keep more operating cash and delay supporter cosmetics until a practical upgrade has paid itself back.
Architect Life is at its best when efficient construction and personal style meet. Farm career contracts with disciplined layouts, spend gold on tools that remove friction, and treat every successful house as a reusable blueprint. For more beginner-focused build planning, see Steamoz's starting-build guide for DeltaZeal, then check the game's Steam news and patch notes for balance changes before committing to an older money route. The result is a faster level curve, a healthier bank balance, and much more time spent designing instead of correcting mistakes.