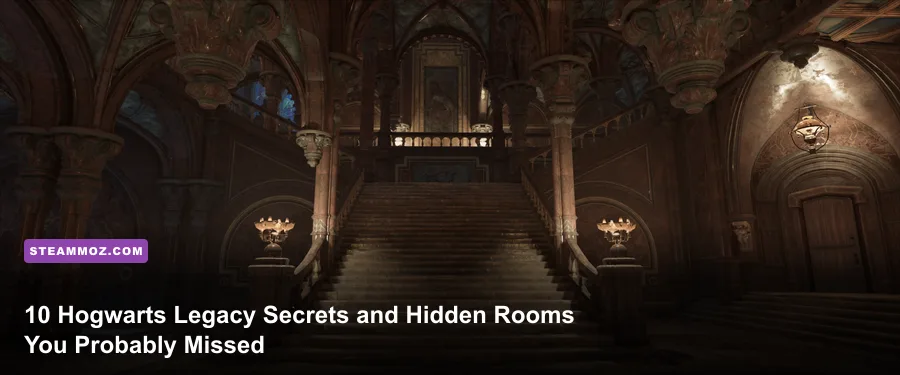
Hogwarts Castle is an absolute labyrinth designed to overwhelm your senses, and despite spending dozens of hours hunting Demiguise Statues and tracking ancient magic hotspots, you almost certainly sprinted past some of the coolest environmental storytelling in modern gaming. Avalanche Software packed the 1890s Scottish Highlands with subtle lore callbacks, illusory walls, and locked sanctums that don't pop up on your compass or show off gold quest markers. Unlocking these spaces requires more than just spamming Revelio down every hallway; you need high-tier Lockpicking, precise spell interactions, and a keen eye for architectural anomalies.
Whether you're hunting down elusive legendary gear chests, collecting every Field Guide page to hit true 100% completion, or just want to soak in the incredible world-building, tracking down these concealed spaces completely transforms your playthrough. Much like mapping uncharted sectors in our Everspace 2 secret locations and hidden rewards guide, knowing where the map hides its coolest corners turns an already massive open world into a treasure hunt. Here is your definitive breakdown of the best secret locations and easter eggs hidden across Hogwarts Legacy on Steam.
1. The Key of Admittance: Unlocking the Castle's Highest Sanctum
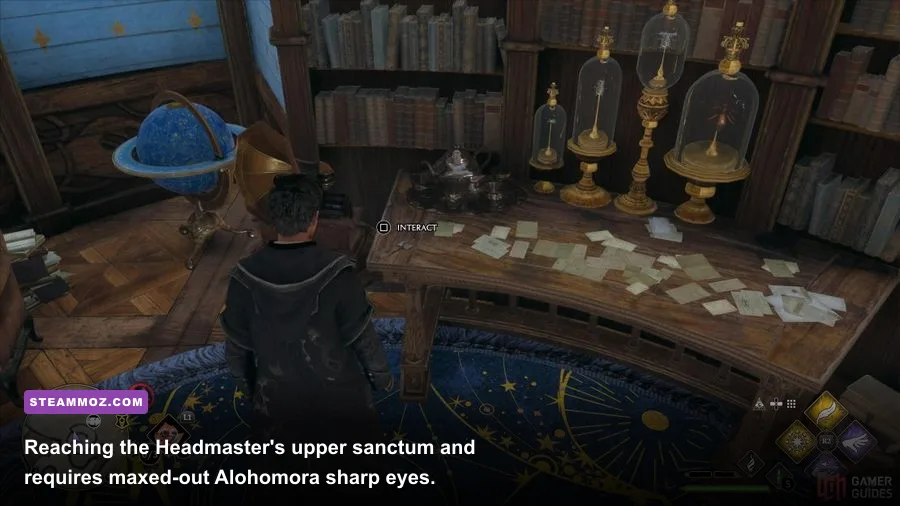
Perched at the highest architectural point of Hogwarts Castle sits an ornate, mysterious tower room that remains completely inaccessible until the final third of the campaign. To crack this mystery, you must progress through Natsai Onai's and Gladwin Moon's questlines to acquire Alohomora Level III. Fast-travel to the Trophy Room Floo Flame in the Grand Staircase wing, wind through the corridor filled with display cases, and hike up the spiraling wooden staircase toward the Headmaster's Office.
Once inside the Headmaster's private study, ignore the main desk and look for the exterior door leading out to an open-air stone balcony. Follow the spiraling exterior stairs in the freezing wind until you hit a locked wooden door guarded by a Level III lock. Inside this high study, sitting cleanly on an ornate desk, rests the Key of Admittance. Snag it, retreat all the way back down to the corridor just outside the Headmaster's Office door, and locate the massive black iron door built with four mechanical interlocking keyholes.
Slide the key home, and the heavy door grinds open to reveal the legendary Book and Quill of Acceptance. In Wizarding World lore, this enchanted quill detects the earliest signs of magical talent in newborn children, while the ancient book decides whether that child's magic is potent enough to attend Hogwarts. Inside this cramped, dusty tower, you will find an exquisite Legendary Gear chest, a Wand Handle, and an extremely rare Field Guide page that chronicles the foundation of student selection.

🎮 Hogwarts Legacy
Looking to experience this game? Grab your digital key directly on our store for $59.99.
View on Steammoz Store →2. The Werewolf Tapestry Room: The Tragic Tale Hidden Behind a Letter

Tucked deep within the Bell Tower Wing lies one of the easiest hidden chambers to miss because it masquerades as a solid wall. Start at the Bell Tower Courtyard Floo Flame, run up the stairs, and duck through the wooden door leading into the long history displays. Head down the winding staircase into the basement area where ancient tapestries line the damp stonework. Look for a massive tapestry depicting a woman surrounded by hunting hounds, distinguished by a prominent, stylized golden letter 'K' embroidered into the fabric.
Do not look for a door handle. Simply sprint directly into the center of the tapestry. The fabric acts as an illusion, letting your character pass seamlessly through the weave into a hidden corridor carved out of the foundations. Cast Lumos as you navigate down the narrow corridor to reach a forgotten lounge that feels completely detached from the rest of the vibrant school.
The real brilliance of this secret room isn't just the Collection Chest tucked in the corner; it's the sequence of five tapestries hanging along the walls. If you walk past them normally, they appear to show an everyday story of a noble witch. However, hold your wand up and cast Lumos against each tapestry in sequential order. The magical light transforms the artwork before your eyes, exposing the heartbreaking story of a mother who was bitten by a werewolf, hid her lycanthropy from her family, and was eventually hunted down by her own village. It is one of the darkest, most masterfully executed pieces of environmental storytelling built by Warner Bros. Games and Avalanche.
3. The Deathday Party Ballroom: The Dungeons' Creepiest Gathering
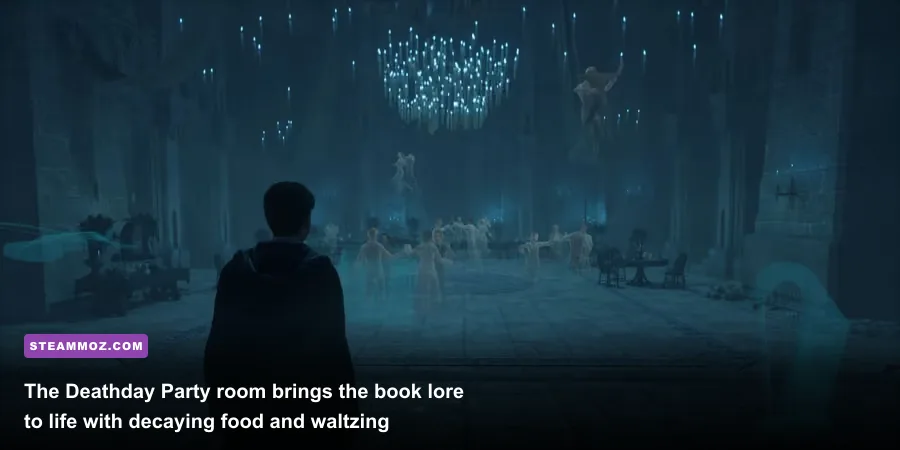
Book purists will instantly recognize this subterranean chamber, which was famously cut from the film adaptations of *Harry Potter and the Chamber of Secrets*. Hidden in the depths of the Slytherin Dungeons, the Deathday Party room is an icy, spectral celebration hall reserved exclusively for the castle's resident ghosts.
To reach it, fast-travel to the Lower Great Hall Floo Flame, descend the steps toward the dungeon network, and weave your way past the Slytherin common room entrance. Keep following the dripping corridors toward the dead ends until you discover a locked iron gate requiring Alohomora Level I. Pop the lock, step through the threshold, and you'll immediately notice the temperature drop: your character's breath turns to mist, frost lines the walls, and a muted, chilling cello melody plays through the ambient audio.
Inside, translucent specters glide and waltz through the floorboards. Step up to the banquet tables on the perimeter to inspect the horrific buffet laid out for the dead: platters of rotting fish, mold-encrusted blackened cakes, putrid cheeses, and spoiled meats—food aged to putrescence so the sensory-deprived spirits can catch faint whiffs of taste. Don't leave without inspecting the back corner, where a Field Guide page details Sir Nicholas de Mimsy-Porpington's failed attempts to join the Headless Hunt, along with a high-tier loot container hidden in the crypt alcove.
4. Slytherin Lake Windows and the Giant Squid Easter Egg
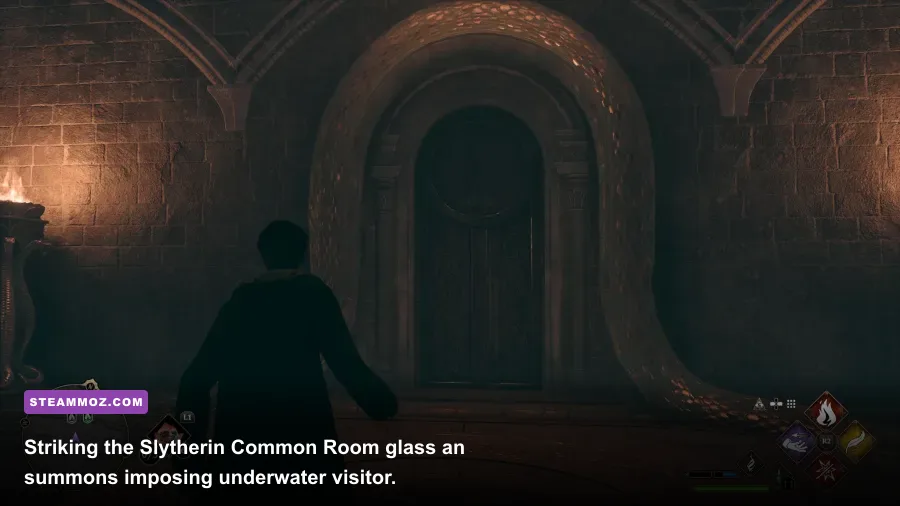
The Giant Squid that inhabits the murky depths of the Black Lake isn't just a background prop during flying sequences; it has multiple interactive triggers hidden across the game world, especially if you belong to House Slytherin or know where to poke the castle's plumbing.
If your character is sorted into Slytherin, head into the Common Room and approach the massive glass windows that look directly into the underwater depths of the Black Lake. Draw your wand and cast your Basic Cast spell at the reinforced glass five to six times in rapid succession. The repeated impacts will trigger a scripted sequence: deep within the blue gloom, a massive, tentacled behemoth emerges from the weeds and violently smacks the glass with a massive suckered arm, rattling the stone pillars before drifting back into the abyss.
If you aren't a Slytherin, you can still trigger squid-related easter eggs elsewhere. In the corridors connecting the Bell Tower to the lower storage vaults, you can find a stone wall adorned with a mosaic of a kraken. Right in front of the mosaic sits an empty pedestal. Cast Revelio nearby, and you'll reveal a dish requiring an offering of toast. Finding the slice of toast in the Great Hall's morning banquet layout and interacting with the mosaic triggers a delightful tribute to the friendly beast who loves floating near the surface for snacks.
5. The Robbie Coltrane Memorial: Hagrid's Future Grounds

Following the tragic passing of beloved actor Robbie Coltrane in late 2022, Avalanche Software added a quiet, incredibly moving tribute within the game's landscape. Because *Hogwarts Legacy* takes place in 1890, Rubeus Hagrid hasn't been born yet, but the iconic groundskeeper's hut near the southern cliffs still commands a special presence.
Fly your broom south from the Clock Tower Courtyard toward the edge of the Black Lake, hovering along the rocky ridge overlooking the water. Nestled against the tree line where the game's groundskeeper hut sits, walk around to the cliffside behind the small pumpkin patch. Overlooking the calm waters rests a small, solitary headstone carved from granite.
Etched into the face of the stone marker is the distinct silhouette of a Hippogriff—a clear, touching nod to Buckbeak and Hagrid's lifelong devotion to magical creatures. If you step up to the grave and remain still, your character will lower their wand in a solemn, respectful animation. There are no combat trials, no gear upgrades, and no achievements tied to this spot; it's purely a quiet place for players to pay their respects to the man who welcomed millions of fans into the wizarding world.
Hogwarts Legacy Secret Locations: Difficulty, Requirements, and Rewards

Navigating Hogwarts requires knowing which rooms yield legendary equipment and which ones offer pure lore satisfaction. If you are balancing your character's progression curve alongside our leveling fast and farming mechanics in Kakarot or optimizing your character's combat layout using insights from our Far Cry 6 beginner build guide, you'll want to prioritize which doors you crack open first based on your current lockpicking capabilities.
| Secret Location Name | Required Spells & Unlocks | Wing / Regional Zone | Key Rewards Found Inside | Mystery Tier |
|---|---|---|---|---|
| Key of Admittance Sanctum | Alohomora Level III | Grand Staircase / Headmaster's Tower | Book of Acceptance Page, Legendary Chest | S-Tier |
| Werewolf Tapestry Room | Lumos (Basic Access) | Bell Tower Wing / Dungeons | Collection Chest, Transforming Lore Murals | S-Tier |
| Deathday Party Ballroom | Alohomora Level I | Slytherin Dungeons | Ghost Buffet Field Guide Page, Gear Chest | A-Tier |
| Slytherin Lake Depths | Slytherin House Access or Revelio | Slytherin Common Room / Corridors | Giant Squid Interaction, Kraken Page | A-Tier |
| The Secret Herbology Corridor | Incendio / Lumos / Disillusionment | Library Annex / Greenhouse Underbelly | Venomous Tentacula Seeds, Gear Caches | B-Tier |
| Robbie Coltrane Memorial | Broomstick / Flying Mount | South Hogwarts Castle Grounds | Emotional Easter Egg, Scenic Vista | S-Tier |
| Sleeping Dragon Dungeon | Basic Exploration (No Lock) | Dungeons / Bell Tower Lower Corridor | Sleeping Dragon Field Guide Page | B-Tier |
| Chamber of Secrets Bathroom | Basic Access (Slytherin Girls' Loo) | Dungeons / Grand Staircase Border | Serpent Tap Engraving Field Guide Page | A-Tier |
As outlined in the tier list above, focusing your efforts on tracking down Demiguise Moons early pays massive dividends. Unlocking Alohomora III gives you instant clearance into S-Tier vaults like the Headmaster's upper study, delivering top-level gear stats that scale directly with your character's current level.
6. The Chamber of Secrets Girl's Bathroom: The Serpent on the Tap
While Avalanche made it clear prior to launch that the full Chamber of Secrets would not be accessible—sticking firmly to canon lore stating the Chamber remained sealed between Salazar Slytherin's departure and Tom Riddle's opening in 1942—the developers still left a chilling trace for dedicated explorers to discover.
Travel to the Slytherin Dungeons and navigate the stone corridors until you locate the girls' lavatory near the bottom of the Grand Staircase. Step inside the damp, dimly lit restroom and walk directly up to the circular bank of copper washbasins standing in the center of the room. Walk around to the eastern sink basin and aim your reticle down at the brass faucet.
Casting Revelio reveals a hidden Field Guide page floating directly above the copper spigot, titled "Scratched Sinks." If you zoom into the faucet model using your photo mode or wand-aim perspective, you will clearly see a small, intricately carved snake etched into the side of the metal handle. It is the exact trigger point where a Parselmouth must speak to open the massive underground plumbing slide leading down to the Basilisk's lair, serving as a brilliant, canon-compliant nod that rewards observant fans.
7. The Forbidden Forest: The Flying Ford Anglia and Aragog's Brood
Venturing out of the castle walls and into the gloomy canopies of the Forbidden Forest opens up an entirely different category of hidden references. While completing side quests and hunting down beasts, head deep into the northeastern quadrant of the forest, away from the cleared dirt trails.
Tucked inside a rocky hollow surrounded by aggressive Thornback Shooters and Venemous Ambusher spiders, you'll discover a wrecked wooden supply cart wedged violently into a tangled tree stump, completely wrapped in thick white silk. While it takes the form of an era-appropriate Victorian wooden cart rather than a turquoise 1962 Ford Anglia, its placement, angle, and proximity to massive spider nests is an undeniable tribute to Ron and Harry's chaotic crash into the Whomping Willow and their desperate escape from Aragog's children.
Speaking of Acromantulas, exploring the deep caves scattered throughout the Forbidden Forest pits you against mini-boss variants whose attack patterns and cavernous dens directly evoke the terrifying encounters from *The Chamber of Secrets*. Just ensure you bring fire-based magic like Confringo and Incendio; these giant spiders hit hard and shrug off standard kinetic force.
8. The Secret Herbology Corridor and Devil's Snare Vault
Most players run straight into the Greenhouses via the Library Annex to attend Professor Garlick's classes, gather Mandrakes, and buy Venomous Tentacula seeds without realizing a massive underground arboretum exists right under their feet. Just like managing your resource supply routes in our Empires of the Undergrowth fast leveling guide, knowing where to forage free botanical resources early saves you hundreds of Galleons at Dogweed and Deathcap.
Descend down the exterior stone staircase outside the Greenhouse complex and search along the courtyard foundation walls until you find an archway completely smothered by thick vines. Cast Incendio to burn away the overgrowth, uncovering a subterranean gate that leads into the forgotten Secret Herbology Corridor.
The moment you step inside, you will notice the floor is blanketed with writhing, sun-averse tendrils of Devil's Snare. If you step onto them without caution, they will rapidly ensnare your character, dealing continuous physical damage. Keep Lumos active at all times to force the tendrils to recoil into the floor cracks. As you explore this damp subterranean network, you will uncover giant mature Venomous Tentaculas ripe for free harvesting, along with a hidden chest containing rare conjuration spellcrafts for your Room of Requirement.
9. The Sleeping Dragon Statue and the Frog Choir Minigame
If you take the Bell Tower staircase down past the Muggle Artefacts classroom, you will stumble across a colossal stone sculpture of a sleeping dragon curled into a dormant loop. While casting Revelio gives you the historical Field Guide page for the statue, interacting with it yields an extra treat: casting a fire spell like Incendio or throwing a Basic Cast sparks an ambient animation where the dragon stirs, blows smoke from its nostrils, and shifts in its slumber.
Just a few corridors away, you can track down the hidden Music Room. Here, six large, colorful bullfrogs sit atop velvet pedestals. If you interact with them, they begin a synchronized, resonant choral performance of classic themes from John Williams' original cinematic score. It's an easily missed interactive corner that demonstrates just how much artisanal love Avalanche poured into every non-essential room in the castle.
10. How to Master Environmental Audio and Map Detection to Find Every Secret
If you want to unearth every remaining secret hidden across the Highlands without relying on outside cheat maps, you need to understand how the game communicates hidden objects through its audio and visual design. Revelio is not just an outline tool; it functions as a directional sonar system that many players completely misunderstand.
Whenever you cast Revelio, listen closely through your headset. If a hidden Field Guide page, locked collection chest, or puzzle object is nearby, the game emits a crisp, bell-like chime. The volume of this chime corresponds to your distance from the object, but more importantly, the audio is fully directional. If the chime pings predominantly in your left ear, the secret room is buried on that side of the corridor, often obscured behind a false bookshelf or an unlit brazier.
Furthermore, upgrade your Revelio range immediately in the Core Talent tree once you unlock Talent Points at Level 5. The base spell has a surprisingly narrow detection cone that often fails to trigger through thick dungeon walls or across vertical floor gaps. By extending its radius, you can ping hidden rooms above and below you as you traverse the Grand Staircase, ensuring that no illusory wall, locked crypt, or forgotten ballroom ever stays hidden from your sight again. Check the official Hogwarts Legacy website and explore the world with your wand ready—there's always another secret waiting behind the stones.