
Dragon Ball: Sparking! ZERO has no traditional crafting system or farmable crafting materials. The best equivalent rewards are Zeni, Ability Items, skill capsules, Dragon Balls, and character unlocks. Spend Zeni in the Shop, complete Episode Battle objectives, raise character proficiency, and use Shenron, Porunga, or Super Shenron wishes instead of searching for a nonexistent ore, ingredient, or crafting station.
This distinction matters because many guides use “crafting materials” as shorthand for the resources needed to improve a roster. Sparking! ZERO does not let you combine drops into weapons, armor, or recipes. Your progression comes from buying capsules, unlocking fighters, equipping abilities, and earning summon rewards. The fastest route is therefore a targeted farming loop rather than random match grinding.
For official terminology and current platform information, check the Sparking! ZERO Steam page, the Bandai Namco game page, and the official publisher hub before relying on third-party reward lists.
What Counts as a Material in Sparking Zero?
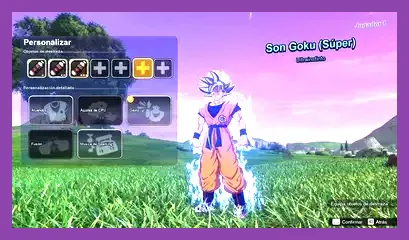
In practical terms, “materials” means the currencies and progression items that improve your team. The most important are Zeni, Ability Items, Dragon Balls, character proficiency levels, and Super Training rewards. Each serves a different purpose, so farming the wrong one wastes time.
Zeni
Zeni is the primary Shop currency. It pays for Ability Items, outfits, capsules, and some unlockable content. Zeni is the closest equivalent to a universal crafting material because almost every preparation route eventually uses it. Do not spend your first large balance on cosmetic outfits if your goal is competitive performance; buy the core abilities for your regular team first.
Ability Items and skill capsules
Ability Items modify a fighter’s performance or give a team useful utility. Examples include Rising Fighting Spirit, which improves starting Ki, Senzu Bean, which restores health under its activation condition, Afterimage, which rewards defensive timing, and God of Destruction’s Roar, associated with destructive pressure and Ki management. Exact availability can depend on progression, character requirements, and Shop unlocks.
These are not permanent weapon upgrades. They are equipable effects with point costs, and every fighter has a limited ability-point budget. A capsule that looks powerful on Goku may be less valuable on a character with a different game plan. Check the ability description, activation condition, and cost before buying duplicates.
Dragon Balls
Dragon Balls are reward items rather than crafting ingredients. Collecting a complete set lets you summon a dragon and choose a wish. The available dragon and reward list can vary, so use the summon screen itself as the final authority. Wishes may provide Zeni, Ability Items, titles, costumes, or character unlocks, depending on the dragon and progression state.
Proficiency and unlock progress
Character proficiency is another hidden-looking progression target. Fight with a character repeatedly to increase proficiency, then check the associated rewards in the character menu. This route is especially useful when you want unlocks tied to specific fighters rather than general money. Use it while completing Episode Battles instead of grinding empty matches.
Best Ability Items to Buy First

If your goal is the best early progression setup, prioritize flexible abilities that improve neutral, defense, or resource control. No single capsule is best for every fighter, but the following ranking is a reliable buying order for a developing roster.
S-Tier: Rising Fighting Spirit and defensive utility
Rising Fighting Spirit is one of the best first purchases because starting with more Ki immediately improves access to charged attacks, transformations, and Sparking! pressure. It is particularly useful on characters whose game plan depends on reaching Sparking! mode quickly. Pair it with disciplined movement rather than charging recklessly in front of an opponent.
Afterimage belongs in the S-Tier utility group when you understand its timing. It can punish predictable rush strings and make close-range defense safer, but it is not a substitute for perception. Players who activate it too early waste the effect; trigger it when the opponent commits to a melee sequence or predictable vanish approach.
A-Tier: Senzu Bean and health-focused options
Senzu Bean is valuable in long fights because a well-timed recovery can reverse a losing exchange. It is strongest on durable characters, defensive teams, and fighters you expect to keep active for several minutes. It is less impressive in short matches where the activation requirement is rarely reached.
Health and damage-reduction effects also become more valuable in Episode Battle routes with strict survival objectives. Equip them on the character expected to absorb pressure, not automatically on your leader. Read the capsule’s exact trigger text: an item that activates below a health threshold requires you to survive long enough to benefit.
B-Tier: Specialized Ki and damage capsules
Ki-boosting and damage-focused Ability Items are worthwhile after your core defensive package is complete. They are strongest on specialists: beam users benefit from efficient Ki access, while aggressive rushdown characters may prefer effects that improve melee pressure. Avoid stacking several expensive damage capsules before buying one defensive option; extra damage does nothing if you cannot reach your attack safely.
When testing a build, enter Training and compare the same combo with and without the capsule. Watch Ki consumption, Sparking! activation time, and damage across a full sequence. This is more reliable than judging an item from its description alone.
Fastest Ways to Farm Zeni and Rewards

The best general-purpose farm is a rotation of Episode Battle objectives, Bonus Battles, proficiency progress, and Dragon Ball summons. There is no resource node to reset, so efficient farming means choosing activities that pay multiple progression systems at once.
1. Clear Episode Battle objectives
Start with Episode Battle because it awards story progress, Zeni, unlock conditions, and alternate routes. Pay attention to optional objectives such as defeating an opponent quickly, winning with a specific technique, or changing the battle outcome. These conditions can open “What-If” branches and additional rewards.
For example, Goku’s Episode Battle includes routes connected to major fights with Raditz, Nappa, Vegeta, Frieza, Cell, and Majin Buu. Do not rush past the battle details screen. If an objective is unclear, replay on a lower difficulty, focus on the requirement, and collect the reward before returning to the main route.
2. Use Bonus Battles for repeatable challenges
Bonus Battles are designed scenarios with unusual conditions, teams, or win requirements. They are a strong alternative when the story route is exhausted because they provide structured objectives rather than slow free battles. Complete newly unlocked entries first, then replay the shortest challenge that pays a reward you actually need.
3. Raise proficiency while farming
Choose one fighter you genuinely use and keep that character active during repeat matches. Switching constantly spreads proficiency progress across the roster and delays character-specific rewards. If you are building Goku (Super), Vegeta (Super), or a fusion-focused team, concentrate on those characters until their reward track advances.
4. Collect Dragon Balls during normal play
Dragon Ball drops are not a conventional guaranteed material route. They can appear through regular battles and progression, so do not abandon the main game to chase a perfect drop loop. Check your collection after completing Episode Battles, Bonus Battles, and other match types. Once a set is complete, summon immediately if you need a Shop shortcut, Zeni, or an unlock.
For performance tips while running repeated battles, Steamoz’s guides on Steam Deck optimization and low-end PC optimization provide useful general settings advice, although Sparking! ZERO is a fighting game rather than an open-world title.
Best Dragon Ball Wishes for Materials
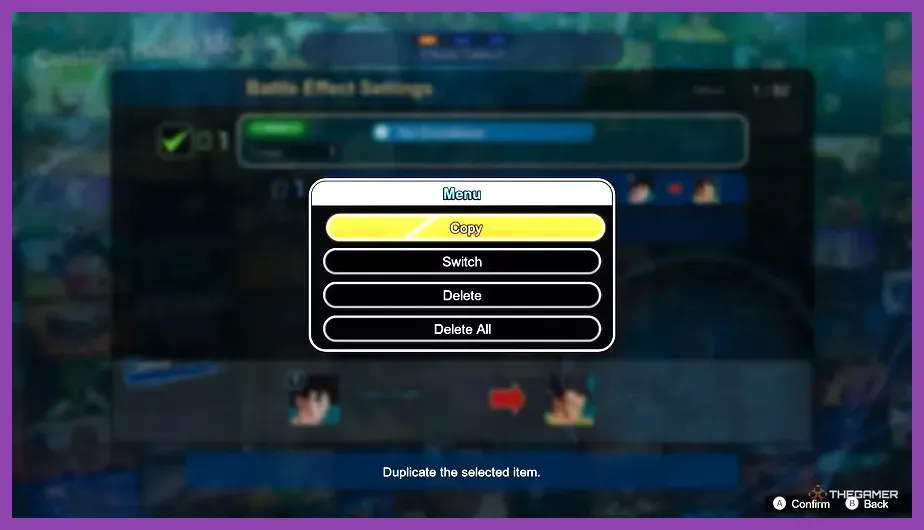
Use wishes according to your immediate bottleneck instead of automatically choosing the rarest-looking reward. If your Shop inventory is empty but your team is ready to build, choose the option that grants Ability Items or Zeni. If your roster lacks a required fighter, choose the character unlock option when available. Cosmetic rewards are fine after your functional setup is complete.
Shenron
Shenron is generally the first dragon most players use. His wishes can include Zeni, Ability Items, outfits, and progression rewards. Pick Zeni when you need several Shop purchases, but choose a specific Ability Item reward when it replaces multiple expensive purchases or completes a build.
Porunga
Porunga’s reward selection can differ from Shenron’s and may offer multiple rewards or a different quantity. Read every option carefully. A larger-looking number is not always the strongest choice: three useful rewards can outperform a larger Zeni payment if you are assembling a competitive team.
Super Shenron
Super Shenron is the premium wish target for major unlocks and high-value progression. Use him for a character or reward that would otherwise take substantial playtime, especially if it completes a specific roster plan. Do not spend the wish casually on a cosmetic item unless your gameplay collection is already complete.
Wish availability can change with updates and may be restricted by unlock conditions. The in-game dragon menu is more accurate than an old farming chart, so verify the current list before committing your Dragon Balls.
Efficient Material Farming Loadout

Build a farming team that wins quickly without requiring complicated execution. A practical setup includes one reliable close-range fighter, one beam or blast specialist, and a durable backup. Goku (Super), Vegeta (Super), and a fusion such as Gogeta (Super) can cover many situations, but use whichever characters you control confidently.
Recommended preparation
- Equip Rising Fighting Spirit on the fighter that needs fast Ki access.
- Use Afterimage on a character that regularly fights at close range and benefits from defensive timing.
- Equip Senzu Bean for long Episode Battle survival objectives rather than short speed-clear attempts.
- Keep your remaining ability points available for a capsule that directly supports the chosen fighter’s win condition.
- Set Training controls or a familiar Custom Battle scenario to test the build before spending more Zeni.
In combat, open with safe movement, build Ki behind cover or at range, then use a knockdown to charge or activate Sparking! mode. Do not spend every resource on the first exchange if the objective requires survival. Against large bosses or story opponents, watch for armored attacks, vanish counters, and super armor before committing to a long rush string.
Custom Battle is useful for testing because you can reproduce a matchup and practice a specific objective. Online matches are better for validating whether an ability works against real defensive timing. If you need a broader progression checklist, our guides to achievement progression and weapon tier-list planning illustrate the same principle: farm toward a defined build rather than collecting everything blindly.
Bottom line: the best “crafting materials” in Dragon Ball: Sparking! ZERO are Zeni, Ability Items, Dragon Balls, and proficiency rewards. Farm Episode Battle objectives first, buy Rising Fighting Spirit and defensive utility, collect Dragon Balls naturally, and reserve Super Shenron for a meaningful unlock. That route gives you stronger fighters faster than looking for a crafting menu the game does not have.