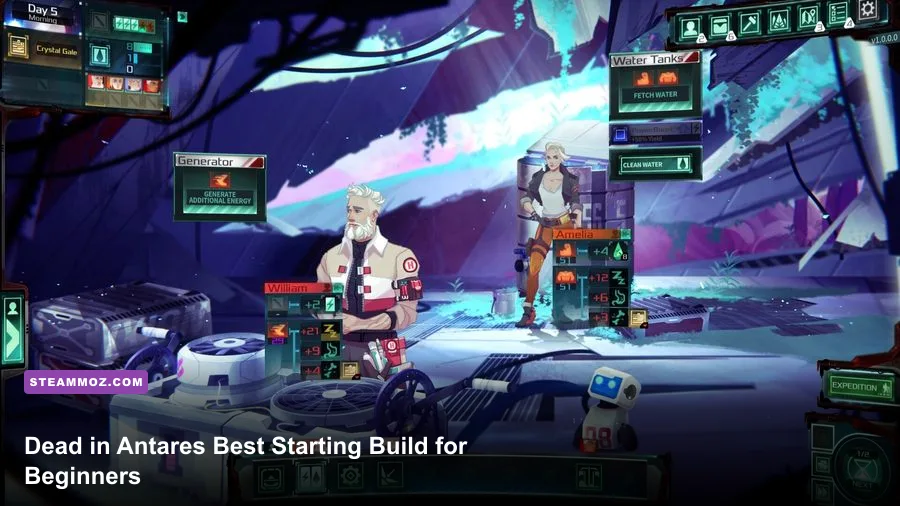
The best beginner build in Dead in Antares Supporter Edition is a balanced Scout-Mechanic setup: prioritize exploration and repair capability first, keep one reliable survivor focused on food and water, and spend early progression on recovery rather than damage. The Supporter Edition does not turn the opening into an easier mode or add a separate beginner class, so your first real advantage comes from how you assign jobs, schedule expeditions, and protect the crew from fatigue spirals.
That distinction is important. Dead in Antares is less about finding one overpowered character and more about building a crew that can complete a short task, return safely, and recover before the next risk. Beginners usually fail by treating every available action as equally valuable. It isn't. A repair that prevents a broken shelter, a food reserve that avoids a starvation penalty, or an early scouting run that reveals a safe route will usually outperform a greedy resource grab.
The Scout-Mechanic opening build

Start by assigning your most dependable explorer to scouting and your most technically capable survivor to repairs, construction, or equipment maintenance. The remaining crew member should cover food, water, and routine camp duties. If your available characters have different strengths, don't chase a perfect specialist spread. What matters is covering three jobs without forcing the same survivor to perform every task.
The build has three priorities. First, create a reliable information loop by scouting nearby locations before committing to long journeys. Second, make the base functional enough that the crew can recover from a bad expedition. Third, preserve a reserve of supplies so a single injury, failed task, or unexpected event doesn't end the run.
| Role | Early responsibility | Priority | Why it matters |
|---|---|---|---|
| Scout | Reveal nearby routes and low-risk locations | Exploration and awareness | Reduces wasted travel and prevents blind commitments |
| Mechanic | Repair equipment and improve camp reliability | Technical tasks and construction | Stops small failures becoming resource disasters |
| Quartermaster | Food, water, storage, and recovery duties | Supply stability | Protects the crew from hunger and fatigue spirals |
| Flex slot | Research, medical help, or secondary gathering | Adapt to the current crisis | Lets you answer events without wrecking the main routine |
Use the Scout as your expedition lead, but don't send that character out constantly. Exploration produces information, not automatically useful progress. Once a route is known, the scout can return to camp while another survivor handles a nearby low-risk task. This keeps your best explorer from accumulating fatigue for no reason.
The Mechanic should not be treated as a second scout. Their value comes from maintaining the systems that make every later day cheaper. If the game presents a choice between a flashy upgrade and a repair or utility improvement, take the utility option during the opening phase. You are building consistency, not trying to win one spectacular expedition.

🎮 Dead in Antares Supporter Edition
Looking to experience this game? Grab your digital key directly on our store for $17.49.
View on Steammoz Store →Stat priorities and the first progression curve

For a first run, rank your priorities as recovery and task reliability, then exploration, then production, and damage last. This doesn't mean combat is irrelevant. It means that a crew which reaches an encounter with low health, poor morale, or heavy fatigue has already lost the important part of the fight.
Use a simple threshold system. Keep food and water above one full expedition's cost before leaving camp. Avoid starting a long trip when the lead character is already carrying a major fatigue penalty. If a survivor's health or morale is visibly trending downward, stop expanding and spend the next cycle recovering. The exact resource number changes with difficulty and scenario conditions, but the principle doesn't: never spend your emergency reserve on an optional location.
| Progression stage | Spend points on | Hold back on | Beginner target |
|---|---|---|---|
| Opening days | Scouting, repair, basic production | Specialized damage upgrades | One safe route and a stable camp loop |
| First expansion | Storage, recovery, task consistency | Luxury construction | Emergency food and water reserve |
| Midgame transition | Specialization for your strongest survivor | Duplicating the same role | Two dependable expedition options |
| Dangerous zones | Medical support, defensive tools, escape options | Greedy gathering during low health | Return route planned before departure |
The biggest beginner trap is over-specialization. A character who is excellent at one task may still be your only available option when an event demands something else. Keep one flexible survivor with enough general capability to cover a failed roll or emergency assignment. The marginal gain from making a specialist slightly better is usually smaller than the value of having a backup.
Morale deserves special attention because its effects are easy to underestimate. A crew can have enough supplies and still collapse if repeated failures, injuries, or unpleasant events keep pushing performance lower. Rotate exhausting jobs, use recovery windows, and don't chain difficult expeditions simply because a location is nearby.
Gear, camp upgrades, and the correct build order

Your first camp investments should support the Scout-Mechanic loop. Build or improve whatever increases food and water reliability, then prioritize storage and recovery. Only after those foundations are working should you chase upgrades that improve risky exploration or combat.
A good build order looks like this: secure basic survival production, establish a reserve, improve repair access, then expand scouting range or expedition efficiency. If the game offers multiple resource-generating structures, choose the one that reduces the number of emergency gathering trips. Every unnecessary trip costs time, fatigue, and often durability.
Do not equip every useful item on the expedition leader. Give the Scout the equipment that improves discovery, travel, or escape, while the Mechanic keeps repair-oriented tools and the quartermaster holds items that protect camp efficiency. This division prevents one unlucky event from disabling your entire operation.
Before leaving, check four things: the route, the expected travel cost, the crew's current condition, and the return reserve. If you can't explain how the group gets home after the objective is complete, the expedition is too ambitious. That rule sounds conservative, but it is exactly what makes the beginner build work.
The Supporter Edition's bonus content is best treated as supplementary rather than foundational. If it includes cosmetic, soundtrack, or supporter extras in your installation, don't build your strategy around them. The opening economy, survivor assignments, and expedition discipline remain the important systems. Check the official Steam listing for the current package contents and version notes.
Combat and expedition rotation

When an encounter begins, use the safest action that preserves your ability to retreat or recover. Beginners often spend their strongest option immediately, then discover that the next turn or event demands the same resource. The Scout-Mechanic build wins through controlled repetition: scout, isolate a manageable objective, complete it, return, repair, recover, and only then raise the risk.
A practical three-step rotation
- Scout first. Reveal nearby threats and identify whether the destination is worth the travel cost. Information is a resource; don't throw it away by entering blind.
- Stabilize second. Repair damaged equipment, restore the most vulnerable survivor, and use defensive or control options before committing to a prolonged exchange.
- Finish or withdraw third. If the encounter is consuming supplies faster than expected, leave. A partial reward is better than returning with multiple injured crew members and no reserve.
Against a dangerous enemy, watch the telegraph rather than the health bar. A large wind-up, visible movement cue, or sudden change in behavior usually signals that the next exchange is more dangerous than the previous one. Use that window to reposition, defend, or apply a utility effect. Damage should come after the threat is controlled.
Repairs are also part of combat preparation. Entering a fight with damaged equipment turns every successful hit into a future camp problem. The Mechanic's job is not merely to fix things after a disaster; it is to keep the crew from entering that disaster with a hidden penalty.
For additional perspective on resource-focused progression, Steamoz's Everspace 2 hidden locations guide and Empires of the Undergrowth farming guide both reinforce the same useful lesson: route planning beats reckless efficiency.
Common beginner mistakes that ruin good runs
The first mistake is sending the same survivor on every expedition. Even if that character is your best scout, fatigue and injury eventually turn the strongest role into a liability. Rotate low-risk work through the rest of the crew so the expedition lead can recover before a genuinely important trip.
The second is expanding the camp too early. New structures feel like progress, but each one competes with food, water, repairs, and emergency supplies. A small camp that functions every cycle is stronger than a large camp that constantly demands rescue.
The third is treating optional objectives as mandatory. If a location offers a tempting reward but requires a long route through unknown danger, mark it and return later. Your first objective is not to clear the map. It is to establish a repeatable loop that survives bad luck.
The fourth is ignoring the return journey. Players calculate what they need to reach a location and forget to reserve enough for the trip back. Add the return cost before departing, then add a cushion for an event or failed task. If that total empties your stockpile, wait.
Finally, don't restart after every imperfect result. A failed task, lost resource, or minor injury is often recoverable if you stop escalating. Repair the camp, rotate the damaged survivor out, and rebuild your reserve. Learning when to pause is the real beginner skill.
Recommended beginner checklist
- Assign separate Scout, Mechanic, and Quartermaster responsibilities.
- Reveal nearby routes before committing to dangerous destinations.
- Keep one full expedition's food and water in reserve.
- Invest in production, storage, repair, and recovery before specialist damage.
- Rotate expedition leaders to control fatigue and injury.
- Carry enough supplies for the return trip, not just the outward journey.
- Withdraw when an encounter starts consuming emergency resources.
- Use the flexible crew member to cover failed tasks and unexpected events.
For a broader look at surviving older-school RPG systems, see Steamoz's Dungeon Siege review and Dungeons 3 beginner tips. They approach different genres, but both reward the same habit: build a dependable foundation before chasing spectacular gains.
If you want to verify patches, package details, or community-discovered interactions, use the Steam Community hub alongside the developer's official announcements and the Steam store page. That matters especially for an indie survival game, where balance changes can quietly alter resource costs or event behavior.
In short, the strongest Dead in Antares Supporter Edition starting build is deliberately unglamorous. Scout with purpose, let the Mechanic keep your operation running, protect a flexible survivor for emergencies, and treat recovery as progression rather than wasted time. Once that loop is stable, you can specialize aggressively. Before then, consistency is the closest thing Antares has to an overpowered build.