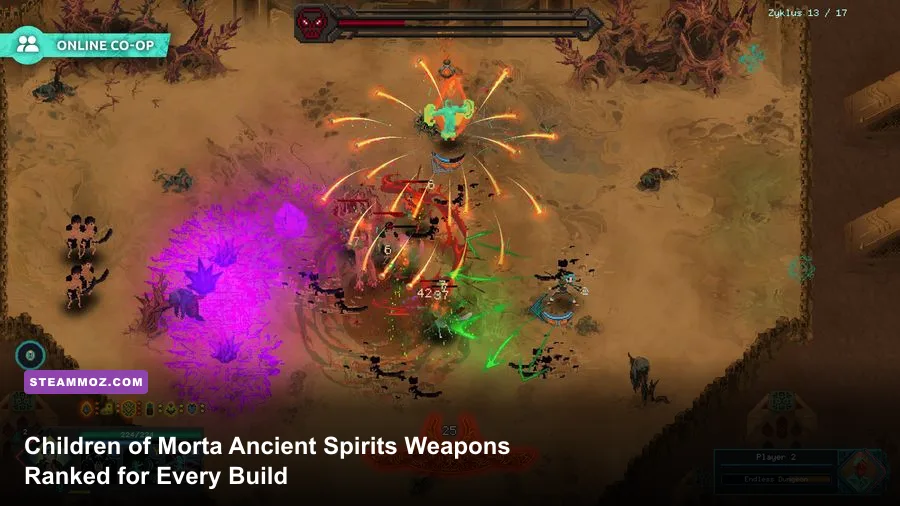
Children of Morta: Ancient Spirits does not add a traditional loot table packed with dozens of new swords and bows. Its real weapon shake-up comes from the new Yajouj and Majouj character, the Ancient Spirits systems, and the way runes, charms, divine relics, and family upgrades reshape each Bergson's signature weapon. For most players, John's sword and shield, Linda's bow, and Lucy's staff remain the safest S-tier choices, while Kevin's daggers and Joey's hammer become spectacular once your equipment fixes their range and mobility problems.
That distinction matters before you start ranking gear. Children of Morta gives every family member a fixed weapon kit rather than a conventional Diablo-style weapon inventory. You cannot replace Linda's bow with a legendary crossbow, for example. Instead, you build around the weapon's attack pattern, stamina demands, crowd-control tools, and the bonuses rolled into each run. This tier list ranks those weapon kits in real Ancient Spirits play: normal rooms, elite encounters, bosses, and the harder late-game difficulties.
How the Ancient Spirits weapon system actually works
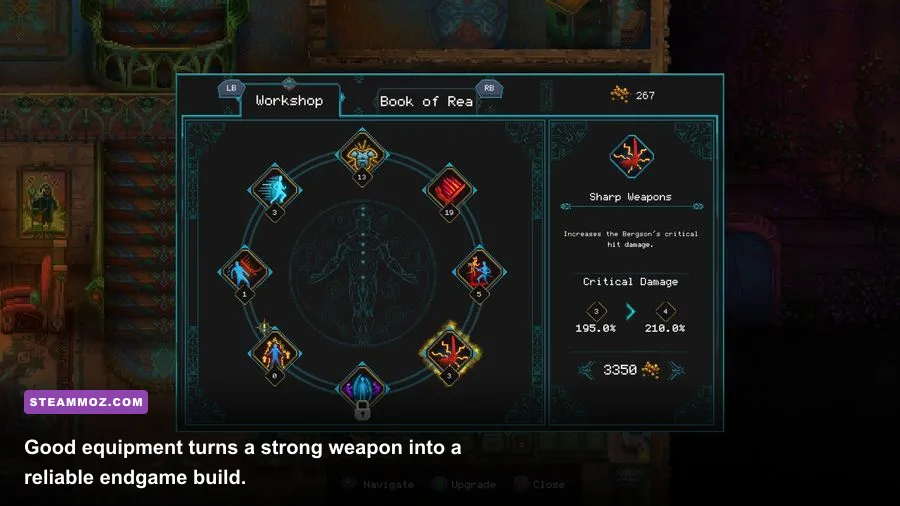
Ancient Spirits is best understood as a character-and-equipment expansion, not a stand-alone weapon pack. The DLC adds Yajouj and Majouj to the playable roster, while the broader game continues to distribute offensive power through runes, charms, divine relics, special items, and temporary dungeon blessings. Your weapon is therefore only half the equation. A mediocre-looking kit with the right cooldown reduction and survivability can outperform a higher-damage character that constantly gets interrupted.
Every run also has a different economy. Gold buys permanent improvements through the Bergson family progression, while dungeon resources help you activate or upgrade temporary bonuses. Because equipment choices are run-dependent, this list uses four practical tests: sustained damage against bosses, room clear speed, safety when surrounded, and how quickly the character becomes useful without rare drops.
There is one more wrinkle: the game separates normal attacks from skills, and many of the best equipment effects amplify only one side of that equation. Linda wants attack speed and Focus support because her bow turns sustained firing into damage. John benefits more from effects that reward staying close to enemies and blocking correctly. Lucy, meanwhile, gets enormous value from anything that lets her cast more often without emptying her resource pool.
| Rank | Weapon kit | Best strength | Main weakness |
|---|---|---|---|
| S-Tier | Linda's bow | Safe single-target and lane damage | Needs space and resource discipline |
| S-Tier | Lucy's staff | Area damage and elite control | Fragile when surrounded |
| S-Tier | John's sword and shield | Defence, consistency, and boss safety | Slower room clears |
| A-Tier | Kevin's daggers | Explosive close-range damage | Low forgiveness |
| A-Tier | Joey's hammer | Stagger and crowd control | Slow attacks and limited reach |
| B-Tier | Mark's gauntlets | Mobility and melee pressure | Requires precise positioning |
| B-Tier | Apan's spirit weapon | Support and sustain | Lower personal burst damage |
| A-Tier | Yajouj and Majouj | High-impact Ancient Spirits play | Learning curve and unusual timing |
🎮 Children of Morta - Ancient Spirits
Looking to experience this game? Grab your digital key directly on our store for $1.49.
View on Steammoz Store →S-Tier weapons deliver the best all-purpose runs
Linda's bow
Linda is the cleanest recommendation for players who want a powerful weapon without gambling every room on melee positioning. Her bow attacks let you maintain damage while moving, and that freedom is priceless against enemies that leave ground hazards or punish short-range attacks. She also scales naturally with attack speed and Focus management: the longer you can keep firing without panicking, the more her kit pulls ahead.
Linda's weakness is not damage; it is setup. If enemies spawn behind you or teleport into melee range, her advantage disappears quickly. Prioritize movement speed, cooldown reduction, and any equipment that gives you a defensive trigger after taking damage. A good Linda build uses her dodge to preserve firing distance rather than treating it as a panic button. Her best room pattern is simple: fire while circling, relocate before enemies close in, then spend an active skill to break a dangerous pack.
Lucy's staff
Lucy earns S-Tier status because her staff and fire-based skill kit erase clustered enemies faster than almost anyone else. Her area damage is especially valuable in rooms filled with small targets, where melee characters lose time walking between threats. She is also excellent against bosses with summoned adds because one well-timed spell can clear the distraction while your basic attacks continue pressuring the main target.
Build Lucy around resource efficiency rather than blindly stacking damage. Extra damage feels great, but a staff user who runs dry before an elite wave is effectively unarmed. Cooldown reduction, energy recovery, and defensive equipment are usually better than a small theoretical damage increase. Keep one escape route open, cast from the edge of the room, and never stand still simply because an enemy is already burning. Lucy's damage-over-time effects continue working while you reposition.
John's sword and shield
John is the least flashy S-Tier pick and arguably the best learning weapon in the game. His sword provides dependable close-range damage, while the shield gives you a way to answer attacks that would force other characters into a dodge. That makes John outstanding in unfamiliar areas and against bosses with readable telegraphs.
The important detail is timing. Blocking is not permission to hold position forever. Use it to absorb a specific hit, then answer with a short attack string before backing away. Equipment that improves health, damage reduction, or skill uptime makes John even more reliable. His clear speed is lower than Lucy's and Linda's, but his failed-run rate is often lower too. In a roguelite, that consistency is real power.
A-Tier weapon kits are deadly with the right equipment

Kevin's daggers
Kevin's daggers can produce some of the highest close-range damage in the family, particularly when his stealth-oriented tools let him choose the opening engagement. He shines when you understand enemy attack timing and can remain behind or beside a target instead of trading blows face-to-face. His weapon kit rewards aggression, but careless aggression gets punished immediately.
Kevin wants movement speed, dodge recovery, and damage bonuses that activate after using a skill or avoiding an attack. Do not build him like John. Health is useful, but defensive stats that keep you mobile are usually more valuable because Kevin survives by refusing to be where the hit lands. Against bosses, attack during recovery animations, disengage before the next telegraph, and use stealth to reset the fight rather than squeezing in one greedy extra combo.
Joey's hammer
Joey's hammer sits just below the S-Tier group because its raw impact is fantastic but its attack cadence is unforgiving. His wide swings and heavy skills stagger enemies, interrupt dangerous attacks, and make narrow rooms feel manageable. When several enemies stack together, Joey can solve the problem with fewer actions than a faster character.
The trade-off is obvious: missed swings cost time, and slow recovery animations leave you exposed. Look for cooldown reduction, attack-speed support, and effects that increase survivability during or after a skill. Joey is at his best when you funnel enemies through doorways or corners. In open rooms, avoid chasing individual targets. Let them approach, land the hammer's wide hit, then move before the retaliation starts.
Yajouj and Majouj
The Ancient Spirits character deserves a high A-Tier placement because the pair changes how you think about weapon timing and burst windows. Yajouj and Majouj are not simply another fast melee option; their unusual presentation and skill flow make them feel built around coordinated, high-impact attacks. They reward players willing to learn when to commit and when to reset.
That learning curve keeps them below John's immediate reliability. Their best equipment is anything that increases skill uptime, improves mobility, or gives a defensive buffer during a committed attack. Do not evaluate the character after one short run. Early attempts feel awkward because you are still reading the rhythm of the kit. Once the timing clicks, Ancient Spirits' new fighter becomes one of the most entertaining ways to tear through elite rooms.
B-Tier weapons are specialized, not weak

Mark's gauntlets
Mark's gauntlets are a strong choice for experienced players who enjoy staying in the danger zone. His martial-arts weapon kit delivers rapid melee pressure and excellent mobility, but it asks you to understand enemy spacing better than John or Joey does. Mark's damage is impressive when you maintain momentum; it falls sharply when you are forced to retreat.
Choose equipment that supports stamina, movement, and cooldown flow. Mark does not need to become tanky if you are already using his mobility correctly, but a small amount of damage reduction can prevent one mistake from ending a run. His ideal combat loop is hit, reposition, bait the attack, then return with another short burst. Trying to mash through every enemy is the fastest way to make a good weapon look bad.
Apan's spirit weapon
Apan ranks lower for solo damage because her strength is tied to support, sustain, and keeping the family alive rather than deleting enemies instantly. That does not make her a poor pick. In a co-op run, or in a dungeon where attrition is the real threat, Apan's utility can be more valuable than raw burst.
Build Apan around cooldown reduction, healing efficiency, and enough damage to prevent fights from dragging forever. Her weapon is especially useful for players who prefer a controlled pace. You can stabilize a rough room, recover from chip damage, and let a teammate take the dangerous angle. The mistake is chasing the same clear speed as Lucy. Apan wins by making bad rooms survivable.
Best equipment pairings for every weapon tier
The strongest equipment ranking is less about a single universally best item and more about correcting each weapon's failure point. A ranged character needs room to operate. A heavy melee character needs recovery support. A support character needs uptime. When a temporary relic or charm offers a modest bonus that directly solves your character's problem, take it over a larger but irrelevant damage number.
| Weapon kit | Priority one | Priority two | Equipment to avoid overvaluing |
|---|---|---|---|
| Linda's bow | Attack speed | Movement and Focus support | Pure health with no mobility |
| Lucy's staff | Energy efficiency | Cooldown reduction | Damage bonuses that drain resources faster |
| John's sword and shield | Damage reduction | Health and skill uptime | Glass-cannon effects |
| Kevin's daggers | Dodge recovery | Skill-triggered damage | Slow, stationary bonuses |
| Joey's hammer | Attack-speed support | Stagger and defensive effects | Bonuses requiring constant movement |
| Mark's gauntlets | Mobility | Stamina and cooldown flow | Bonuses that reward standing still |
| Apan's spirit weapon | Healing efficiency | Cooldown reduction | Maximum burst at the cost of sustain |
| Yajouj and Majouj | Skill uptime | Defensive effects during commitment | Slow effects that disrupt attack rhythm |
Permanent family upgrades matter just as much. If you are struggling with a low-tier character, do not ignore the Bergson home upgrades that improve shared health, gold, experience, or resource income. Those bonuses smooth out the early progression curve and let specialized characters reach their real build sooner. Ancient Spirits runs become much easier once you stop treating each failed attempt as wasted time and start converting every run into permanent family power.
How to use the tier list against elites and bosses
Normal rooms reward damage, but bosses expose a weapon's real ranking. Before entering a boss arena, keep at least one mobility tool available and avoid spending every resource on the first add wave. Linda and Lucy can punish bosses from range, but they still need a plan for summons. John can block a telegraphed hit, while Kevin and Mark should attack only during recovery windows. Joey should use stagger opportunities instead of trying to race the boss's health bar.
Watch for the universal telegraph pattern: enemies pause, turn, flash, or create a ground marker before committing to a major attack. That moment is your signal to stop attacking. The best players are not dealing damage every second; they are dealing damage during safe seconds and preserving health for unavoidable mistakes. Equipment that increases survivability often adds more real damage over an entire run because you spend less time dead or forced to play cautiously.
For a first Ancient Spirits playthrough, pick John if you want the safest learning curve, Linda if you understand kiting, or Lucy if you are comfortable managing resources. Choose Yajouj and Majouj once you want a fresh mechanical challenge rather than an easy win. Kevin, Joey, Mark, and Apan are all excellent specialists, but their ranking depends more heavily on your equipment rolls and familiarity with their combat rhythm.
For more dungeon-focused RPG coverage, check Steamoz's Dungeon Siege review, then compare its old-school approach with our Dungeons 3 tips and Everspace 2 hidden rewards guide.
You can confirm the DLC's current package and platform details on the official Children of Morta: Ancient Spirits Steam page, learn more about the studio through Dead Mage's official site, and review the base game's release information from the official Children of Morta website.
The short version is straightforward: Linda, Lucy, and John are the best all-purpose weapon kits; Kevin, Joey, and Yajouj and Majouj are high-value A-Tier picks with sharper strengths; Mark and Apan reward specialists. Whatever you choose, rank equipment by the weakness it fixes, not by the biggest number on the tooltip. That is the difference between a flashy first room and a build that actually survives Ancient Spirits' hardest runs.