
BloodRayne: Terminal Cut becomes far more manageable once you stop treating Rayne like a conventional run-and-gun hero. The winning formula is simple: keep moving, feed before you are desperate, use Aura Vision to control encounters, and switch between blades, guns, and vampiric powers instead of forcing one attack through every situation. These 10 tips cover the habits that make the opening levels safer, boss fights less chaotic, and the entire 2002 action game feel much sharper.
1. Learn Rayne's movement before chasing kills
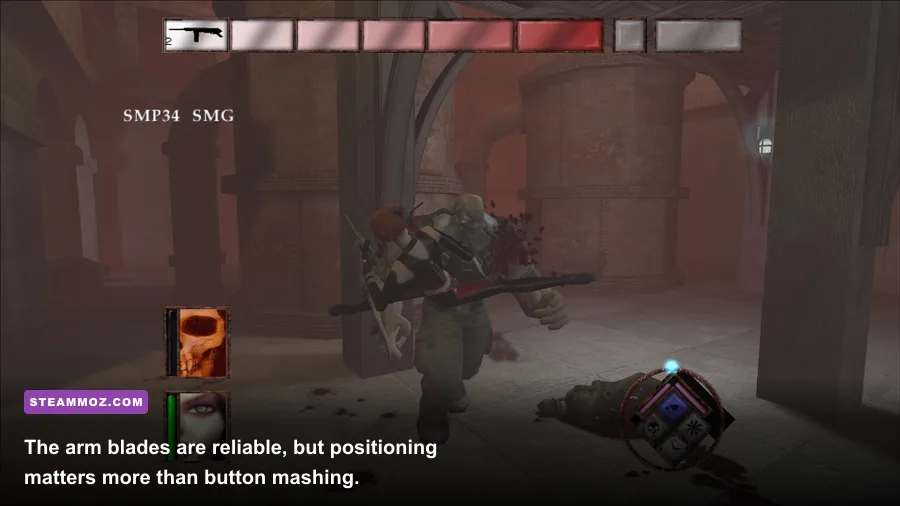
Rayne's greatest defense is her mobility. Her jump, strafe, side-step, and evasive movement let her attack from angles that most enemies cannot answer cleanly. The mistake new players make is standing in front of a target and waiting for the arm blades to finish the job. BloodRayne's combat is built around circling, closing distance, and leaving before the counterattack lands.
Start every encounter by moving laterally. Hold a wide arc around gunmen while you identify who is firing, then cut toward the most dangerous shooter. Against melee enemies, take one or two blade swipes and immediately reposition. Rayne's damage output is strong, but she is not invulnerable during her attack animations, and several enemies can stagger her if you remain planted.
Jumping is useful for clearing crowds and reaching enemies on different elevations, but don't turn every fight into random aerial spinning. Land deliberately, especially near pits, electrified machinery, or explosive objects. A missed jump can cost more health than the enemy you were trying to avoid.
Camera control also matters. Keep the camera high enough to see incoming projectiles and low enough to track Rayne's feet near ledges. If the view becomes cluttered, disengage rather than continuing to attack blind. A five-second reset is cheaper than being trapped between a wall and three enemies.

🎮 BloodRayne: Terminal Cut
Looking to experience this game? Grab your digital key directly on our store for $5.99.
View on Steammoz Store →2. Treat blood as ammunition, not just healing

Rayne's dhampir physiology gives her access to one of the game's most important systems: feeding. Blood restores health and supports her supernatural abilities, but grabbing every available victim immediately is a poor habit. Think of nearby enemies as a reserve you can spend strategically.
Use the feeding command when a target is isolated and the surrounding room is temporarily safe. Feeding in the middle of a crowd can leave Rayne locked into an animation while a gunman or heavy enemy attacks. Clear ranged threats first, then feed from a weaker melee target. This keeps the resource loop under control without turning every recovery attempt into a gamble.
Human enemies are usually your safest source of blood. If a target is marked as a reliable feeding opportunity, do not waste it just to top off a tiny amount of missing health. Save that victim for after the next ambush or for a power-heavy sequence. The game regularly places enemies near the route where their blood will be needed, so exploring carefully has a direct combat payoff.
There is another reason to avoid panic feeding: Rayne's health and power economy work best when you enter a fight with a plan. Shoot from range, use blades to finish a vulnerable target, feed only when the room is controlled, and preserve your strongest abilities for enemies that cannot be safely dismantled with ordinary attacks.
| Situation | Best first move | Why it works | Common mistake |
|---|---|---|---|
| Several melee enemies | Circle and separate them | Prevents a surround | Standing still for a full combo |
| Gunmen at long range | Close on the nearest shooter | Removes the biggest pressure source | Trading shots from the open |
| Low health after a fight | Find an isolated human target | Restores resources safely | Feeding while surrounded |
| Mixed enemy group | Use guns, then blades | Weakens threats before contact | Using one weapon for everything |
3. Use Aura Vision before entering unfamiliar rooms
Aura Vision is not a novelty filter. It is Rayne's information advantage, and new players should activate it whenever a room, corridor, or objective feels unclear. The mode helps identify enemies, living targets, interactive elements, and the general shape of a route that can be difficult to read in the normal visual presentation.
Turn it on before opening doors, crossing a large arena, or dropping into an area where retreat may be difficult. This gives you a few seconds to identify gunmen, locate potential feeding targets, and decide which side of the room offers the best escape route. You don't need to leave Aura Vision active constantly; use it like a tactical scan.
It is especially valuable during exploration. BloodRayne's levels contain switches, traversal routes, locked doors, and environmental hazards that are easy to overlook when the camera is focused on combat. If you have defeated the visible enemies but the objective has not advanced, stop wandering randomly and use Aura Vision to inspect the room's edges and upper platforms.
Experienced players also use the mode to prevent ambushes. Before stepping into a narrow hallway, scan it. Before jumping across a gap, scan the landing area. This takes almost no time and prevents the classic Terminal Cut death: moving confidently into a new space only to discover a shooter positioned outside your camera's view.
4. Match the weapon to the distance

Rayne's arm blades are the game’s signature weapon, but they are not automatically the best answer. Her arsenal includes guns such as the Carpathian Dragon, shotgun, and grenade launcher, and each tool solves a different problem. The safest weapon choice depends on distance, enemy density, and how much room you have to maneuver.
Use the Carpathian Dragon for controlled ranged damage and for finishing targets that are dangerous to approach. Its accuracy makes it a sensible answer to exposed gunmen and enemies standing on platforms. The shotgun is stronger when a target is close and you need immediate stopping power, particularly against enemies that survive a quick blade exchange. The grenade launcher is best reserved for clustered enemies or targets protected by awkward positioning; explosive damage is powerful, but careless shots can turn a tight room into your own trap.
The blades are most effective against isolated enemies, stunned targets, and opponents you can reach from the flank. They also conserve ammunition, which matters during longer sections. Don't insist on melee combat when a sniper-like enemy is forcing you to cross open ground. Fire while advancing, use cover or geometry where available, and only switch to blades once the threat is no longer controlling the room.
BloodRayne does not give you a modern loadout screen with damage numbers and attachment bonuses. That makes practical testing more important than chasing a fictional “best weapon.” Fire a few shots, observe the enemy's reaction, and decide whether the weapon is creating space or merely making noise.
| Weapon or attack | Best range | Best target | Use it when |
|---|---|---|---|
| Arm blades | Close | Isolated or staggered enemies | You can circle without being surrounded |
| Carpathian Dragon | Medium to long | Gunmen and exposed targets | Closing distance is dangerous |
| Shotgun | Close to medium | Durable enemies and sudden threats | You need immediate stopping power |
| Grenade launcher | Medium | Groups and entrenched enemies | There is safe space around the blast |
| Vampiric powers | Situational | Priority threats and crowds | Normal attacks are too risky or slow |
5. Build combat around stuns and short combos
BloodRayne rewards aggression, but it does not reward mindless button mashing. Your goal is to create a brief opening, spend it efficiently, and escape before the enemy's turn begins. A short blade sequence followed by a reposition is safer than committing to every possible hit.
Watch for hit reactions. When an enemy reels, step in for damage; when the reaction ends, move away. Against groups, attack the edge of the formation instead of the center. The outside target gives you a body to hit while keeping one escape lane open. If two enemies collapse on Rayne from opposite sides, stop attacking and jump or dodge toward open ground.
Use environmental geometry as part of the combo. Doorways, railings, raised platforms, and narrow passages can limit how many enemies reach you at once. Rayne is at her strongest when the environment turns a crowd into a queue. She is at her weakest when you allow every opponent to attack simultaneously.
Special abilities should solve a problem, not merely decorate a victory. If a room contains a dangerous ranged enemy and several disposable melee targets, spend power on the ranged threat or remove it with the quickest weapon available. Saving every ability for a hypothetical later fight can be just as wasteful as using everything immediately.
6. Respect environmental hazards and explosives
Terminal Cut's enemies are only half the danger. Industrial areas, laboratories, trains, machinery, fire, electricity, and explosive objects can kill or heavily damage Rayne when you are focused on a target. Before beginning a fight, look at the arena itself. Identify what can hurt you, what can be used against enemies, and where a safe landing zone exists.
Explosive barrels and environmental objects are tempting crowd-control tools. Use them from an angle and at a distance. A blast that catches three enemies is excellent; a blast that catches Rayne while she is already low on blood is a needless reload. Similarly, don't backpedal through an unfamiliar area while firing. You may evade the enemy and step directly into a hazard.
Vertical spaces deserve special caution. A jump can bypass an enemy formation, but a missed landing can send Rayne into a pit or force an awkward camera angle. Pause before every large leap and confirm where the landing surface begins. The game often communicates safe traversal through level geometry, but the camera can hide the edge when Rayne is moving quickly.
7. Handle gunmen before melee targets
Ranged enemies deserve priority because they continue dealing damage while you are engaged with someone else. A melee opponent usually has to reach Rayne before becoming dangerous; a gunman can punish you immediately from across the room. This makes target order more important than raw damage output.
When a room opens, locate shooters with Aura Vision or a quick camera sweep. Move toward the nearest one using lateral movement, not a straight sprint. If the path is exposed, use the Carpathian Dragon to weaken or eliminate that target before returning to the melee group. Once the shooters are gone, the fight becomes much more predictable.
Never assume that killing the enemy in front of you means the room is safe. Keep listening for gunfire and check elevated balconies, windows, and side platforms. If Rayne suddenly loses health during a blade exchange, break off and find the shooter. Continuing the combo only gives the unseen enemy more time to fire.
8. Treat bosses as pattern checks, not damage races
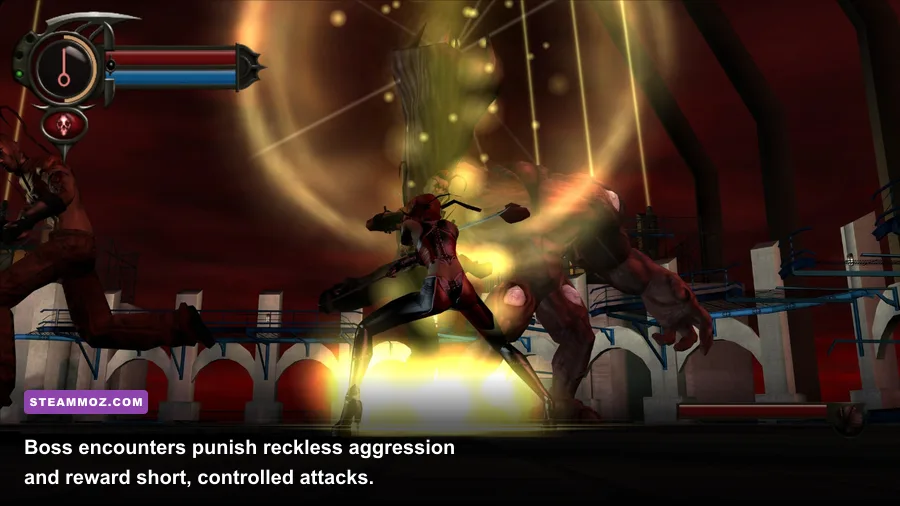
Boss encounters are where the game's old-school design becomes most obvious. The answer is rarely “attack harder.” Watch the boss's wind-up, identify the safe angle, punish briefly, and reset. Most failed attempts come from staying close after the damage window has ended.
Enter a boss arena with ammunition, blood, and a clear sense of the surrounding geometry. If the fight contains hazards or elevated platforms, learn which spaces are safe before committing to an attack. Use ranged weapons to test the boss's reaction, then switch to blades or powers when the boss is visibly recovering.
Do not spend your entire resource pool during the opening phase. Bosses often change their rhythm, summon support, or make the arena more dangerous after taking damage. Keep enough blood for recovery and enough ammunition to handle a sudden priority target. A conservative first attempt that reveals the pattern is more valuable than a reckless attempt that produces slightly more damage.
| Boss-phase problem | Danger signal | Counter strategy | Optimal tool |
|---|---|---|---|
| Close-range wind-up | Boss pauses before a heavy strike | Move laterally, then punish the recovery | Blades or shotgun |
| Open arena pressure | Projectile or ranged attack begins | Break contact and use the arena perimeter | Carpathian Dragon |
| Summoned support | New enemies enter the arena | Remove ranged support first | Gunfire or area damage |
| Low-health scramble | Rayne loses room to maneuver | Disengage before feeding | Movement, then a safe feed |
9. Explore after fights instead of rushing objectives
BloodRayne's levels are not open-world playgrounds, but they reward a deliberate sweep. Once a combat encounter ends, check side rooms, upper walkways, dead-end corridors, and alternate doors before moving on. You may find ammunition, blood sources, switches, or a route that makes the next encounter easier.
Use a simple routine: finish the visible fight, activate Aura Vision, inspect the perimeter, then test every clearly interactive object. If a door will not open, don't waste time repeatedly attacking it. Look for a nearby switch, a traversal route, or an objective trigger instead. The game can be cryptic, and brute force is usually slower than a careful visual scan.
Exploration also improves your survival curve. Extra ammunition means you can use the Carpathian Dragon against a dangerous shooter instead of taking unnecessary melee damage. Finding a safe blood target before the next room gives you a recovery option. These small advantages compound over a full chapter.
If you enjoy compact action games with focused levels rather than enormous maps, Steamoz's guides to games like 10 Second Ninja X and games like Dead Rising 4 offer useful follow-up recommendations.
10. Tune Terminal Cut for visibility and stable play
Terminal Cut is an enhanced edition of the original BloodRayne, but its presentation still reflects an older PC game. The goal is not to crank every display option blindly. You want a readable image, stable frame pacing, and controls that let you track threats without fighting the camera.
Start at your monitor's native resolution, then adjust from there if the image stretches or the game behaves oddly. Widescreen presentation can improve the view, but older interfaces and cutscenes may not scale perfectly. If you notice judder, inconsistent frame delivery, or input delay, lower visual effects before lowering resolution. Rayne's combat depends more on responsive movement than on a small upgrade in texture clarity.
Keep brightness high enough to read dark corridors, but don't wash out the game's contrast. Motion blur, if available in your setup, is usually a poor trade for an action game that relies on tracking enemies during quick turns. A stable 60 frames per second is a better target than unstable higher output, especially during crowded fights and explosive encounters.
| Setting or priority | Recommended value | Performance impact | Visual note |
|---|---|---|---|
| Resolution | Native monitor resolution | Medium to high | Use the highest stable option |
| Widescreen mode | Enable if correctly framed | Low | Improves peripheral awareness |
| Texture quality | High | Low on modern PCs | Keeps environments readable |
| Effects and particles | High, reduce if unstable | Medium | Explosions can clutter combat |
| Motion blur | Off where possible | Low | Sharper enemy tracking |
| Frame-rate target | Stable 60 FPS | Depends on system | Prioritize consistency over peaks |
For reference, check the game's official Steam page for the current PC build, supported features, and player discussions. The publisher's Ziggurat Games website is also worth checking if you need current information about the Terminal Cut release. If a display issue appears after changing settings, return to the last stable configuration before experimenting with compatibility options.
The quick-start routine to remember
These 10 tips come together in a simple loop. Scan the next room with Aura Vision. Find the ranged threats. Move laterally while closing distance. Use the Carpathian Dragon or shotgun when approaching is unsafe, then switch to blades against isolated targets. Feed only after the room is controlled. Check hazards and alternate paths before leaving.
Rayne is powerful, but Terminal Cut doesn't hand that power to careless players. Her vampire abilities, weapons, and movement are strongest when you make decisions a few seconds ahead of the enemy. Once you stop chasing every kill and start managing space, BloodRayne's rough edges become part of its appeal: fast, violent encounters where every clean escape feels earned.
Players looking for more action-heavy PC recommendations can also browse Steamoz's games like F.E.A.R. 2, games like Far Cry Primal, and Atomic Heart weapon recommendations. But if you have Terminal Cut installed already, start with one rule: never stand still when Rayne can move.