
The best beginner build in Bionic Commando is a mobility-first loadout: keep the Machine Gun equipped for dependable damage, switch to the Shotgun when enemies collapse your space, and treat the Bionic Arm as your primary weapon rather than a traversal gimmick. The 2009 PC game has no RPG skill tree, stat screen, or traditional class system, so your “build” is really a combat routine built around grapples, swing momentum, Death From Above attacks, and disciplined weapon swaps.
That distinction matters. New players often approach Nathan Spencer like a standard third-person shooter protagonist, plant their feet, aim downrange, and burn through ammunition. Bionic Commando fights back immediately. Its arenas are designed around vertical movement, dangerous gaps, explosive hazards, and enemies that become much easier once you attack from above or yank yourself into a new position.
This guide is for the original Bionic Commando PC release on Steam, starring Nathan “Rad” Spencer. It explains the strongest starting setup, the order in which to learn its mechanics, weapon priorities, enemy counters, and the performance settings that make swinging through Ascension City feel responsive.
The Best Beginner Build for Bionic Commando
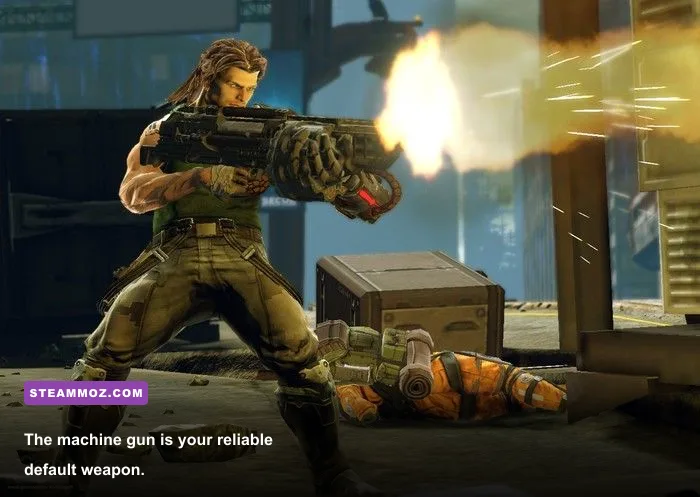
There is no permanent character build to lock in, which is good news if you are starting fresh. You cannot ruin Spencer with a bad stat allocation. The closest thing to an optimal beginner build is a flexible three-part setup: Machine Gun for sustained pressure, Shotgun for close-range interruption, and Bionic Arm movement for positioning and burst damage.
Keep the Machine Gun as your default because it works against nearly every common target. It is the weapon you use while learning enemy behavior, clearing exposed troops, and finishing targets after a grapple attack. The Shotgun is your emergency button. Pull it out when a soldier rushes you, when a shielded enemy gets too close, or when you land in a cramped rooftop area where a long swing is impossible.
Grenades and explosive weapons should support this core rather than replace it. Explosions are excellent against grouped enemies and armored targets, but using them as your only answer creates two problems: you run dry at the wrong time, and you stop learning the arm mechanics that the campaign expects you to master.
| Build Element | Starting Priority | Best Use | Beginner Mistake |
|---|---|---|---|
| Machine Gun | S-Tier default | Reliable damage against soldiers and flying targets | Holding the trigger until every magazine is empty |
| Shotgun | A-Tier backup | Close-range stagger and emergency crowd control | Carrying it into every long-range engagement |
| Bionic Arm | S-Tier core tool | Grappling, swinging, striking, throwing, and repositioning | Using it only to cross gaps |
| Grenades | A-Tier utility | Groups, cover, explosive objects, and armored threats | Throwing them at isolated basic soldiers |
| Rocket Launcher | Situational finisher | Large targets and high-damage windows | Wasting rockets before a major encounter |
What to practice in the first missions
Your first goal is not speed. It is control. Practice attaching the arm to a ledge, holding the swing, releasing at the top of the arc, and immediately finding the next grapple point. Once that feels natural, add a jump or kick at the end of the swing. The strongest version of this build never stops moving for more than a few seconds.
Use the Machine Gun while airborne whenever the arena gives you a clear line of sight. You do not need to land before attacking. Shoot, release, grapple again, and use the environment to break enemy aim. That loop is safer than crouching behind one piece of cover while several enemies slowly surround you.

🎮 Bionic Commando
Looking to experience this game? Grab your digital key directly on our store for $3.19.
View on Steammoz Store →How the Bionic Arm Should Drive Your Combat
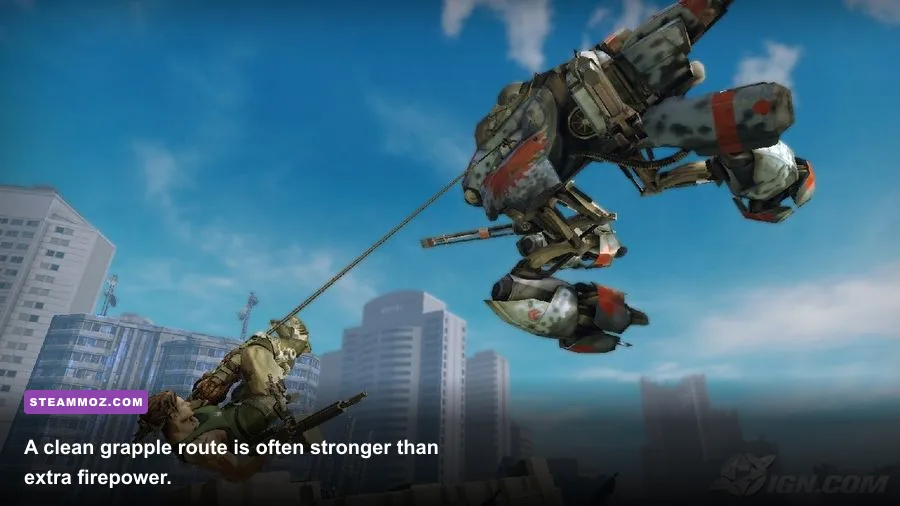
The Bionic Arm is the defining mechanic of Bionic Commando, and it has several jobs. It is a grappling hook, a swing system, a melee weapon, a traversal tool, and a way to manipulate parts of the environment. The beginner-friendly approach is to think in terms of attack lanes: every time you enter an arena, identify a high ledge, a suspended platform, and at least one escape route before firing.
Grapple to a safe surface first, then swing across the arena instead of walking through its center. The arm can attach to marked surfaces and environmental points, but not every wall is usable. If the reticle does not confirm a grapple point, do not stubbornly fire into it while enemies are shooting. Move laterally and look for the next valid anchor.
The basic combat rotation
Use this sequence against ordinary groups:
- Open from elevation. Grapple to a high point and get above the enemy line of fire.
- Tag the most dangerous target. Use the Machine Gun on rocket troops, shield users, or any enemy controlling your landing area.
- Swing through the group. Release at the forward part of the arc rather than dropping straight down.
- Attack on arrival. Use a kick, arm strike, or close-range Shotgun blast as you reach the next platform.
- Reset immediately. Grapple away before the group recovers and turns the landing zone into a crossfire.
The important detail is the reset. Beginners often complete a stylish swing, land successfully, and then stand still admiring it. That is when enemy fire catches you. Treat every landing as temporary. You are either attacking, grappling, or moving toward the next anchor.
Death From Above is especially effective when enemies cluster below a usable ledge. Look for the prompt or attack opportunity as you descend, then commit to the strike rather than trying to correct your position at the last second. It deals strong impact damage and can create breathing room, but it is not a free move: missing places Spencer in the middle of the group.
| Situation | Recommended Action | Why It Works | Follow-Up |
|---|---|---|---|
| Open rooftop with infantry | Grapple high and swing laterally | Breaks enemy aim and exposes the group | Machine Gun fire during the swing |
| Enemy rushes your landing point | Shotgun at close range | Creates immediate space | Grapple away after the stagger |
| Several enemies beneath a ledge | Death From Above | Turns height into burst damage | Move before the survivors surround you |
| Armored or large target | Explosives, then Machine Gun | Uses burst damage to open a safer window | Attack exposed weak points |
For more movement-focused PC action advice, Steamoz’s Everspace 2 secret locations guide offers a useful reminder: exploration mechanics are often strongest when they double as combat positioning tools.
Weapon Priorities and Enemy Counters
Bionic Commando’s weapons are not a traditional upgrade tree, so the best loadout changes with the arena. The Machine Gun handles the bulk of the campaign, but it is not automatically the right answer for every enemy. Weapon discipline means using the right tool for the shortest possible window, then returning to mobility.
Machine Gun
The Machine Gun is the safe default for basic soldiers, distant targets, and enemies exposed while you swing. Short bursts are better than spraying. Recoil and ammunition waste become more noticeable when you fire from an unstable position, and continuous fire can leave you empty just as a close threat reaches you.
Use it to finish enemies that have already been damaged by a kick, environmental impact, or explosive. It is also useful against airborne targets when you have a stable grapple point. Do not chase a flying enemy across an unsafe gap; keep your position and shoot only when the target enters a clean firing lane.
Shotgun
The Shotgun is your panic tool, but “panic tool” does not mean random tool. It shines when an enemy is inside your grapple rhythm and you need one fast burst to reclaim space. Fire at close range, then immediately swing or retreat. Do not stay planted to confirm the kill.
It is particularly useful after a bad landing. If Spencer touches down among soldiers, the Shotgun can interrupt the nearest threat long enough to attach the arm to a new point. That escape is often more valuable than the damage itself.
Grenades and heavy explosives
Grenades are best against groups hiding behind cover, enemies positioned around explosive objects, and targets that are difficult to reach safely. Bounce or throw them into a cluster before swinging through. The goal is to force enemies out of their defensive position, not simply to score a few points of damage.
Save heavy explosive ammunition for large enemies and boss-style encounters. A rocket fired at a lone basic soldier is almost always a poor trade. If the target has a clear weak point, wait until it is exposed rather than launching immediately into armor.
| Enemy or Threat | Best Opening | Preferred Tool | Positioning Rule |
|---|---|---|---|
| Basic infantry | While exposed between cover | Machine Gun or arm strike | Stay above or beside the firing line |
| Close-range rushers | As they enter your landing zone | Shotgun | Stagger, then grapple out |
| Shielded soldiers | After they expose their side or rear | Flank with the arm, then Machine Gun | Never trade shots from the front |
| Biomechs | During attack recovery | Explosives and sustained gunfire | Circle vertically and avoid the stomp zone |
| Aircraft and distant targets | When their movement crosses your lane | Machine Gun or available heavy weapon | Anchor first; do not aim while falling blindly |
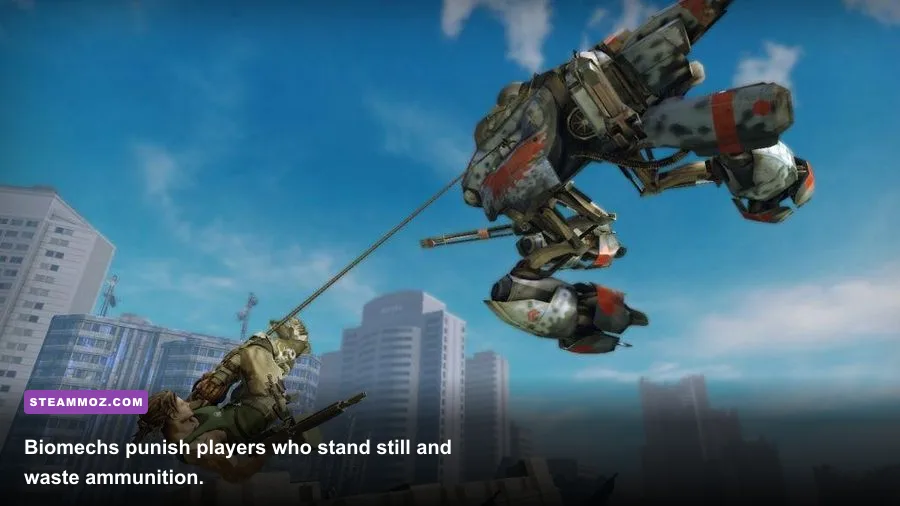
Biomechs deserve special caution. Their size makes them tempting targets for a full magazine, but their attacks punish greedy damage windows. Watch the wind-up, fire during recovery, and keep an escape grapple available. If you cannot see a safe anchor behind you, you are too committed.
Progression, Collectibles, and the Right Practice Curve
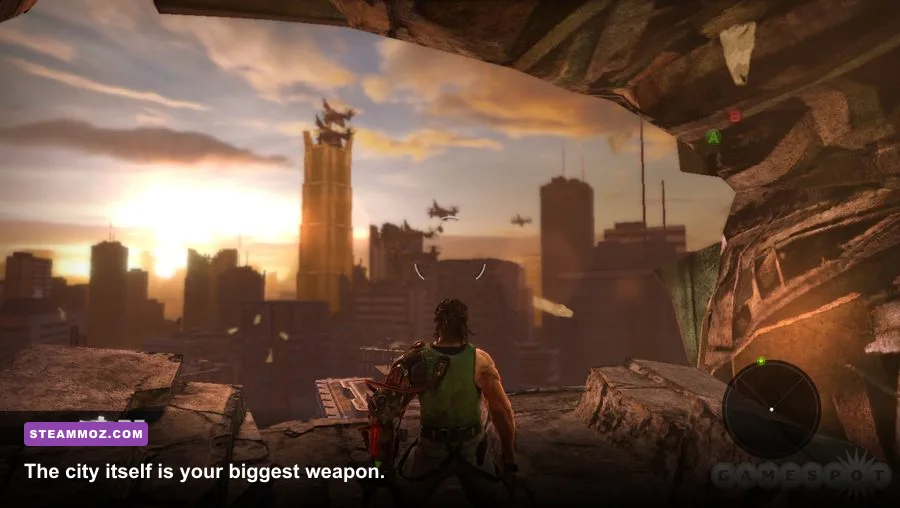
Because Bionic Commando does not give you conventional skills to unlock, progression is mostly mechanical. The game gradually asks you to combine more movement options, longer swings, combat attacks, and environmental awareness. That means the best beginner “upgrade path” is a practice path.
Stage one: survive the grapple
At the start, focus on attaching consistently. Look for the visual language of usable grapple surfaces and stop treating every jump as a commitment. If you miss an anchor, search for a lower one instead of forcing the original route. A slower recovery is better than a fall that dumps you into enemy fire.
Stage two: add momentum
Once basic grappling is comfortable, learn release timing. A swing is not just a way to reach the next platform; it is a launch. Releasing too early gives you a short, low arc. Releasing near the forward peak carries Spencer farther and creates better attack angles. This is also where you should practice changing direction after release so you are not predictable.
Stage three: combine movement and damage
Now add attacks during transitions. Fire the Machine Gun while swinging, use a kick when closing on a target, and use Death From Above when the enemy group is directly below a safe ledge. Do not attempt all three in every encounter. Choose one based on the arena layout.
Collectibles are worth pursuing when they sit near your route, but do not wreck a clean combat flow to grab a difficult one during a firefight. The main value of exploration is learning the city’s geometry. Hidden ledges and alternate grapple paths teach you where the game expects you to move when combat becomes chaotic.
Steamoz’s Dungeon Siege review covers a very different kind of progression, but its broader lesson applies here: understand what the game actually tracks before chasing a build system it does not have. In Bionic Commando, player execution is the progression system.
PC Settings for a More Responsive Bionic Commando
The original PC version is old, but smooth input still matters. Swing timing, release timing, and grapple corrections all feel worse when frame pacing is uneven. The goal is not maximum visual quality; it is a stable presentation with responsive controls and no distracting camera stutter.
Start with a stable 60 frames per second if your system can hold it. If the game produces uneven frame pacing at a higher refresh rate, a locked 60 FPS can feel better than an unstable 120 FPS. Disable extra visual effects one at a time rather than dropping every setting immediately. You want to preserve the ruined-city atmosphere while protecting combat clarity.
| Setting | Recommended Value | Performance Impact | Visual Note |
|---|---|---|---|
| Resolution | Native monitor resolution | High at 1440p and above | Keep native unless GPU usage is high |
| Anti-aliasing | Medium or High | Moderate | Helps distant cables and skyline edges |
| Texture Quality | High | Low on modern GPUs | Preserves concrete, metal, and debris detail |
| Shadow Quality | Medium | Moderate to high | Lower this first if crowded areas stutter |
| Motion Blur | Off if available | Small performance gain | Makes grapple release points easier to read |
| V-Sync | On with a stable 60 FPS | Can add input latency | Use a driver-level cap if tearing is severe |
| Frame Rate Cap | Stable 60 FPS | Improves consistency | Better for timing than a fluctuating uncapped rate |
If the camera feels sluggish, check controller dead zones and sensitivity before blaming the game. A slightly higher look sensitivity helps you locate the next grapple point during a swing, but extreme sensitivity makes landing corrections harder. Change one setting, test it for a full mission, and keep the version that lets you track targets without overcorrecting.
For more PC optimization advice, compare Steamoz’s Dragonkin graphics settings guide and the practical ELEX PC fixes guide. The games differ technically, but the same rule holds: stable frame pacing is more valuable than a handful of flashy settings.
Common Beginner Mistakes That Break the Build
The first mistake is playing Bionic Commando like cover shooter. Cover exists, but it is a pause point, not your permanent home. Enemies can pressure you from multiple angles, and standing behind one wall prevents you from exploiting the arm’s greatest advantage: choosing where the fight happens.
The second mistake is grappling without a destination. Every swing should answer a simple question: where am I going after release? If the answer is “somewhere over there,” you are likely to land in the open. Aim for a ledge, vertical surface, rooftop, or platform that gives you the next anchor immediately.
Third, beginners reload at the worst possible time. If a group is closing, use the Shotgun or grapple away before reloading. The Machine Gun is dependable, but it is not worth standing still while a rusher crosses the gap.
Fourth, players waste explosives on targets that the arm can handle. Throwing a grenade at every soldier feels efficient, but it empties your reserve and removes options from tougher encounters. Use the arm for ordinary enemies, the Machine Gun for clean ranged finishes, and explosives when the target’s armor, position, or numbers justify the cost.
Finally, do not confuse a missed swing with a failed build. Bionic Commando has a demanding movement rhythm, especially on keyboard and mouse if your bindings feel awkward. Put grapple and jump where your hand can reach them without leaving movement control, then practice the opening routes until your eyes start identifying anchor points automatically.
The short version is simple: Machine Gun first, Shotgun second, explosives for priority targets, and the Bionic Arm always working. Keep moving, attack from elevation, and treat every landing as the beginning of your next escape. That is the strongest starting build for beginners because it matches what Bionic Commando actually rewards—not character-sheet optimization, but confident movement through a dangerous city.
Before starting, check the game’s official Capcom site for publisher information and the official PlayStation Store for platform listings. You can also verify the original release through the official Xbox website. Availability and compatibility can vary by storefront, so confirm your version before troubleshooting the PC port.