
Start by unlocking combat counters, upgrading the Batsuit and remote gadgets, and resisting the urge to clear every Riddler trophy immediately. Batman: Arkham Knight rewards a deliberate rhythm: build your combo safely, use the correct gadget on each enemy, and spend WayneTech points on upgrades that expand your options rather than flashy moves you rarely need. The Premium Edition also includes the Season of Infamy and Arkham episodes, so the best plan is to finish the core systems first, then use the DLC as a second campaign.
These ten tips are aimed at first-time players, especially anyone moving from Arkham Asylum or Arkham City to Rocksteady’s larger, more vehicle-focused finale. They cover combat, exploration, upgrades, the Batmobile, side missions, performance, and the Premium Edition’s extra content without spoiling the ending.
🎮 Get Batman: Arkham Knight Premium Edition
Ready to dive in? Grab your copy today for just $5.99.
Check Offer1. Learn the FreeFlow rhythm before chasing upgrades
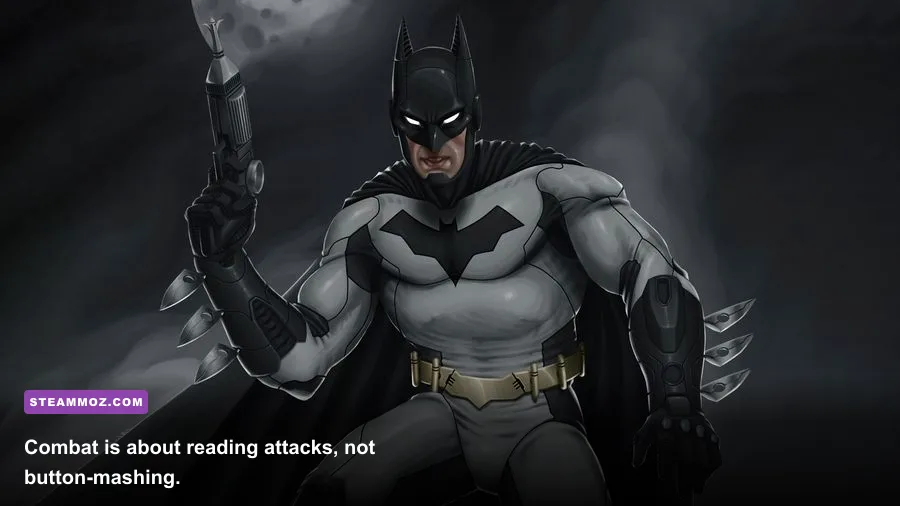
Arkham Knight’s combat looks frantic, but Batman’s basic loop is wonderfully controlled: strike, watch for an incoming attack, counter, then redirect toward the next threat. A blue lightning bolt above an enemy’s head signals a strike that can be countered. Double lightning bolts mean a blade attack, which needs a cape stun before you can safely engage. A red weapon icon means the enemy is preparing a firearm attack; break line of sight or use a gadget immediately.
Never mash the attack button while surrounded. Holding a direction while pressing the jump button twice lets Batman evade over an enemy, preserving your combo and creating space. The evade is also the answer to shield carriers, brutes, and many awkward group situations. Against a shield enemy, jump over the shield and attack from behind. Against a brute, stun with the Batarang or cape, then perform the beatdown only when nearby enemies cannot interrupt it.
Your combo multiplier matters because higher combos unlock stronger options. At a 5x combo, you can use a combat takedown; at 8x, many gadgets receive a more powerful variation. Ground takedowns are quick but leave Batman vulnerable if you trigger them in the wrong place. Save them for the last few enemies or for moments when a nearby firearm makes standing combat too risky.
Use every enemy’s telegraph
Militia medics should be prioritized because they revive incapacitated enemies. Disarm them with the Disruptor before a fight begins, or target them early with a silent takedown. Ninjas attack quickly and can evade your strikes, so countering and dodging is safer than trying to overwhelm them. Brutes have armor and require repeated cape stuns before a beatdown. The game is effectively teaching you a visual language; once you read the icons, large rooms become controlled puzzles instead of brawls.
| Enemy | Warning | Best counter | Common mistake |
|---|---|---|---|
| Shield carrier | Shield raised | Evade over, then strike from behind | Attacking the shield directly |
| Blade enemy | Double lightning icon | Cape stun, then attack | Attempting a normal counter |
| Brute | Large armored target | Cape stun and repeated beatdown | Fighting it beside armed enemies |
| Medic | Blue revival effect | Disruptor or early takedown | Leaving it until the end |

🎮 Batman: Arkham Knight Premium Edition
Looking to experience this game? Grab your digital key directly on our store for $5.99.
View on Steammoz Store →2. Spend WayneTech points on the right early upgrades

WayneTech points come from story missions, side missions, Riddler challenges, and the Militia checkpoints spread across Gotham. The strongest early purchases are not always the most entertaining. Prioritize the Batsuit’s ballistic armor, combat armor, and special combo moves, then improve the Batmobile’s Vulcan Gun and riot suppressor. These upgrades directly reduce damage and make required encounters less punishing.
For a first run, the most useful combat unlocks are Special Combo Batarang, Special Combo Explosive Gel, and Special Combo Batclaw. They turn a clean 8x combo into instant crowd control. In Predator rooms, upgrade Fear Multi-Takedown when available. It lets Batman chain silent takedowns after generating fear, but don’t force it in rooms with medics or armored enemies unless you have already identified the escape route.
Gadget upgrades are excellent investments because they work in both combat and exploration. The Remote Hacking Device can disable weapons and create new routes, while the Disruptor’s mine capacity makes armed militia encounters much safer. You’ll eventually unlock more powerful versions of the Batarang, Batclaw, and Explosive Gel, but you don’t need to buy every upgrade the moment it appears. Keep a point or two available when a mission introduces a new enemy type.
| Upgrade area | Early priority | Why it matters | Delay until later |
|---|---|---|---|
| Combat armor | High | Improves survivability in frequent melee encounters | Rarely worth delaying |
| Special Combo Batarang | High | Instantly interrupts multiple enemies at 8x | Cosmetic-focused upgrades |
| Disruptor capacity | High | Neutralizes firearms before Predator fights | Situational gadget refinements |
| Batmobile Vulcan Gun | High | Destroys missile locks and damages drone weak points | Less urgent pursuit upgrades |
| Fear Multi-Takedown | Medium | Clears isolated groups silently | Advanced challenge-focused skills |
If you enjoy build planning in other games, the same principle applies here: buy upgrades that multiply your options. Our starting-build guide for Delta Zeal covers a similar mistake new players make—spreading resources too thin instead of strengthening a reliable core.
3. Treat Detective Mode as a tactical tool

Detective Mode is more than a clue-finding filter. Tap it before entering a room and you’ll see armed guards, weapons, destructible walls, ventilation routes, and enemy status. Blue outlines usually identify unarmed or non-alert targets; orange weapon indicators warn you about firearms and other threats. This information lets you pick the correct opening move rather than improvising after the alarm sounds.
In Predator encounters, start by identifying the highest-risk tool. A jammer can hide enemy positions, a medic can revive guards, and a commander can coordinate militia responses. Use the Disruptor on firearms or mines, hack a terminal with the Remote Hacking Device, and then create a distraction with a Voice Synthesizer or Batarang. Smoke pellets are not just emergency escapes; they break enemy sight lines and give you time to relocate.
When investigating crime scenes, use the Evidence Scanner and follow the highlighted trail instead of wandering. Batman often reconstructs events in stages, and switching between Detective Mode and normal vision reveals environmental details the other view hides. The Batcomputer’s mission menu also identifies unresolved objectives, so check it whenever you reach a new island.
Predator rooms reward patience
Don’t immediately drop from a vantage point after a silent takedown. Guards communicate, investigate, and change patrol patterns. Move through grates, ceiling vents, and gargoyle positions to keep the room unpredictable. If an enemy is carrying a thermal scanner, gargoyles become less safe; use floor grates and corners instead. The best Predator takedown is the one that leaves you with a clean exit.
4. Master the Batmobile without fighting its controls

The Batmobile is the biggest adjustment for new Arkham players. In pursuit mode it is fast and responsive; in battle mode, the car becomes a hovering tank with a reticle, dodge thrusters, and specialized weapons. Enter battle mode before aiming at drones, because attempting to fight while still driving at full speed makes every encounter harder than it needs to be.
The Vulcan Gun is your precision tool. Use it to destroy drone weak points, missile locks, and incoming projectiles. The 60mm cannon handles heavier targets, but it has limited ammunition and a slower firing rhythm. The missile barrage requires a combo meter built by damaging enemies, so save it for clusters or heavily armored targets rather than firing it on cooldown.
Movement is defense. Keep circling instead of reversing into a corner, and use the dodge thrusters as soon as the red targeting line locks onto you. Drone battles punish tunnel vision: while aiming at one tank, briefly release the reticle and scan for missile warnings. The Batmobile’s health regenerates only when you avoid incoming fire, so reckless trades turn manageable encounters into repair marathons.
| Batmobile threat | Telegraph | Counter | Best weapon |
|---|---|---|---|
| Missile barrage | Red lock-on indicator | Dodge sideways and keep moving | Vulcan Gun |
| Drone tank | Exposed glowing weak point | Circle and aim carefully | Vulcan Gun or 60mm cannon |
| Diamondback | Direct targeting line | Break the line with a dodge | 60mm cannon |
| Cobra drone | Rear weak point and scan pattern | Stay hidden, then strike from behind | 60mm cannon |
Upgrade the Batmobile’s armor and weapon systems before optional high-difficulty tank encounters. If a battle feels unfair, it usually means you’re under-upgraded or standing still, not that the game expects a different button combination.
5. Don’t rush every side mission

Arkham Knight’s Most Wanted missions are designed to unfold alongside the main story. Some objectives are inaccessible until Batman receives a gadget or Batmobile upgrade, so forcing completion early creates unnecessary backtracking. The Riddler’s challenges are the clearest example: many require the Remote Electrical Charge, Freeze Blast, Voice Synthesizer, or the Batmobile’s forensic scanner.
Do a quick sweep for breakable objects, militia checkpoints, and firefighter rescues while traveling, but leave complicated Riddler rooms marked on the map. Green question marks are tempting, yet clearing them in a single obsessive push can drain the campaign’s momentum. A better rhythm is one story mission, one nearby side objective, then a return to the main route.
Some side missions also provide meaningful combat practice. The Watchtower and checkpoint activities teach you how to approach armed groups, while firefighter rescues encourage stealth and gadget combinations. The “Occupy Gotham” checkpoints are especially useful for practicing Disruptor shots, Fear Multi-Takedowns, and environmental takedowns before the game asks you to combine them under pressure.
For completionists, remember that the ending requirements are tied to Gotham’s Most Wanted content. You don’t need to solve every Riddler trophy immediately, but you will eventually need substantial side-mission progress. This is a good reason to mark inaccessible challenges and return later rather than forgetting where they were.
6. Use the Premium Edition content at the right time
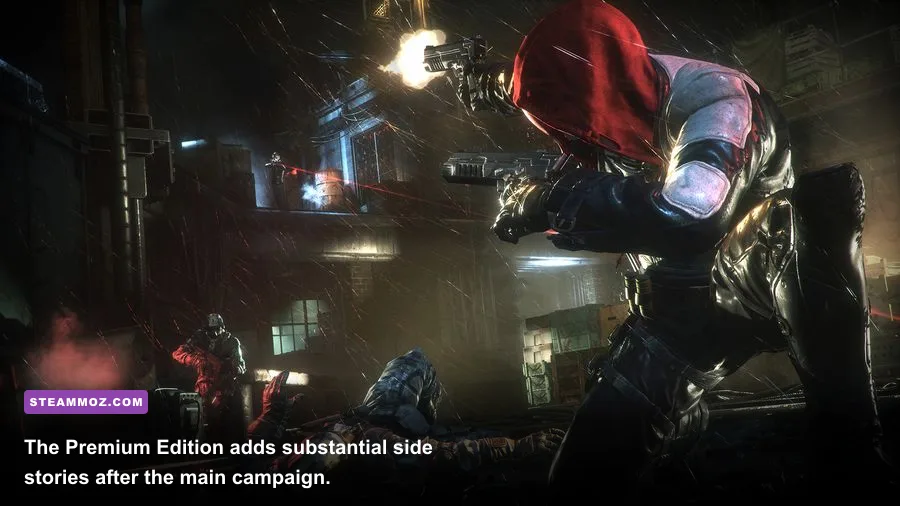
The Premium Edition bundles the base game with the Season Pass, which includes story episodes such as Batgirl: A Matter of Family, Red Hood Story Pack, Harley Quinn Story Pack, Nightwing: GCPD Lockdown, Catwoman’s Revenge, Robin: A Flip of the Coin, and the Season of Infamy missions. These episodes use familiar systems but often assume you understand the core game’s stealth and combat vocabulary.
For the smoothest progression, play the main campaign first or at least reach the point where Batman has unlocked the major gadgets. Batgirl’s episode takes place at the abandoned Seagate Amusement Park and feels like a compact Arkham scenario; it’s a strong early detour once you’re comfortable with Predator rooms. Harley Quinn’s story is shorter and more character-focused, while Red Hood’s missions emphasize aggressive gunplay and special takedowns.
Save Season of Infamy for later. Its side missions introduce tougher encounters and major villains, including Mr. Freeze, Ra’s al Ghul, Killer Croc, and the Mad Hatter. The Mr. Freeze content in particular rewards patience and environmental awareness; brute-force combat is rarely the answer. Playing these missions after the core campaign also gives you more upgrades and avoids a difficulty spike during your first hours.
The Premium Edition’s challenge maps are worth using as a training lab. Switch between Batman, Nightwing, Robin, and Catwoman to learn how their moves differ. Nightwing’s electrical escrima attacks control crowds, Robin’s staff rewards defensive timing, and Catwoman’s agility makes her excellent at repositioning. Those differences make the DLC feel more substantial than a simple costume pack.
7. Fix PC performance before tuning your combat
On PC, Arkham Knight’s performance can vary dramatically by hardware and driver configuration. The Steam version’s published minimum specification lists a 64-bit operating system, an Intel Core i5-750 or AMD Phenom II X4 965, 6 GB of RAM, and a GeForce GTX 660 or Radeon HD 7870-class graphics card. A modern SSD, 16 GB of RAM, and a graphics card with at least 6 GB of VRAM are much more comfortable targets, especially in Gotham’s open areas.
Start with the game’s default preset, then adjust the settings that create the biggest frame-time spikes. Volumetric fog, shadow quality, reflections, and view distance affect Gotham traversal more than texture quality. NVIDIA GameWorks options such as Interactive Smoke and Fog, Enhanced Rain, and NVIDIA Turbulence can look impressive but are expensive; disable them first if the Batmobile produces stutter.
| Setting | Recommended value | Performance impact | Visual trade-off |
|---|---|---|---|
| Texture quality | High if VRAM allows | Low to medium | Sharpens suit and city detail |
| Shadow quality | Medium or High | Medium | Lower settings soften building shadows |
| View distance | Medium | Medium to high | Fewer distant city details |
| Volumetric fog | Off or Medium | High in stormy areas | Less atmospheric haze |
| GameWorks effects | Off for stability | High on older GPUs | Reduced smoke, rain, and debris effects |
| Frame cap | Match monitor refresh target | Improves frame pacing | May limit peak FPS |
Use an SSD and verify the game files if textures stream late or the world briefly freezes during traversal. A stable 60 frames per second feels better than an unstable 90 that collapses whenever the Batmobile crosses the city. For more PC-focused tuning advice, see Steamoz’s settings guide for Dragonkin: The Banished and our breakdown of real-world PC requirements.
8. Make gadgets part of every combat plan
Batman’s gadgets are strongest when chained together. A quick Batarang interrupts an enemy; a cape stun creates a safe opening; the Batclaw can pull a weapon away; and Explosive Gel can remove a dangerous group from the arena. You don’t need to memorize elaborate strings. Pick the threat, choose the tool, and keep moving.
The Remote Electrical Charge is particularly valuable against shielded generators, mechanical enemies, and environmental traps. The Freeze Blast temporarily locks down enemies that cannot be stunned normally, giving you breathing room in crowded rooms. The Remote Hacking Device can turn automated turrets against militia, while the Voice Synthesizer lets you lure an enemy to a specific location without exposing Batman.
Use quickfire controls instead of opening the gadget wheel in the middle of a fight. On a controller, each gadget has a directional or trigger shortcut; on keyboard and mouse, bind the tools you use most to comfortable keys. The difference is huge in late-game encounters, where pausing to select a gadget can cost your combo and your health bar.
9. Approach boss encounters as mechanics tests
Arkham Knight’s major confrontations rarely reward simply attacking harder. Bosses and vehicle set pieces test specific systems: stealth routes, Batmobile positioning, gadget timing, or the ability to identify a scripted opening. If an enemy seems invulnerable, stop attacking and scan the arena for a change in behavior, environmental prompt, or new attack telegraph.
For Cobra drone sequences, avoid rushing the shot. Enter Battle Mode, use cover to break the drone’s scan, then circle behind it and fire at the exposed rear weak point. The drone’s orange scanning cone tells you where it is looking; staying outside that cone is more important than dealing immediate damage. Against Mr. Freeze, environmental distractions and patience matter more than your usual combo skills.
During story missions featuring the Arkham Knight, listen for dialogue cues and watch the arena geometry. The game often gives you a safe route—an observation point, vent, or destructible wall—but only if you stop treating the room like a conventional brawl. This is where Detective Mode and the Remote Hacking Device earn their keep.
10. Build a clean map routine and keep moving
Gotham is much easier to manage when you use the map as a checklist. Mark a nearby militia checkpoint, firefighter rescue, or Riddler puzzle before leaving a story objective. Clear activities on the island you’re already visiting, then move on. This reduces repeated Batmobile trips and lets you naturally collect upgrade points without turning the campaign into administrative work.
Glide whenever possible. Dive-bombing into a launch point, grapnel-boosting between rooftops, and using dive-bomb attacks lets Batman cross the city faster than constant driving. The Grapnel Boost upgrade is one of the best movement purchases because it improves both travel speed and the ability to reach high ledges. If you lose momentum, grapple to a vantage point and launch again rather than dropping to street level.
Finally, save often before optional objectives and revisit locked areas after major story milestones. Arkham Knight clearly signals when a new gadget changes the map, and many previously impossible puzzles become simple once you return with the correct tool. That patient loop—story, nearby activity, upgrade, revisit—is the key to enjoying the Premium Edition instead of drowning in Gotham’s icons.
If you like checklist-heavy progression guides, Steamoz’s Dins’s Curse survival tips and Death Howl progression guide follow the same practical approach. For official details, check the Batman: Arkham Knight Steam page, the Rocksteady Studios website, and DC’s official Arkham Knight page.