If you’re starting Assassin’s Creed Valhalla: Dawn of Ragnarök, prioritize the Hugr-Rip, collect Silica before chasing story objectives, and treat every lava field, giant camp, and dwarf shelter as part of the same puzzle. The expansion becomes dramatically easier once you switch powers deliberately, upgrade the right abilities, and stop fighting every enemy head-on.
Dawn of Ragnarök takes Eivor to Svartalfheim as Odin, where the mission is personal: rescue Baldr from Surtr and survive a realm filled with Muspels, Jötnar, and corrupted dwarven ruins. Ubisoft recommends entering around Power Level 340, although the expansion can scale to your character. A high-level build helps, but smart power management matters more than simply bringing a heavier axe.
Start with the right preparation before entering Svartalfheim

Tip 1: Bring a finished build, not a half-built one. The DLC is designed for a late-game Eivor. You don’t need every skill, but having a reliable health pool, upgraded rations, a stocked quiver, and at least one weapon set with strong rune support makes the opening hours much smoother. If your original settlement progression is unfinished, consider polishing your combat setup first. Our advice on building a dependable RPG setup applies here too: consistency beats flashy damage.
Tip 2: Don’t burn your skill points randomly. Raven’s Distraction and Advanced Assassination remain useful for stealth players, while Brush with Death is excellent for anyone who likes perfect dodges. Adrenaline Fiend rewards aggressive combat, and Stomp is still one of the best ways to finish a stunned enemy. If you use bows, focus on ranged damage and weak-point bonuses rather than spreading points across every weapon branch. Dawn of Ragnarök throws resistant supernatural enemies at you, so a focused build will outperform a character with many disconnected bonuses.
Tip 3: Set your difficulty and scaling with intent. On Drengr or higher, Muspel enemies can erase your health during a bad stagger loop. Leave level scaling on if you want the expansion to stay threatening; turn it down temporarily if you’re under the recommended Power Level and mostly exploring. There’s no trophy value in wasting an hour on an underprepared fight when you could return after upgrading your gear.
| Preparation | Recommended target | Why it matters |
|---|---|---|
| Character level | Power Level 340+ | Matches the expansion’s intended entry point |
| Healing | Maximum ration capacity | Long fights often contain multiple elite waves |
| Gear | One upgraded melee set and bow | Prevents damage falling behind in scaled areas |
| Skills | Brush with Death, Stomp, Advanced Assassination | Covers dodge, stun, and stealth options |
🎮 Assassin's Creed Valhalla: Dawn of Ragnarök
Looking to experience this game? Grab your digital key directly on our store for $9.99.
View on Steammoz Store →Master the Hugr-Rip instead of treating it like a gimmick
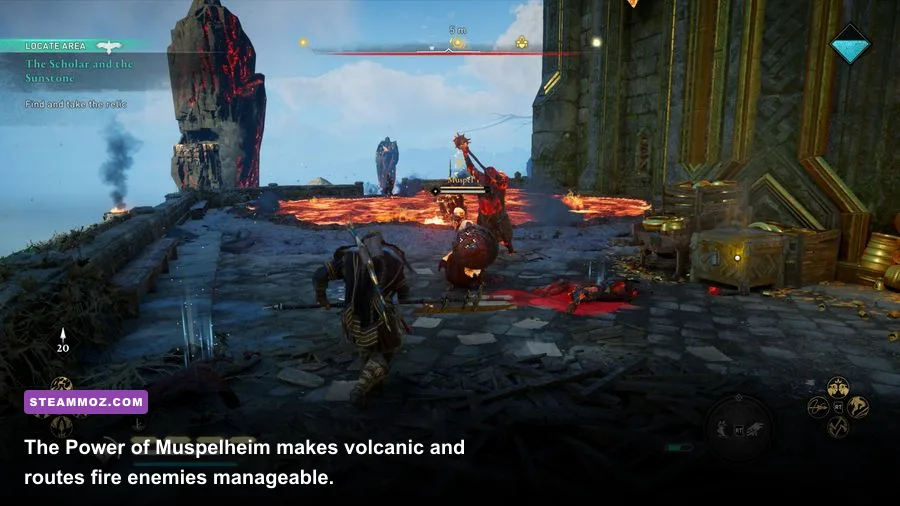
Tip 4: Choose powers based on the obstacle in front of you. The Hugr-Rip is Dawn of Ragnarök’s defining mechanic. It can absorb powers from defeated enemies, but you can only carry a limited selection at once. The five main abilities are the Power of Muspelheim, Power of Winter, Power of the Raven, Power of Jotunheim, and Power of Rebirth.
The Power of Muspelheim lets Eivor walk across lava and resist fire, which is essential around molten routes and Muspel camps. The Power of Winter adds frost damage and can freeze enemies, making it particularly useful against fiery Muspels. The Power of the Raven turns Eivor into a raven for aerial traversal and assassination opportunities. Jotunheim’s power enables teleportation through specific World Knots and creates movement tricks around cliffs. Rebirth raises defeated enemies as temporary allies, making it the best answer when a camp becomes a chaotic melee.
Tip 5: Upgrade only the powers you actually use. Hugr-Rip upgrades are purchased at dwarven shelters using Silica, the bright resource found throughout raids, ruins, and hostile locations. Upgrade costs vary by ability, so don’t spend every shard immediately. Muspelheim and Winter deserve early attention for a combat-focused run. Raven and Jotunheim are better priorities for explorers who want to reach hidden platforms and collect wealth.
Hugr is the fuel for these abilities. You can refill it by killing enemies, harvesting giant flowers, or interacting with Hugr Blooms. Don’t activate a power at the first sign of danger. Instead, look for a cluster of flowers before a major encounter, then enter the fight with a full meter. This small habit saves countless failed attempts.
| Power | Best use | Upgrade priority | Common mistake |
|---|---|---|---|
| Muspelheim | Lava crossings and fire resistance | High | Trying to cross volcanic areas without checking Hugr |
| Winter | Frost damage and freezing Muspels | High | Using it after enemies have already surrounded you |
| Raven | Gliding, scouting, and aerial assassinations | Medium | Ignoring high ledges and hidden routes |
| Jotunheim | World Knots and traversal puzzles | Medium | Spending Hugr before a teleport puzzle |
| Rebirth | Turning large groups against each other | Situational | Activating it on a single weak enemy |
Use Svartalfheim’s terrain to break every difficult encounter
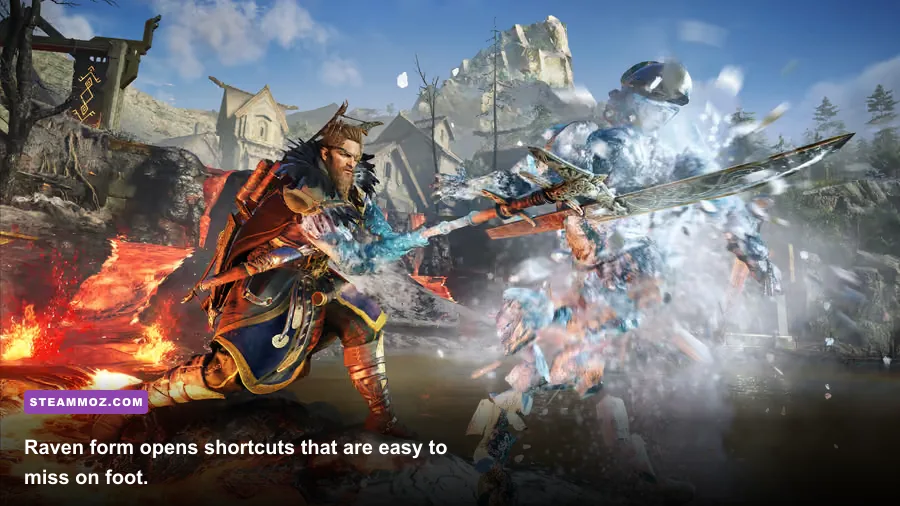
Tip 6: Fight elemental enemies with the opposite mindset. Muspels are aggressive, fire-based opponents, so don’t stand in their flame pools or trade hits with elite champions. The Power of Winter can slow their momentum and create stun windows. Against Jötnar, watch for teleportation effects and sudden ranged attacks; reposition instead of chasing a disappearing target across the arena.
Weak points still matter. Use Odin’s Sight before a camp assault, mark elite targets, and open with a bow shot to the glowing weak spot. A successful weak-point hit can create a stun opportunity, after which a heavy attack or Stomp delivers far more value than repeated light swings. If you use dual-wielded weapons, spend stamina carefully: the off-hand special attack can interrupt pressure, but it won’t save you after a mistimed dodge.
Tip 7: Make stealth your first attack, even when you plan to go loud. Raven form can help you scout approach routes, while regular stealth lets you remove weaker guards before the alarm spreads. Assassinate isolated enemies, then trigger a Rebirth power inside the remaining group. That combination reduces incoming damage and gives you a temporary frontline. Players who normally rush camps will find this especially useful on Master Assassin difficulty.
For a deeper lesson in positioning and silent takedowns, compare your approach with the methods used in Desperados III’s stealth encounters. Dawn of Ragnarök is more action-heavy, but the same rule applies: isolate targets before the alarm turns the battlefield into a blender.
Explore shelters, raids, and wealth in the correct order

Tip 8: Unlock dwarven shelters before long exploration loops. Shelters are more than fast-travel points. They give you access to blacksmith services, merchants, quests, and Hugr-Rip upgrades. The first time you arrive at a new region, follow the shelter objective before chasing distant wealth markers. You’ll gain a safe reset point and avoid hauling resources across a hostile map.
Tip 9: Collect Silica during raids, not afterward. Silica is often tucked inside monasteries, underground rooms, or guarded structures. Use Odin’s Sight to locate wealth, then solve the entry route with Muspelheim, Raven, or Jotunheim as needed. If a raid chest is blocked by lava, don’t search for a conventional door; the intended solution is usually an elemental power or a destructible wall.
Keep an eye out for Dwarven Altars, heroic sagas, and arena activities. These aren’t filler distractions: they provide useful rewards and give you practice with the DLC’s new powers. The map’s vertical design also hides shortcuts above obvious roads, so scan rooftops and cliffs whenever Raven form is available.
For players who enjoy hunting secrets, the same resource-first mindset used in secret-location guides pays off here. Mark locked wealth, note the power it appears to require, and return later instead of repeatedly throwing yourself at an impossible route.
| Activity | Best timing | Primary reward | Practical advice |
|---|---|---|---|
| Dwarven shelter | At the start of each region | Fast travel and upgrades | Use it as your exploration hub |
| Monastery raid | After filling Hugr | Silica and wealth | Search side rooms before leaving |
| World Knot puzzle | When Jotunheim is equipped | Hidden routes and wealth | Look for matching teleport markers |
| Heroic saga | Between story missions | Experience and narrative rewards | Complete nearby objectives together |
Survive Surtr and finish the story without wasting attempts

Tip 10: Save your best resources for boss phases. Surtr is not a normal Muspel champion. His attacks cover large areas, punish greedy combos, and force you to respect arena positioning. Before the confrontation, refill rations, arrows, adrenaline, and Hugr. Equip a weapon you can control rather than the one with the highest theoretical damage.
During the fight, watch the telegraph before watching your damage numbers. When Surtr raises his weapon or fills the arena with fire, disengage immediately. Dodge through predictable horizontal swings, but don’t roll repeatedly into burning ground. After a committed attack, use a short two- or three-hit punish, then reset. Perfect-dodge skills such as Brush with Death create excellent slow-motion windows, while Stomp is strongest after you expose a stun bar.
When the arena changes or Surtr begins using wider area attacks, prioritize survival over aggression. Use Muspelheim when fire hazards block your route, and keep Winter ready if you need a quick burst of control. Rebirth can help clear summoned enemies, but it’s usually less valuable than preserving a traversal power for the next phase.
| Boss situation | Danger | Counter strategy | Best tool |
|---|---|---|---|
| Wide melee swing | Large hitbox and knockback | Dodge through, then use a short punish | Brush with Death |
| Burning ground | Damage over time and restricted movement | Move to clear space before attacking | Power of Muspelheim |
| Summoned enemies | Stagger pressure from multiple angles | Thin the group or turn foes against Surtr | Power of Rebirth |
| Phase transition | Greedy attacks during arena changes | Heal, refill Hugr, and wait for the next telegraph | Rations and patience |
Finally, don’t ignore performance settings if the battlefield becomes visually noisy. On PC, test a lower volumetric cloud setting and reduce shadows before sacrificing texture quality. Stable frame pacing makes dodge timing feel much more reliable than a prettier but inconsistent presentation. Ubisoft’s official Valhalla page, the Steam listing, and Ubisoft support are useful references for installation and platform details.
Dawn of Ragnarök rewards players who think like explorers and duelists at the same time. Upgrade the Hugr-Rip, bank Silica, scout every camp, and switch powers before the problem becomes obvious. Once those habits click, Svartalfheim stops feeling like an oversized combat gauntlet and starts behaving like one enormous, brilliantly designed puzzle.