The best beginner build in Cult of the Lamb is a simple, forgiving setup: take the Sword or Axe, prioritize extra hearts and weapon damage from Tarot cards, unlock the first Crown upgrade that improves healing, and spend your opening doctrines on reliable faith and follower stability. This build avoids fragile gimmicks, gives you room to learn dodge timing, and remains useful against Leshy, Heket, Kallamar, and Shamura.
The important thing to understand is that Cult of the Lamb does not hand you a permanent class or fixed loadout. Weapons, curses, Tarot cards, and room routes are randomized during crusades. Your “build” is really a decision-making framework: choose safe damage, preserve Fervour, and turn the cult’s economy into extra attempts. If you want a broader look at how PC performance affects action games, Steamoz’s maximum-FPS settings guide is a useful companion.

The best opening loadout is built around consistency
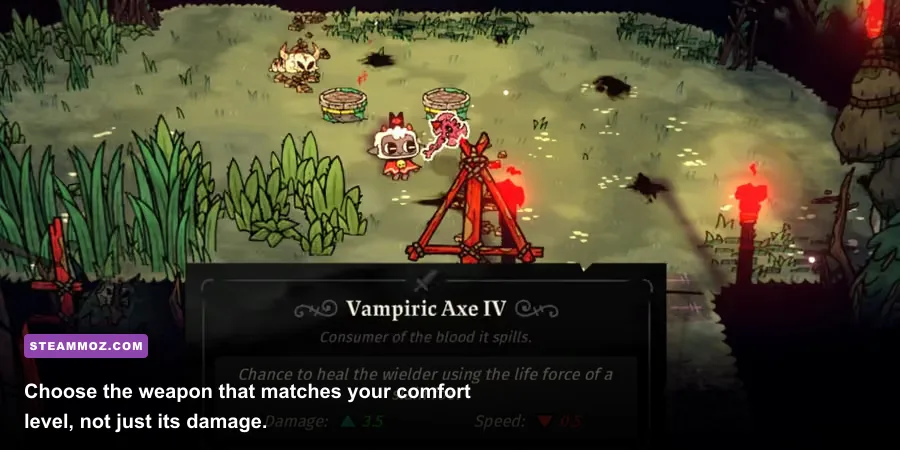
For a first run, the Sword is the cleanest starting weapon. Its balanced reach and attack speed let you land one or two hits, roll away, and repeat without committing to a long animation. The Axe is the next-best choice if you already understand enemy spacing. It hits harder but swings more slowly, so missed attacks cost more health.
The Dagger has excellent speed and works beautifully with attack-speed or poison effects, but its short range makes early rooms more dangerous. The Hammer can delete enemies when it connects, yet its wind-up is punishing against fast targets. Gauntlets are stylish and potentially explosive, though their combo behavior demands more practice. Treat the Blunderbuss as a later comfort pick rather than your first recommendation; its ammunition and reload rhythm add another resource to monitor.
| Weapon | Beginner rating | Why it works | Main danger |
|---|---|---|---|
| Sword | S-Tier | Balanced reach, speed, and low commitment | Does not burst down bosses quickly |
| Axe | A-Tier | Strong single-target damage and useful range | Slow recovery after a missed swing |
| Dagger | A-Tier | Fast hits and excellent synergy with attack effects | Short reach invites contact damage |
| Hammer | B-Tier | Huge damage when enemies are stunned or cornered | Long animation leaves you exposed |
| Gauntlets | B-Tier | High combo potential and strong late-hit payoff | Requires familiarity with combo timing |
Weapon names such as Merciless, Bane, Vampiric, and Necromantic describe modifiers, not separate permanent classes. A Merciless weapon can randomly gain critical-hit potential, while a Bane weapon can apply poison. Don’t abandon a good Sword because its label is ordinary; an easy-to-control weapon with a strong Tarot setup beats a flashy drop you can’t safely use.
🎮 Cult of the Lamb
Looking to experience this game? Grab your digital key directly on our store for $12.49.
View on Steammoz Store →Spend Crown upgrades on survival before style

Your first Sermons unlock permanent Crown abilities, and this is where many new players waste momentum. The strongest early target is the Crown upgrade that improves your ability to recover health during crusades. Healing is more valuable than a small damage increase while you’re still learning room layouts and boss telegraphs.
At the start of a crusade, you have a limited heart pool and a Fervour meter used for curses. Red hearts are your normal health, while Diseased Hearts can damage enemies when you take a hit and then disappear at the end of the run. Blue Hearts provide temporary protection and are especially valuable before a Bishop encounter. Because healing opportunities are not guaranteed, a build that adds survivability often produces more total damage over a full run than a glass-cannon setup.
Use this priority order for your first permanent upgrades:
- Healing access: prioritize the Crown path that makes recovery more dependable.
- Heart improvements: choose upgrades that increase your effective health or add temporary protection.
- Fervour support: improve curse access once you can consistently avoid unnecessary hits.
- Convenience upgrades: save movement or luxury unlocks for after your basic survival loop works.
That order also changes how you play. Don’t burn Fervour on every weak enemy. Basic attacks are free, while curses can solve dangerous groups, interrupt priority targets, or create distance. Enter an elite room with enough Fervour to respond rather than arriving empty because you wanted to speed through the previous chamber.
Take these Tarot cards for a safe damage curve

Tarot cards are the real engine of a beginner build. Clauneck offers them during crusades, and you’ll often see a choice between two cards. The best opening picks are the ones that improve every room instead of requiring a perfect combo.
| Tarot card | Priority | Build role | Best pairing |
|---|---|---|---|
| Master of the Art | S-Tier | Raises weapon damage and scales with every attack | Sword or Axe |
| Fervour’s Host | S-Tier | Improves curse reliability by supporting Fervour gain | Any weapon with a strong curse |
| The Hearts I | A-Tier | Adds dependable healing value during a run | Slow weapons and first crusades |
| Bane | A-Tier | Poison adds damage while you reposition | Dagger or fast Sword |
| Weeping Moon | A-Tier | Rewards temporary heart management | Runs with Diseased or blue hearts |
| Hounds of Fate | B-Tier | Excellent ranged burst when aimed carefully | Boss rooms and crowded corridors |
Master of the Art is the safest damage pick because it has no activation condition: every sword slash, axe swing, and curse-related follow-up benefits immediately. Bane is deceptively strong with a Dagger because poison keeps working while you dodge, but it is less impressive if you rarely connect with quick attacks. The Hearts I is never exciting on a screenshot, yet it can be the card that lets a first-time player reach a Bishop with enough health to learn the fight.
For curses, start with a projectile or area option such as Hounds of Fate when it appears. Fire it at clustered enemies, then return to basic attacks. Save more technical curses for later runs. A curse that looks powerful but consumes your entire Fervour meter is a poor trade if it leaves you defenseless in the next room.
Early doctrines that keep your cult from collapsing

Combat upgrades mean little if your followers are starving, sick, or losing Faith. The first doctrine choices should make the settlement resilient rather than maximize a theoretical endgame route. At the Law and Order branch, Ritualistic Fight Pit gives you a controlled way to handle conflict, but Murder Follower is the more practical emergency button when a single disloyal follower is poisoning the group. Pick based on your comfort with darker choices; neither is required for the combat build.
For the first Faith doctrine, Belief in Afterlife reduces the penalty from follower death and is forgiving when a crusade or illness goes wrong. Belief in Sacrifice can be stronger if you actively use sacrifice rituals and maintain a steady supply of followers, but it asks you to play more aggressively with your population.
Keep sermons frequent, cook basic meals before long crusades, and build Sleeping Bags early so followers don’t spend every night collapsing in the dirt. A faith crash can trigger dissent, and dissenting followers can spread their mood while you’re away. The base is not a separate minigame you can ignore; it is the resource pipeline that funds weapons, buildings, and repeated boss attempts.
For more progression-focused reading, compare this loop with Steamoz’s starter build breakdown for Excubitors and its equipment tier-list approach. The games are different, but the lesson is the same: reliable early investments beat flashy upgrades you can’t consistently exploit.
Use this combat rotation against every Bishop

The beginner rotation is deliberately boring: enter a room, identify the fastest or ranged enemy, land one short attack string, roll through the next telegraph, and spend a curse only when two or more threats overlap. Your dodge grants brief invulnerability, but rolling on instinct can leave you vulnerable when the real attack arrives. Watch the enemy animation first, then dodge through the hitbox instead of away from the entire room.
Against Leshy in Darkwood, stay near the outer edge during his burrowing and projectile patterns. When he rises, punish briefly, then back out before the area attack. His summoned enemies are not just distractions: clearing them gives you safer movement space and prevents a small mistake from becoming a stun-lock.
Heket fills space with frogs and ranged pressure, so use Hounds of Fate or another projectile curse to thin the arena. Kallamar tests projectile awareness; keep moving in a circle rather than retreating straight backward. Shamura combines fast melee pressure with jumping attacks, making the Sword’s quick recovery more valuable than the Hammer’s raw damage. Don’t chase a boss after it leaves the punish window. Reset to the center, watch the telegraph, and wait.
| Boss | Key danger | Counter strategy | Best tool |
|---|---|---|---|
| Leshy | Burrows, area attacks, summoned enemies | Clear adds and punish only after emergence | Sword plus damage Tarot |
| Heket | Frogs and crowded arena control | Keep moving and use ranged curses on groups | Hounds of Fate |
| Kallamar | Heavy projectile pressure | Circle the arena and dodge through patterns | Extra hearts or healing Tarot |
| Shamura | Fast jumps and close-range pressure | Attack once or twice, then immediately reset | Fast Sword or Dagger |
On every Bishop run, favor routes with a shop, Tarot reader, or heart opportunity if your health is low. Resource rooms are worth more than a risky combat detour when the objective is simply reaching the boss. If you die, you lose some collected resources, but the information you gain about attack timing is permanent. Treat the first attempt as scouting, not failure.
A practical first-ten-hours progression plan
During your opening hours, alternate crusades with short base-management sessions. Return after a run, cook food, heal sick followers, collect devotion, and queue one meaningful building before leaving again. The Shrine and temple progression unlocks the systems that make future runs easier, while excessive decoration can wait.
| Stage | Priority | What to avoid | Success benchmark |
|---|---|---|---|
| First crusades | Sword, safe Tarot, basic food, Sermons | Chasing every optional room | Reach a boss with healing available |
| After Leshy | Upgrade buildings and unlock stronger Crown tools | Ignoring dissent and sickness | Followers remain productive between runs |
| After Heket | Add curse and Fervour support | Overcommitting to slow weapons | Clear elite rooms without panic healing |
| Before Kallamar | Stack hearts, damage, and ranged answers | Entering with an empty Fervour meter | Survive projectile-heavy rooms consistently |
Finally, check the official Cult of the Lamb Steam page for current patch information and expansion details. Massive Monster’s official developer site is also the best place to track major updates, while the community wiki can help identify unlock conditions once you start experimenting.
Stick with the Sword, choose universal Tarot bonuses, protect your Faith, and spend Fervour with intent. That combination won’t produce the most dramatic highlight reel, but it teaches the exact habits that make every later weapon, doctrine, and Bishop fight much easier.