
The best beginner build in Buffet Knight - Decadent Full Course is a balanced close-range setup: prioritize your basic attack’s damage and cooldown, take one reliable area-of-effect food upgrade, then add movement speed, maximum health, and a defensive recovery effect before chasing critical-hit or rare dessert bonuses. This route is forgiving, easy to read, and strong enough to teach the game’s real lesson: a small number of compatible dishes beats a plate piled with unrelated effects.
That advice sounds modest, but it solves the biggest early mistake. New players often grab every upgrade that flashes on screen, spreading their damage across too many conditions while ignoring survivability. Buffet Knight looks playful, yet its rooms quickly become a positioning test. You need a weapon that clears the enemies directly in front of you, an area tool for crowd control, and enough movement or healing to recover when the screen gets messy.
This guide focuses on a first clear rather than a flashy high-roll run. It also explains what to do when the ideal upgrade fails to appear, how to spend early currency, and why the tempting glass-cannon route usually collapses before the first serious boss. For broader roguelite comparisons, Steamoz’s Death Howl leveling guide makes a similar point about building a dependable foundation before optimizing.
The Beginner Build at a Glance

Your opening plan is built around four jobs. The basic attack handles normal enemies, the area upgrade prevents surrounding enemies from becoming a death sentence, movement speed keeps you out of contact damage, and health or recovery covers the mistakes that inevitably happen while you learn attack patterns.
Think of the build as a priority order rather than a rigid shopping list. The game’s upgrade offers are random, so refusing every option that is not perfect will leave you weaker than taking a merely good upgrade. The important rule is to keep your first six to eight selections pointed at the same goal: consistent damage at close range with enough room to disengage.
| Build Slot | Beginner Priority | What It Solves | When to Take It |
|---|---|---|---|
| Basic attack damage | S-Tier | Shortens every dangerous engagement | First damage offer |
| Attack cooldown | S-Tier | Improves pressure and missed-hit recovery | Before the first elite room |
| Area damage or knockback | A-Tier | Stops groups from collapsing on you | Within the first three upgrades |
| Movement speed | A-Tier | Creates space from charging enemies | Early or mid-run |
| Maximum health | A-Tier | Provides a larger mistake buffer | Before the first boss |
| Critical-hit chance | B-Tier | Raises burst damage but adds inconsistency | After core damage is stable |
| Rare conditional bonuses | B-Tier | Powerful only in a completed synergy | Late run, not as an opener |
The most important breakpoint is not a particular number on the character sheet. It is whether your basic attack can remove a standard enemy in one fewer hit. That breakpoint reduces incoming pressure, shortens the time you spend standing near danger, and makes every later room easier. Cooldown is nearly as valuable because a faster attack gives you more chances to interrupt, finish weakened targets, and correct a missed swing.

🎮 Buffet Knight - Decadent Full Course
Looking to experience this game? Grab your digital key directly on our store for $4.99.
View on Steammoz Store →What to Upgrade First

On the first upgrade screen, take direct damage unless the alternative is an exceptionally strong defensive effect. The opening rooms are where a damage lead compounds. Killing one enemy before another reaches melee range is effectively a defensive upgrade, and it is usually more valuable than a tiny amount of maximum health at this stage.
Early upgrade order
- Basic attack damage: Take the first clean increase to your primary attack.
- Attack cooldown: Faster attacks make your damage more reliable and reduce dead time between swings.
- Area control: Choose an effect that hits multiple enemies, pushes them back, or damages enemies around your position.
- Movement speed: This is the safest answer to charging enemies and crowded room layouts.
- Maximum health or recovery: Take one before the first boss rather than waiting until you are already struggling.
- Damage multiplier: Only start investing in critical hits, execute effects, or conditional bonuses after the core is functioning.
If the game offers several food-themed choices, sort them by function instead of flavor. A dish that increases raw damage belongs to the primary damage lane. A dish that triggers after a dodge, kill, or full-health hit belongs to a conditional lane. Conditional upgrades are not bad; they are simply unreliable until your movement and attack rhythm are comfortable.
Do not spend early currency rerolling every mediocre offer. One reroll can rescue a poor screen, but repeated rerolls often leave you entering the next room with no meaningful upgrade. Save enough currency for a purchase that improves either your primary attack or your ability to survive contact. The same restrained spending logic appears in Steamoz’s Dins Curse survival tips: immediate stability is worth more than a theoretical late-game jackpot.
| Offer Type | Rank | Reason | Beginner Decision |
|---|---|---|---|
| Flat primary damage | S-Tier | Works in every room and against every target | Take early |
| Primary attack cooldown | S-Tier | Raises sustained damage and improves rhythm | Take before luxury effects |
| Area burst or knockback | A-Tier | Protects against groups and body-blocking | Take by upgrade three |
| Movement speed | A-Tier | Improves both offense and defense | Take when offered early |
| Healing on rare trigger | B-Tier | Strong only when the trigger is dependable | Take after basic defense |
| Low-health damage bonus | B-Tier | Encourages risky play before you know enemy patterns | Skip on a first attempt |
How the Combat Rotation Actually Works
The safest rotation is deliberately boring. Enter a room, identify the fastest enemy, attack it while moving laterally, then use your area effect when two or more threats overlap. Do not stand still to squeeze out one extra hit. Buffet Knight’s close-range damage is strongest when you keep moving through a predictable loop rather than circling randomly.
The three-step attack rhythm
- Approach on an angle: Move diagonally toward a target instead of walking directly into it. This gives you a better view of projectiles and charging bodies.
- Strike during commitment: Attack as the enemy begins its approach, then immediately move away. Your goal is to punish the enemy’s animation without remaining beside it.
- Reset the room: When several enemies converge, trigger your area effect and move through the opening. Never spend the entire cooldown trying to finish one target while the rest surround you.
There is a subtle difference between retreating and resetting. Retreating means backing away from one enemy. Resetting means moving to a new section of the room so the whole group has to approach again. The second option is far safer. It prevents enemies from forming a wall around your knight and gives your basic attack time to recover.
Use your defensive effect proactively. If it grants a temporary shield, damage reduction, or invulnerability window, activate it before contact rather than after your health bar has already dropped. If it heals on a condition, deliberately create that condition in a safe room. Wasting a recovery effect because you were waiting for the perfect moment is one of the fastest ways to lose a promising run.
Players coming from more equipment-heavy games may find this rhythm familiar. Steamoz’s Dead in Antares weapon guide also emphasizes the difference between theoretical damage and usable damage. In Buffet Knight, the strongest hit is worthless if it forces you to remain inside an enemy’s attack range.
Food Synergy Without the Beginner Trap

Food upgrades are easiest to understand when you divide them into three lanes: blade, banquet, and survival. Blade upgrades improve your primary attack. Banquet upgrades handle groups through area damage, chain effects, or knockback. Survival upgrades increase health, movement, shields, or recovery. A first build should invest in all three, but not equally.
Use a 3-2-1 balance during the opening half of a run: roughly three offensive upgrades, two area or mobility upgrades, and one health or recovery upgrade. After that, react to what the game is throwing at you. If standard enemies still take too many hits, continue down the blade lane. If damage is fine but rooms become crowded, add another banquet effect. If you are losing health despite clean movement, survival has become the best damage upgrade because it lets you stay active longer.
Avoid combining effects that require opposite behaviors. For example, a full-health damage bonus conflicts with a low-health berserker bonus, while a stationary charge-up effect conflicts with a build that depends on constant movement. Both may be individually strong, but taking them together creates an awkward character that is never operating at full value.
| Synergy Lane | Core Effect | Best Pairing | Common Mistake |
|---|---|---|---|
| Blade | Primary damage and cooldown | Execute or critical effects | Taking burst before reliable base damage |
| Banquet | Area damage, chain hits, knockback | Movement speed and cooldown | Using it only after enemies surround you |
| Survival | Health, shield, healing, damage reduction | Close-range attack bonuses | Ignoring defense until the boss room |
| Conditional | Full-health, dodge, kill, or low-health bonuses | A completed primary lane | Building around conditions you cannot trigger consistently |
Room Routing, Currency, and Shop Choices
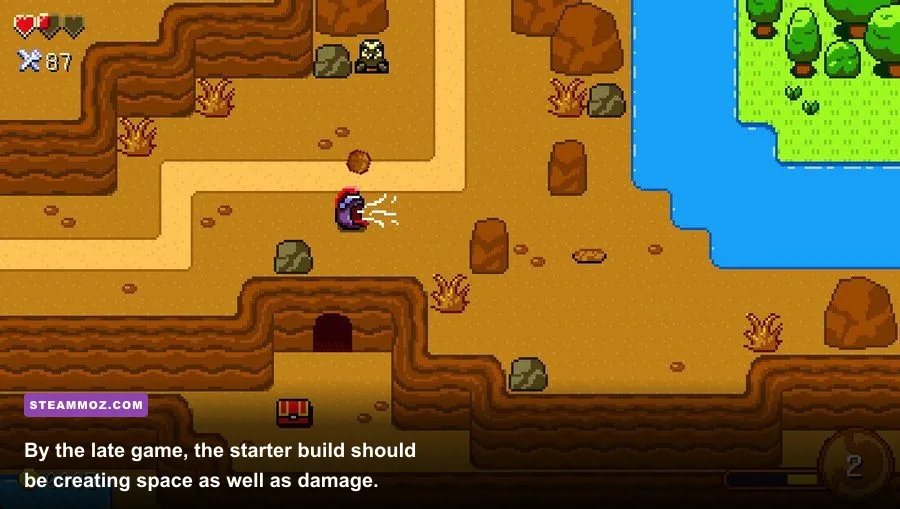
Routing should serve the build, not just the shortest path. Early combat rooms are valuable because they provide upgrade opportunities and teach you which enemy combinations cause trouble. Shops are strongest when they offer a permanent improvement to the character rather than a small temporary boost that disappears after one bad room.
Prioritize routes in this order: guaranteed upgrade opportunities, elite rooms you can clear comfortably, healing or recovery, then ordinary currency rooms. Elite rewards are attractive, but entering one before your primary attack and area control are online is a poor trade. A difficult elite can cost more health than its reward is worth, especially when your build has not yet acquired a way to escape a crowded arena.
Spend currency on permanent damage, cooldown, movement, or health improvements before cosmetic unlocks and low-impact consumables. If a shop presents two plausible options, choose the one that improves every room. A small movement increase may look less exciting than a conditional damage bonus, but movement affects dodging, positioning, attack uptime, and access to dropped rewards.
Keep a reserve for emergency recovery. Entering a boss with zero currency and a damaged health bar is not brave; it is simply removing your last safety net. You do not need to hoard everything, but having enough for one meaningful defensive purchase can turn a failed run into a clear.
Boss Preparation and the First Clear
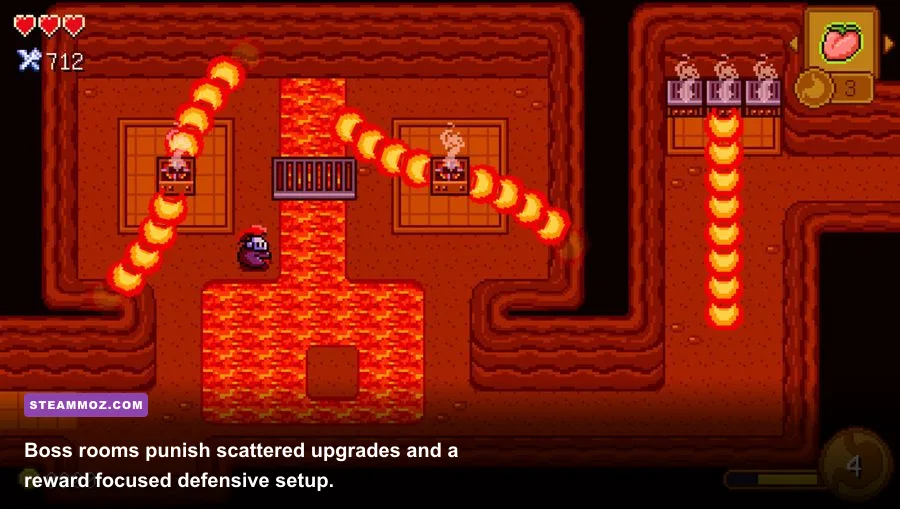
The first boss is where unfocused builds get exposed. Normal rooms allow you to retreat and reset. Boss arenas reduce that freedom, often combining a direct attack with projectiles, summoned enemies, or a space-controlling hazard. Your goal is not to maximize burst during the opening seconds. It is to keep your damage active while preserving an escape route.
Boss-room checklist
- Enter with at least one area-control effect ready to use.
- Keep your defensive cooldown available for the boss’s committed attack, not routine chip damage.
- Fight near the outer half of the arena, but never pin yourself against the wall.
- Move in wide arcs so projectiles and summoned enemies remain visible.
- Attack after the boss finishes an animation instead of trading hits during its wind-up.
- Clear summons when they block your route; otherwise keep damaging the boss.
| Boss Situation | Primary Danger | Counter Strategy | Best Tool |
|---|---|---|---|
| Direct charge | Contact damage and cornering | Move diagonally, then pass behind the boss | Movement speed |
| Wide ground attack | Large area denial | Wait for the warning, then cross the safe gap | Defensive window |
| Summoned enemies | Lost room space | Use area damage to open a route | Knockback or burst |
| Projectile pattern | Forced movement into melee threats | Circle instead of retreating in a straight line | Movement speed |
| Low-health phase | Faster attacks and panic decisions | Keep the same rhythm; do not chase | Cooldown and recovery |
When the boss reaches its final phase, stop taking unnecessary risks. You have already proven the build works; the only remaining job is to repeat the pattern. Many first clears are lost because players abandon spacing when the boss is nearly defeated. A few extra seconds are cheaper than a complete restart.
What to Change After Your First Successful Run
Once you understand the rooms, you can replace some defensive consistency with specialization. The cleanest upgrade is usually moving from a 3-2-1 balance toward a 4-2-1 offensive setup, adding a second damage multiplier only after your attack speed and area control are reliable. If you enjoy aggressive play, critical-hit effects become more attractive because movement knowledge lets you exploit damage windows safely.
Do not immediately abandon the beginner build for a complicated rarity-focused setup. First, identify what actually killed you. If enemies surrounded you, improve area control. If you were hit by telegraphed attacks, improve movement and learn the animation. If the boss simply took too long to defeat, add damage after checking whether your cooldown was too slow. The correct upgrade is the one that removes the specific failure, not the one with the biggest number.
For players who prefer experimenting with routes and unlocks, the structure is similar to the planning required in Steamoz’s Delta Zeal starting build guide. Establish a dependable baseline first, then test one variable at a time. Changing weapon, food lane, and defensive plan simultaneously makes it impossible to tell what improved the run.
Common Beginner Mistakes to Stop Making
Taking every rare upgrade: Rarity does not automatically equal value. A rare effect that never triggers is weaker than a common cooldown increase you use in every room.
Ignoring movement: Damage only matters while you are alive and able to reach targets. Movement speed is not a comfort stat; it directly raises attack uptime and escape reliability.
Saving area damage too long: If your area tool is full and three enemies are converging, use it. Cooldowns are resources, but unused resources deal zero damage and create zero space.
Fighting at the center of every room: The center gives enemies more angles to approach from. Start near an edge, then rotate around the arena while keeping one escape lane open.
Chasing weakened enemies: A target at low health is not worth walking through two other enemies. Let your next attack cycle finish it naturally while you maintain a safe position.
Building only for the boss: A theoretically excellent boss setup is useless if it cannot survive the rooms that lead there. Optimize for consistency across the entire run.
Final Verdict on the Best Starting Build
For a first attempt, Buffet Knight - Decadent Full Course rewards restraint. Build your primary attack first, secure an area-control effect before rooms become crowded, add movement speed early, and buy one dependable layer of health or recovery before the first boss. Only then should you chase critical hits, conditional food bonuses, or a high-risk damage ceiling.
This route will not produce the most spectacular screenshot or the largest single hit. It will produce something more useful: a knight that can keep attacking, escape bad positions, and recover from the mistakes every new player makes. Once that rhythm becomes automatic, the game’s stranger combinations open up naturally. Until then, keep the plate balanced, keep one route open, and never let a shiny dessert distract you from the main course.
Check the official Steam listing search for the current version, patch notes, and community updates before committing to a specialized build. If your PC setup is also giving you trouble, Steamoz’s Dragonkin graphics settings guide offers useful frame-rate tuning principles for similarly busy combat scenes.