The fastest way to progress in Bee Simulator is not chasing a hidden gold exploit. The Steam game does not use a traditional gold currency, character-level ladder, or endlessly upgradeable bee build. Your real progression comes from completing story objectives, gathering pollen, returning to The Hive, finishing side activities, and learning Central Park’s shortest routes. Treat honey as your practical spending resource, and you’ll move through the campaign much faster than players who fly randomly from flower to flower.
That distinction matters because a lot of guides use “gold farming” language borrowed from Bee Swarm Simulator or other Roblox bee games. Bee Simulator, developed by Varsav Game Studios, is a compact adventure game with exploration, races, challenges, bee combat, and story progression. It is not an infinite stat-grind game. There is no reliable AFK gold loop, no secret multiplier that turns every flower into a jackpot, and no reason to spend hours farming after the next objective is already unlocked.
What “leveling” and “gold” actually mean here

In Bee Simulator, your bee does not gain conventional RPG levels with a visible experience bar and a skill tree. The campaign unlocks new activities and areas through mission completion. Pollen is collected from flowers, carried in your bee’s capacity, and converted into honey when you return to The Hive. Honey functions as the game’s meaningful economic resource, but it is better understood as mission and progression fuel than as gold in a loot-heavy RPG.
The most important rule is simple: never keep flying after your pollen load is full. Once your capacity is reached, extra flower visits are wasted unless you are completing a specific objective. Return to The Hive, deposit the pollen, and start the next circuit. This sounds obvious, but it is the biggest time loss in the opening hours because players often continue gathering while carrying a full load.
| System | What it does | Best progress strategy |
|---|---|---|
| Pollen | Collected from flower patches | Gather in dense clusters and return before capacity is wasted |
| Honey | Practical resource created at The Hive | Use it for available progression needs rather than hoarding it |
| Story objectives | Primary progression gate | Follow the active objective instead of free-flying aimlessly |
| Side activities | Races, challenges, and encounters | Complete nearby activities while already in that part of the park |
| Cosmetics | Visual customization and optional rewards | Buy or collect them after core progression is secure |
Before following any third-party “gold glitch,” check the official Steam listing for Bee Simulator. The game’s feature set explains why conventional farming guides can be misleading. You are optimizing travel time and objective order, not building a permanent economy.
🎮 Bee Simulator: The Hive
Looking to experience this game? Grab your digital key directly on our store for $14.99.
View on Steammoz Store →The fastest early-game route through The Hive
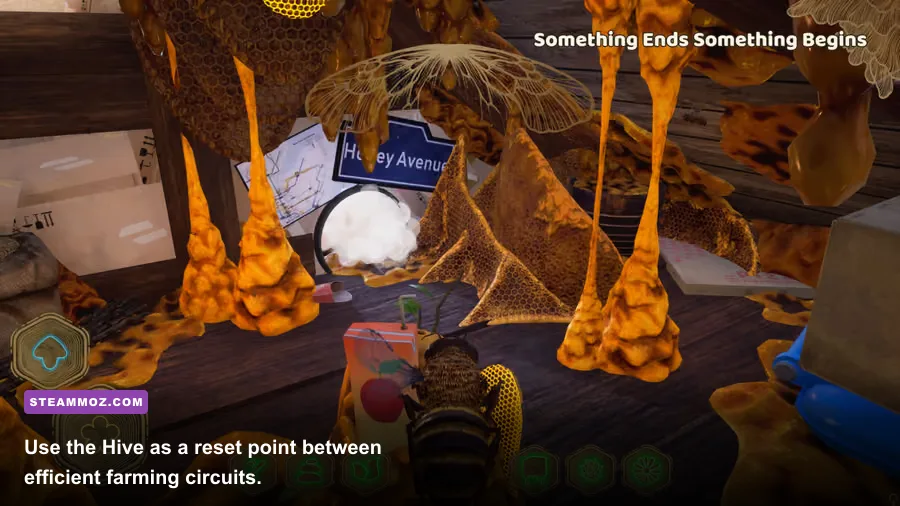
Start each session by checking the active story objective inside or near The Hive. The objective marker is more valuable than a random flower patch because completing the mission usually unlocks the next activity faster than stockpiling honey. If the objective asks for pollen, use the nearest dense flower group. If it asks you to escort, race, investigate, or fight, go directly there and gather only when the route naturally crosses flowers.
Step 1: Establish a short gathering loop
Use The Hive as your anchor. Fly from the Hive to the nearest flower cluster, sweep the patch in a tight oval, then return along the same general line. Avoid zigzagging across the entire park. Bee Simulator’s map is designed for sightseeing, but sightseeing is terrible farming. A compact loop gives you more collection time and fewer seconds spent correcting your flight path.
Step 2: Empty your pollen before taking detours
When the pollen container is full or nearly full, return immediately unless the current mission specifically requires another action. Deposit the load, then leave again. If a race marker or story interaction sits directly on your return route, do it first; otherwise, do not turn a two-minute delivery into a ten-minute sightseeing tour.
Step 3: Stack nearby objectives
Side challenges are most efficient when they overlap with the story route. If a race begins beside a flower area, gather first and start the race on the way back. If a wasp encounter appears in a distant section, handle the combat objective during the same trip rather than returning to The Hive after every small task. This is where experienced players gain time: not through a secret multiplier, but through fewer empty flights.
Step 4: Spend honey only when it improves progress
Do not treat honey as a score to protect forever. If the game presents a progression purchase or requirement, pay it and continue. Cosmetic items can wait until the story and useful activities are complete. There is no endgame economy that rewards sitting on a giant reserve, so hoarding slows the part of the game where honey is actually useful.
| Route type | Efficiency | Use it when | Main mistake |
|---|---|---|---|
| Hive to nearest flowers and back | S-Tier | You need pollen quickly | Continuing after the container fills |
| Story marker with flower detour | A-Tier | The objective is nearby | Ignoring the marker to gather elsewhere |
| Full-map flower tour | B-Tier | You are exploring or collecting scenery | Calling it a farming route |
| Repeated combat patrol | C-Tier | A mission requires enemy encounters | Fighting without an active objective |
Honey farming without wasting your flight time

Honey farming works best as a by-product of mission completion. The game’s compact structure means that the highest-value “farm” is usually the next objective, especially when it introduces a race, challenge, or story encounter. Repeating the same flower patch with no objective attached feels productive, but it often produces less meaningful progress than completing one nearby activity.
For a dedicated gathering run, choose a patch with several flowers close together rather than a visually impressive area spread across open grass. Keep your camera pointed toward the next flower, use controlled turns, and avoid climbing high above the canopy. You want a low, predictable flight line. Wide altitude changes make it harder to judge landing angles and increase the time between pollen pickups.
There is also a practical rhythm to the collection animation. Don’t fight the game’s movement by constantly pulling away from a flower as soon as the pollen begins registering. Hold your line long enough to collect the node, then turn toward the next target. A smooth chain of nearby pickups beats frantic direction changes. You’ll also spend less time colliding with trees, benches, and park objects.
Use free flight for learning the map, not for pretending it is an infinite money mode. It is excellent for memorizing where flower groups, race starts, and encounter areas sit relative to The Hive. Once you know the landmarks, return to the story mode and let objectives pay for the travel you were already going to do.
For broader performance and optimization advice, Steamoz’s frame-focused settings guide is useful even though it covers a different game. Stable frame pacing matters here because low-altitude flower collection and race checkpoints are much easier when camera movement feels consistent.
Combat, races, and side activities: what is worth doing?
Not every activity has the same farming value. Races are worth completing when they are part of progression or when you are already nearby. Wasp encounters should be treated similarly. They add variety and can satisfy objectives, but repeatedly hunting enemies is not a dependable replacement for the main story route.
Combat is mostly about positioning and timing rather than a deep equipment build. Watch the opponent’s movement, keep room to turn, and avoid charging blindly into an attack. The safest pattern is to approach with a clear escape line, make your attack, then create distance instead of hovering directly over the enemy. If the camera becomes messy around trees or park structures, move the fight into open space before committing.
Races reward clean lines more than reckless speed. Start each checkpoint approach early, avoid sharp last-second turns, and use the widest unobstructed path available. A slightly longer smooth arc is usually faster than a short route that forces you into a wall or tree. If you fail, restart immediately and focus on the two corners where you lost the most time rather than changing your entire route.
| Activity | Priority | Why it matters | Best approach |
|---|---|---|---|
| Story mission | S-Tier | Unlocks progression and new objectives | Follow the marker and gather only on-route |
| Race challenge | A-Tier | Fast completion when required or nearby | Use smooth turns and learn checkpoint spacing |
| Wasp encounter | A-Tier for missions | Provides combat progress and variety | Fight in open space and preserve an escape line |
| Free-flight exploration | B-Tier | Useful for map knowledge and collectibles | Use it to scout, not as an endless honey exploit |
| Repeated optional combat | C-Tier | Little value without an objective | Skip it during a focused farming run |
The game’s official developer page is a better reference for supported modes than random posts claiming hidden systems. If you want a quick comparison with more traditional progression games, Steamoz’s Death Howl farming guide shows how different a true level-and-currency loop can be.
Settings and controls that make farming faster
Bee Simulator does not need an extreme competitive settings profile, but smooth control helps with every part of the route. On PC, prioritize a stable frame rate over maximum visual effects if your system struggles around the park. Lowering demanding effects can make flower approaches, race gates, and wasp encounters easier to read.
| Setting or habit | Recommended choice | Effect on farming | Why it helps |
|---|---|---|---|
| Resolution | Native resolution if stable | Clearer flowers and markers | Improves target recognition at low altitude |
| Frame rate | Stable cap your PC can hold | More consistent steering | Prevents uneven camera response during races |
| Motion blur | Off if available | Sharper turns and landmarks | Makes rapid direction changes easier to judge |
| Shadows and effects | Medium on weaker hardware | Reduces frame-time spikes | Park scenes can be busier than the Hive interior |
| Camera sensitivity | Comfortable medium starting point | Fewer overcorrections | Helps maintain smooth flower-to-flower lines |
Controller players generally get the most natural flight feel, while mouse and keyboard users may prefer lower sensitivity and shorter correction movements. Whatever your setup, avoid changing sensitivity halfway through a race unless the camera is genuinely fighting you. Consistency matters more than finding a magical number.
If you are seeing stutter, check the basics before blaming the route: close overlays, cap the frame rate, and lower shadows or effects first. Steamoz’s PC performance checklist covers the same troubleshooting logic for another demanding environment. You can also consult the Steam support and community hub for platform-specific reports.
The efficient daily-style loop
Use this five-minute loop whenever you want progress without wandering. First, check the active story objective at The Hive. Second, fly to the closest relevant location. Third, collect pollen only from dense patches that sit on the route. Fourth, complete the activity, whether that is a race, encounter, investigation, or escort. Finally, return to The Hive, convert the load, spend any required honey, and repeat.
When the objective sends you far across Central Park, don’t interrupt the trip for every flower you see. Gather only enough to justify the detour, then finish the mission. When no mission is active, use the nearest flower cluster for a short collection run and return. This keeps your progress measurable and prevents the classic Bee Simulator trap: flying for twenty minutes and discovering that you barely advanced anything.
Also remember that collectibles and sightseeing are separate goals. They’re worth doing if you want completion or a slower tour of the map, but they are not part of the fastest leveling strategy. Keep a farming session focused, then switch to free flight when you actually feel like exploring.
For players coming from games with gear tiers, the useful mindset shift is similar to the advice in Steamoz’s weapon-ranking guide: identify what truly changes your route and ignore systems that only sound important. Bee Simulator rewards awareness, clean movement, and objective discipline far more than obsessive resource hoarding.
Final verdict on Bee Simulator gold farming
There is no secret gold mine in The Hive, and that is good news once you understand the design. The fastest route is a tight flower loop, immediate pollen deposits, objective stacking, and selective completion of races and wasp encounters. Follow the story, spend honey when progression asks for it, and use free flight to learn Central Park rather than grind an imaginary endgame economy.
If a guide promises unlimited gold, permanent bee levels, or a hidden multiplier, it is probably describing another bee game. In Bee Simulator, efficiency comes from cutting empty flight time. Stay close to the Hive, keep your route low and smooth, and treat every side activity as valuable only when it advances the objective in front of you. That approach gets you through the campaign faster—and leaves the park feeling like a place to explore instead of a spreadsheet to exhaust.