
Back 4 Blood: Expansion 2 – Children of the Worm hides its campaign secrets in four missions: The Road to Hell, The Clog, The Devil's Return, and The Body Dump. Each secret is an interactable golden skull tucked away from the critical path, and finding all four unlocks the DLC's hidden-secret achievement progression while also awarding the usual achievement XP and completion credit. Use a mobility-heavy Cleaner, keep a flashlight ready, and search the marked side routes below before entering each saferoom.
These collectibles aren't random loot, and they don't appear as ordinary supply points. You need to reach the skull, look directly at it, and hold the interaction button until the pickup completes. If a horde starts while you're searching, don't panic: clear the immediate area first, then return to the skull. The item remains in place until someone activates it.
For the wider campaign context, check the official Back 4 Blood Steam page and Turtle Rock's developer site. Children of the Worm is built around short, pressure-heavy missions, so the best secret runs are deliberate rather than reckless speedruns.

The Road to Hell secret location
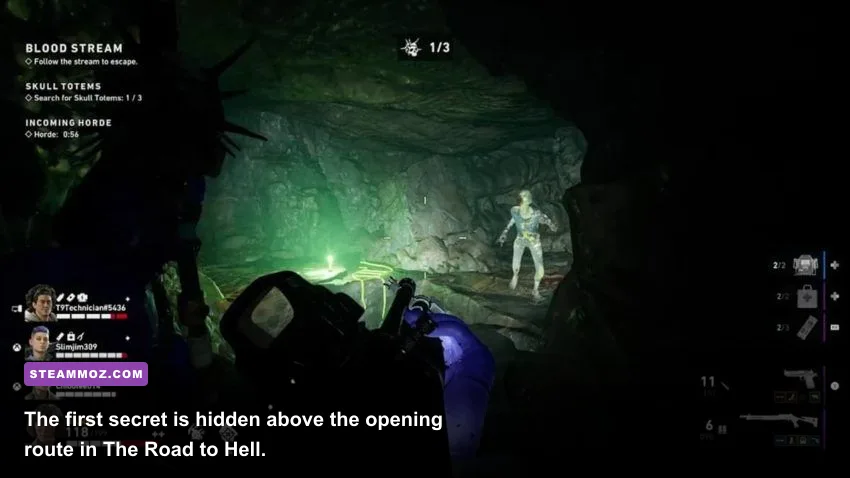
The first hidden skull is in The Road to Hell, shortly after the opening section where the team moves through the industrial approach and begins climbing toward the upper route. Don't follow the orange objective markers without checking the construction framework on your left. The collectible is above the normal floor, behind the exterior scaffolding and wooden platforms that overlook the road.
Step-by-step route
- Leave the starting saferoom and push through the opening industrial lane until the route begins to rise.
- Stay on the left side of the area rather than immediately taking the central ramp toward the objective marker.
- Look for the low stack of pallets and the climbable wooden structure beside the wall. The route is easy to miss because it resembles ordinary level dressing.
- Use the pallets and adjacent platform to reach the upper scaffolding. Move slowly across the narrow boards; a stumble can drop you back into the Ridden pack.
- Follow the platform around the outside edge. The golden skull sits in the shadowed corner behind the upper framework, not on the main road.
- Interact with it before activating the next objective or opening the nearby progression route.
The most common mistake is searching the ground below the scaffolding. The skull is deliberately positioned above eye level from the intended route. If you can see the objective marker but not the collectible, turn around and inspect the platforms you just passed. A flashlight helps, but the skull's gold surface is usually visible once you're standing on the correct elevation.
Recommended approach: Holly or Heng are comfortable picks for a first attempt because melee stamina and utility let them survive the detour. In a higher-difficulty lobby, Evangelo's movement speed is even better for crossing the exposed boards, while Karlee can spot nearby hazards and keep the team moving after the pickup.
| Section | Main danger | What to do | Best tool |
|---|---|---|---|
| Opening lane | Common Ridden and sleepers | Clear corners before splitting | Flashbang or Molotov |
| Scaffolding climb | Falls and Tallboy pressure | Use the pallets as a controlled staircase | Stamina card or Evangelo |
| Skull platform | Limited retreat space | Secure the platform before interacting | Pipe Bomb |
Once the pickup animation finishes, the secret is recorded immediately. You don't need to complete the entire mission for the collectible to count, but finishing the level is the safer choice if you're chasing all achievements in one run. For general progression advice, the resource-management principles in our new-player tips guide apply surprisingly well here: don't spend every throwable before the detour, and don't split from the team without announcing the route.
🎮 Back 4 Blood - Expansion 2: Children of the Worm
Looking to experience this game? Grab your digital key directly on our store for $2.99.
View on Steammoz Store →The Clog secret location
The Clog hides its golden skull in the drainage section, where the level funnels the team through a dirty, cramped route filled with water, debris, and ambush angles. The secret is off to the side of the sewer passage, inside a pipe-like drainage opening that is easy to mistake for a dead end.
How to reach the skull
- Advance through the first part of The Clog until the team reaches the flooded drainage area.
- Continue past the initial clutter, but don't immediately climb the central exit route when the path opens.
- Search the side of the drainage channel for a low opening bordered by concrete and pipework. The entrance is roughly at ground level and can be obscured by darkness.
- Crouch or walk into the opening. The route is short, but it turns away from the mission's obvious direction.
- Follow the pipe to its wider end. The golden skull rests at the back, beside the debris rather than in the middle of the passage.
- Have one Cleaner cover the opening while another interacts. Tallboys and Stingers can make this cramped space dangerous.
This secret is less about platforming and more about resisting the level's momentum. The Clog constantly pushes you forward with narrow lanes and horde pressure. If your team sees the next objective and rushes toward it, the skull is already behind you. Mark the side opening before advancing, because returning through the flooded section during a scripted horde is much riskier.
Shotguns are excellent here, especially the 870 Express and AA12. The 870's reliable burst damage clears a single Ridden blocking the pipe, while the AA12 gives a close-range Cleaner enough sustained fire to protect the interaction. Avoid carrying a slow, precision-only loadout if you're playing Nightmare or No Hope; the pipe leaves very little room to create distance.
| Loadout choice | Why it works in The Clog | Weakness | Suggested fix |
|---|---|---|---|
| 870 Express | Strong close-range stagger and efficient ammo use | Slower follow-up shots | Pair with reload-speed cards |
| AA12 | Excellent emergency damage in the pipe | Burns shells quickly | Carry an ammo pouch or let a teammate share ammo |
| SMG build | Fast handling and easy movement | Less reliable against armored mutations | Bring a frag or a high-damage sidearm |
Don't confuse the collectible with nearby copper or a standard loot attachment. The secret skull has a distinct interaction prompt. If the prompt isn't appearing, move around the back wall and check that you're fully inside the pipe; looking through the entrance often leaves the skull just out of interaction range.
The Devil's Return secret location
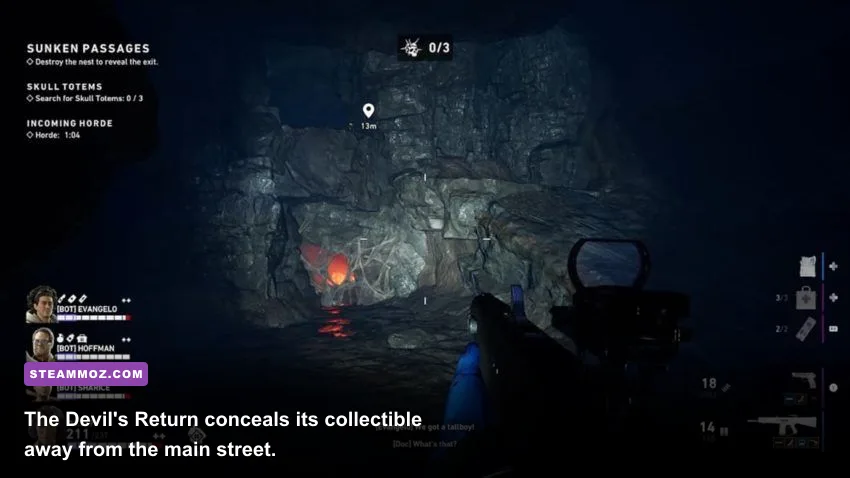
In The Devil's Return, the hidden reward is located away from the main street in the settlement section. The route takes you into a side building and then upward, so this is another secret that punishes players who only scan the floor around the objective marker. Search the building and elevated exterior route before committing to the next progression trigger.
Exact route and danger points
- Move through the opening settlement and follow the main road until the level begins directing you toward the next objective.
- Before leaving the area, inspect the buildings along the side of the street. Look for the structure with an accessible entrance and a staircase or climbable interior route.
- Enter the building and clear the first room. Check for sleepers before climbing; a surprise alarm inside this detour can trap the whole team.
- Go upstairs and continue toward the rear exit. The route leads to an exterior ledge or upper balcony overlooking the settlement.
- Follow the ledge to the far corner, where the golden skull sits behind the building's outer structure.
- Pick it up before triggering the next event. Once the team advances, the ensuing horde can make the return route unnecessarily punishing.
The key visual clue is elevation. If you're still at street level and have already passed the objective's first major landmark, you probably went too far. Turn back and check every building with a usable doorway. Back 4 Blood's secrets are often placed just beyond a plausible door rather than behind an obviously marked treasure chest, and The Devil's Return is a textbook example.
Bring a utility item that handles indoor pressure. A Flashbang is safer than a Molotov when the team is fighting inside the building, because it disables a dangerous mutation without setting the narrow route on fire. A Pipe Bomb is ideal for the extraction from the upper ledge if the Director spawns a horde immediately after the pickup.
| Encounter | Telegraph | Counter | Why it matters during the hunt |
|---|---|---|---|
| Stinger | Distinct ranged screech and projectile wind-up | Break line of sight or use a flashbang | Prevents a Cleaner being pinned on the balcony |
| Tallboy | Heavy footsteps and raised club arm | Back through the doorway and focus the weak side | Stops the mutation blocking the narrow stairs |
| Sleepers | Subtle wall or doorway placement | Ping and shoot before entering | Avoids an alarm during the side-route search |
On Recruit and Veteran, you can usually make this detour with modest preparation. On Nightmare, leave one player watching the stairwell, because the interaction animation holds you in place. This is also a good mission for Doc: her healing efficiency keeps the team from burning trauma supplies on a side trip that takes less than a minute when executed cleanly.
The Body Dump secret location

The final Children of the Worm secret is in The Body Dump, near the upper exterior route late in the mission. The collectible is positioned above the central combat space, on a rooftop or raised platform reached through the surrounding structure. You can walk past it while following the objective because the critical path keeps your eyes pointed toward the next arena.
Step-by-step rooftop route
- Push through the opening section of The Body Dump until you reach the broad outdoor combat area.
- Clear the first wave before searching. The arena gives mutations too many angles to safely investigate while enemies are active.
- Instead of heading straight toward the next objective, scan the perimeter for the structure with an external staircase, ladder, or stacked platform route.
- Climb to the upper level and follow the roofline around the side of the building. The secret isn't in the middle of the arena.
- Check the far corner behind the rooftop obstruction. The golden skull is tucked into the dead-end section, where it can be hidden by the surrounding geometry.
- Collect it, then retreat to the cleared arena rather than dropping into an unexplored lower area.
The Body Dump has the highest combat risk of the four secrets because the open space gives Special Ridden room to pressure the climber. Don't send a lone Cleaner up the stairs during a horde. Clear the arena, deploy a Pipe Bomb if the Director starts spawning commons, and keep the rooftop player within sight of the group.
A rifle such as the M4 Carbine or SCAR works well for covering the approach. The M4 is easier to control and handles commons efficiently, while the SCAR's damage is more comfortable against mutations at medium range. If you're using a melee build, let the ranged players cover the rooftop rather than trying to force a close-range fight across the arena.
| Role | Position | Priority target | Critical mistake to avoid |
|---|---|---|---|
| Collector | Upper route and skull corner | Any Stalker or Stinger with line of sight | Dropping into an uncleared section |
| Cover player | Base of stairs or ladder | Tallboys and Bruisers | Chasing commons away from the route |
| Horde control | Open arena fallback point | Dense common Ridden wave | Using every throwable before the pickup |
If you reach the upper route and see no skull, check the opposite end of the rooftop. The placement is easy to miss when the area is covered by fog, particle effects, or the game's darker lighting. Turning up brightness slightly for the search can help, but don't sacrifice visibility settings that make mutations harder to read during the fight.
How hidden rewards and achievement tracking work
The Children of the Worm secrets are collectibles rather than a conventional loot chain. They don't grant a new weapon, card, or permanent damage bonus when picked up. The reward is the secret's achievement credit and the satisfaction of completing the campaign's hidden-object layer. That distinction matters: many players expect a skull to drop copper or a legendary attachment, then assume the interaction failed when nothing appears in their inventory.
For the cleanest run, select the mission directly from the campaign menu instead of relying on Quickplay. Quickplay can place you into a random checkpoint after the secret's position, and joining an active session late won't reliably let you repeat the pickup. If you're playing with friends, have the host call out the checkpoint and let the entire team interact with the skull before moving on.
| Goal | Best method | What counts | Recommended difficulty |
|---|---|---|---|
| Find one secret | Replay the exact mission and search before objectives | Successful skull interaction | Recruit or Veteran |
| Find all four | Run The Road to Hell, The Clog, The Devil's Return, and The Body Dump in order | Each mission's secret recorded separately | Veteran for a balanced challenge |
| Complete the campaign too | Use a coordinated four-player lobby | Secret pickup plus mission completion | Veteran or Nightmare |
| Practice routes | Use Recruit with bots, then repeat on your target difficulty | Route familiarity and safe extraction | Recruit |
Difficulty changes the danger around the secrets, not the basic route. Recruit is useful for learning the geometry, but don't assume the same leisurely pace on Nightmare or No Hope. Mutation health, trauma pressure, corruption cards, and horde timing can turn a thirty-second detour into a wipe. The route should always be announced before the team leaves the critical path.
Build around movement, stamina, and emergency control rather than maximum boss damage. Cards such as Superior Cardio, Mad Dash, and Run Like Hell make exposed climbs and retreats easier, while Utility Scavenger and On Your Mark... improve the team's ability to find and sustain utility. If you're already running a dedicated melee deck, avoid stacking so much damage that you lose movement or team support; a secret hunt is won by reaching the skull and getting back alive.
For another perspective on careful exploration, our secret-hunt guide covers the same useful habit: learn the visual language of optional routes instead of searching randomly. If performance issues make dark corners difficult to read, the optimization lessons in our low-FPS troubleshooting guide are worth applying before you start.
Final checklist
- The Road to Hell: climb the left-side scaffolding above the industrial route.
- The Clog: enter the low drainage pipe beside the flooded passage.
- The Devil's Return: search the accessible settlement building and follow its upper exterior route.
- The Body Dump: climb to the raised rooftop route around the outdoor combat arena.
- Interact with every golden skull until the pickup completes.
- Replay missions directly from the campaign menu if a secret does not register.
- Clear hordes before entering narrow side routes, especially on Nightmare and No Hope.
That’s the full Children of the Worm secret sweep. None of the skulls is mechanically difficult once you know the elevation or side passage involved, but each one is placed where Back 4 Blood's Director wants you to keep moving. Slow down at the right moment, secure the detour, and the entire hidden-reward hunt becomes a controlled four-mission cleanup rather than a frantic scavenger chase.
For official patch information and DLC availability, consult the official Back 4 Blood news page. If you're also collecting secrets in other games, Steamoz's secret locations guide for Disciples: Liberation has the same kind of route-first approach.