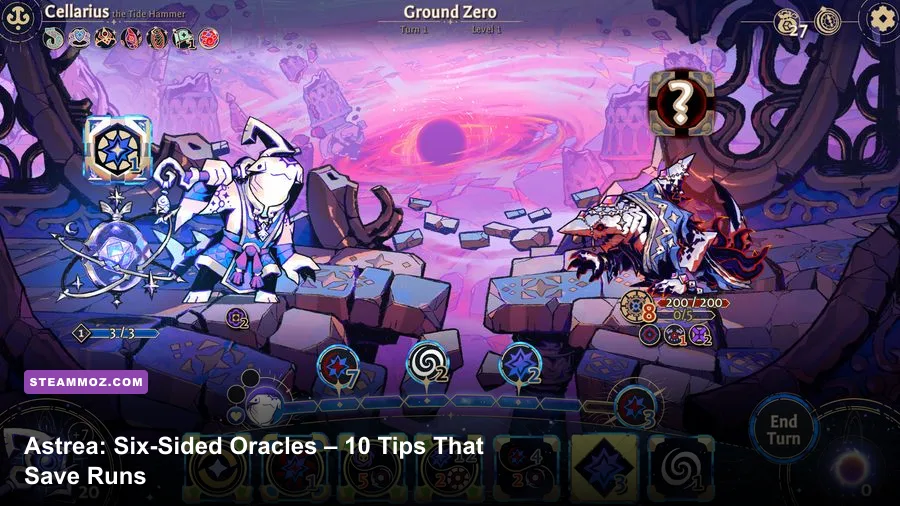
Astrea: Six-Sided Oracles becomes much easier once you stop treating it like a conventional card deckbuilder. Your real deck is a pool of dice, your turn is shaped by rerolls and locked faces, and surviving depends on balancing Purification with Corruption rather than simply dealing the biggest number. These 10 tips will help new players build thinner pools, read enemy intent, and turn bad rolls into controlled victories.
1. Learn what Purification and Corruption actually do

Astrea's defining system is its two-sided approach to combat. Dice can produce Purification or Corruption, and those effects are not interchangeable versions of ordinary damage. Purification is generally your clean, direct way to remove hostile progress, while Corruption can interact with enemies, effects, and your Oracle's own strategy in more dangerous ways. The important lesson is that a die with a larger number isn't automatically better.
Read the full tooltip before committing a face. Some effects reward using Corruption first, then converting the result into a stronger Purification turn. Others become much safer when you cleanse your own negative state before ending the round. If you are unsure, prioritize the result that leaves your Oracle healthier and the enemy's next intent less threatening. Winning a fight with a smaller total is better than creating a brilliant combo that leaves you one hit from death.

🎮 Astrea: Six-Sided Oracles
Looking to experience this game? Grab your digital key directly on our store for $12.49.
View on Steammoz Store →2. Treat every reroll as a resource
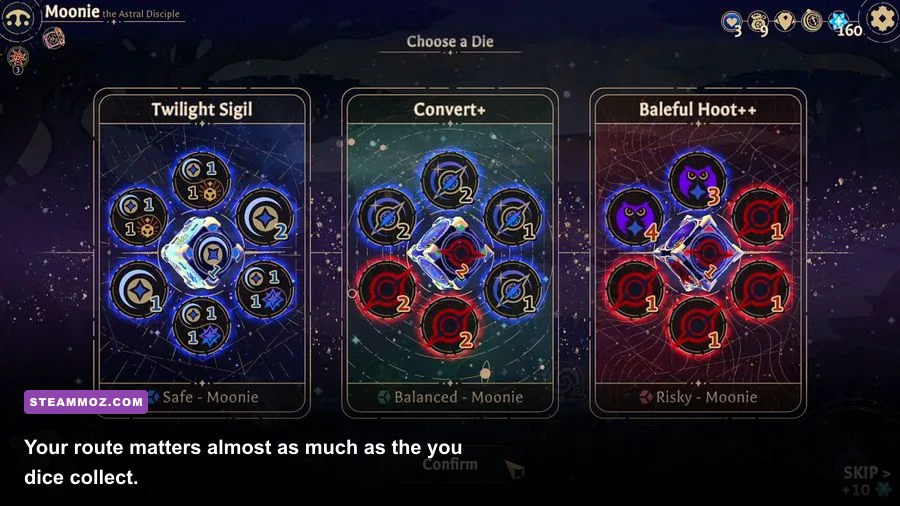
Rerolling feels harmless during the opening battles, but it is one of the most important decisions in Astrea. A poor die can still be useful if its face supports a passive, a threshold, or a setup effect. Before rolling again, inspect every available face and ask what the turn needs: immediate defense, a specific Purification value, a trigger for your Oracle's ability, or enough Corruption to activate a payoff.
Don't reroll automatically just because a die shows a low value. Lock useful faces first, then reroll only the dice that fail the current plan. This reduces variance and makes your turn easier to read. In particular, save a reroll when the enemy is already close to defeat and your first result can safely finish the encounter. Astrea rewards disciplined averages far more often than spectacular gambling.
3. Build around one engine, not every shiny die

The early game offers plenty of tempting upgrades, but adding every powerful-looking die is how new runs become inconsistent. A die that is excellent in isolation may dilute the faces your main engine needs. If your current build wants repeated Purification, don't suddenly add several Corruption-heavy dice because one encounter made them look impressive. Your future rolls will contain fewer of the effects that actually make the build work.
Choose a central plan by the end of the first few encounters. That plan might be repeated Purification, Corruption conversion, healing and sustain, status manipulation, or a high-value finisher. Then take additions that improve consistency, provide defense, or solve a specific weakness. The best upgrade is often a modest die that works with everything you already own.
| Build direction | What to prioritize | Common trap | Best use |
|---|---|---|---|
| Purification | Reliable damage and repeatable triggers | Adding slow setup dice | Fast, safe encounters |
| Corruption | Conversion effects and payoff abilities | Ignoring self-risk | Long fights with setup time |
| Sustain | Healing, defense, and efficient utility | Taking no damage tools | Learning unfamiliar routes |
| Hybrid | Flexible faces and selective scaling | Trying to support everything | Adapting to awkward rewards |
4. Keep your dice pool lean
Astrea doesn't punish a large pool with a simple hard cap, but dilution is still brutally real. Every unnecessary die makes your key faces less likely to appear. Removing a weak die can be more valuable than taking a flashy reward, especially after your starting pool has begun collecting replacements.
Look at each die's worst face, not only its best face. If the die has several results that do nothing for your plan, it will create dead turns at exactly the wrong moment. A lean pool also makes rerolls stronger because you are more likely to see a useful face on the second attempt. Visit removal opportunities when your core plan is already working; don't wait until the run is clogged with filler.
5. Read enemy intent before spending anything

Enemy intent is your most reliable source of information. Start every turn by identifying the most dangerous upcoming action, then decide whether you need to attack, defend, cleanse, or set up. A huge offensive roll is worthless if the enemy's next effect will apply a crippling status or push your Oracle into a lethal range.
Use small encounters to learn telegraphs rather than rushing through them. When several enemies are present, remove the one that creates the worst future problem, not necessarily the one with the lowest health. Some targets are dangerous because they amplify allies or stack effects, while a larger enemy may be manageable for another turn. Astrea's combat is about controlling the next round as much as winning the current one.
6. Pick an Oracle that matches your habits
The six playable Oracles are not cosmetic variations. Each one changes the value of dice, the pace of a run, and the mistakes you can afford. Moonie is a strong first choice because her game plan is easier to understand while you learn the fundamentals. Other Oracles ask you to manage more specialized interactions, so don't judge them after one failed run with an unfocused pool.
Play several early battles before deciding whether an Oracle suits you. Pay attention to what the character rewards: careful rerolls, aggressive Purification, Corruption manipulation, healing, or a particular status effect. You can also browse the official Astrea Steam page for the game's core feature overview. If you enjoy methodical experimentation, Astrea's roster has much more depth than the starter experience suggests.
7. Use blessings and pets to fix weaknesses
Blessings and pets should support your engine, not replace it. A blessing that improves a mechanic you already trigger repeatedly is usually stronger than a generic bonus with a larger headline number. Likewise, a pet that helps you survive early turns can be more valuable than one that only improves a perfect late-game combo.
Before choosing, identify the hole in your run. Are you dying before your setup begins? Take sustain or defensive help. Are you surviving but failing to close battles? Seek scaling or a finisher. Are your turns inconsistent? Choose effects that improve dice quality, rerolls, or reliable triggers. This is the same principle behind the best starting builds for new players: consistency beats theoretical peak power.
8. Spend resources before they become wasted value
New players often hoard currency, upgrade opportunities, and healing until the final stretch. That feels safe, but a resource that never improves the run has provided zero value. Spend early when the purchase makes your next several fights easier, particularly if it removes a weak die or strengthens your central engine.
Healing deserves the same scrutiny. Don't automatically heal to full after every encounter if an upgrade will prevent more damage across the next three battles. Conversely, don't enter an elite encounter with a dangerously low health total just to preserve currency. Astrea's strongest route decisions are about expected value: ask which choice increases the chance that you reach the next major reward alive.
9. Respect elites and bosses as build checks
Elite fights are not just harder versions of normal encounters. They test whether your pool can produce a dependable answer under pressure. Before entering, make sure you have a way to deal meaningful damage, survive at least one bad roll, and recover from a status or resource setback. If your build only works when every die lands perfectly, an elite will expose it immediately.
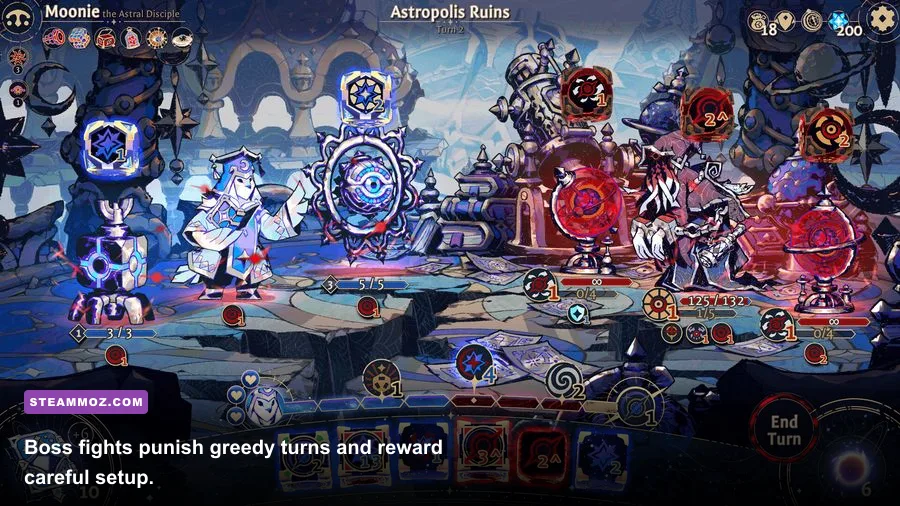
Bosses amplify that lesson. Save your strongest once-per-fight effects for moments that prevent a dangerous phase or stop an escalating enemy pattern. Don't burn everything on turn one unless the payoff is decisive. Track what the boss has already revealed, preserve rerolls for its most threatening intent, and avoid ending a turn with a negative state you cannot answer next round.
| Encounter | Preparation check | Turn priority | Typical mistake |
|---|---|---|---|
| Normal battle | At least one reliable damage line | Learn intent and preserve value | Overusing rerolls |
| Elite battle | Damage plus emergency defense | Remove the biggest future threat | Entering with a diluted pool |
| Boss battle | Scaling, sustain, and a finisher | Answer phase-changing intent | Spending all power immediately |
10. Practice with a deliberate loss
Astrea is a roguelike, so a failed run is useful only if you can explain why it failed. After defeat, check whether the problem was bad route planning, too many dice, weak defense, poor rerolls, or a mismatch between your Oracle and chosen rewards. That diagnosis is more valuable than copying a successful build without understanding it.
Try one focused experiment per run. Take fewer rewards and test a lean pool. Choose Corruption effects and learn their risk. Select Moonie and practice locking faces before rerolling. Small experiments turn the game's intimidating systems into habits quickly. For more roguelike fundamentals, Steamoz's Dungeons 3 beginner tips and Dragonkin secrets guide cover the same useful mindset: understand the loop before chasing maximum power.
The beginner plan that works most often
For your first few runs, choose the Oracle whose basic dice feel clearest, keep the pool compact, and build toward one repeatable engine. Read intent before rolling, lock useful faces, and spend resources when they improve your immediate survival odds. Astrea: Six-Sided Oracles has a lot of moving parts, but its central rule is refreshingly simple: make every die serve a purpose. Once your pool stops fighting itself, the game's controlled chaos finally starts working for you.
You can find more information through the Little Leo Games official site and the game's official Steam community hub. For performance-conscious players, the same practical approach applies to settings too: check the developer's listed requirements, then prioritize a stable frame rate over unnecessary visual effects, as explained in Steamoz's frame-focused settings guide.