
Pick Ryan, build around Block, and use counterattacks to stay alive. For a first playthrough, Ryan is Dead Island 2’s best starting Slayer because his 5 Toughness is the highest in the roster, while his innate skills reward the simplest reliable habit in the game: block an attack, then hit back. Pair Block with Safety First, Rallying Cry, and a fast Maiming weapon, and you get a forgiving build that heals itself, staggers crowds, and still hits hard enough for Hell-A’s early bosses.
This isn’t a flashy glass-cannon setup. It’s better for learning the game’s timing, weapon durability, elemental hazards, and zombie mutations without constantly burning med kits. You can respec later at the Serling Hotel, but these choices carry you smoothly from Bel-Air through Ocean Avenue.

Why Ryan is the safest first Slayer
Dead Island 2 gives every Slayer six core attributes, but the most important beginner stat is Toughness. It reduces incoming physical damage, which covers the bites, swipes, and blunt attacks that make up most early encounters. Ryan starts with 5 Toughness, 3 Stamina, 3 Health Recovery, 2 Critical Damage, and 1 Agility. His low Agility means he moves slowly, but that barely matters when you’re holding a chokepoint and countering attacks instead of sprinting circles around every zombie.
Ryan’s two innate skills are Retaliation and Seesaw. Retaliation improves his Force briefly after blocking or dodging, while Seesaw restores health when he successfully blocks or dodges and then follows up with a counterattack. The exact rhythm matters: don’t block and immediately panic-roll away. Hold your ground, wait for the hit, then land the counter. That is where Ryan’s defense becomes offense.
| Slayer | Best Attribute | Beginner Problem | Why Ryan Wins for First Runs |
|---|---|---|---|
| Ryan | 5 Toughness | Low Agility | Most forgiving block-and-counter playstyle |
| Carla | 4 Toughness | Low Critical Damage | Strong near groups, less self-healing early |
| Dani | 5 Stamina | Only 1 Health Recovery | Excellent crowd damage, punishes mistakes |
| Jacob | 5 Critical Damage | Lower durability | Great damage, but less forgiving |
Carla is a close second if you prefer standing in elemental hazards and fighting surrounded. Dani and Jacob are excellent once you know enemy animations. For a genuine beginner build, though, Ryan lets you make more mistakes before the game makes you pay for them.
For official character and game information, check the official Dead Island website and the Dead Island 2 Steam page.
🎮 Dead Island 2
Looking to experience this game? Grab your digital key directly on our store for $9.99.
View on Steammoz Store →The exact Ryan skill-card loadout
Abilities: Block first, then Ground Pound
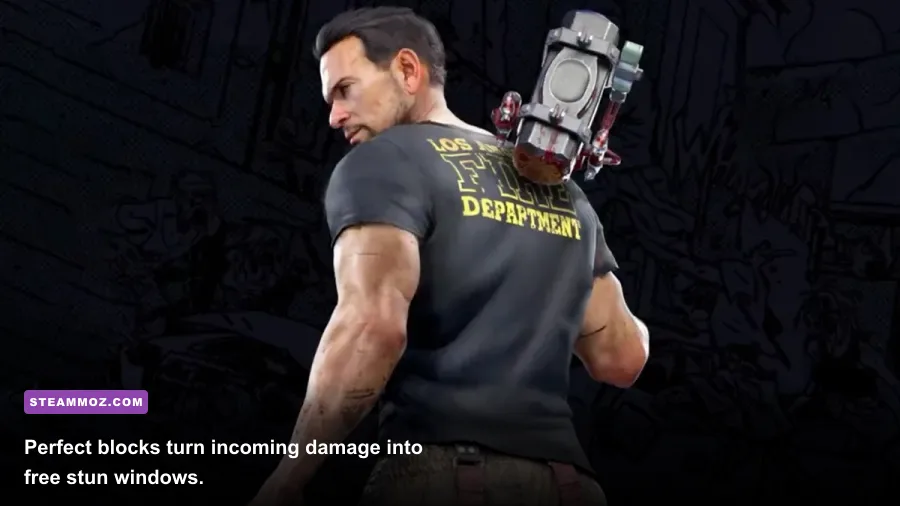
Choose Block in the defensive ability slot as soon as it becomes available. Dodge is useful, but Block is the heart of this build because it triggers Ryan’s innate effects and creates a predictable counter window. Perfect blocks also interrupt many ordinary zombies and can stun tougher targets long enough for a heavy attack.
Use Ground Pound in the jump-kick ability slot once it unlocks. Ground Pound is not your main damage button; it is your emergency crowd-control tool. Jump, activate it near a cluster, and use the resulting knockdown to separate a dangerous group. Against Crushers, don’t spam it into their armor. Save it for surrounding shamblers or the moment a group closes behind you.
Keep War Cry in your ability rotation when you unlock it. War Cry boosts toughness and can weaken nearby zombies, making it ideal before you enter a packed room. It also gives you breathing space to revive a co-op partner or finish a downed enemy. Drop Kick is fun, but it sends targets flying and often breaks your preferred controlled positioning.
Survivor cards: turn defense into healing
Your first key Survivor card is Safety First. It restores health after a well-timed block or dodge, which stacks beautifully with Seesaw. The game doesn’t require you to fill the health bar with med kits when your counters are landing consistently.
Next, equip Rallying Cry when available. War Cry becomes a team-friendly heal and status-cleansing tool, but it remains useful solo because it gives Ryan another way to recover after a messy room. Invigorating is also worth using if you find yourself relying on heavy attacks; it rewards accurate hits with additional stamina, letting you keep pressure on Crushers and Butchers.
Slayer cards: prioritize stagger and execution damage
Use Anger Mismanagement if you want a straightforward damage increase after a counter, then test Survivor or Overhead Smash as your card collection expands. The best choice depends on your weapon, but avoid loading every slot with cards that only activate at low health. A beginner build should make you stronger before the emergency, not merely more dangerous while dying.
| Slot | Recommended Card | Why It Fits Ryan | Replacement Option |
|---|---|---|---|
| Defensive ability | Block | Triggers Retaliation and Seesaw | Dodge for a faster playstyle |
| Jump-kick ability | Ground Pound | Knocks down groups and creates space | Drop Kick for single-target control |
| Support ability | War Cry | Boosts survivability around crowds | Rallying Cry for stronger recovery |
| Survivor | Safety First | Converts precise defense into healing | Invigorating for stamina-focused weapons |
| Slayer | Anger Mismanagement | Rewards counterattacks with damage | Overhead Smash for heavy-weapon users |
Weapons and stats that make the build work
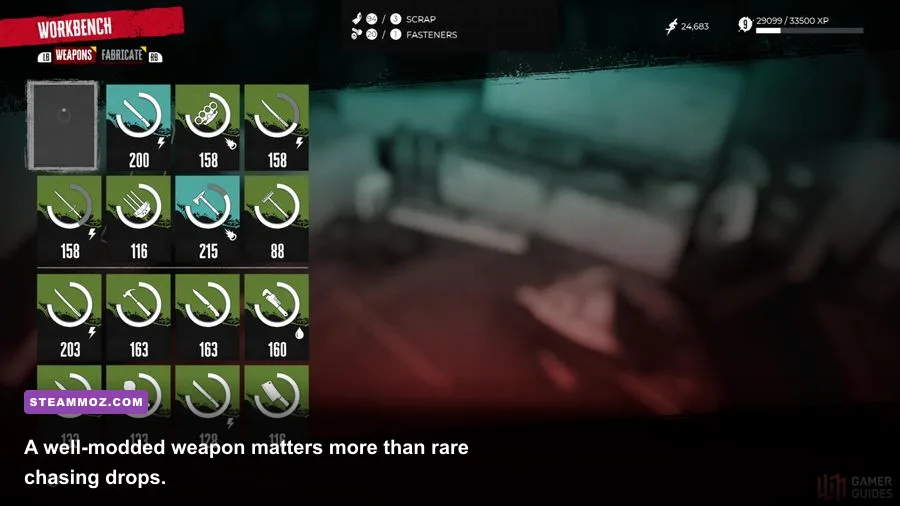
Ryan’s ideal early weapon is a machete or military knife with the Maiming profile. Maiming weapons target limbs, and severing arms removes attacks from the battlefield while charging Fury-related bonuses later. Use a wrench or baseball bat as your second weapon for high Force and knockdown potential. The machete handles normal zombies; the blunt weapon handles Crushers, Riot Gear Walkers, and anything that refuses to flinch.
Don’t spend rare crafting materials upgrading every weapon you pick up. Dead Island 2 constantly drops replacements as your level rises. Upgrade one favorite weapon when it falls behind by several levels, but save expensive Superior mods and perks for weapons you intend to keep. A good level-matched weapon with a useful mod is usually better than a legendary-looking item that is seven levels below you.
For perks, prioritize Frenzy on fast weapons, Empowering when your critical hits are reliable, and Headhunter for blunt weapons if you’re comfortable aiming at skulls. Defensive perks such as Vampire are particularly valuable on Ryan because they reinforce the same sustain loop as Safety First. Use an elemental mod only when the weapon’s damage type suits your target and surroundings.
| Weapon Role | Recommended Type | Mod Priority | Best Target |
|---|---|---|---|
| Main weapon | Machete or military knife | Maiming, then Frenzy | Walkers, shamblers, limbs |
| Heavy backup | Wrench or baseball bat | Impact or Force-focused perk | Crushers and armored zombies |
| Ranged option | Sporting rifle or pistol | Damage and reload perks | Hazardous targets and screamers |
| Elemental tool | Modded blade or firearm | Match fire, shock, or caustic | Specific weakness windows |

| Threat | Telegraph | Counter | Best Tool |
|---|---|---|---|
| Crusher slam | Raises both arms and pauses | Step out or time a block, then punish | Blunt weapon |
| Screamer call | Stands upright and begins vocalizing | Interrupt immediately | Firearm or Ground Pound |
| Butcher guard | Raises arms and faces you | Circle behind and attack recovery | Fast Maiming weapon |
| Spitter pool | Retches before launching acid | Break line of sight and reposition | Rifle or thrown weapon |
The most common beginner mistake is swapping skill cards every few minutes because a new card has a more exciting description. Build around a loop instead: block, counter, heal, stagger, execute. The second mistake is ignoring weapon condition. A broken weapon during a boss fight removes your best damage option and can leave you trapped in a slow animation with fists.
If you’re playing co-op, Ryan becomes even better. Use War Cry before your team enters a room, hold the front line, and let faster Slayers such as Amy or Jacob flank. Don’t chase fleeing zombies across the map; your job is to create a safe combat zone.
Final beginner build checklist
By the time Ryan reaches the midgame, your build should look like this: Block as the defensive ability, Ground Pound for crowd control, War Cry or Rallying Cry for support, Safety First in Survivor, and a damage-focused Slayer card that rewards counters. Carry a level-appropriate machete, a Force-heavy blunt weapon, and one firearm for interrupting dangerous special infected.
Upgrade selectively, use workbenches before major missions, and treat every zombie’s animation as a readable attack rather than a random surprise. Ryan’s low Agility may feel clumsy for the first hour, but once his counter timing clicks, Hell-A becomes far less chaotic. You’re not trying to kill everything faster than it can move. You’re making every enemy attack pay for itself.
For more build-focused reading, see Steamoz’s beginner build guide and starting build breakdown. If performance is getting in the way of your timing, our guide to settings that make every frame count is also worth a look. You can find developer news through PLAION’s Dead Island 2 support hub and community details on the Dead Island 2 community wiki.